Skip the Transplants: Direct Sowing Seeds
Find out how and what to direct seed in your vegetable garden.
by Steven Biggs
Why Direct Sow Seeds?
Ever had transplants that put on the brakes after you move them to the garden?
It’s disappointing.
But a big transplant isn’t always better than a wee seed.
Sometimes, it’s better to plant seeds straight into the garden.
This is called direct sowing (or direct seeding.)
This post tells you how to direct sow, best crops for direct sowing—and simple ways to sow seeds in a home garden.
What is Direct Sowing?
Direct sowing is when we sow seeds directly in the garden.
This is instead of starting seeds indoors—known as growing “transplants.”
Why Direct Sow Vegetable Seeds?
There are many reasons to direct-sow vegetables.
Here are a few reasons:
Pin this post!
Easier (there's no need to care for seedlings indoors)
Less expensive (no need for potting soil or containers)
Less environmental footprint (yeah, your coir-based and peat-based potting soils have an environmental footprint)
Saves indoor seed-starting space for crops that really need to be started indoors
No need to “harden off” young seedlings before planting them in the garden
Some crops don’t transplant well…and don’t bounce back well from transplanting
When Direct Sowing is NOT the Best Choice
Direct seeding isn’t the best choice for all crops, or in all situations.
Here are a few things to consider:
In areas with a short growing season, crops that take a long time to mature are grown from transplants
Slugs and other bugs can devastate small, direct-sown seedlings as they emerge…whereas a larger transplant might get through some insect damage
During hot summer weather, seed germination can be spotty (see below for a summer seed-sowing hack)
In low-lying area, the garden soil might be too wet to plant seeds in the spring
You’re new to gardening and won’t know the difference between emerging direct-seeded crops and the weed seedlings!
How to Direct Sow Seeds
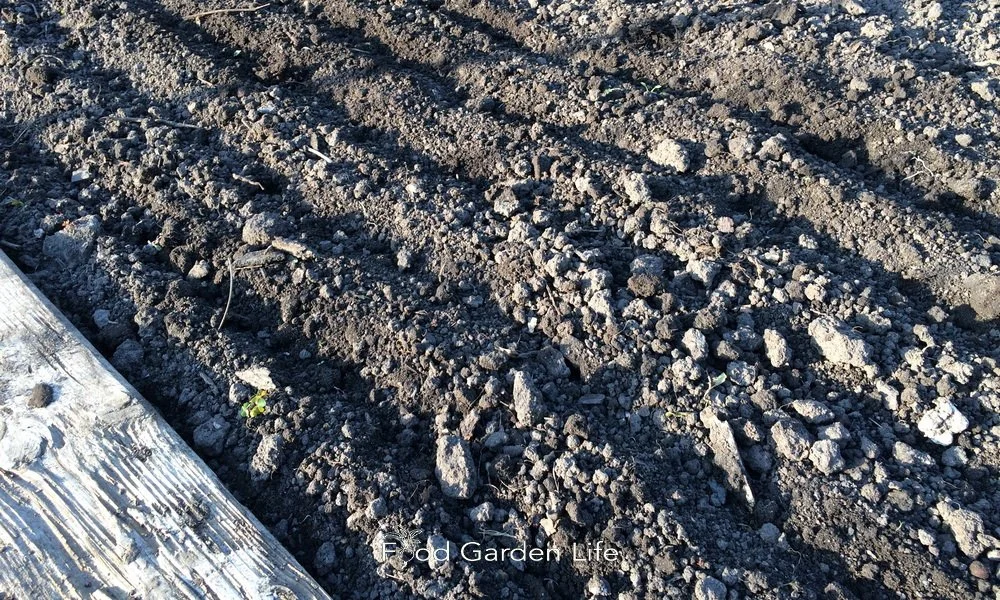
Before sowing seeds, prepare the soil.
Start by preparing the soil ahead of time. When sowing seeds, we want to break up any crust on top of the soil surface, and break up bigger chunks of soil. That way, germinating seeds don’t hit roadblocks.
(Yes, there’s a whole body of work out there on no-dig techniques—and there is a time and place for this…but if you want the best results when planting seeds, prepare the soil.)
Planting Depth
Use the size of the seed as a guide to planting depth. Seed packets usually recommend a depth too.
Plant the seed about twice as deep as it is wide. Too shallow is better than too deep.
But don't feel as if you need to measure and be precise.
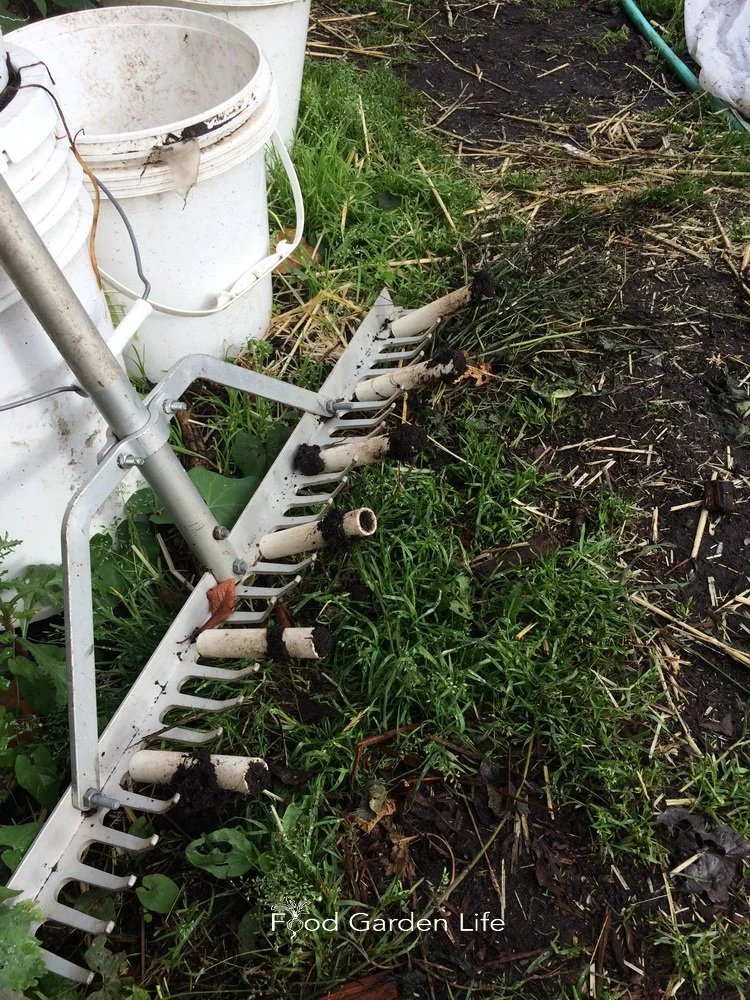
If you’re planting seeds into trenches, you can make well-spaced trenches using a garden rake that has pieces of pipe on it.
Like most things in gardening (and life), direct sowing isn't an exact science.
Trench for Sowing Seeds
If you direct-sow seeds in rows, make a trench with your trowel or the corner of a hoe.
Then, place your vegetable seeds into the trench, and cover with soil.
OR, make your trenches by fitting pieces of pipe onto a garden rake!
Poke Seeds in the Soil (Planting Seeds Simplified!)
This is low-tech and might be laughable to a commercial grower—but in a home-garden setting, can be a simple approach to direct sow seeds!
I drop large seeds into place, and then just poke them into the soil. Then I scuff the soil to fill the holes.
Poking works well for larger seeds that you can easily see:
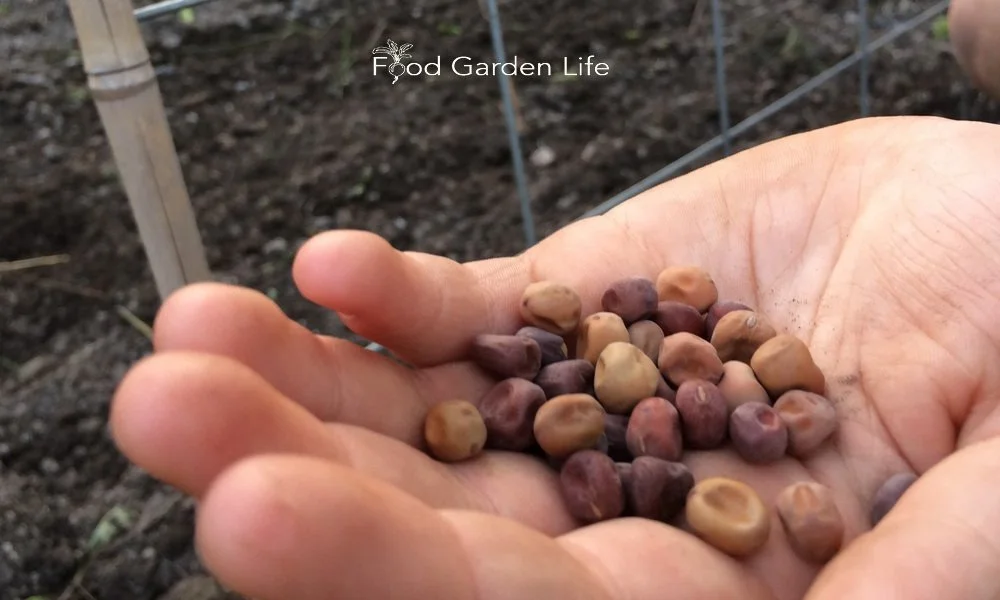
Poking large seeds into the soil is a simple way of planting seeds.
Peas
Beans
Beets
Swiss chard
Squash
Zucchini
If you’re planting a whole block with seeds, as I like to do with beets and Swiss chard, you can do what I call the “scatter-and-poke” method. Scatter seeds to approximately the spacing you want—and then poke them into the soil. Scuff soil to fill in holes.
(Gardening is a great cure for perfectionism, and the scatter-and-poke approach dispenses with all notions of perfection in a garden!)
Broadcast and Cover
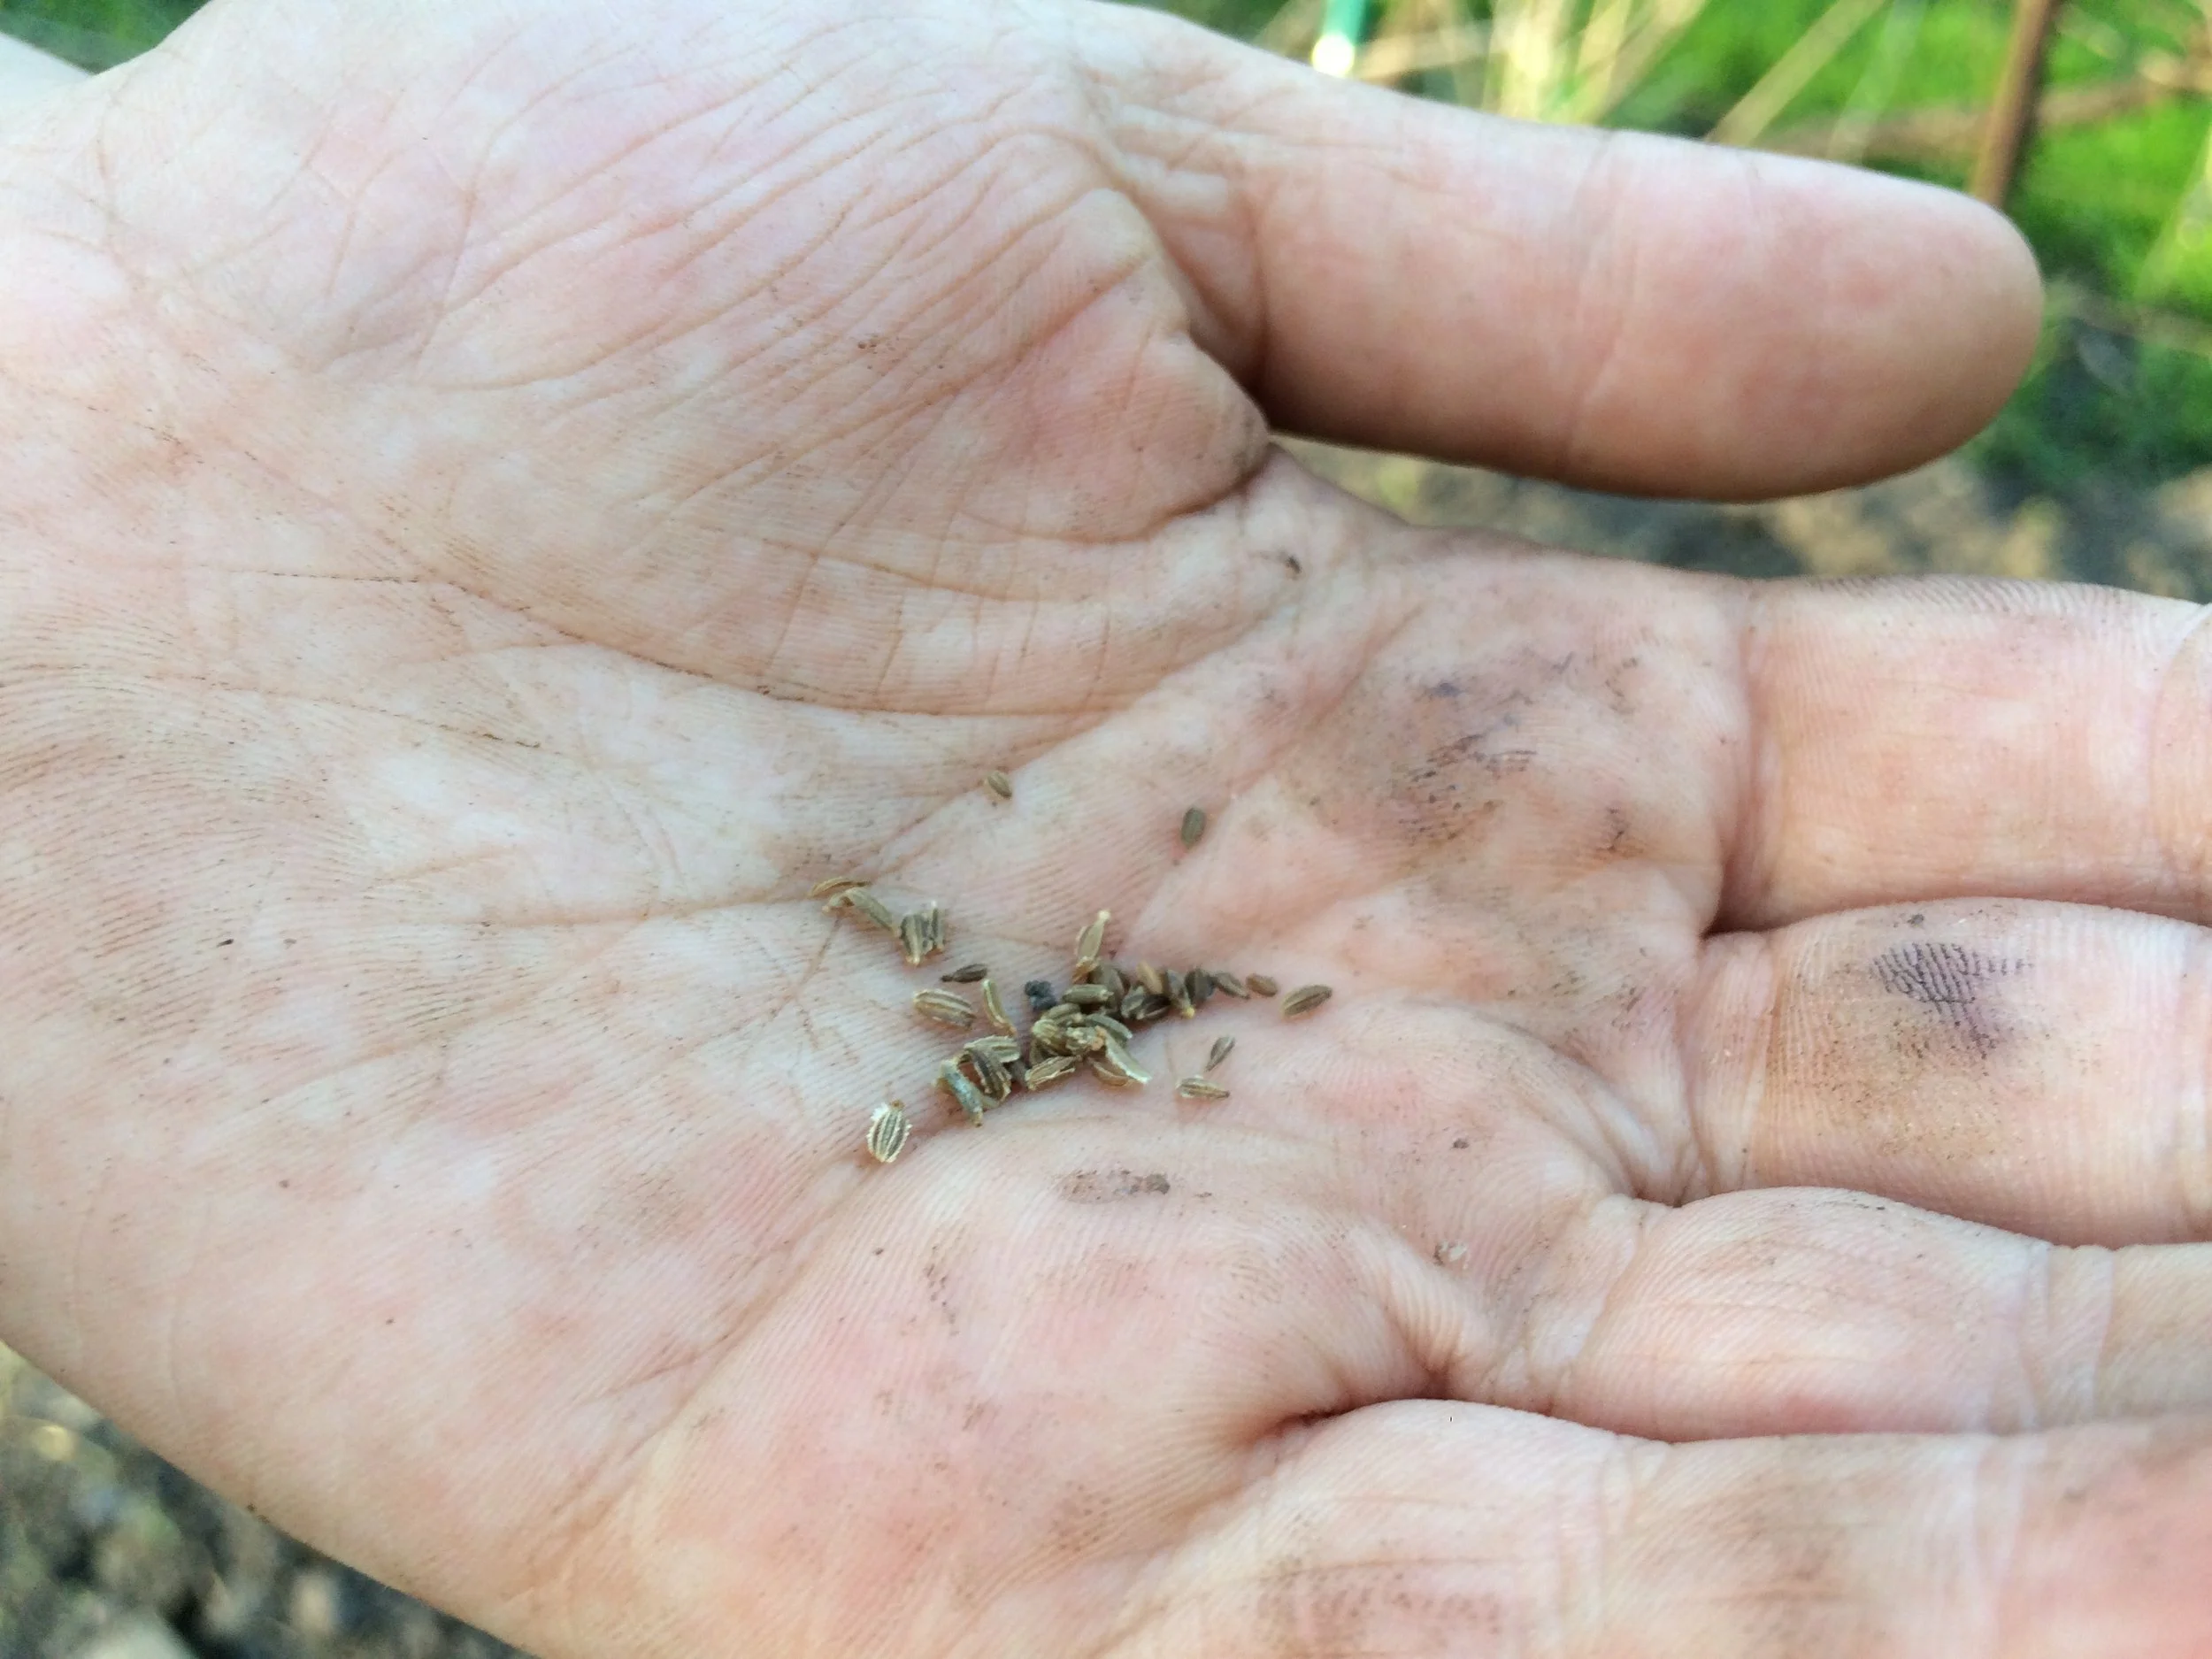
You can sprinkle small seeds such as these carrot seeds by hand, and then cover with soil.
If you’re filling a block or wide row with small seeds (e.g. carrot or lettuce), sprinkle by hand, and then cover with soil.
You might wonder, “Where do I get the soil I’m covering the seed with?” Rake aside some garden soil before you sprinkle your seed in place—and replace it over top of the seed afterwards.
Broadcast and Rake!
I’m always interested in methods that make my life simpler. And raking aside soil before I broadcast seed is a bother.
So I simply broadcast the seed, and then use an up-and-down motion with a hand rake to work some of those seeds into the soil.
Note: There will be some seeds that aren’t at an ideal depth. That’s OK. I’m a home gardener—not a commercial grower. I just seed more heavily to compensate.
Direct Sowing Hacks
Using a broadfork to make straight rows.
Folded paper. Forget the seed-dispensing gizmos for small seed. Fold a sheet of paper in half. Pour seed onto the folded sheet. Now, use a pencil or a nail to dispense individual seeds off the end of this folded sheet. Low tech, yes—but works well.
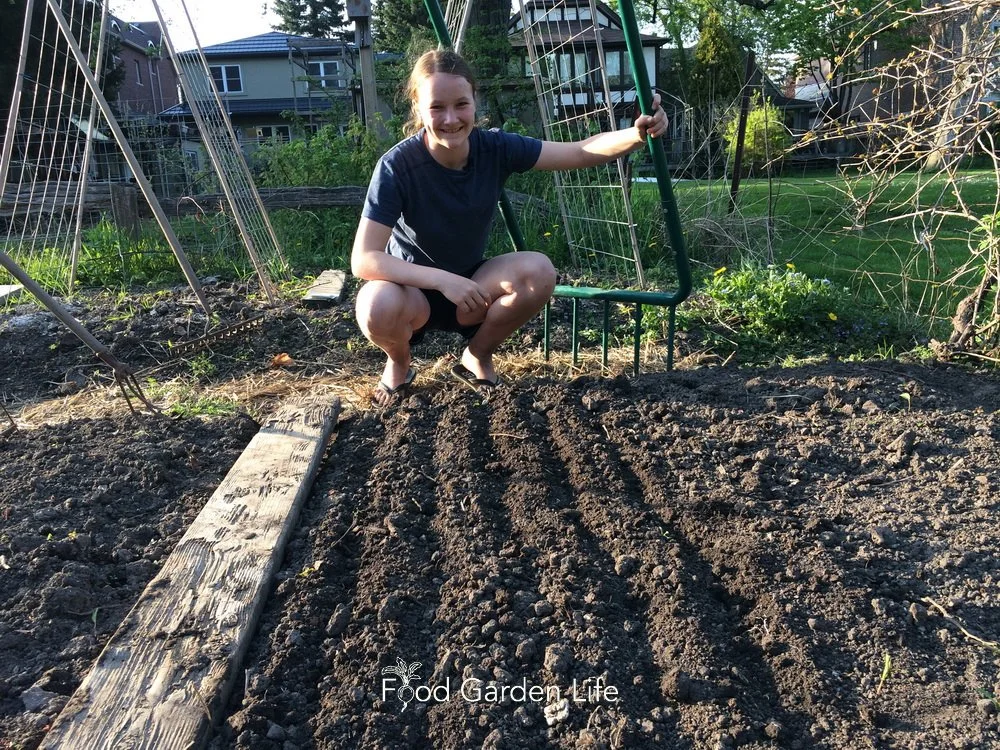
Broadfork. When my daughter, Emma, wanted side-by-side trial rows of a number of crops, she used the broadfork to make a tidy set of trenches. (The broadfork is normally used to loosen soil…but this works nicely!)
Seed tape. Seeds embedded in a strip of biodegradable paper. Yeah, a bit gimmicky. I don’t use this. But if you’re gardening with kids, or you have shaky hands and can’t easily dispense seed, it can be useful.
Using boards to keep the soil moist for direct seeding in the summer.
Pelleted seed. Small seeds bulked out with a clay coating. Like seed tape, you pay more per seed. But again, could be useful if you’re direct seeding with kids, or you’re having trouble coping with smaller seeds.
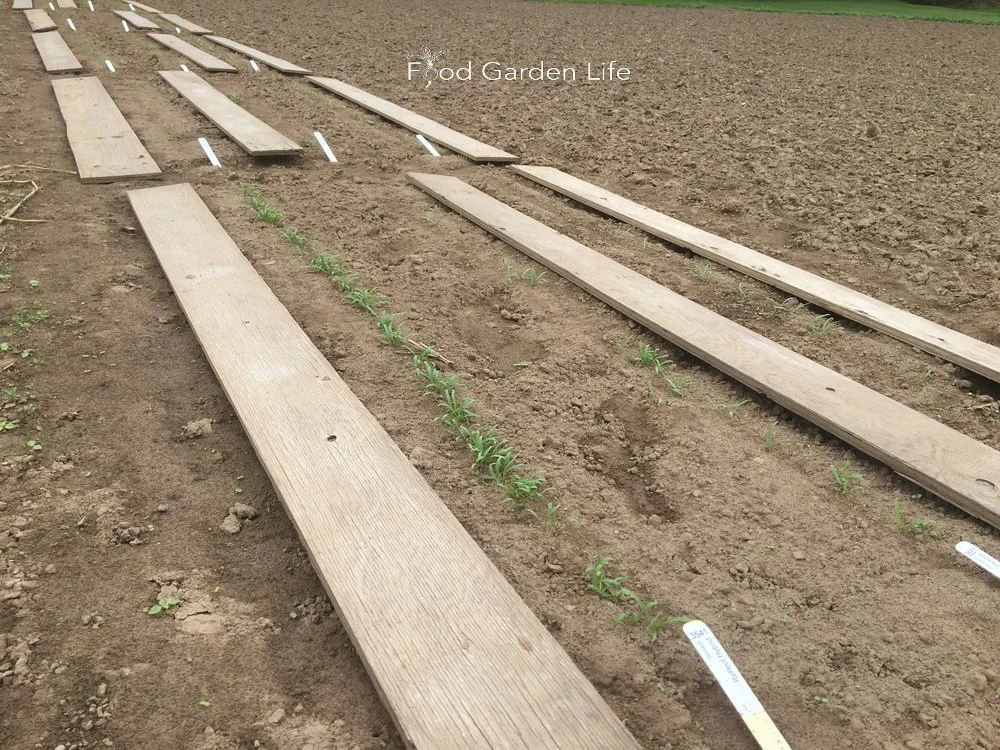
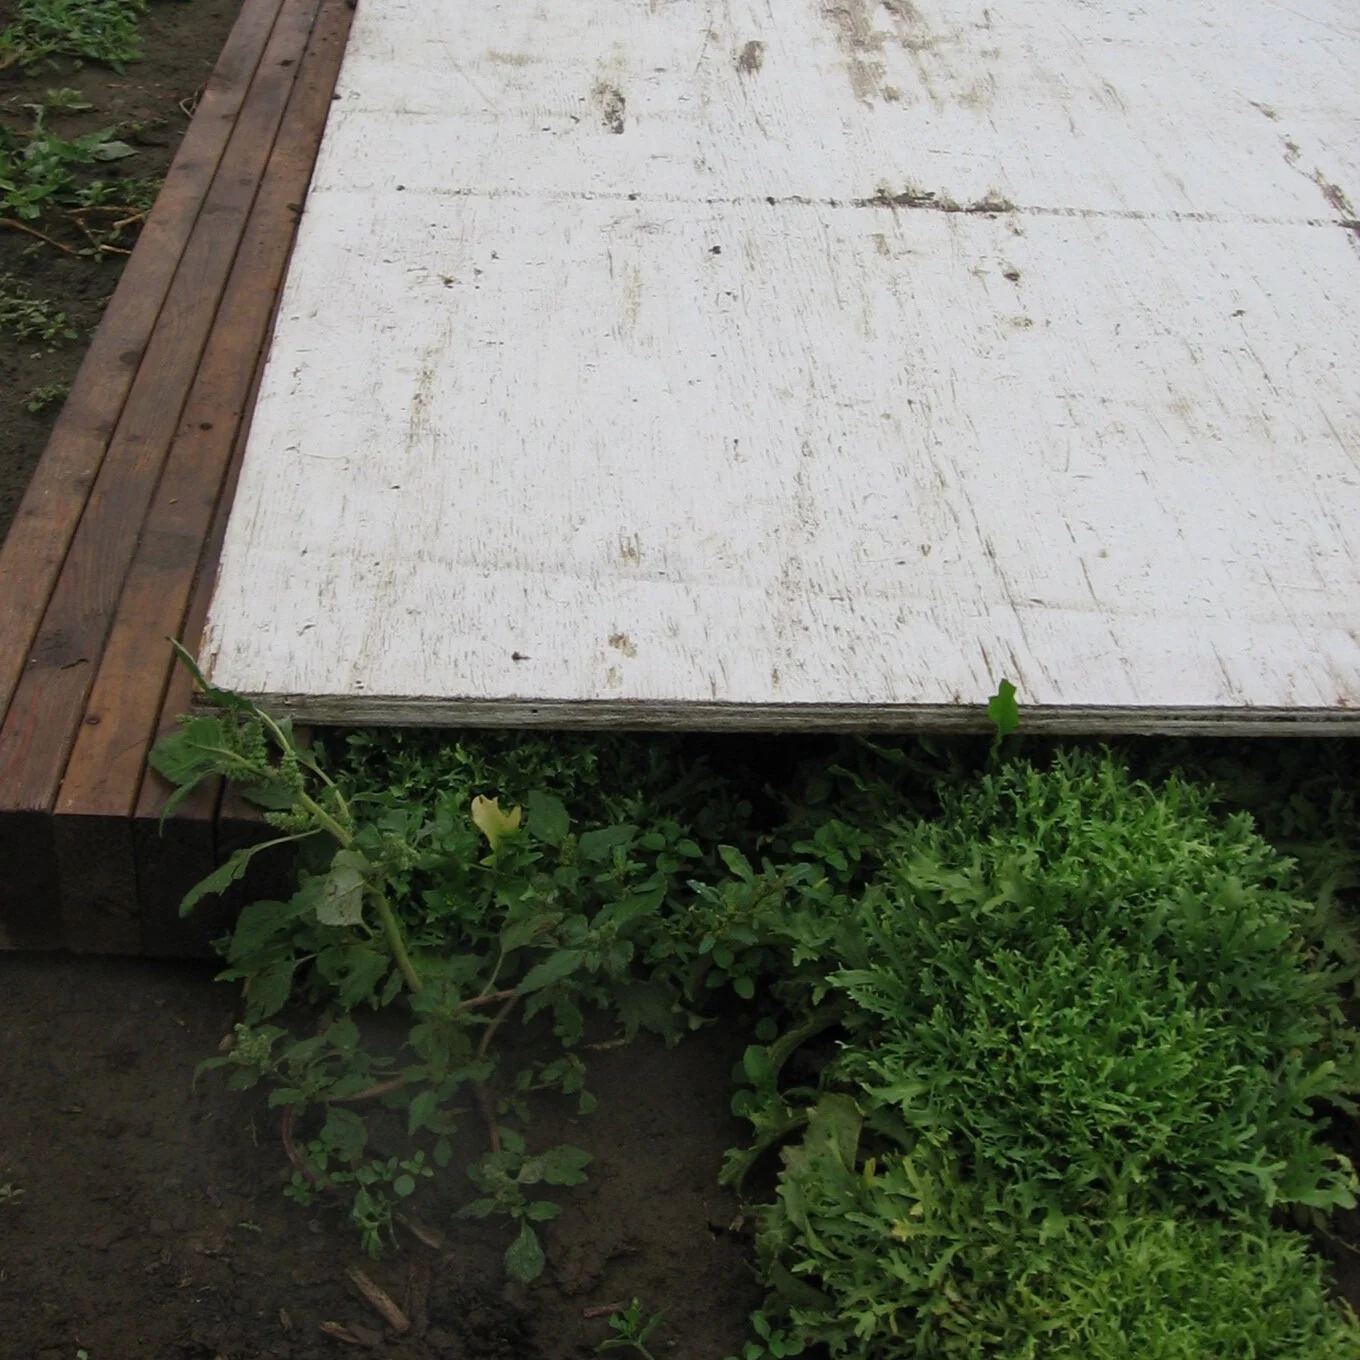
Boards. Yup, low-tech boards over summer-sown small seeds can be a life saver. In summer heat, soil can quickly form a crust that seedling have difficulty breaching. But a board over the soil during the germination window keeps the soil underneath moist. No crust.
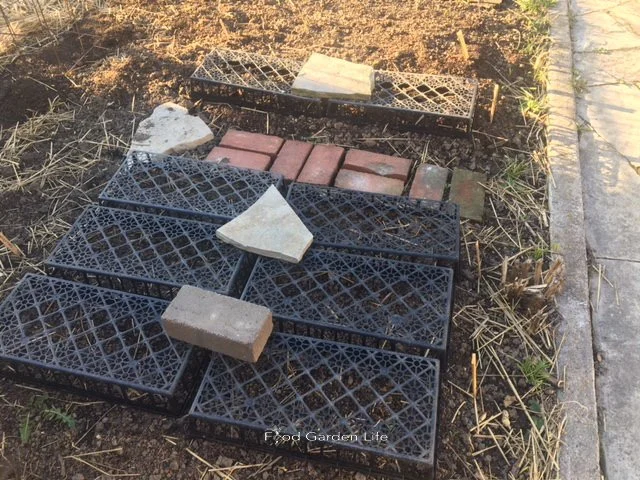
Web trays. As soon as squirrels see freshly turned soil in my garden, they’re eager to disinter seeds. It’s infuriating. Who would have thought there’s a higher purpose for those horrid plastic webbed trays that the horticulture industry so loves! Inverted web trays over top of your directly sown seeds keep digging varmints at bay.
Direct Seeding by Crop
Take that, squirrels!
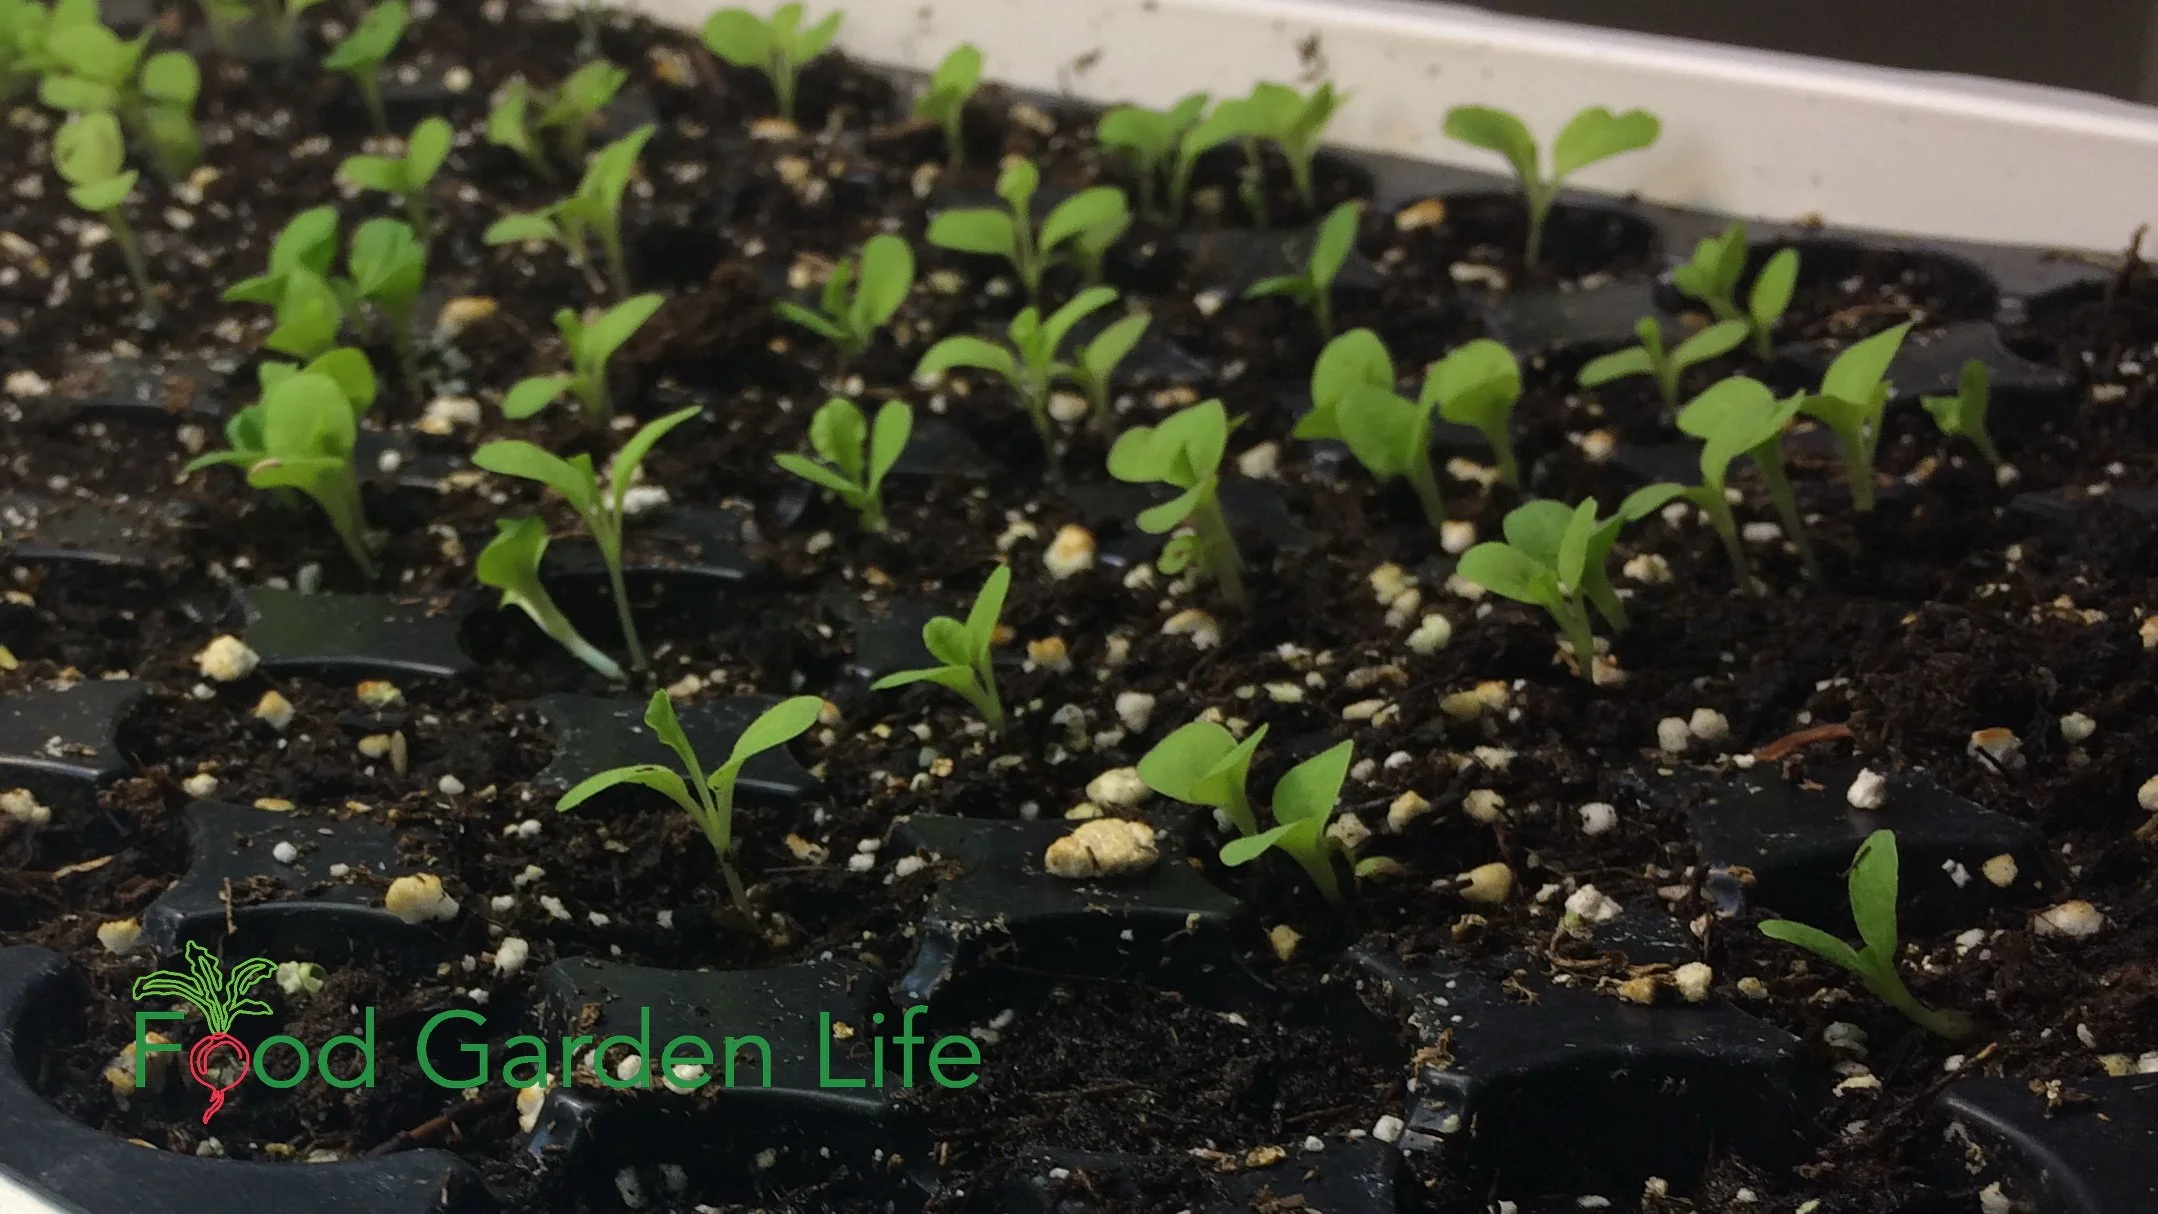
Leafy Greens. I grow transplants of leafy green crops such as lettuce, spinach, and Swiss chard. I also direct-sow seeds into the garden.
Why both ways?
So I have a succession of harvests.
(It is also insurance. If weather or pests cause less successful results one way, I have a backup!)
Root Crops. I direct sow all my carrots, parsnips, and beets. These crops can all be direct-sown in the garden early. And they don’t respond well to root disturbance.
“Fruit” Veg. For those fruits that we insist on calling veg—tomatoes, peppers, and eggplant—I grow everything by transplants because I’m in a cold climate and I extend the harvest window with transplants.
Vining Crops. The vining crops in the squash and cucumber clans don’t respond well to root disturbance. So direct sowing is always a good strategy.
(But, like the leafy greens, I hedge my bets and both direct sow and start a few transplants.)
Find This Helpful?
If we’ve helped in your edible-gardening journey, we’re always glad of support. You can high-five us below! Any amount welcome!
Courses
Here’s a course that guides you through creating an edible garden you love. It’s my ode to edible gardening. You’ll find out how to think outside the box and create a special space. Get the information you need about a wide range of edible plants.
Driveway Makeover! 5 Ideas for Growing a Container Garden for Vegetables
A container vegetable garden is a good way to fit lots of vegetable crops into a small space. Find out how to get started.
by Steven Biggs
My Driveway Container Vegetable Garden
Not enough space to grow everything you want? Be creative! A container garden are a great way to fit more vegetables into your yard.
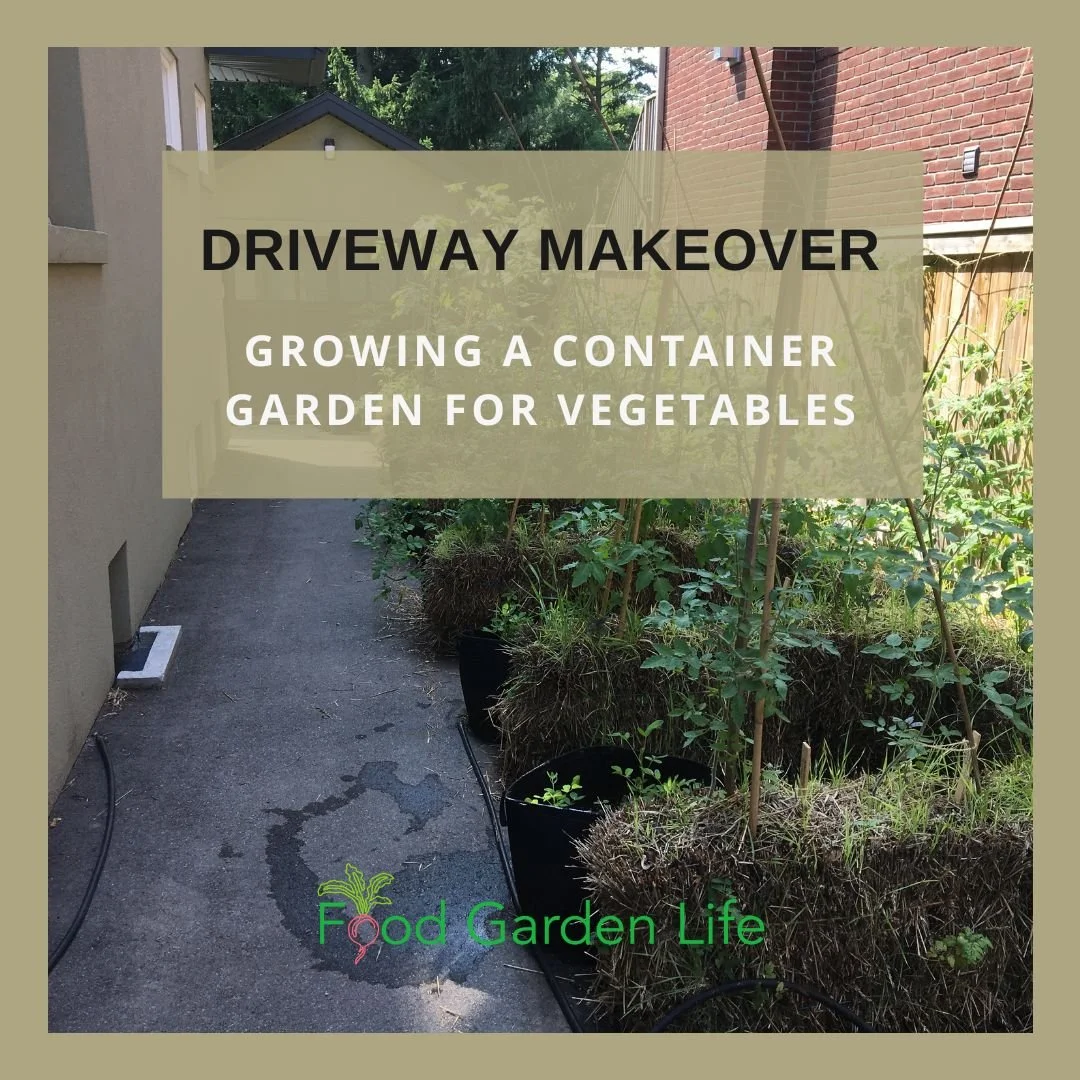
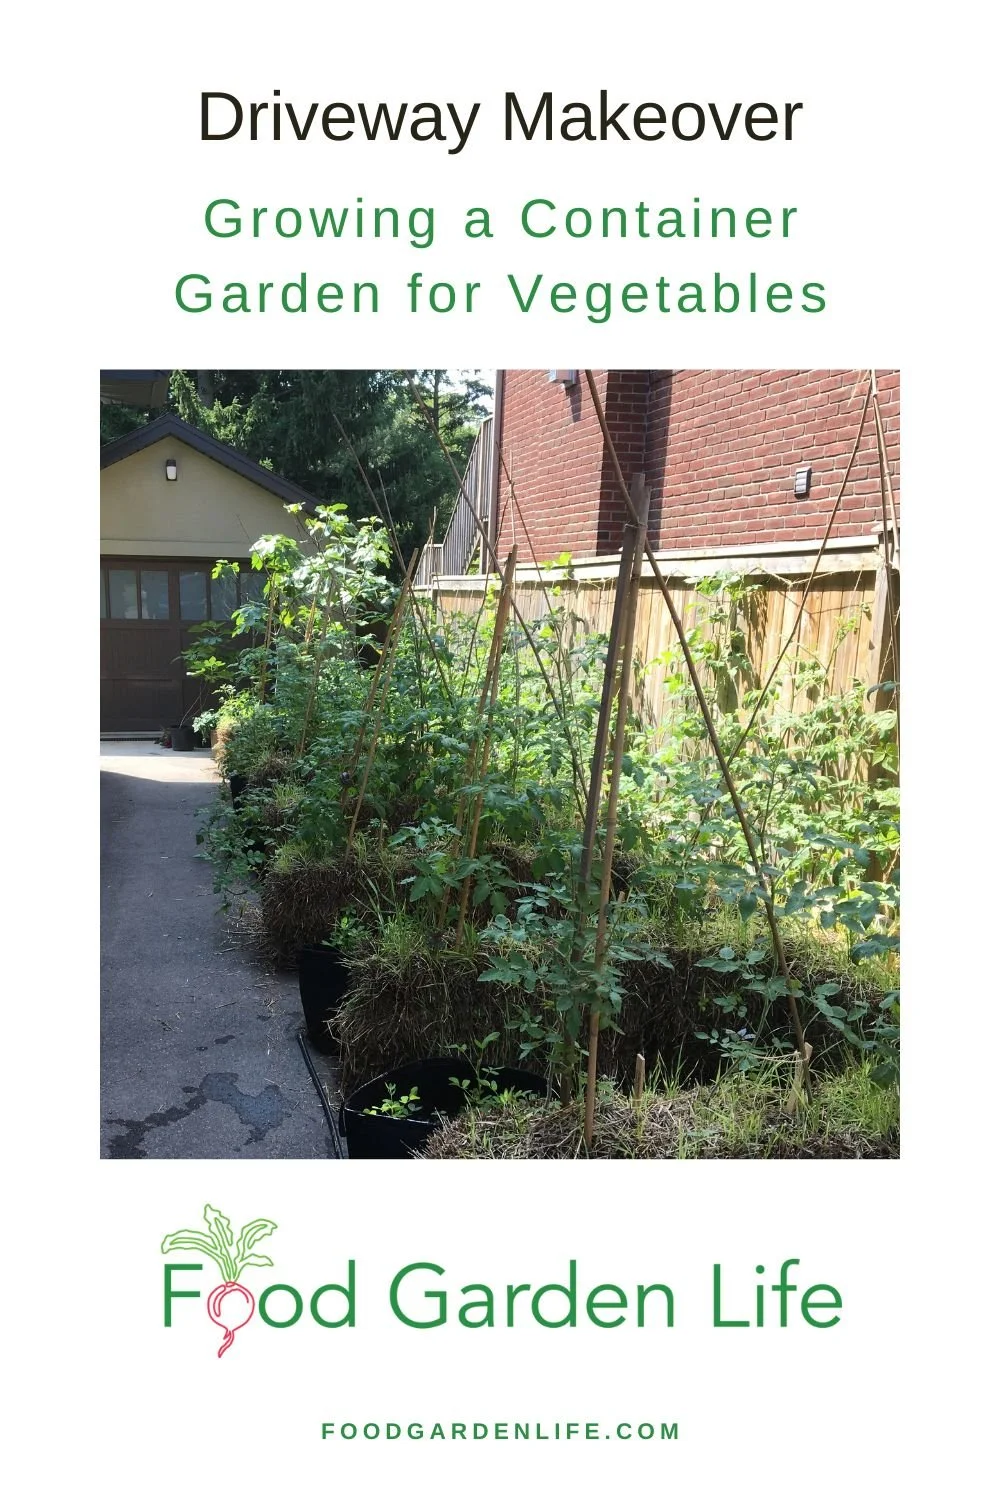
Here’s our driveway container garden. The driveway container garden is a quick, temporary space-making solution so we can grow extra tomato, pepper, potato, summer squash, and chard plants.
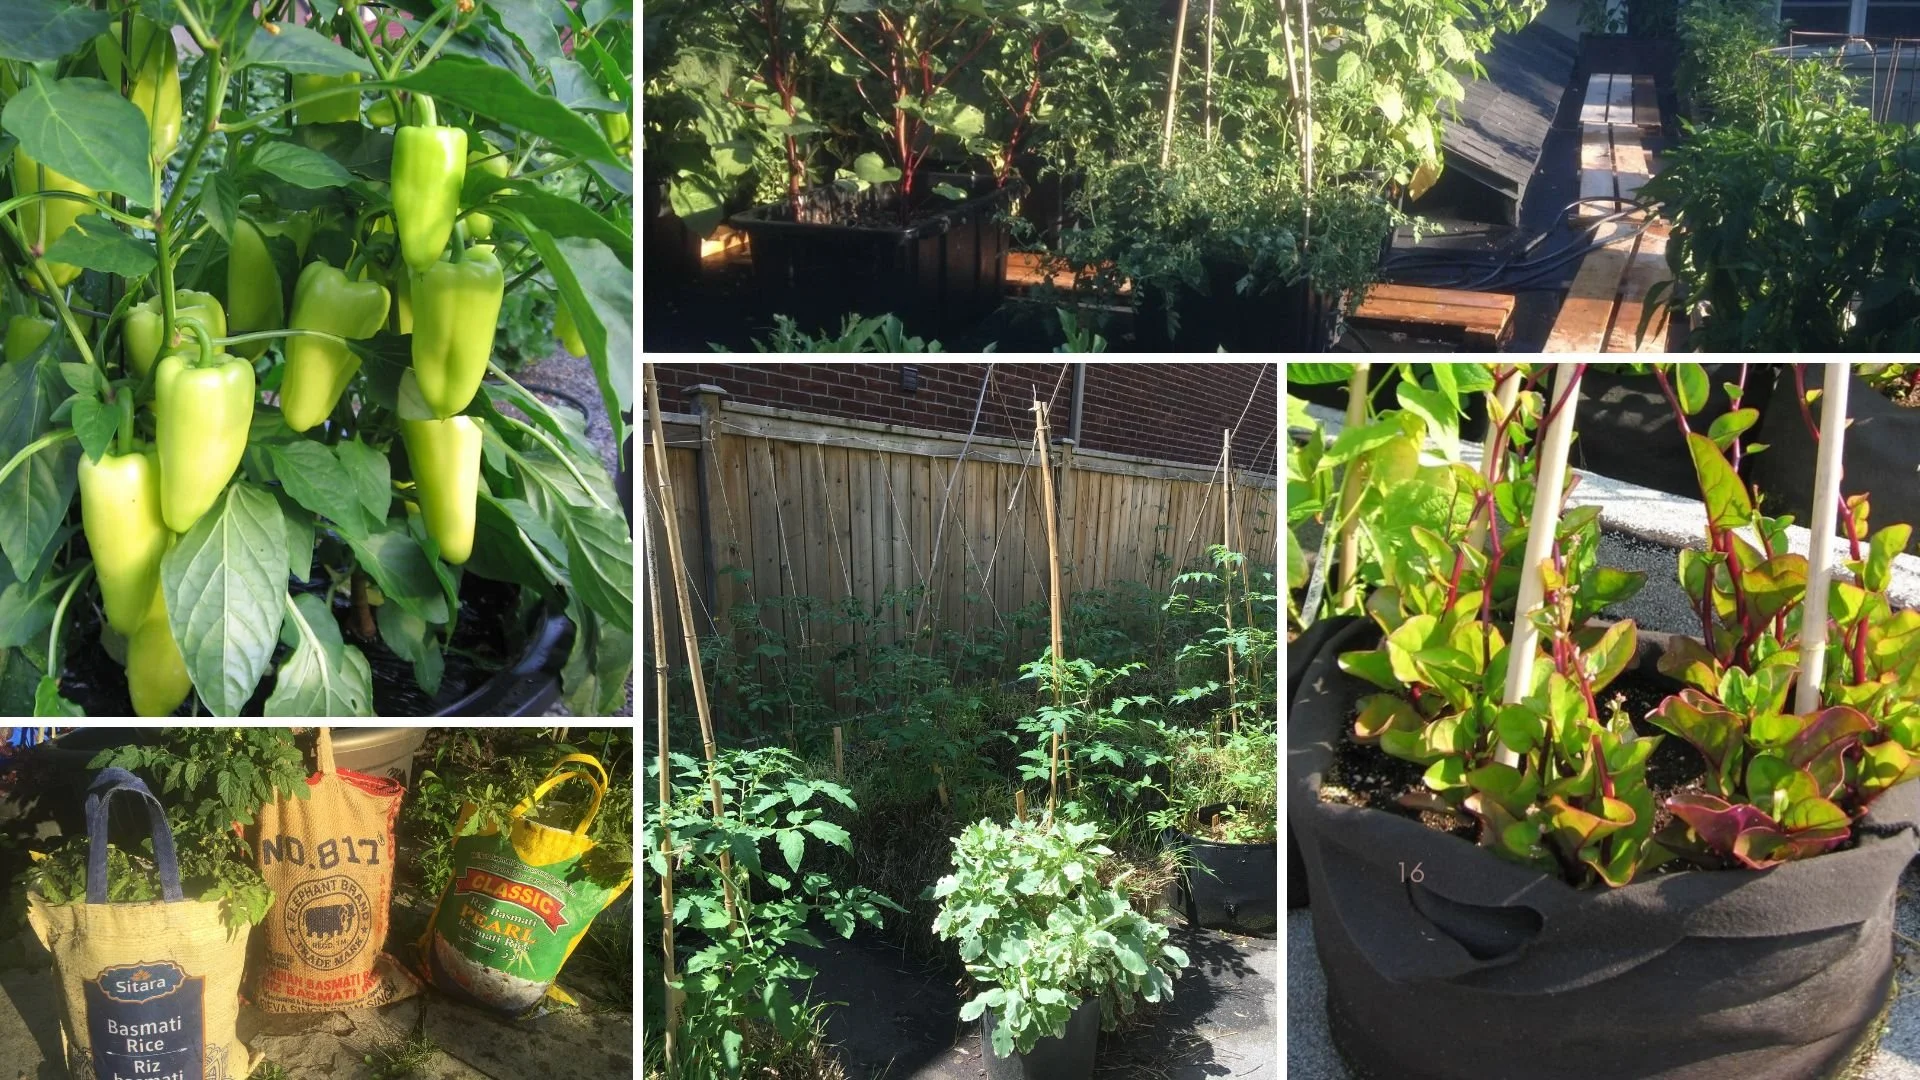
In this vegetable container garden, we use straw bales, fabric pots, nursery pots, bushel baskets, and vertical gardening techniques to make the most of the space.
In this post, I talk about these five vegetable container gardening techniques, along with container plants and container garden tips.
Ideas for Your Vegetable Container Garden
Container gardening is part science, and part creativity. There are lots of ways to approach it. Here are five ideas we’ve used to make the most of our driveway for growing vegetables.
1. Strawbale Gardens: Grow Vegetables in Containers that are Biodegradeable
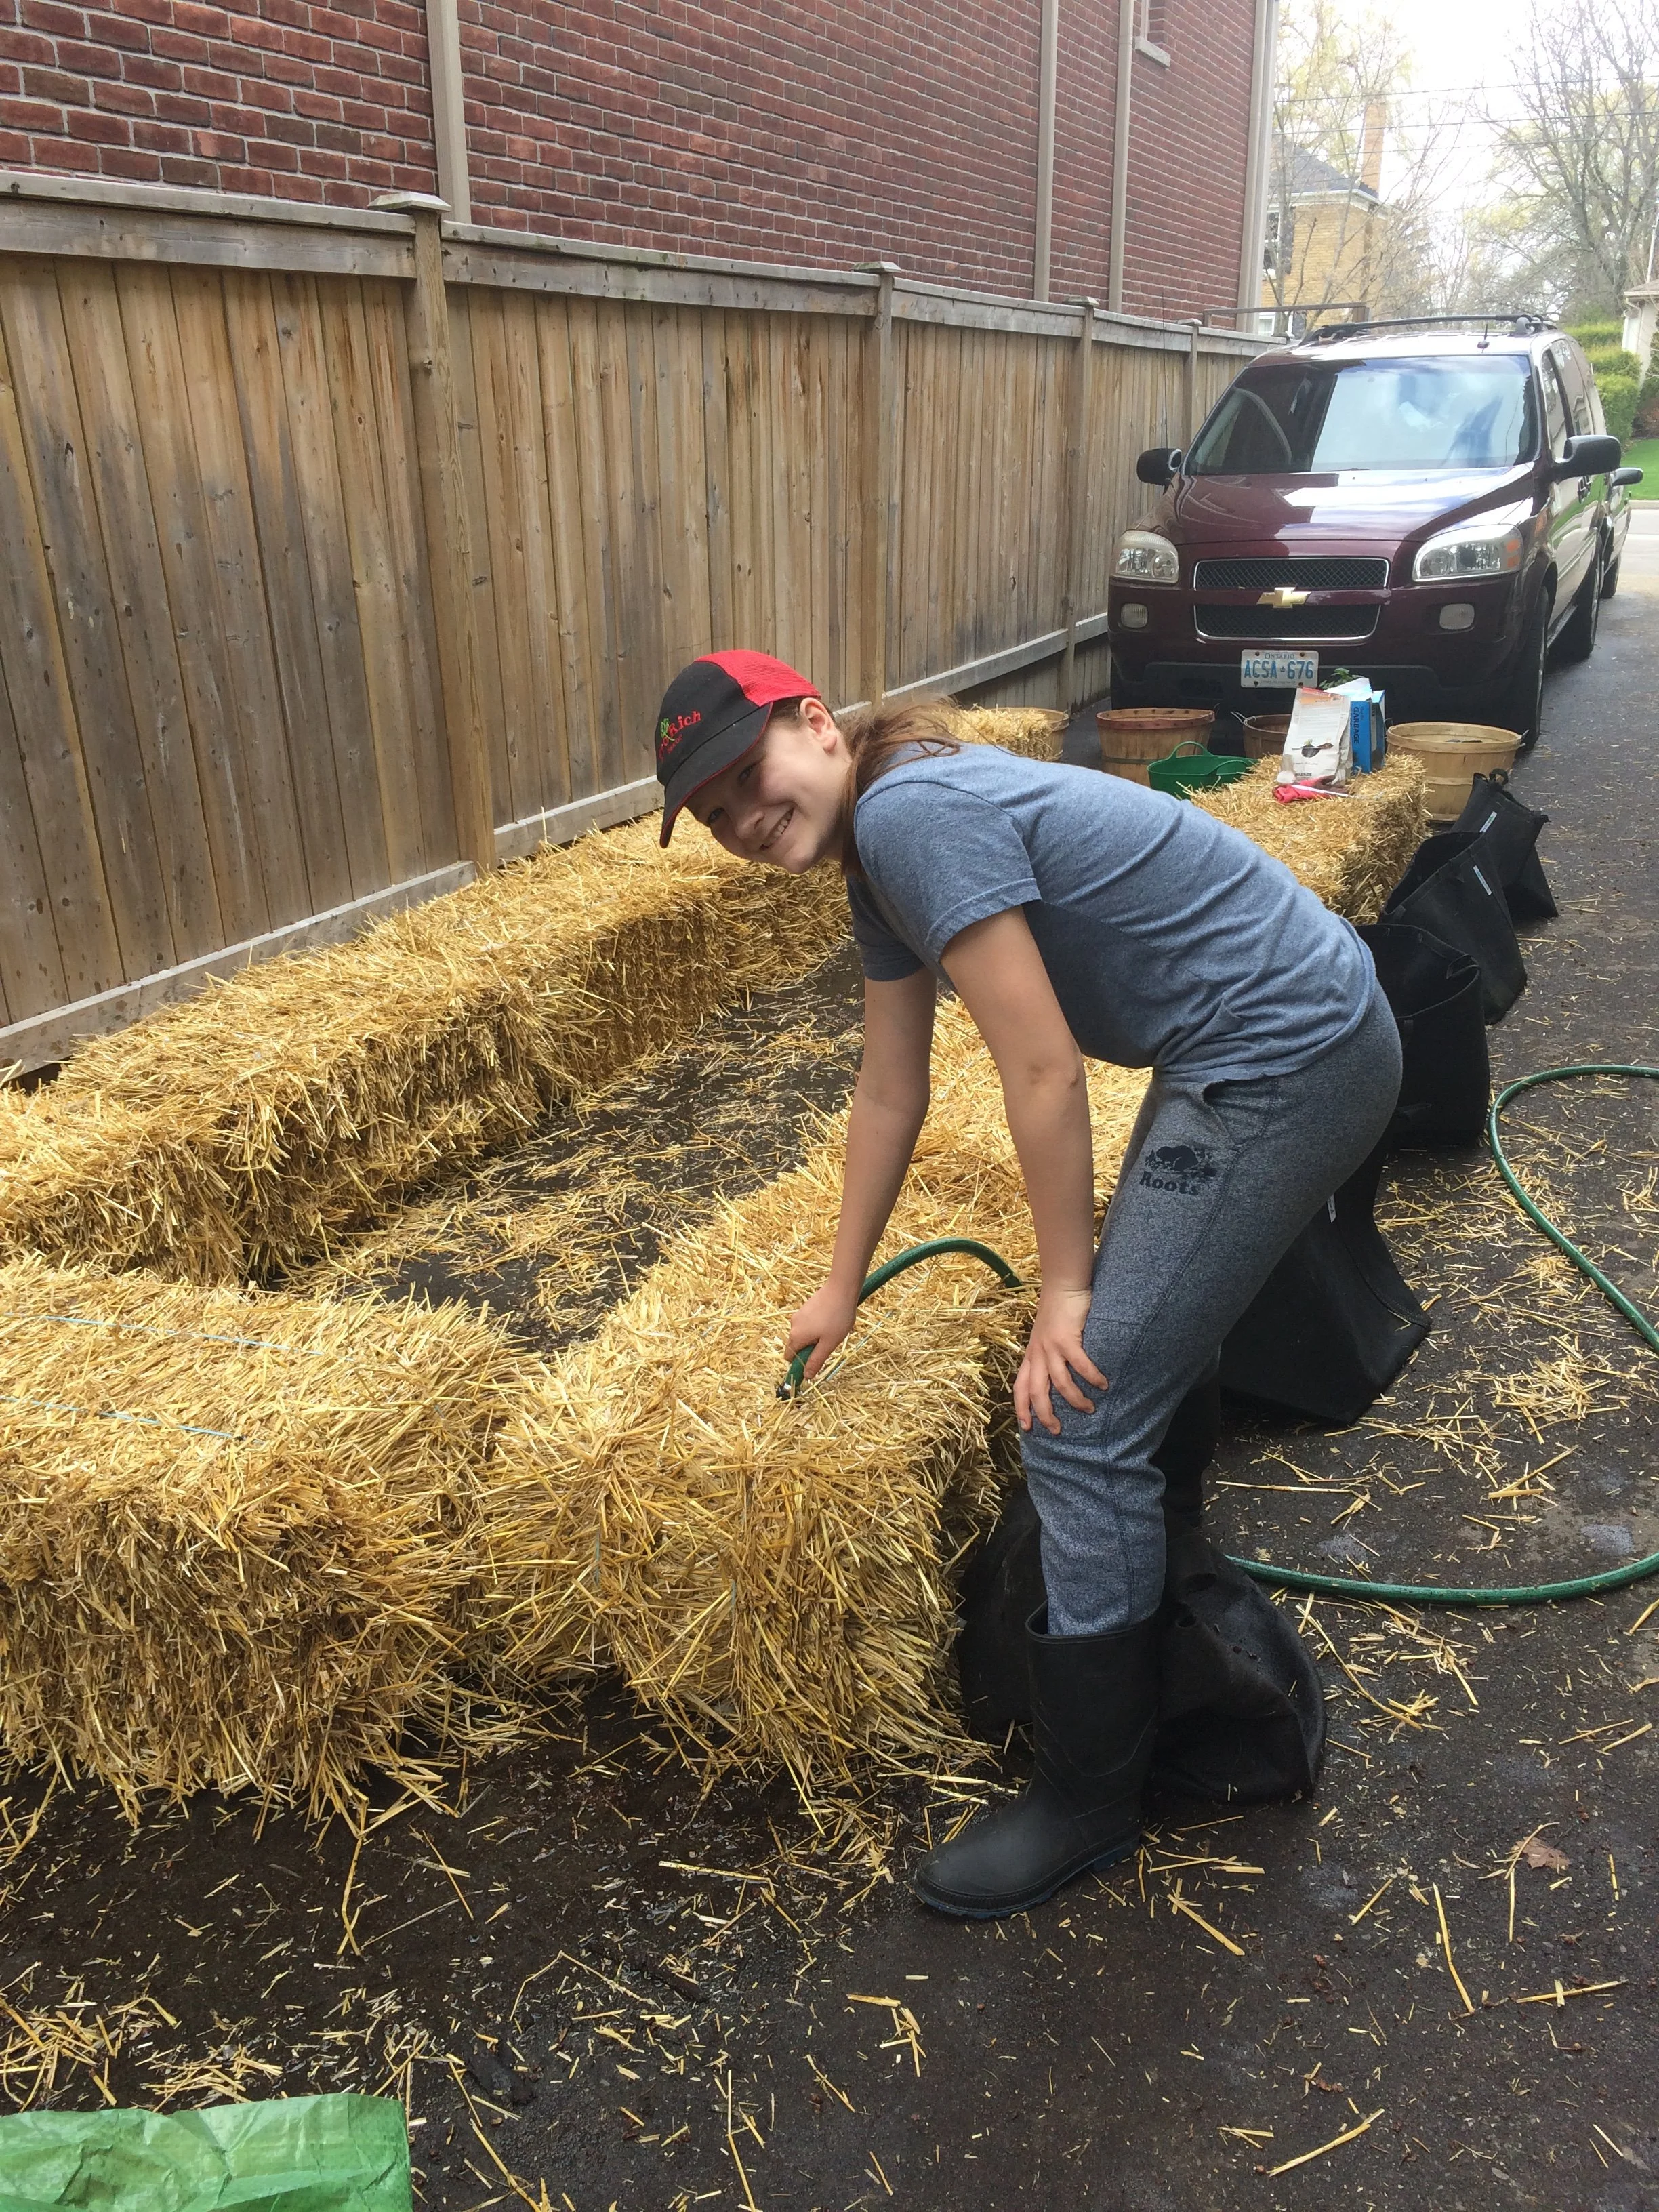
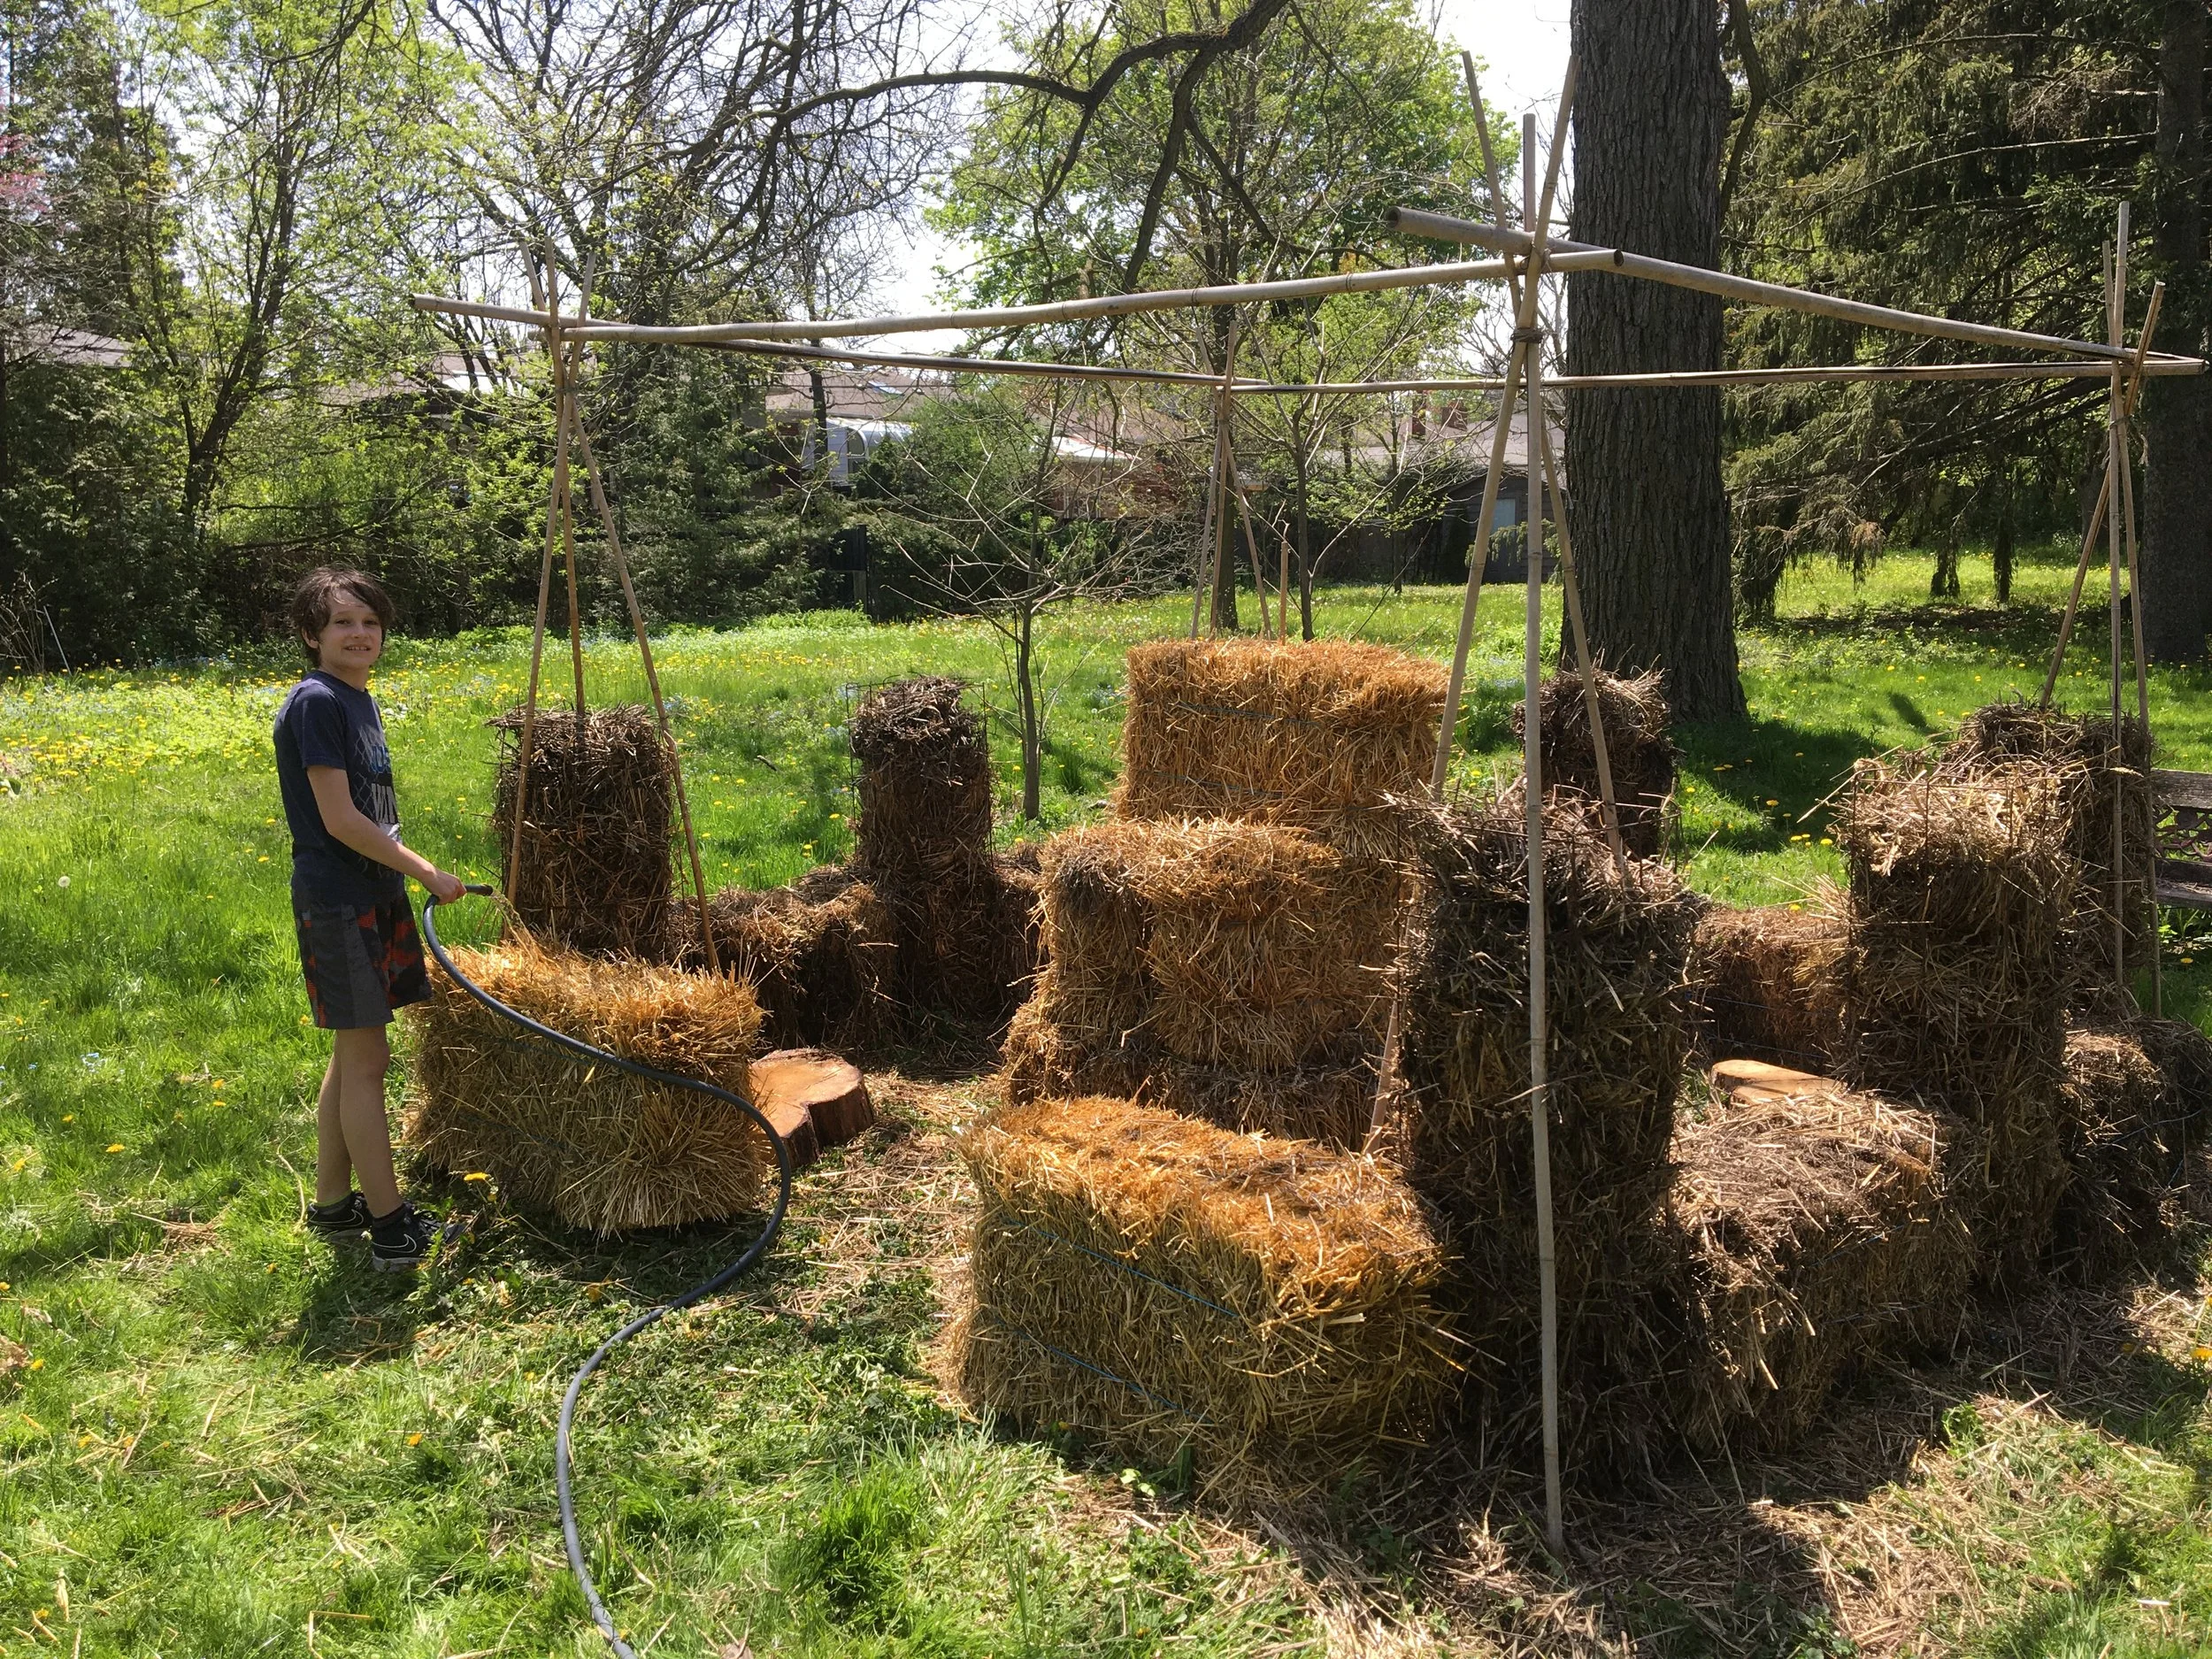
Wetting the straw bales to start the “conditioning” process.
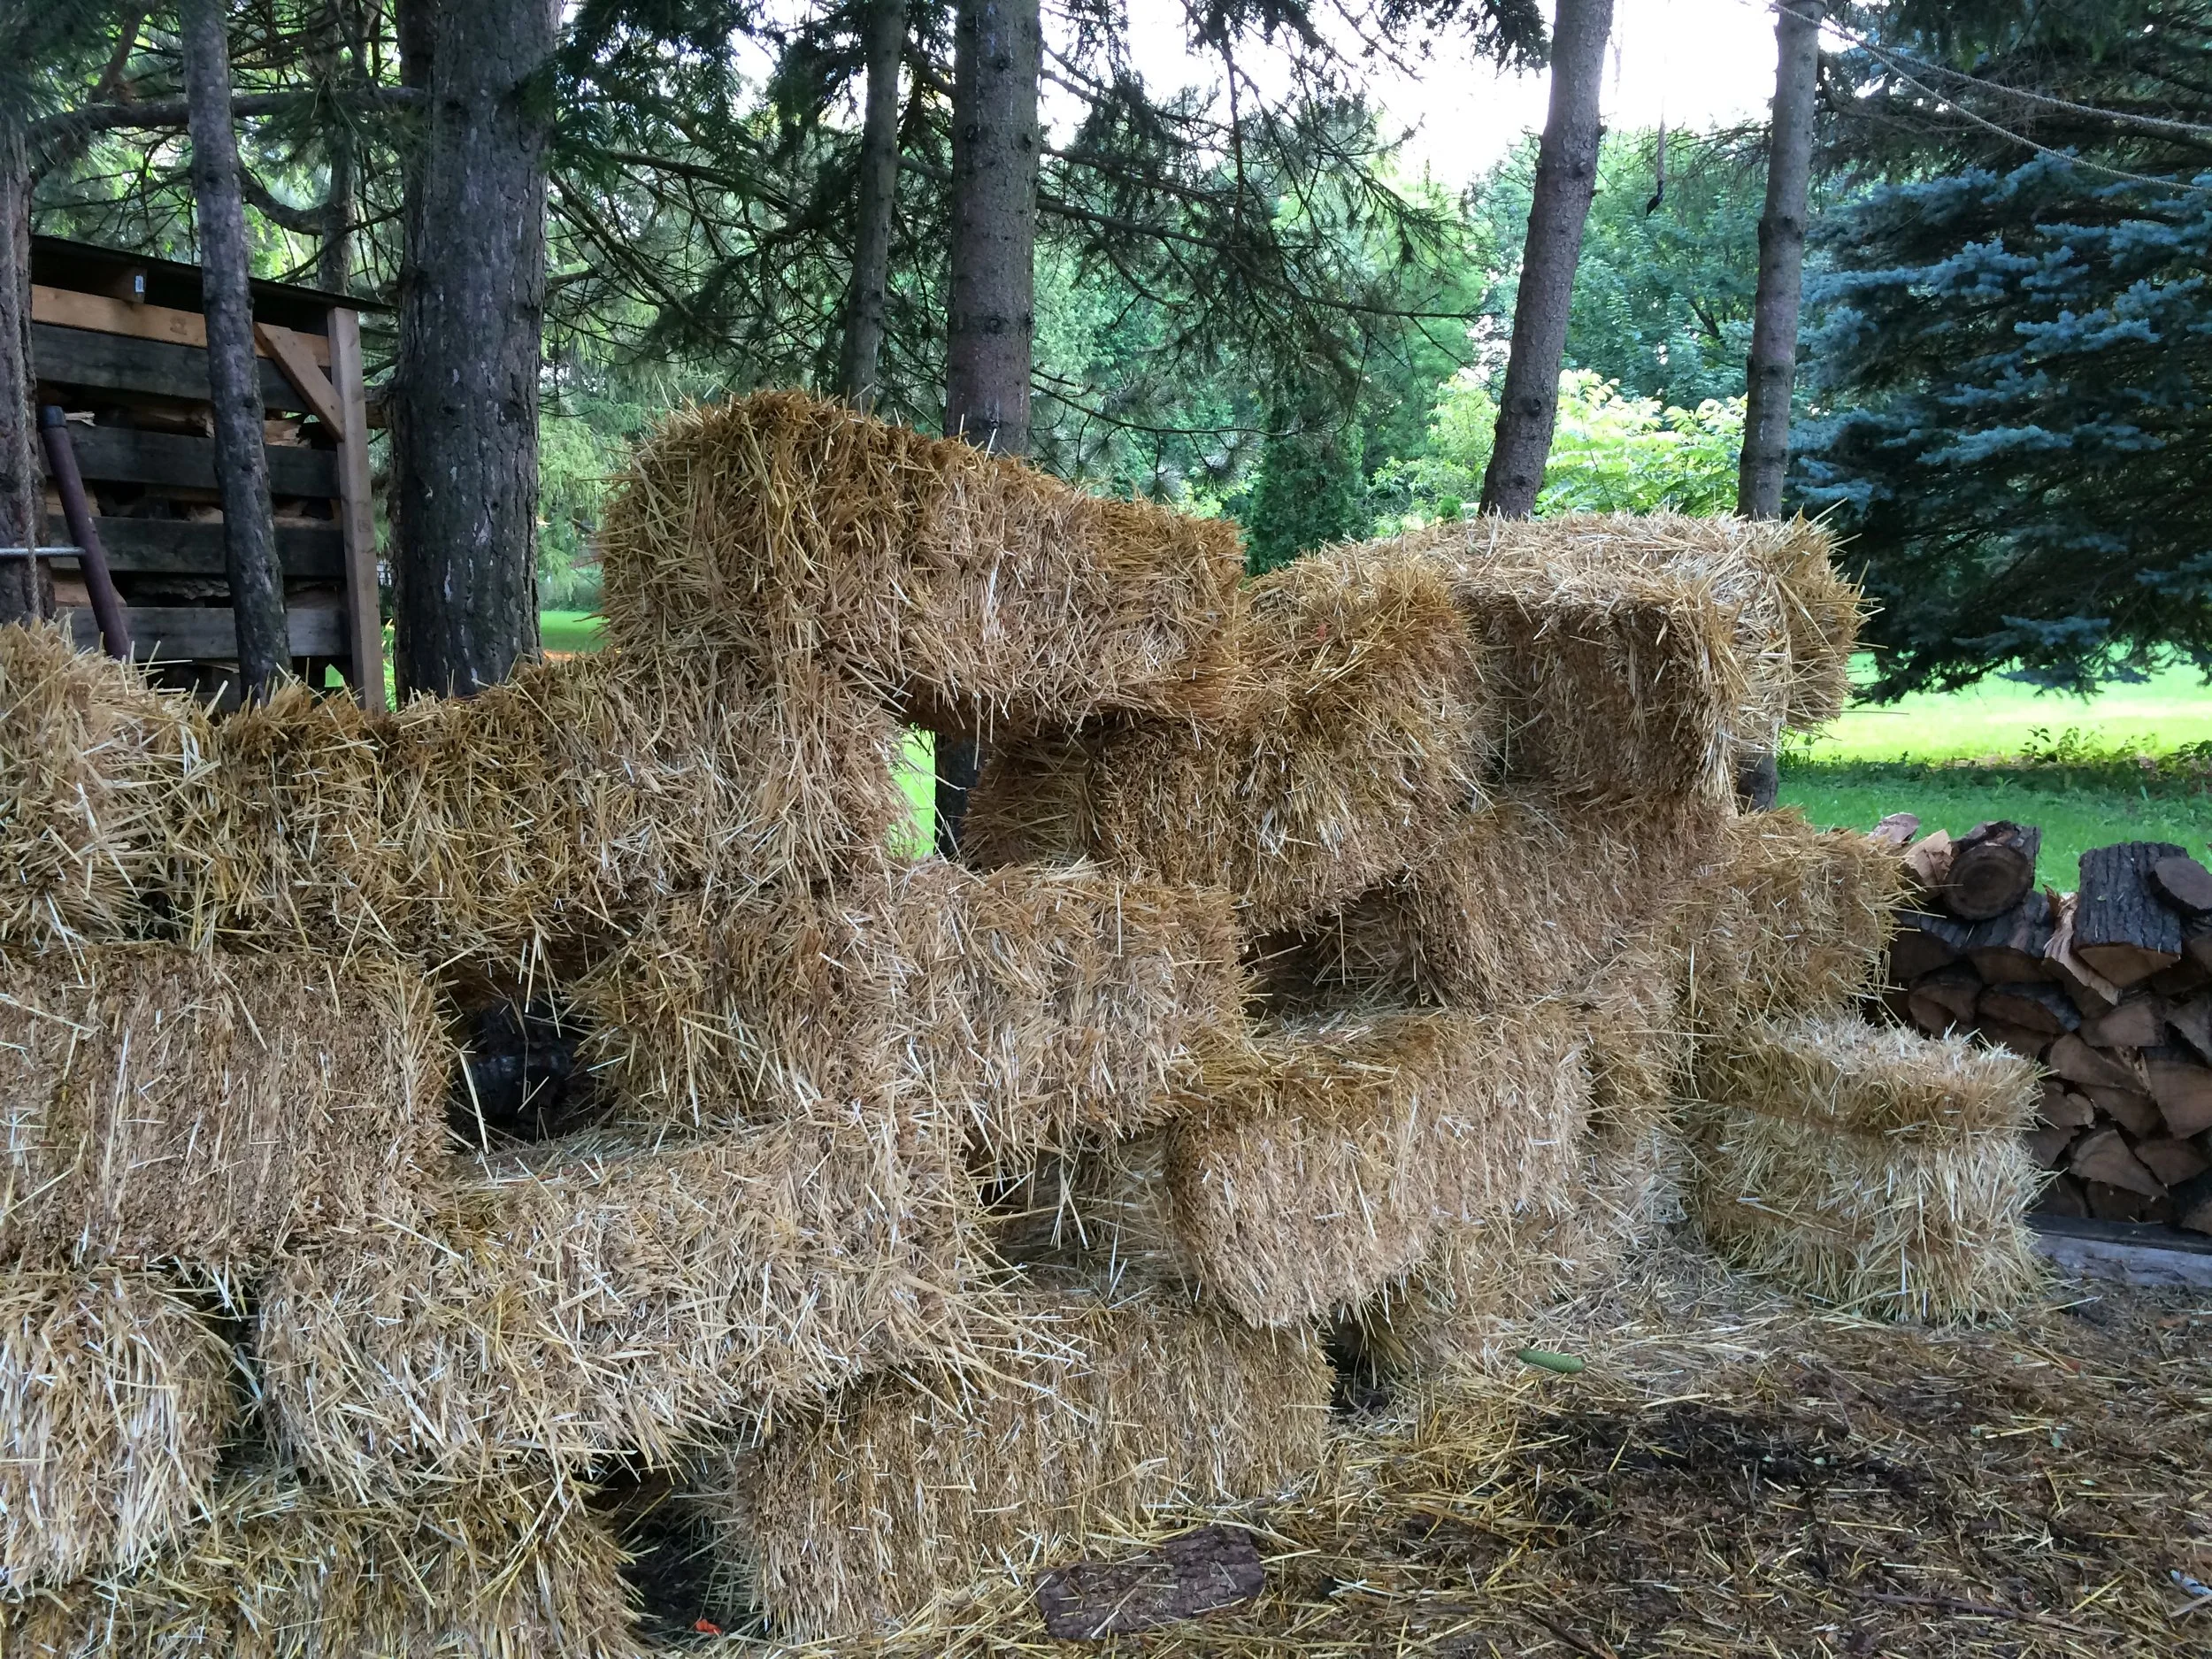
A lot of visitors take a second look at my straw-bale garden and wonder where I put the potting soil. There is no potting soil: The straw bale is both the container and the growing medium. No potting mix required!
The decomposing straw gives plant roots needed air while retaining moisture…like a big sponge.
By the end of the season, when we pull apart a bale, the inside is dark and crumbly. It’s already partially composted and perfect to use as mulch on our gardens. Then, we start again with new bales the following year.
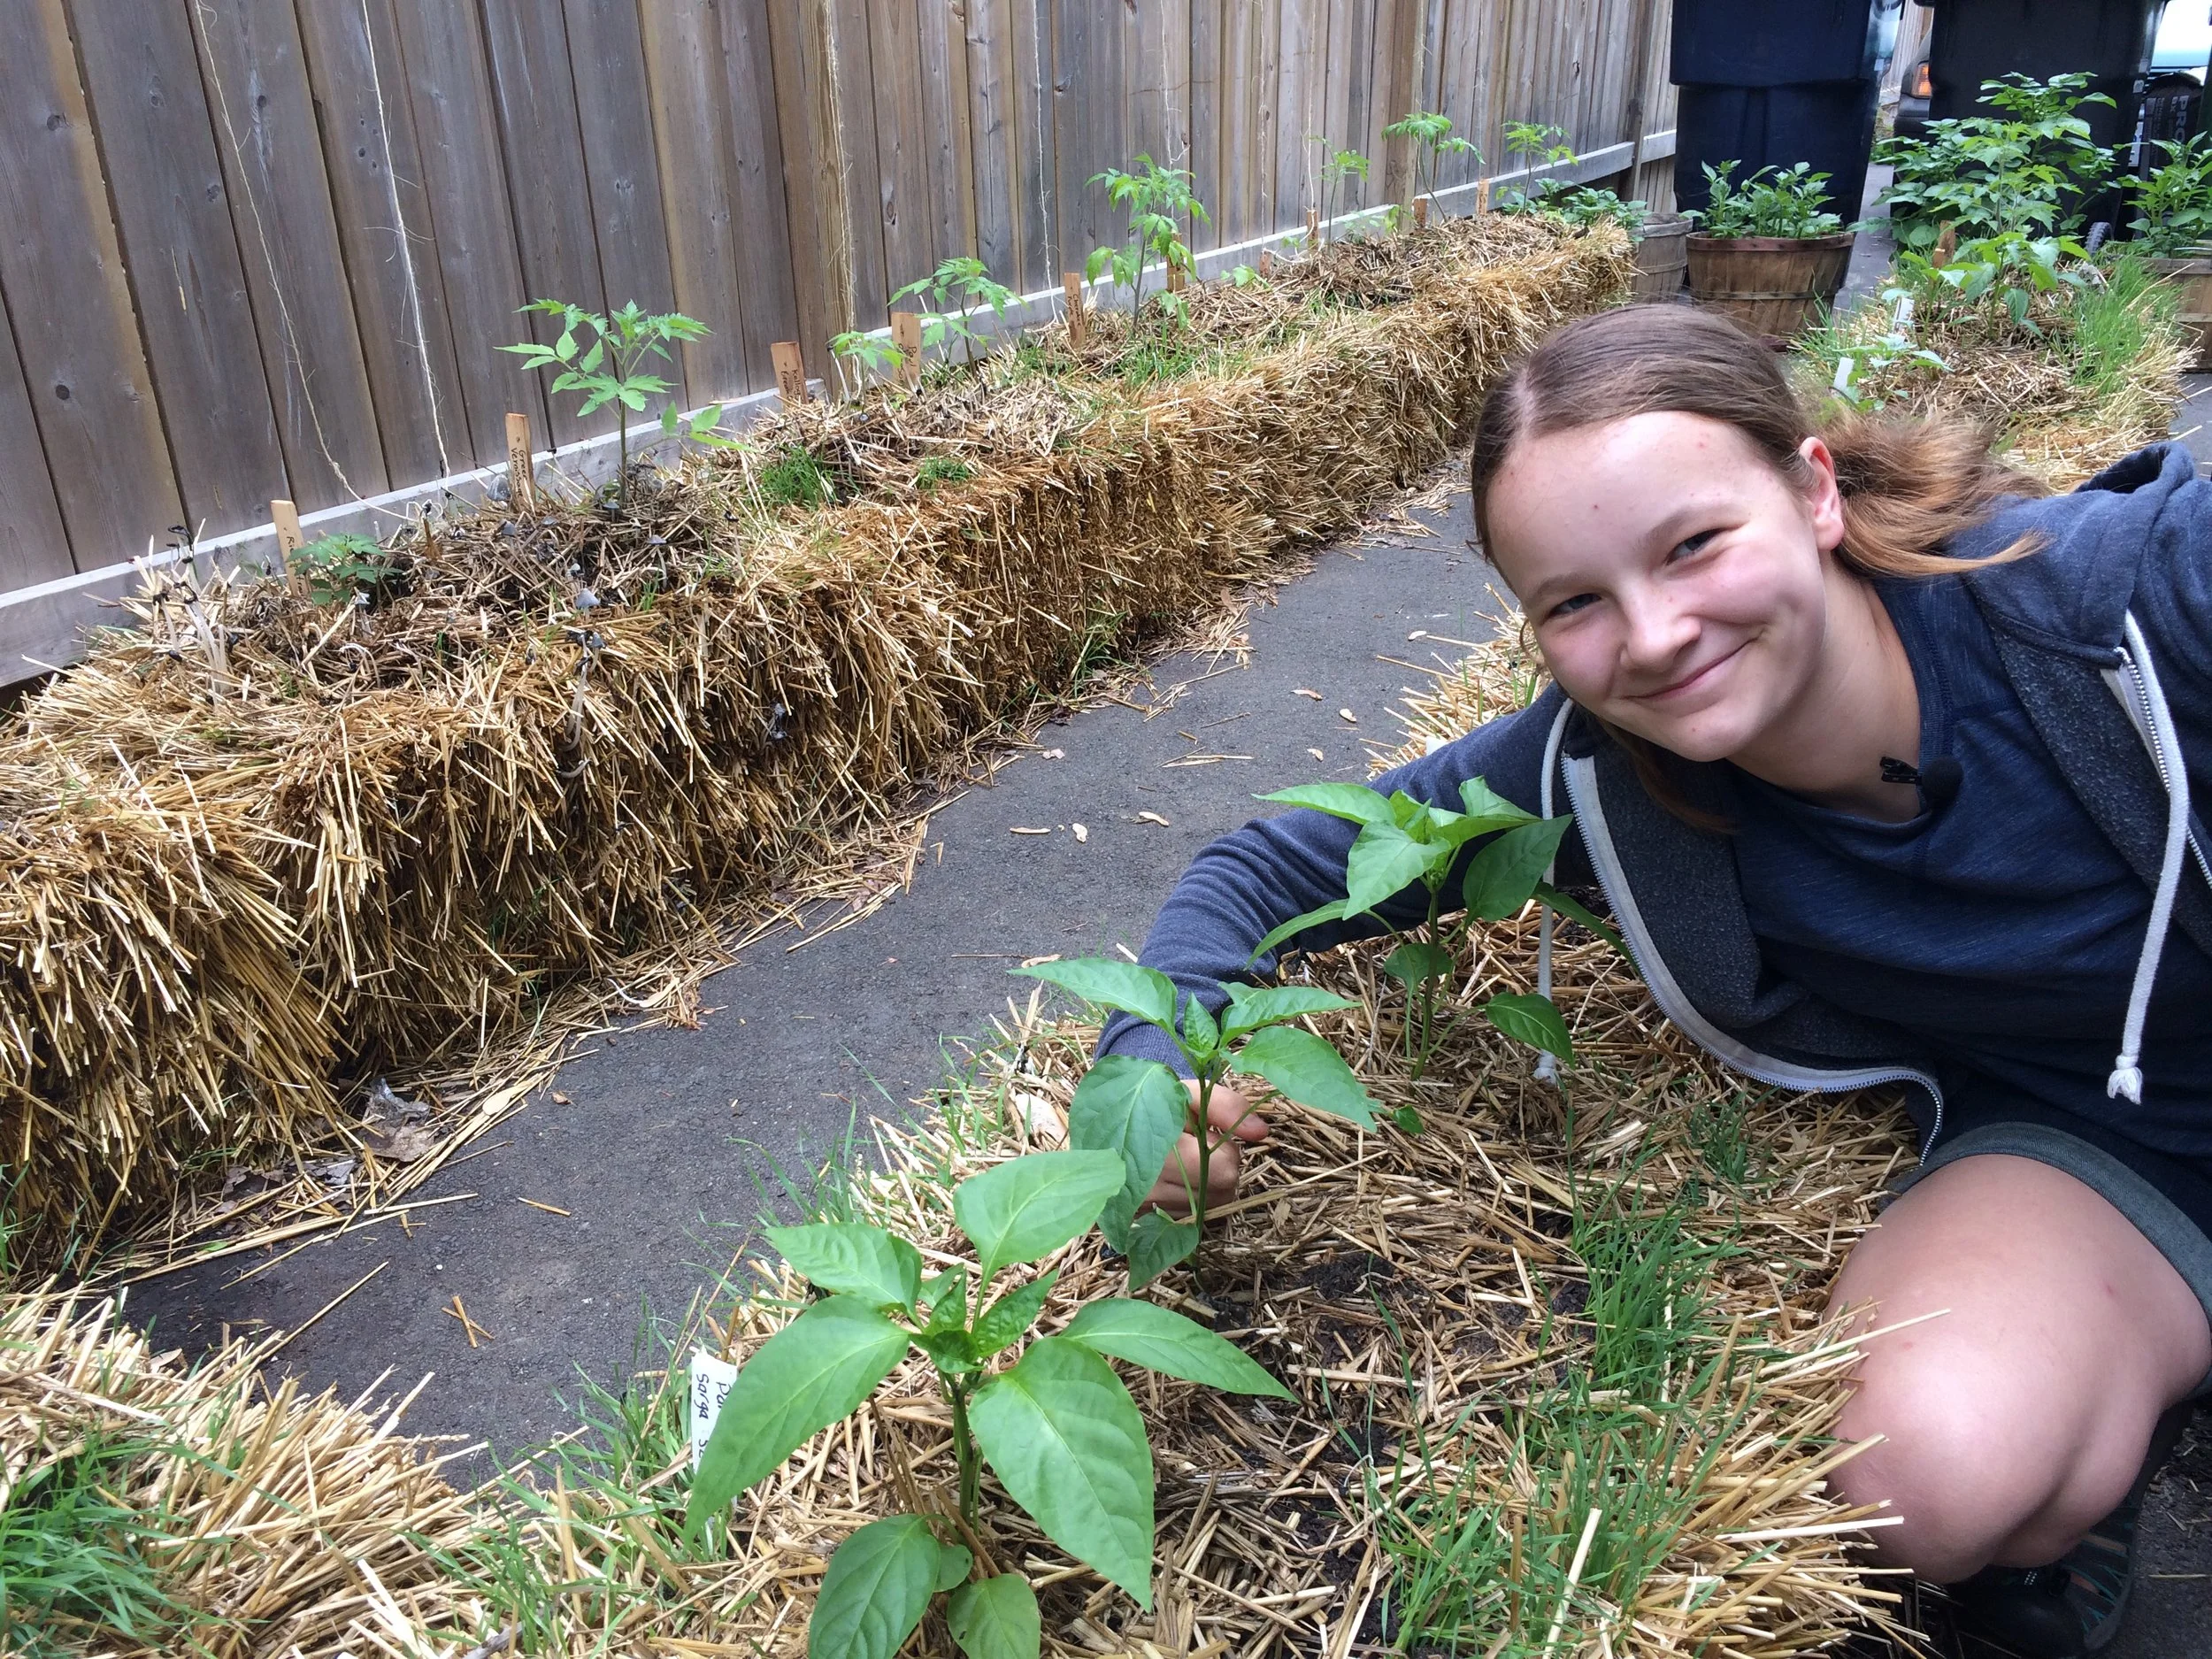
We plant the top with tomato plants and leafy greens. Then we put bush beans on the sides of the bales.
Important: If you’re starting with new, fresh, dry bales, the first step is to get microbial activity underway by watering them and feeding them. This step is called “conditioning.”
Find out more about straw-bale gardening.
2. Bushel Baskets: Growing Vegetables in Containers that are Repurposed
Container vegetable gardening with repurposed stuff! Potatoes growing in lined bushel baskets.
We often have extra bushel baskets from our fall cider-making. So we use them for growing potatoes. (We can’t grow potatoes in our back yard because our neighbour’s black walnut tree gives off a compound that kills them.)
We line the bushel baskets with plastic bags so that the potting soil stays moist longer and so the bushel baskets won’t decompose as quickly. (We poke drainage holes in the bottom of the bags!)
There are lots of repurposed items that work well as containers. Here are a few ideas:
Milk crates. I’ve used these in previous gardens. Just cover the openings on the side and bottom with newspaper or cardboard, so the soil doesn’t escape.
Old wheelbarrow. A friend uses an old wheelbarrow as a driveway planter.
Wash basins. I have neighbours who use metal wash basins as vegetable garden planters. (Make sure to drill drainage holes in the bottom.)
3. Fabric Pots: Garden in Pots that are Moveable
Fabric pots are moveable, and a great way to start container gardening.
These pots are widely available. What we like about them is that they have handles so we can move them aside if we need to move anything large along the driveway.
I’ve seen impressive rooftop container gardens created with fabric pots. While some gardeners use drip irrigation to keep the soil consistently moist, a more simple approach is to put a saucer underneath; as the potting mix begins to dry, water in the saucer wicks upwards.
4. Fence: Grow Vegetable Plants on Surrounding Features
We train tomato plants up the twine that is dangling from the top of the fence.
Sometimes it’s possible to squeeze more crops into a space by growing some of them upwards—a concept that’s often referred to as “vertical gardening.” In the case of our driveway, there’s a wonky board fence that I like to hide with a wall of tomato and squash!
We plant tomatoes next to the fence, and then train them up twine suspended along the fence. We also grow squash vines along the fence—well past where the garden is.
Idea: I’ve also grown squash along hedges and up trees. Because the vines roam around, there are lots of vertical-gardening possibilities.
Here’s more about vertical gardening.
5. Nursery Pots: Figs Growing in Containers
Next to my garage is my potted fig “orchard.” It’s a collection of potted fig plants growing in nursery pots. These fig trees spend the winter in my garage.
Nursery pots are an inexpensive way to start container gardening. Talk with garden centres and arborists—you can often get them for free or very inexpensively.
If you’re interested in growing figs in a cold climate, here’s more about how to do it.
Grow a Container Vegetable Garden
And get an early harvest of crops that usually take too long!
Plan Your Container Vegetable Garden
Choose the Location
If you’re thinking about a container vegetable garden but don’t know where to start, choose your location first.
Then, once you’ve decided on a location, you’ll know how much sunlight you’re dealing with. Remember that full-sun crops such as tomatoes can do respectably well in partial sun. (This is not something a commercial market gardener would do…but if you’re a home gardener, conditions often aren’t perfect.)
Something else to think about is access to water. Is there a tap or hose nearby?
Choosing Container Plants
When it comes to choosing container gardening crops, a good starting point is things you like to eat.
Then, think about crops that do well in containers. Most vegetables grow well if a container is big enough, but some crops are more practical than others.
For example:
Pole beans are great if they're next to something they can grow on, but, otherwise, bush beans are more practical because you don't need to make a trellis.
Parsnips and Brussels sprouts take the whole summer and fall to mature. Instead, look for crops that mature more quickly, like carrots and carrots.
Here’s a list of best vegetables to grow in pots.
If the location is shady, here’s a list of crops that grow in shade.
Consider Containers with Reservoirs
A key to success—and common reason for failure—with container vegetable gardening is watering. When the soil in containers regularly dries out, your vegetable plants put on the brakes. Growth stalls. Or, even worse, your plants skip straight to flowering before they're big enough.
Pin this post!
(When you’re looking for bargain plants at a big-box store and see what looks like a bonsai cauliflower plant that’s only six inches tall, chances are that the plant got parched too often…and that stress made it flower before its time.)
If the potting soil is consistently moist, your crop will be miles ahead. It makes a big difference.
You can keep the potting mix consistently moist with what’s called “sub-irrigated” pots. This is just a fancy way of saying a container with a reservoir. As the potting mix begins to dry, water from the reservoir wicks upwards, keeping the soil continuously moist.
This sort of container is widely available—but you can easily make your own.
Find out more about sub-irrigated (a.k.a. self-watering) pots.
More Container Ideas
If space is tight, small containers might be your only option. I've made herb container gardens by dotting potted plants on a staircase.
Don't forget window boxes. Although they're shallow, they work well for shallow-rooted crops such as leafy greens.
Hanging baskets are a great way to fit more vegetable plants into your container garden.
Find This Helpful?
If we’ve helped in your container-gardening journey, we’re always glad of support. You can high-five us below! Any amount welcome!
Prevent Leggy Seedlings and Grow Vegetable Transplants Like an Expert
The best way to solve the problem of spindly seedlings is to prevent them from getting that way in the first place. Find out how.
By Steven Biggs
Your Seedlings are Leggy? Keep Reading!
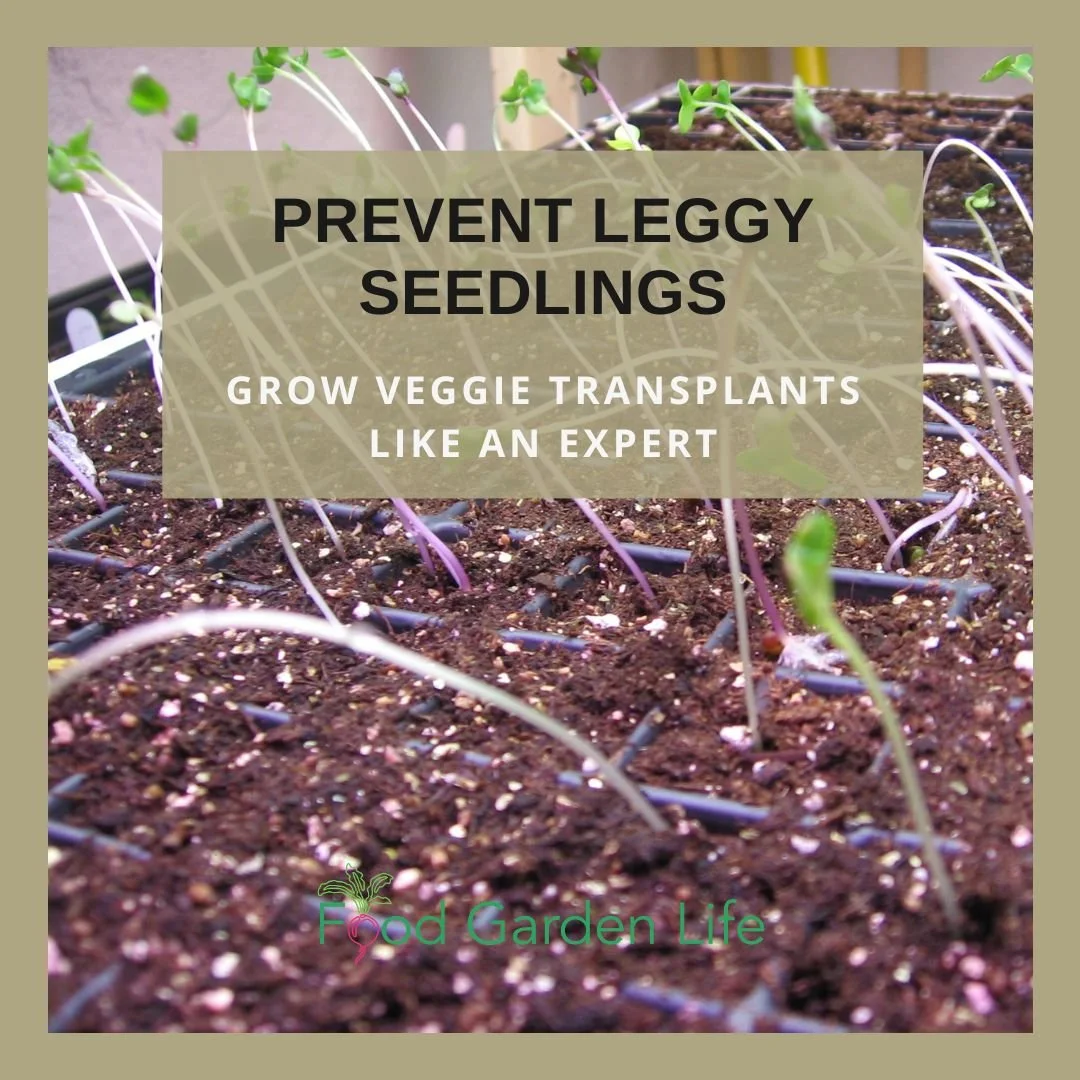
If your seedlings are doing the downward dog, this post is for you.
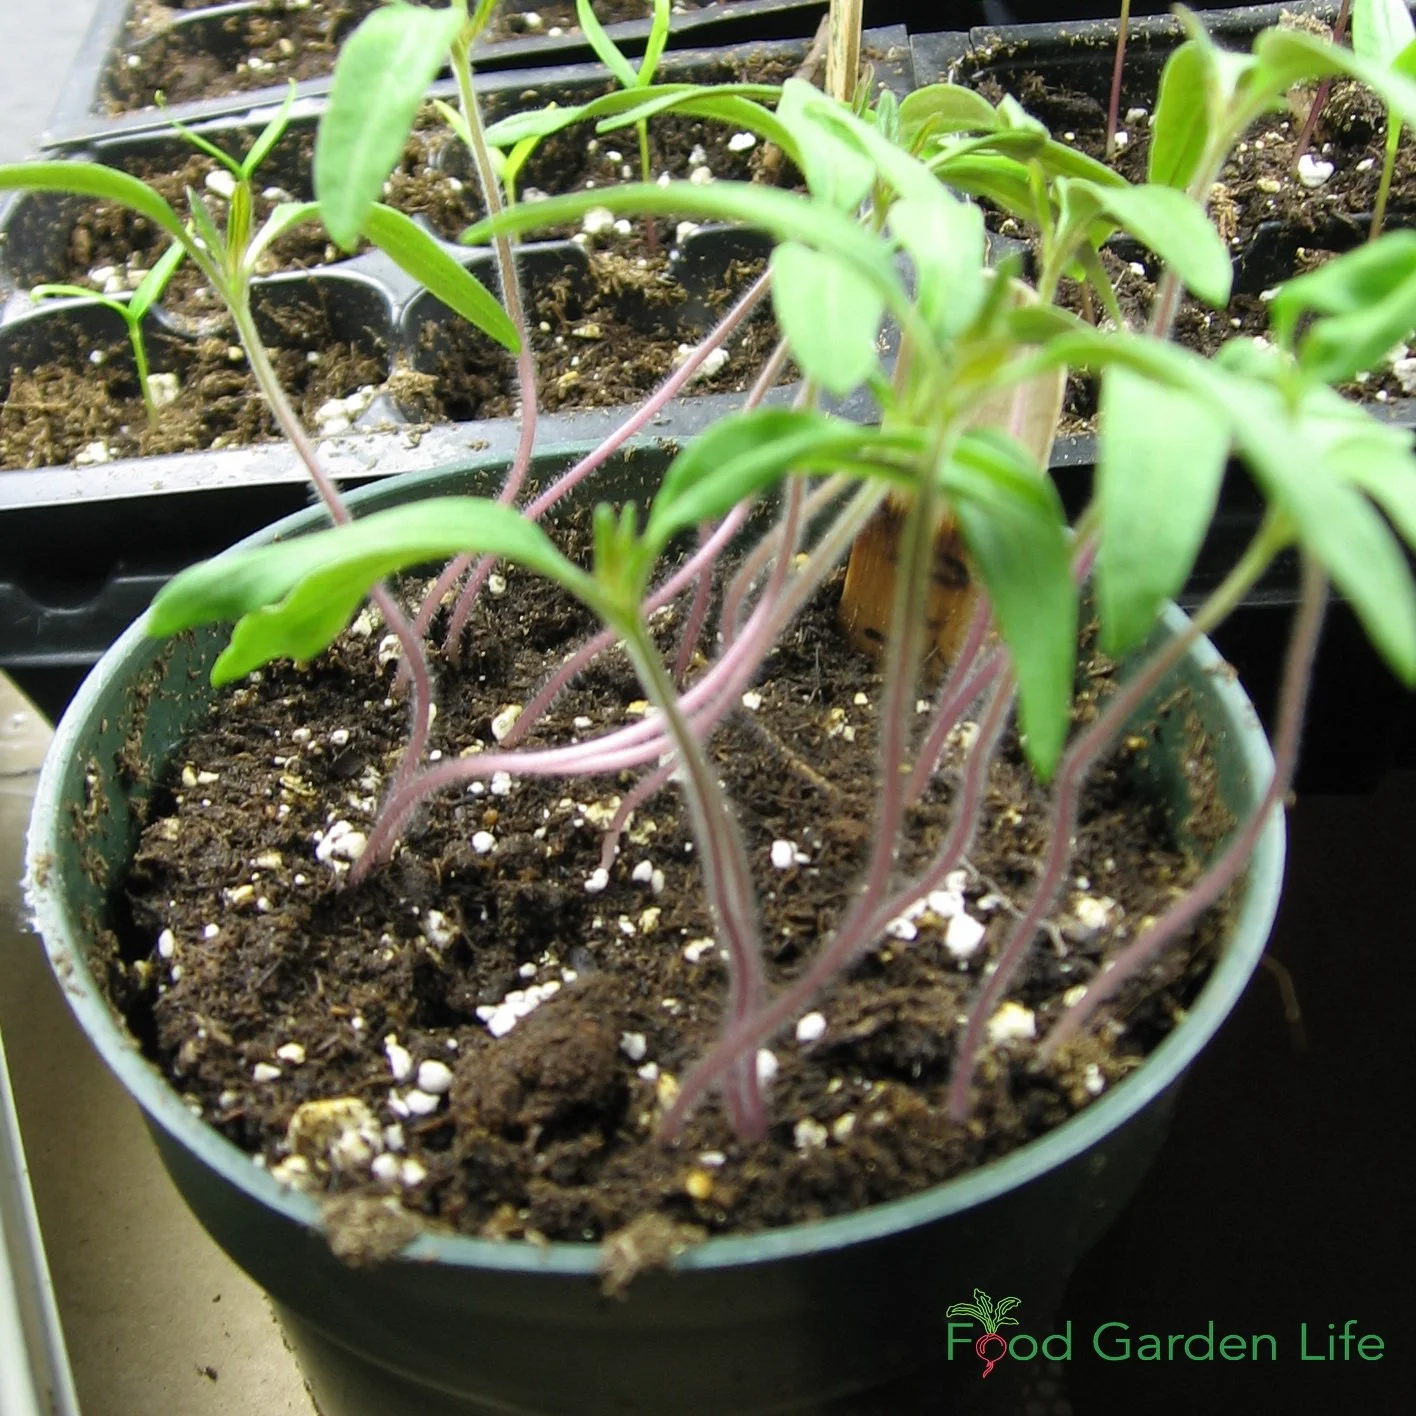
When young seedlings are so fragile that they fold into two, they don’t stand a good chance of success once you transplant them into the garden.
Yet leggy seedlings is a common problem for home gardeners starting seeds indoors. That’s because in a home setting, conditions are often less than ideal.
But there’s good news.
Even if you don’t have perfect conditions—even if you don’t have a greenhouse—you can grow healthy seedlings that will thrive. It’s just a matter of setting up your seed-starting area so you can give small seedlings:
An appropriate temperature
Enough light
A suitable potting soil
Combine these with a suitable container, and you’re away to the races. You can grow strong and healthy plants.
This article tells you how much light you need, what you need to know about temperature, what to look for (and avoid!) in a potting soil, and how to choose a suitable container. Get these four things right, and you’ll prevent leggy seedlings.
Heat to Sow Seeds Indoors
Warmer than room temperature to germinate, cooler than room temperature after germination.
If you see different seed-starting temperature recommendations for different crops, don’t sweat it. You’re probably starting all of your different crops in the same indoor space anyway.
Here’s the big picture, a simple way to think about temperature:
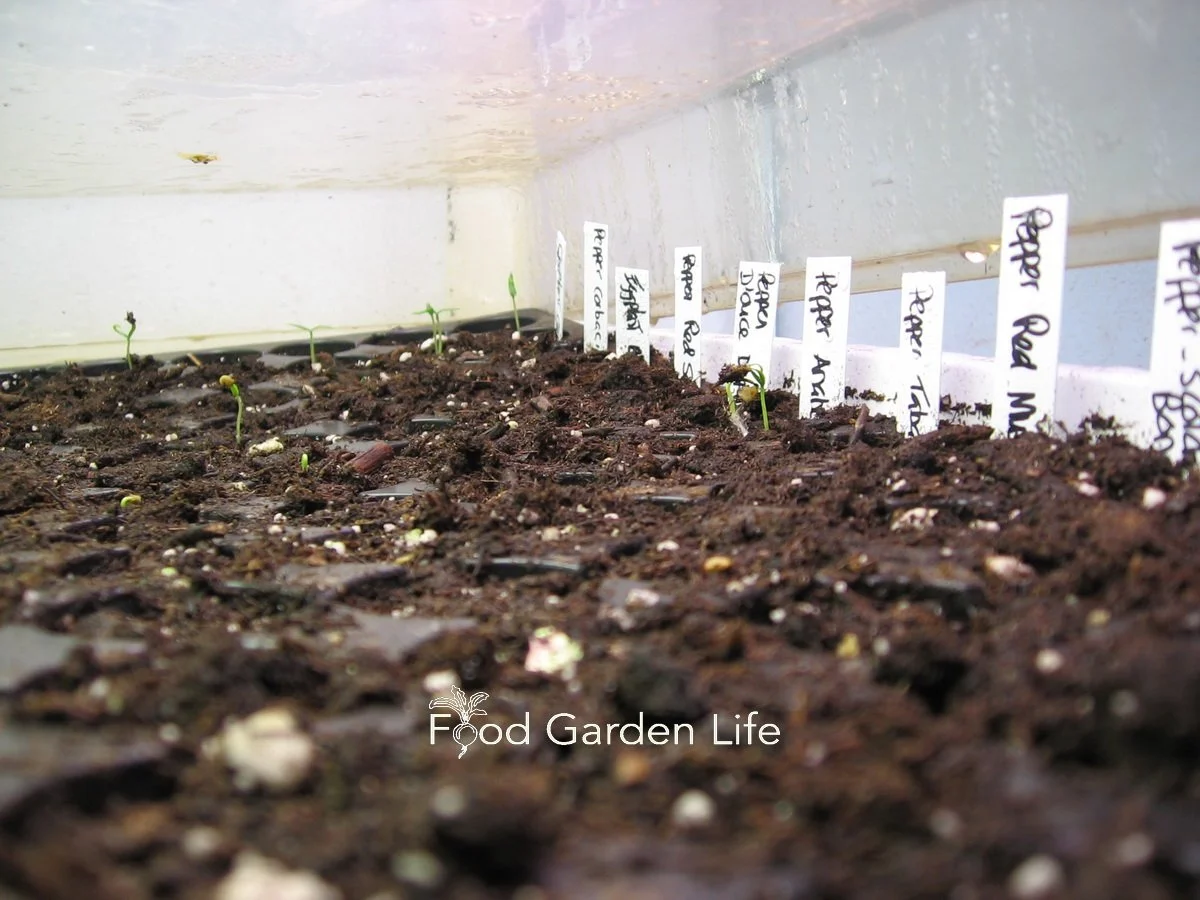
When you start seeds indoors, a temperature a bit above room temperature is helpful for faster, uniform germination
Once your seeds germinate, a temperature slightly cooler than room temperature helps to keep your seedlings more compact
Higher Temperature for Germination
Speed up germination with more heat. Seed tray beside a heat duct to speed up germination.
You can raise the soil temperature without turning your house into a tropical conservatory. Just use what’s called “bottom heat.”
Bottom heat refers to heating the soil from below. There are purpose-made heat mats, like heating pads for plants, that go underneath pots and trays. With a heat mat, you’re only heating a small area.
Here are other ways you might be able to give your seeds bottom heat:
Heated floor
Hot-water radiator
An appliance that gives off heat (my former beer fridge was always warm on top)
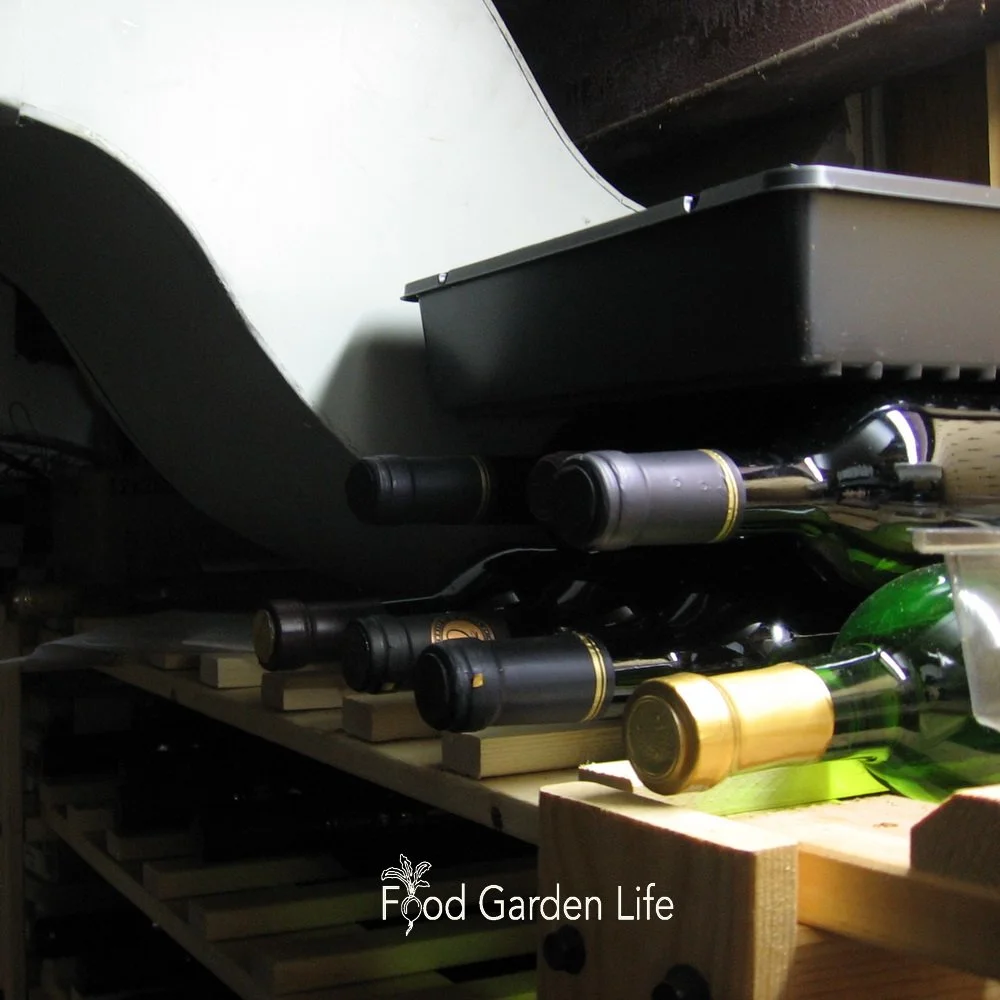
In a previous house, I put seed trays beside basement heat ducts (over top of my wine rack!) to get seeds to germinate quickly. They sprouted seedlings faster than the trays in a cooler location.
Hold in Heat
Along with heat from the bottom, hold in heat and keep the humidity higher during the germination period. There are commercially available humidity domes for trays, or you can use clear plastic bags or cling wrap.
Cooler Temperature for Growing
Once seeds have germinated, a cooler temperature helps to develop sturdy stems. So remove the heat mat if you’re using one, and if you’re using a cover, set it ajar to let out some heat and humidity.
I grow seeds in a basement room with the heat ducts closed. It’s slightly cooler than the rest of the house and the temperature works well for raising seedlings.
Sufficient Light
Insufficient light is one of the things that will cause lanky seedlings.
There's a wide variety of grow lights available for home gardeners. But if you’re growing vegetable transplants indoors, you don’t need fancy grow lights. That’s because you’re not trying to grow the crop indoors for its entire life cycle.
All you’re trying to do is to get a healthy seedling to transplant into the garden. And once it’s in the garden, it gets full sunlight.
Grow Lights
Adequate light is important; but there’s no need for perfect light because seedlings get full sunlight when moved to the garden.
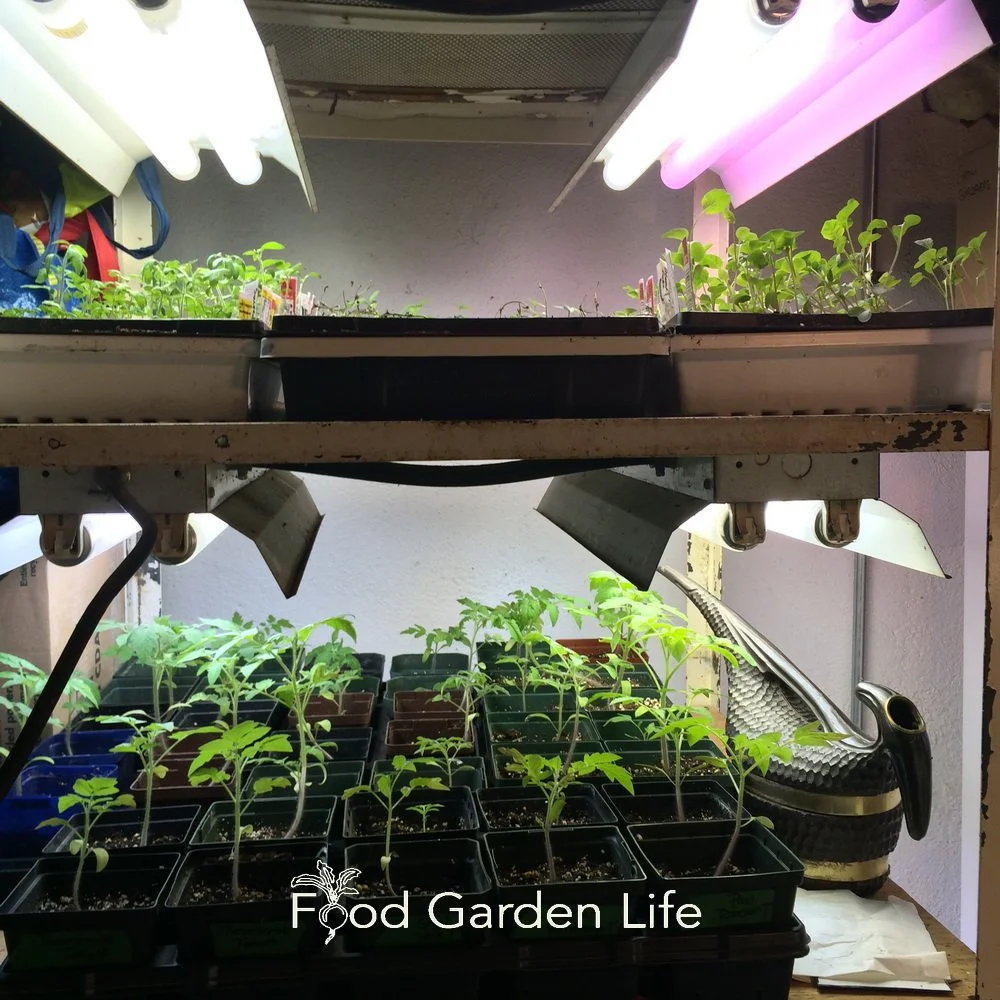
I still use fluorescent lights because that's what I have and I'm on a limited budget. You can buy fancy schmancy lights; there’s no need.
If you’re using artificial light, consider the distance of the seedling from the grow light. Some grow lights have adjustable lights that can be moved close to seedlings, and then moved up as seedlings get taller.
If, like me, you don't have that option, place something under the seedlings to raise them up, closer to the light source. (Mandarin orange crates work well in my setup!) As the plants get bigger, lower them so they’re not touching the lights.
Natural Light
If you’re using natural light, the brightest windows are usually south-facing. One challenge is that south-facing windows can be hot. Warmer temperatures can cause leggy seedlings. A simple solution to this is to place a fan in the area to disperse the heat.
Soil
Even with good light and a suitable temperature, if you have poor-quality soil, your seedlings might flop!
When it comes to soil, the top two things to think about are:
Use a light soil with lots of air space to allow excess water to drain and small roots to grow
Choose soil that’s free from pests and diseases
Create Your Own Unique Edible Landscape
That fits for your yard, and your style!
Disease in Potting Soil
Little seedlings are delicate and they're vulnerable to attack by disease. In a seed-starting environment, the most common disease is what’s called “damping off” disease. This fungal disease can come with the soil—so one of the easiest ways to prevent the disease is to use soil free from damping off.
Here’s how to lessen the chance of damping off:
Don’t reuse potting soil for starting seeds (unless you’re planning to heat sterilize it)
Don’t use garden compost for seed starting; it has more microbial activity—which is great in the garden—just not ideal for indoor seed-starting
Potting Soil Shopping Tips
Big bales. It’s buyer beware with potting soil. Some potting soils are great…some suck. The large compressed bags (a.k.a. bales) that are sold to commercial growers tend to have consistently better quality because commercial growers are more discerning. Big bales are also much better value. They’re compressed, and often quite dry—so also less likely to have eggs of pesky fungus gnats.
Finely-ground potting soils. There are seed-starting potting soils that are more finely ground, the idea being that big particles can get in the way of small seeds. This makes sense in a commercial setting where uniform, perfect germination is a must. It’s absolutely unnecessary in a home-garden setting. Don’t waste your money.
Skip the meal deal. Seeds germinate and start to grow using energy stored in the seed. Don’t buys soil with added fertilizer; it can actually burn tender seedling roots.
And…If you see soil on special at a big box store for a couple of bucks, remember that a bargain isn’t always a bargain.
Grow a Container Vegetable Garden
And get an early harvest of crops that usually take too long!
Containers
When I worked in the horticultural supply industry we sold various seedling trays, pots, the “cell packs” used in commercial seedling production.
Many of these are available to home gardeners, though not necessary.
The key things to think about with containers:
Drainage holes to allow excess water to drain
Not contaminated with damping off disease (see Reusing Pots and Trays, below)
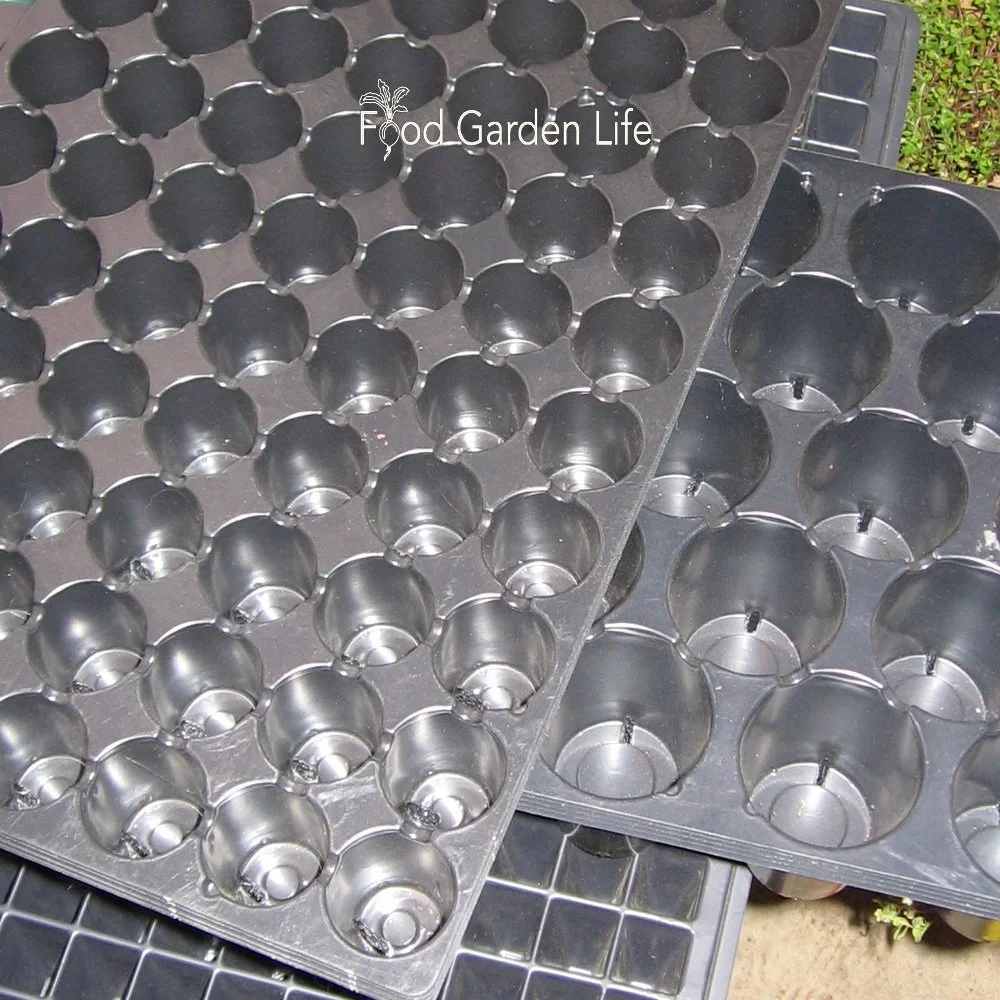
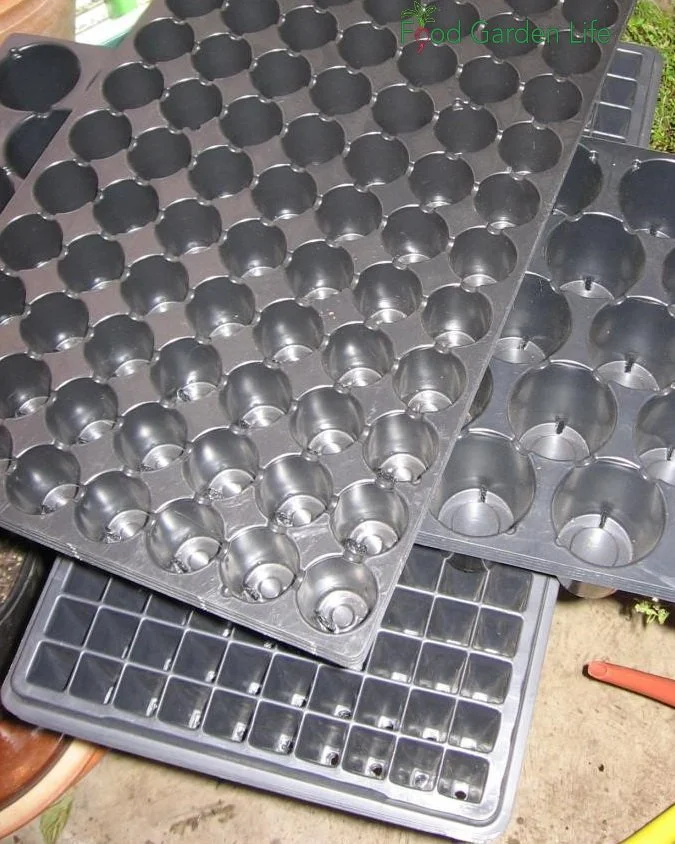
Plug trays for starting seeds indoors. Not necessary, but useful when you grow lots of the same thing.
Container Type and Size
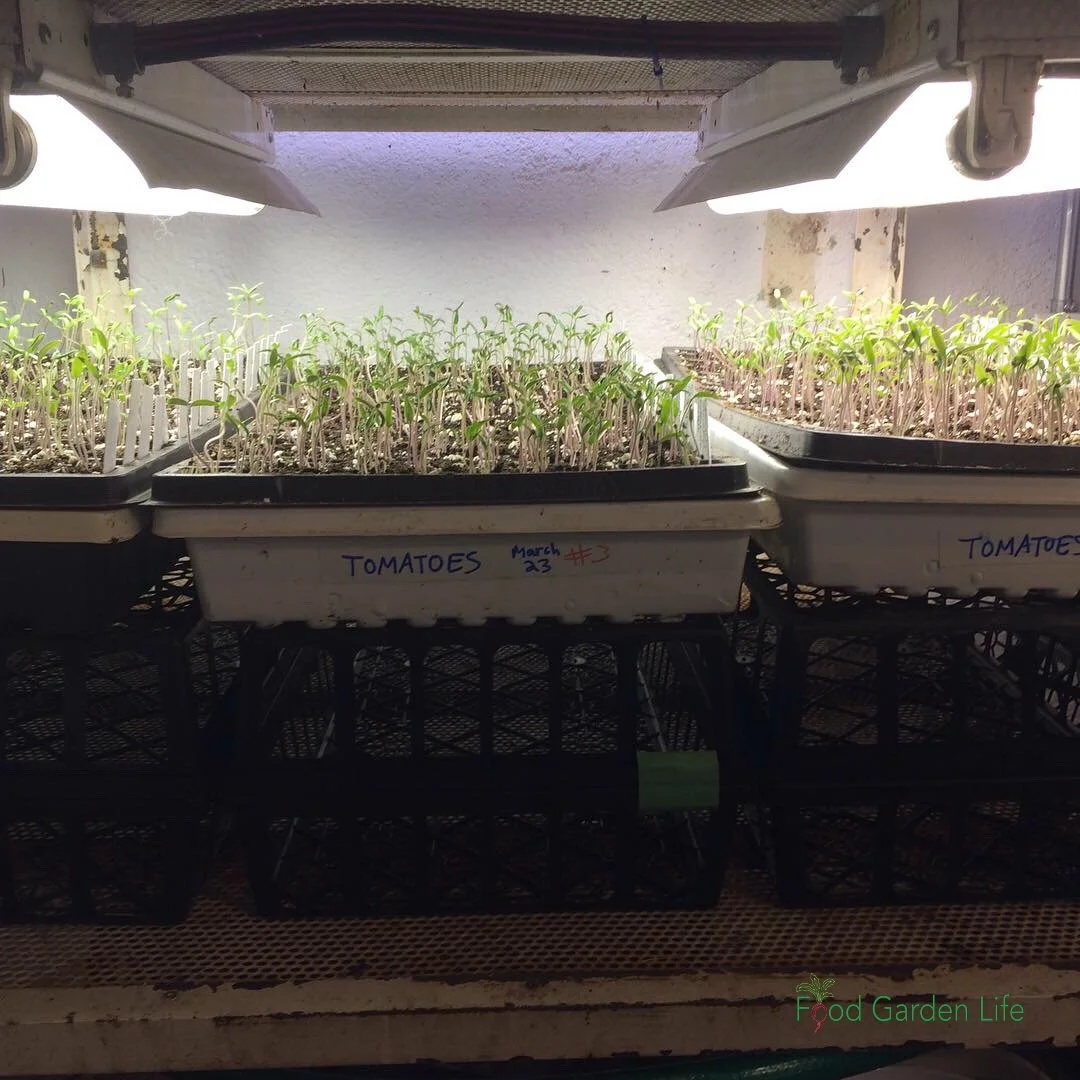
If you’re growing a lot of one type of seed, you might like to have containers that are the same size because it simplifies watering. When my daughter raised hundreds of tomato seedlings, I got her what’s called “plug trays” so she could grow lots of small plants in our small space. They all had the same amount of soil, and dried out at the same speed.
I don’t use the expanding peat pellets. I think they’re gimmicky.
Use What’s in Your Recycling Bin
I am a big fan of scouring the recycling bin for seedling pots. For example:
Yogurt containers
Mandarin orange crates (my favourite for lettuce seedlings)
Tubs for mushrooms
Using a mandarin orange crate to grow tomato seedlings.
Tips when using recycled containers:
The volume of soil in different containers will vary—so water accordingly
Put holes in the container for drainage
Reusing Pots and Trays
If you're reusing pots and trays, it’s a good idea to first sterilize them to prevent damping off disease. That’s because any soil crusted on the container from the previous year can harbour the disease. If you haven’t had damping off disease in the past you might be OK…but personally, I don’t risk it. So I sterilize them.
When damping off disease attacks seedlings, it can wipe out a whole tray in just a day or two. It can be quite devastating.
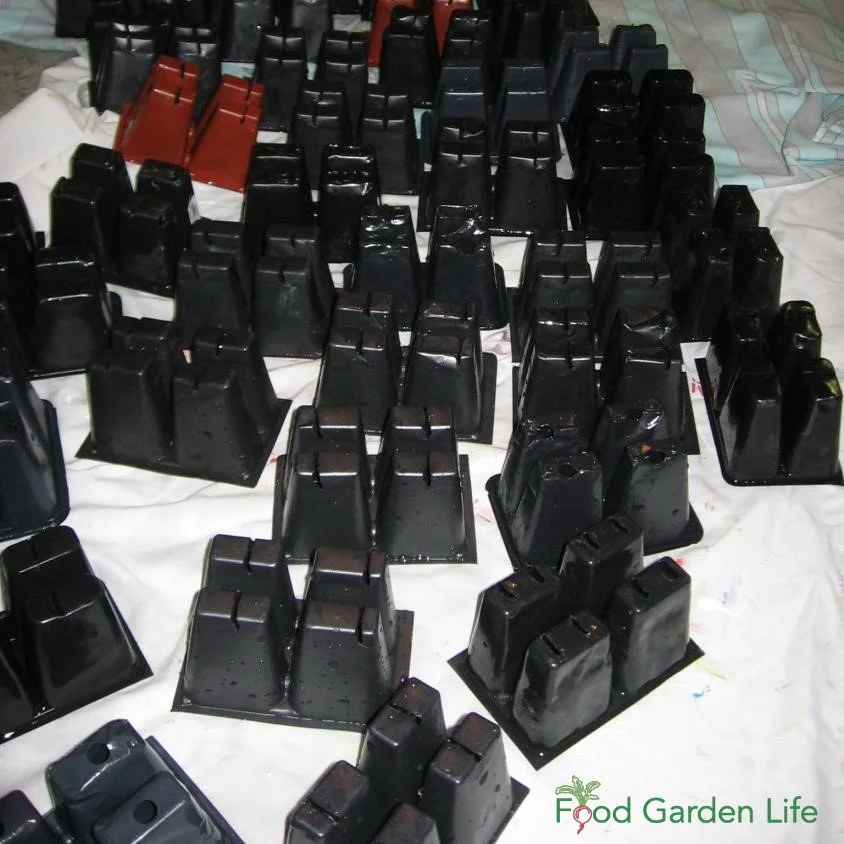
Cell packs drying after washing and sterilizing to prevent damping off disease on seedlings.
Here’s what I do to sterilize containers:
Soak containers in water
Scrub off any crusted soil
Place them in a solution of 10 parts water with one part bleach
Let them air dry
What About Fibre Pots?
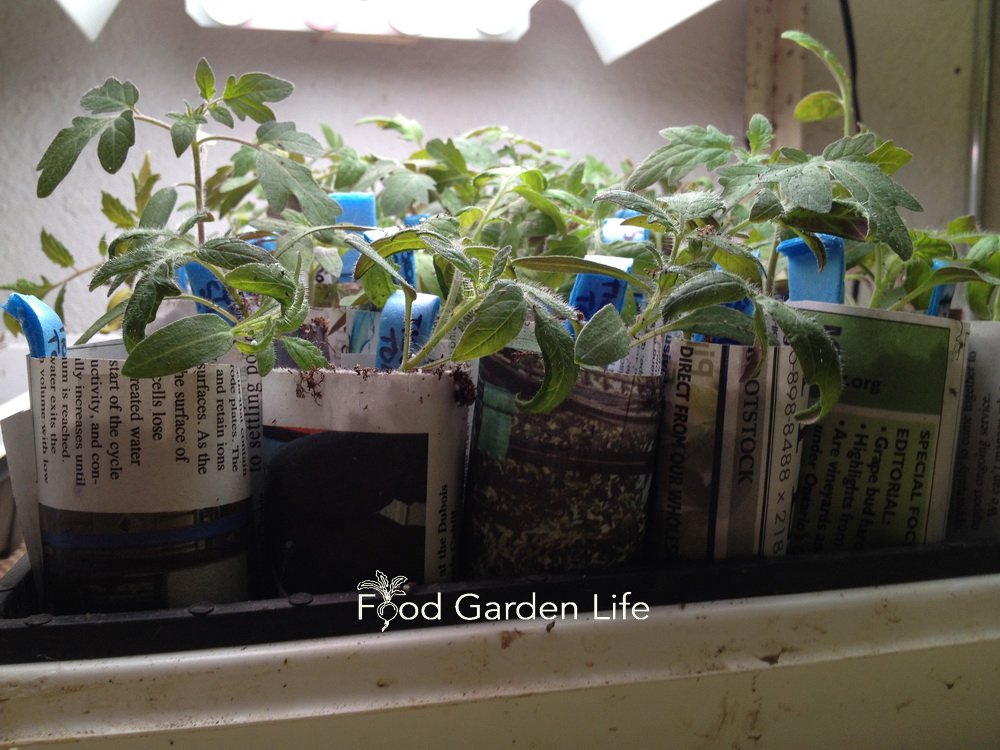
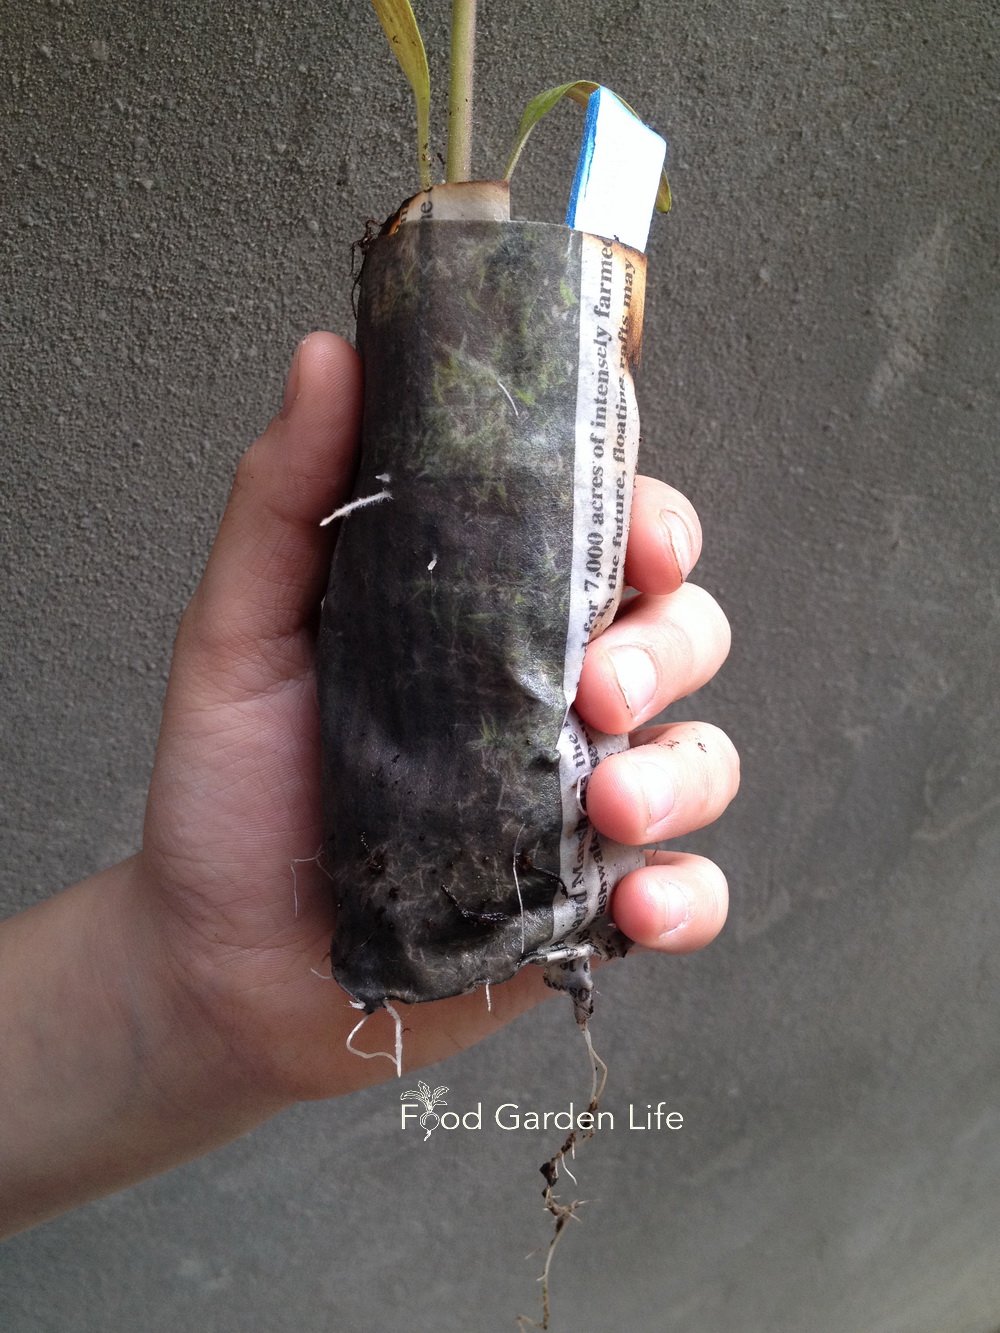
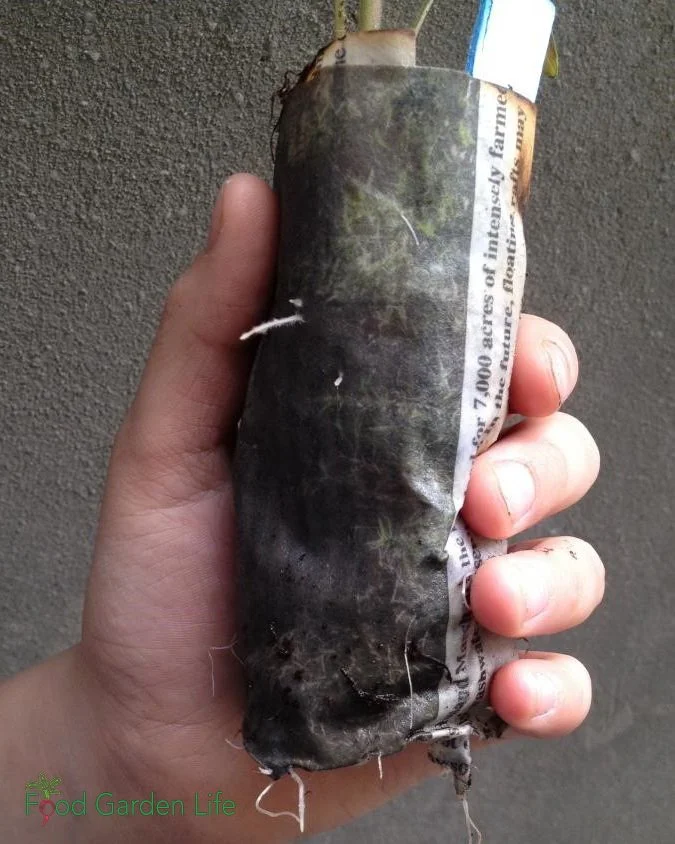
There are a few types of fibre-based biodegradable pots. Recently I saw some made from cow dung! Some people make newspaper pots, or reuse toilet paper rolls for seed starting. In principle, you can plant these pots straight into the ground, but there are a couple of caveats.
The pots wick out moisture, away from plant roots…and they can dry out quickly. So watch the soil moisture to make sure that it doesn't get too dry for your seedlings.
Later, when you transplant seedlings in the garden, if the lip of the pot is above the soil level, it'll wick the water away from around the roots, so the soil around the roots can be drier than the garden soil. So tear off the top of the pot—or bury it. That solves the wicking problem.
FAQ – Leggy Seedlings
Can you fix leggy seedlings? Can leggy seedlings recover? Can you fix stretched seedlings?
You can’t correct leggy seedlings...but if the seedlings aren’t too far gone, you can change the growing conditions so that the seedlings grow thicker stems.
Why are my seedlings flopping over? Why is my plant growing tall and skinny?
It can be too little light, too much heat, excess moisture—or a combination of these.
Can I bury leggy seedlings deeper? Can I fix leggy tomato seedlings?
In many cases, no. First of all, very thin stems can easily be crushed. And most seedlings don’t do well when planted deeper than the level they’re been growing at. Leggy tomato seedlings can be an exception—they do well when planted deeper—but it will depend how long, skinny, and delicate the spindly seedling is. Better to avoid the leggy seedlings in the first place!
Find Out About About Seed Starting in this Podcast
Find This Helpful?
If we’ve helped in your food-gardening journey, we’re always glad of support. You can high-five us below! Any amount welcome!
More on Vegetable Seeds
More on Growing Vegetables
Vegetable Gardening Articles and Interviews
For more posts about how to grow vegetables and kitchen garden design, head over to the vegetable gardening home page.
Vegetable Gardening Courses
Want more ideas to make a great kitchen garden? We have great online classes that you can work through at your own pace.
Ripen Green Tomatoes to Extend Your Harvest
Find out how to ripen the green tomatoes that you still have in your garden, by picking them before the first frost, and bringing them indoors.
By Steven Biggs
How to Ripen Green Tomatoes Indoors
You can eat homegrown tomatoes through the winter. No greenhouse needed.
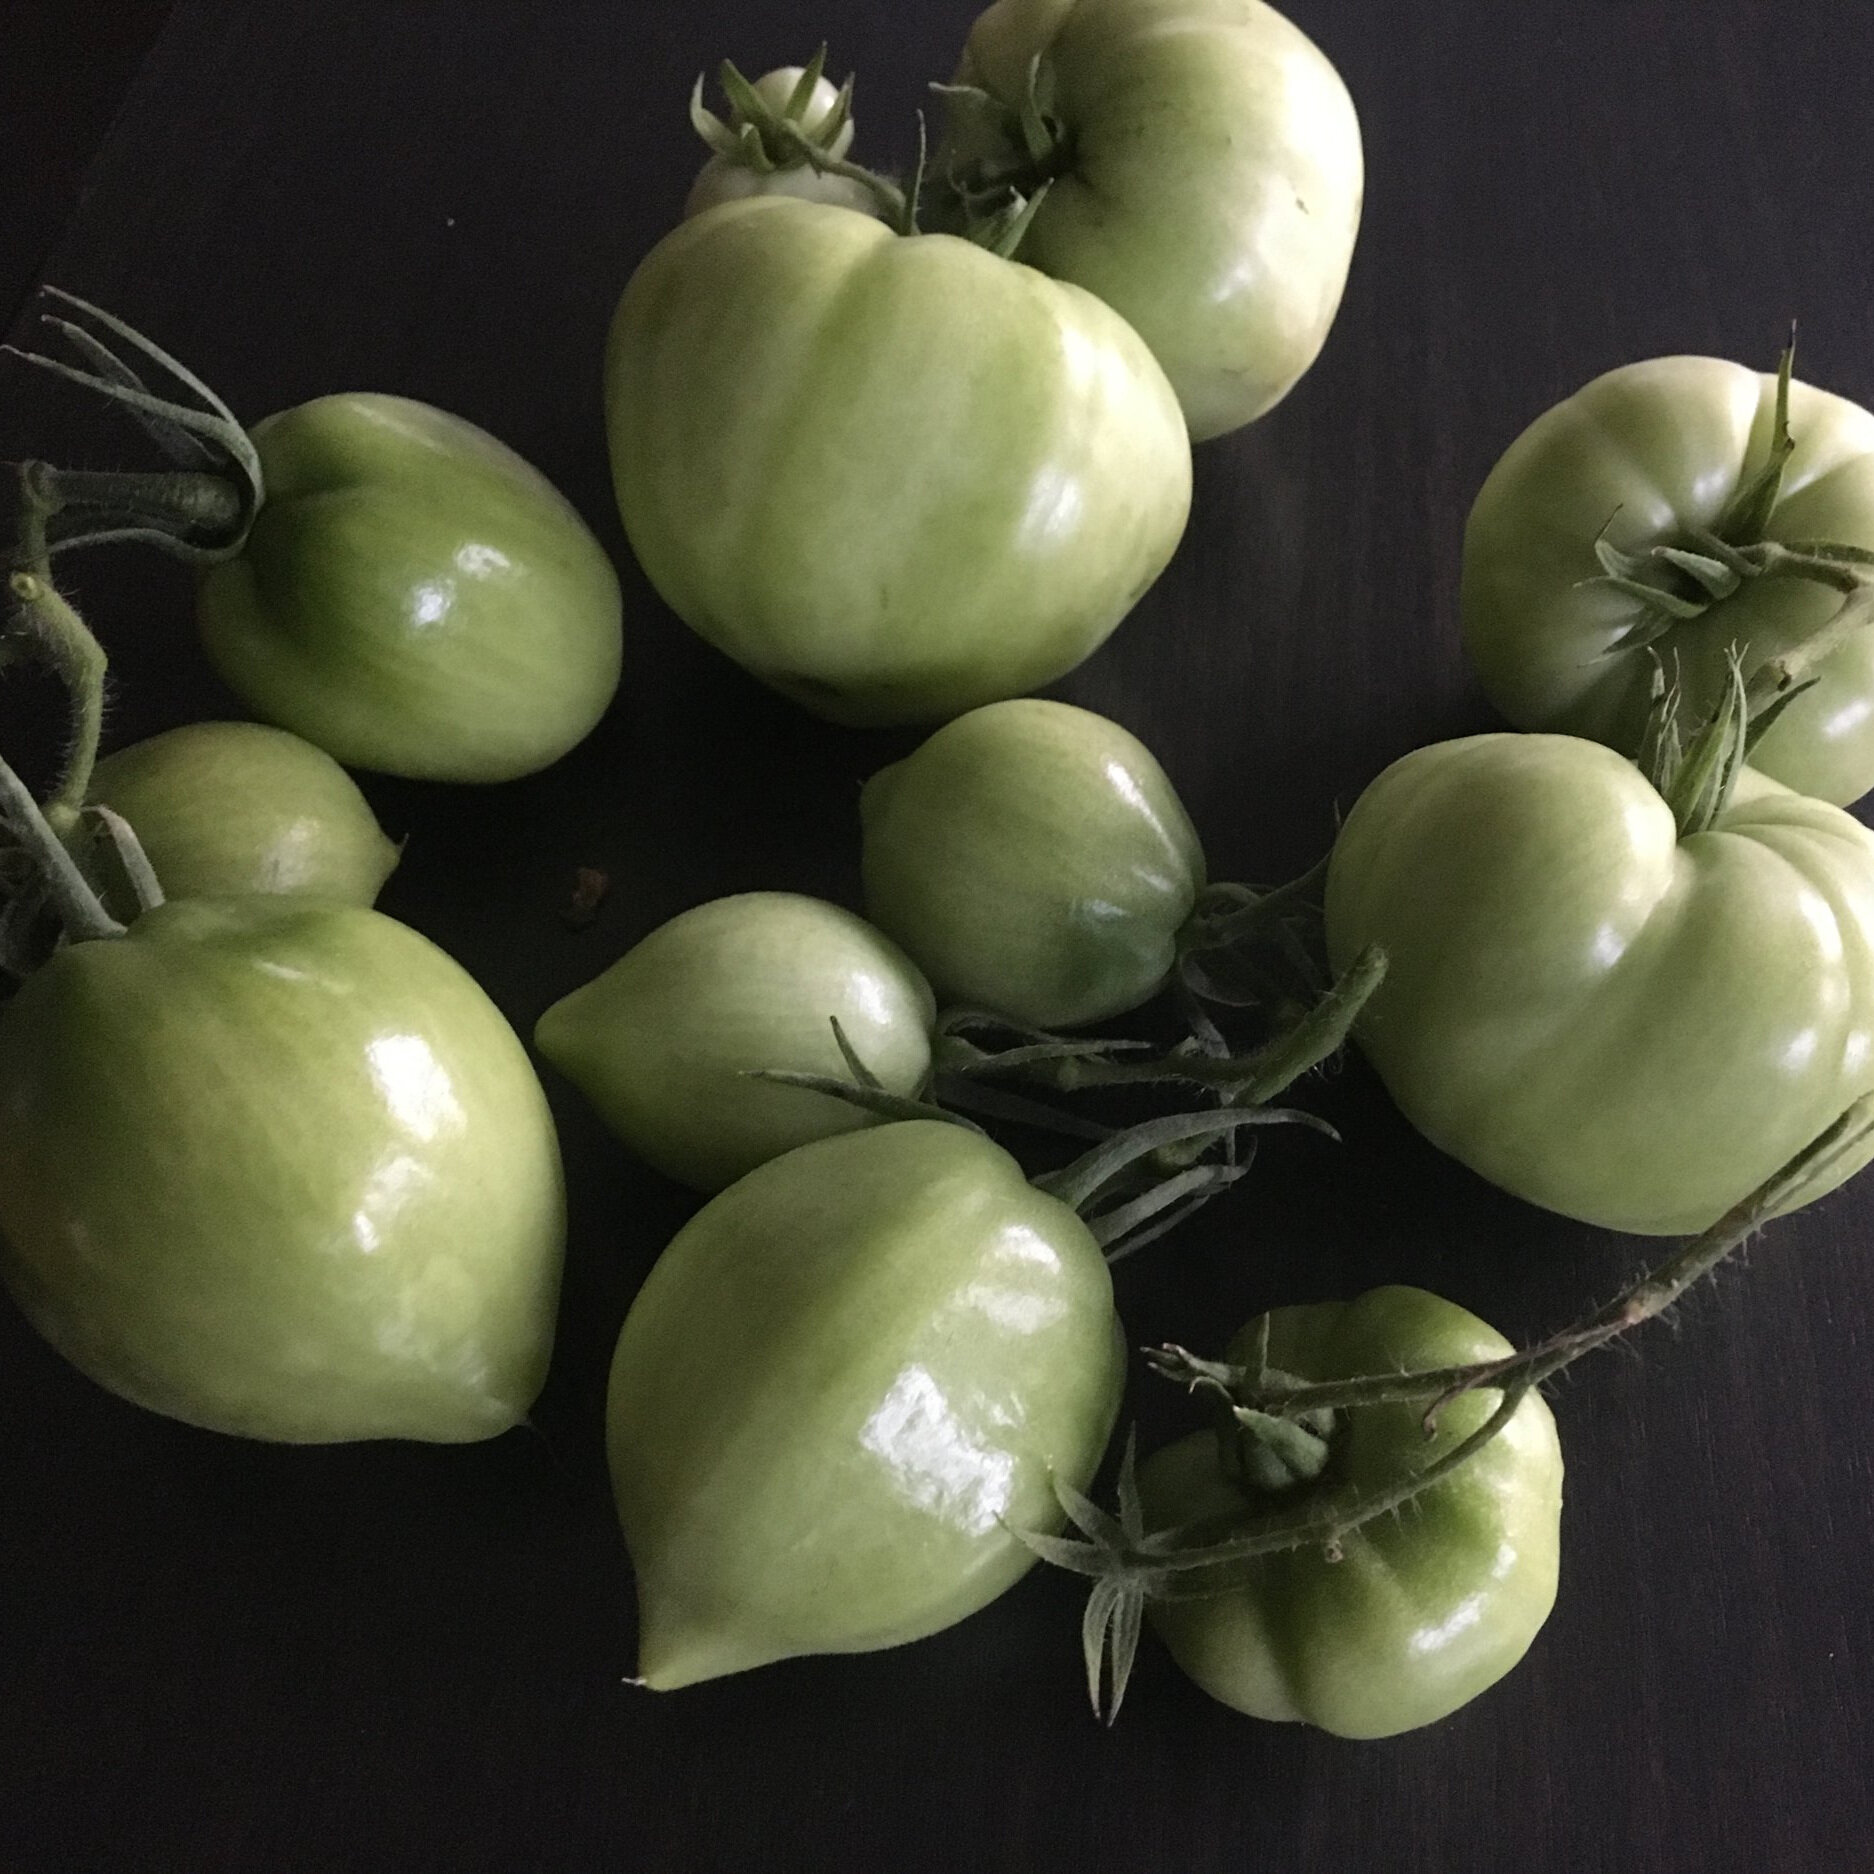
I’ve even eaten my own homegrown, “fresh” tomatoes in April. These are tomatoes I picked green the previous October, just before the first fall frost killed the plants. Then, I ripened them indoors.
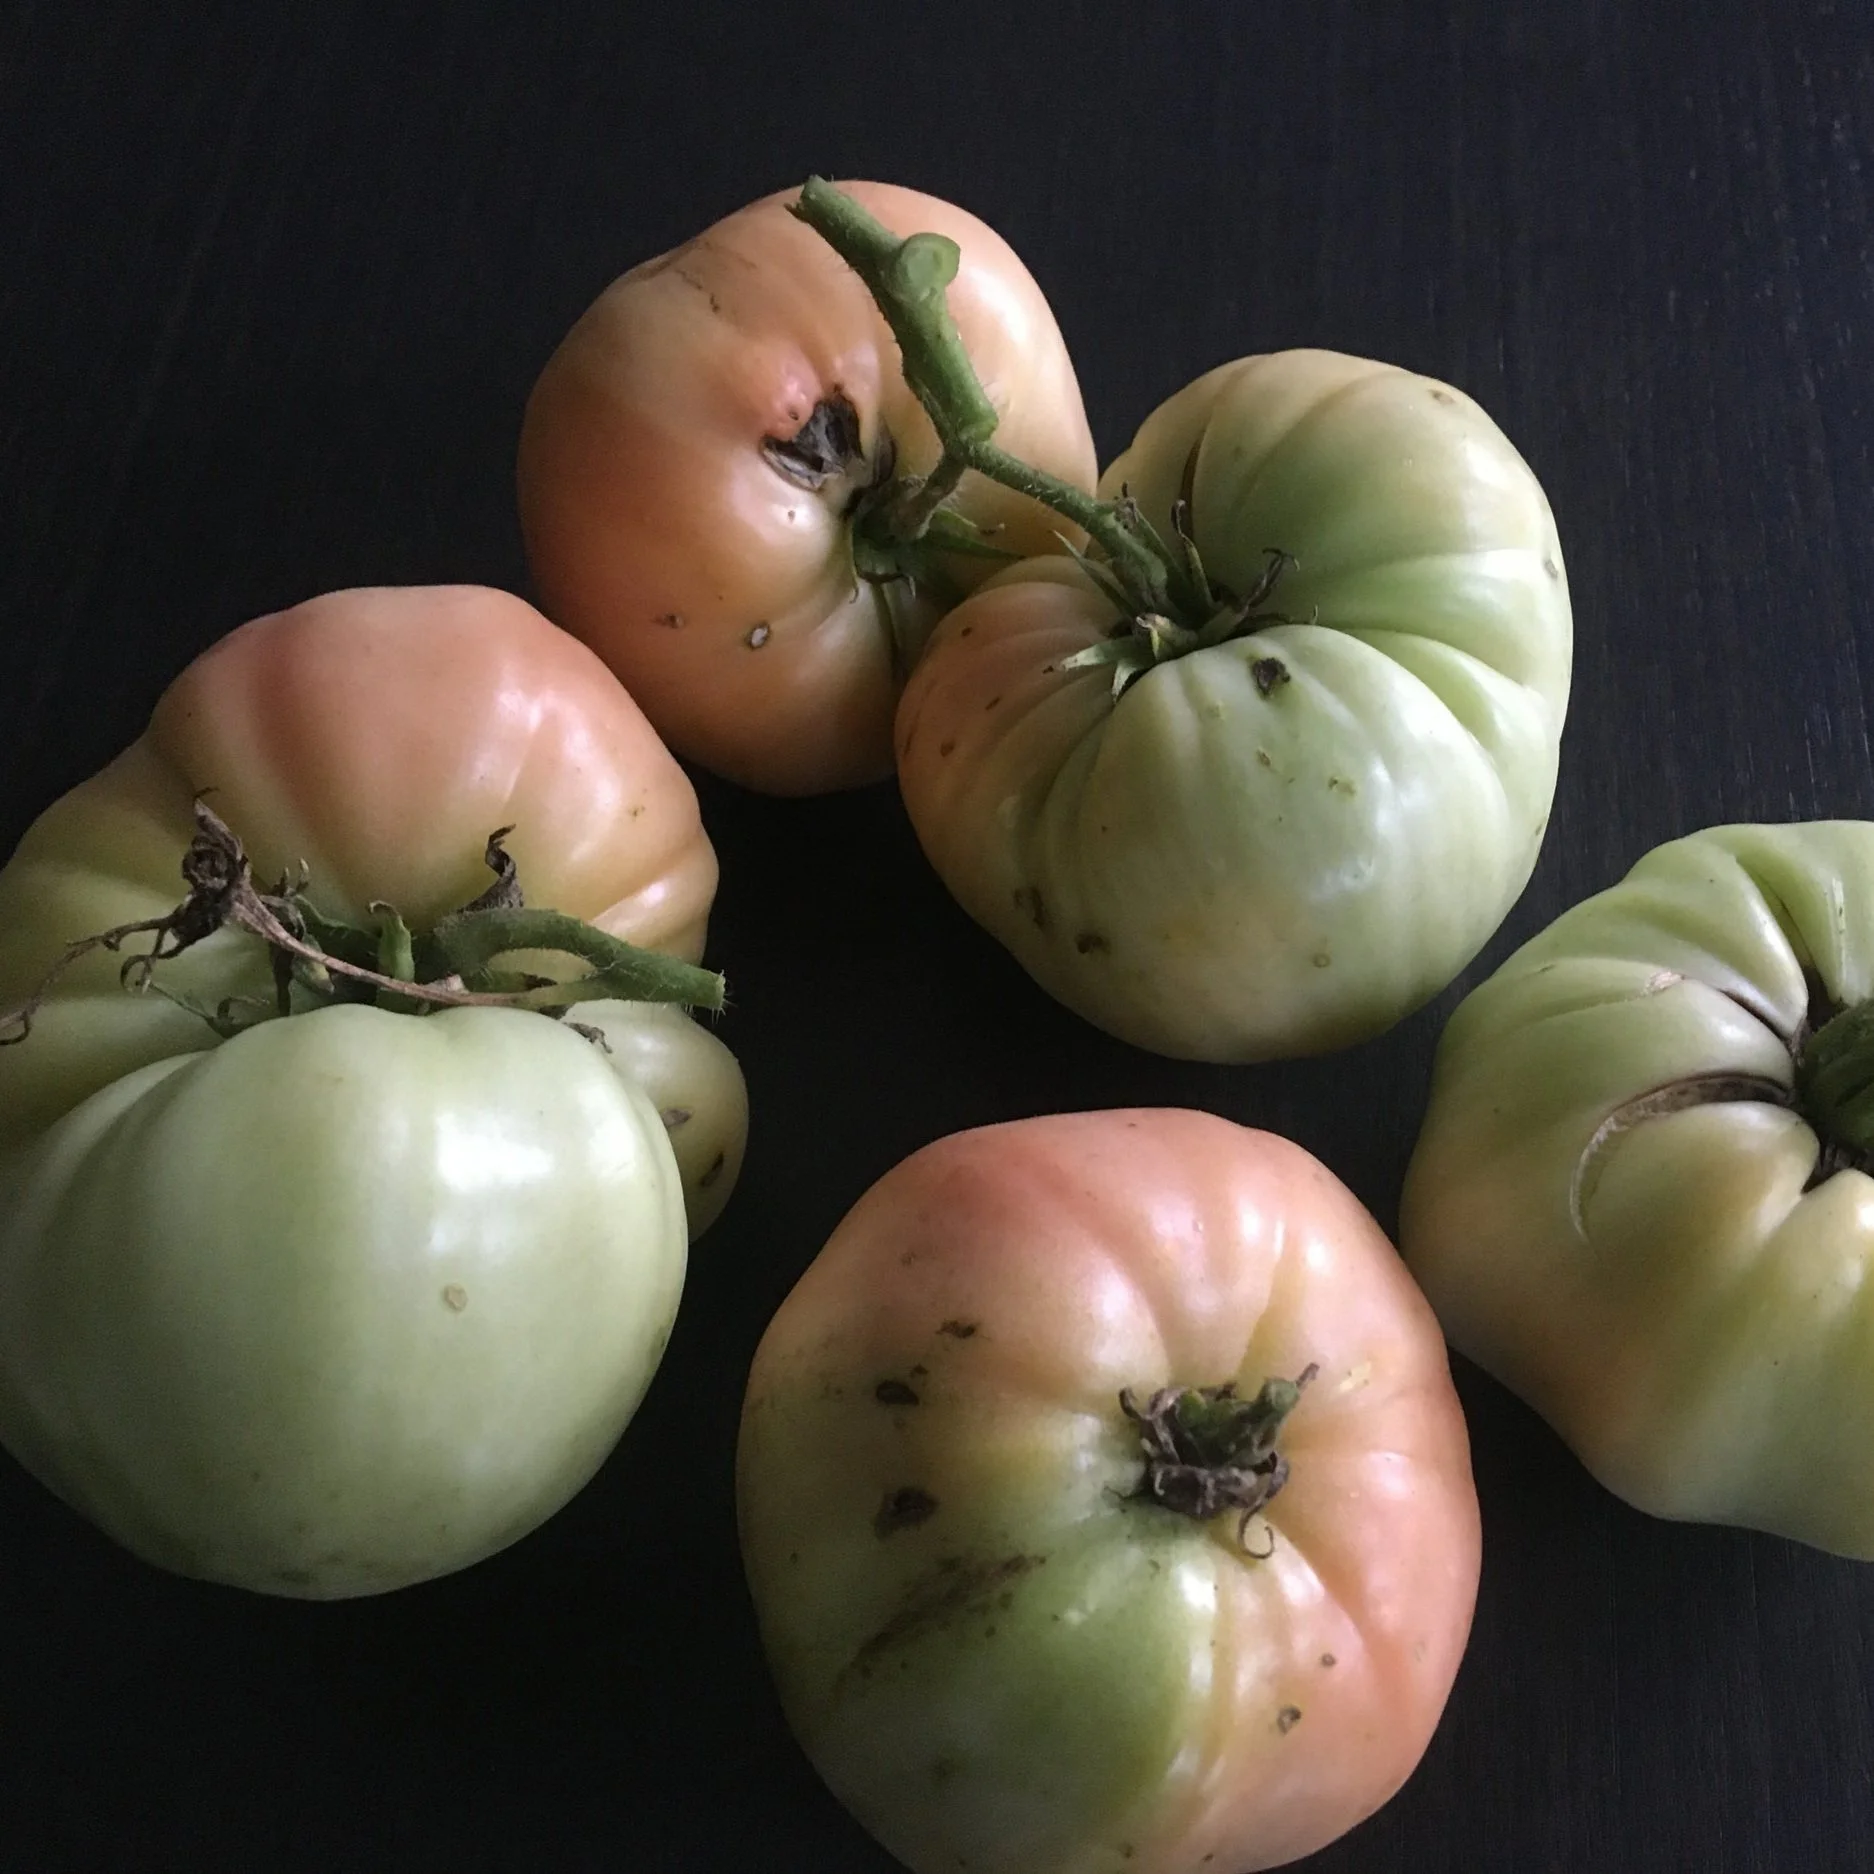
You don’t need special conditions to ripen your green tomatoes because unripe tomatoes that have reached a “mature” size (nearly the final size) will keep ripening after they’re removed from the plant.
You can prolong your tomato harvest for weeks – even months.
Keep reading for pointers on picking, storing, and using your green tomatoes in the fall.
How do they Taste?
A plate of tomatoes picked green and ripened indoors.
A vine-ripened tomato from the garden has better flavour. That’s because tomatoes ripened on the vine in the garden develop more sugars and acids.
But a green tomato ripened indoors can have a respectable flavour – and it’s certainly far better than the insipid, mealy excuses for tomatoes found at grocers over the winter.
When to Pick Green Tomatoes for Indoor Ripening
Pick your green tomatoes before the first frost in the fall. Tomatoes exposed to frost get mushy and don’t store or ripen well indoors.
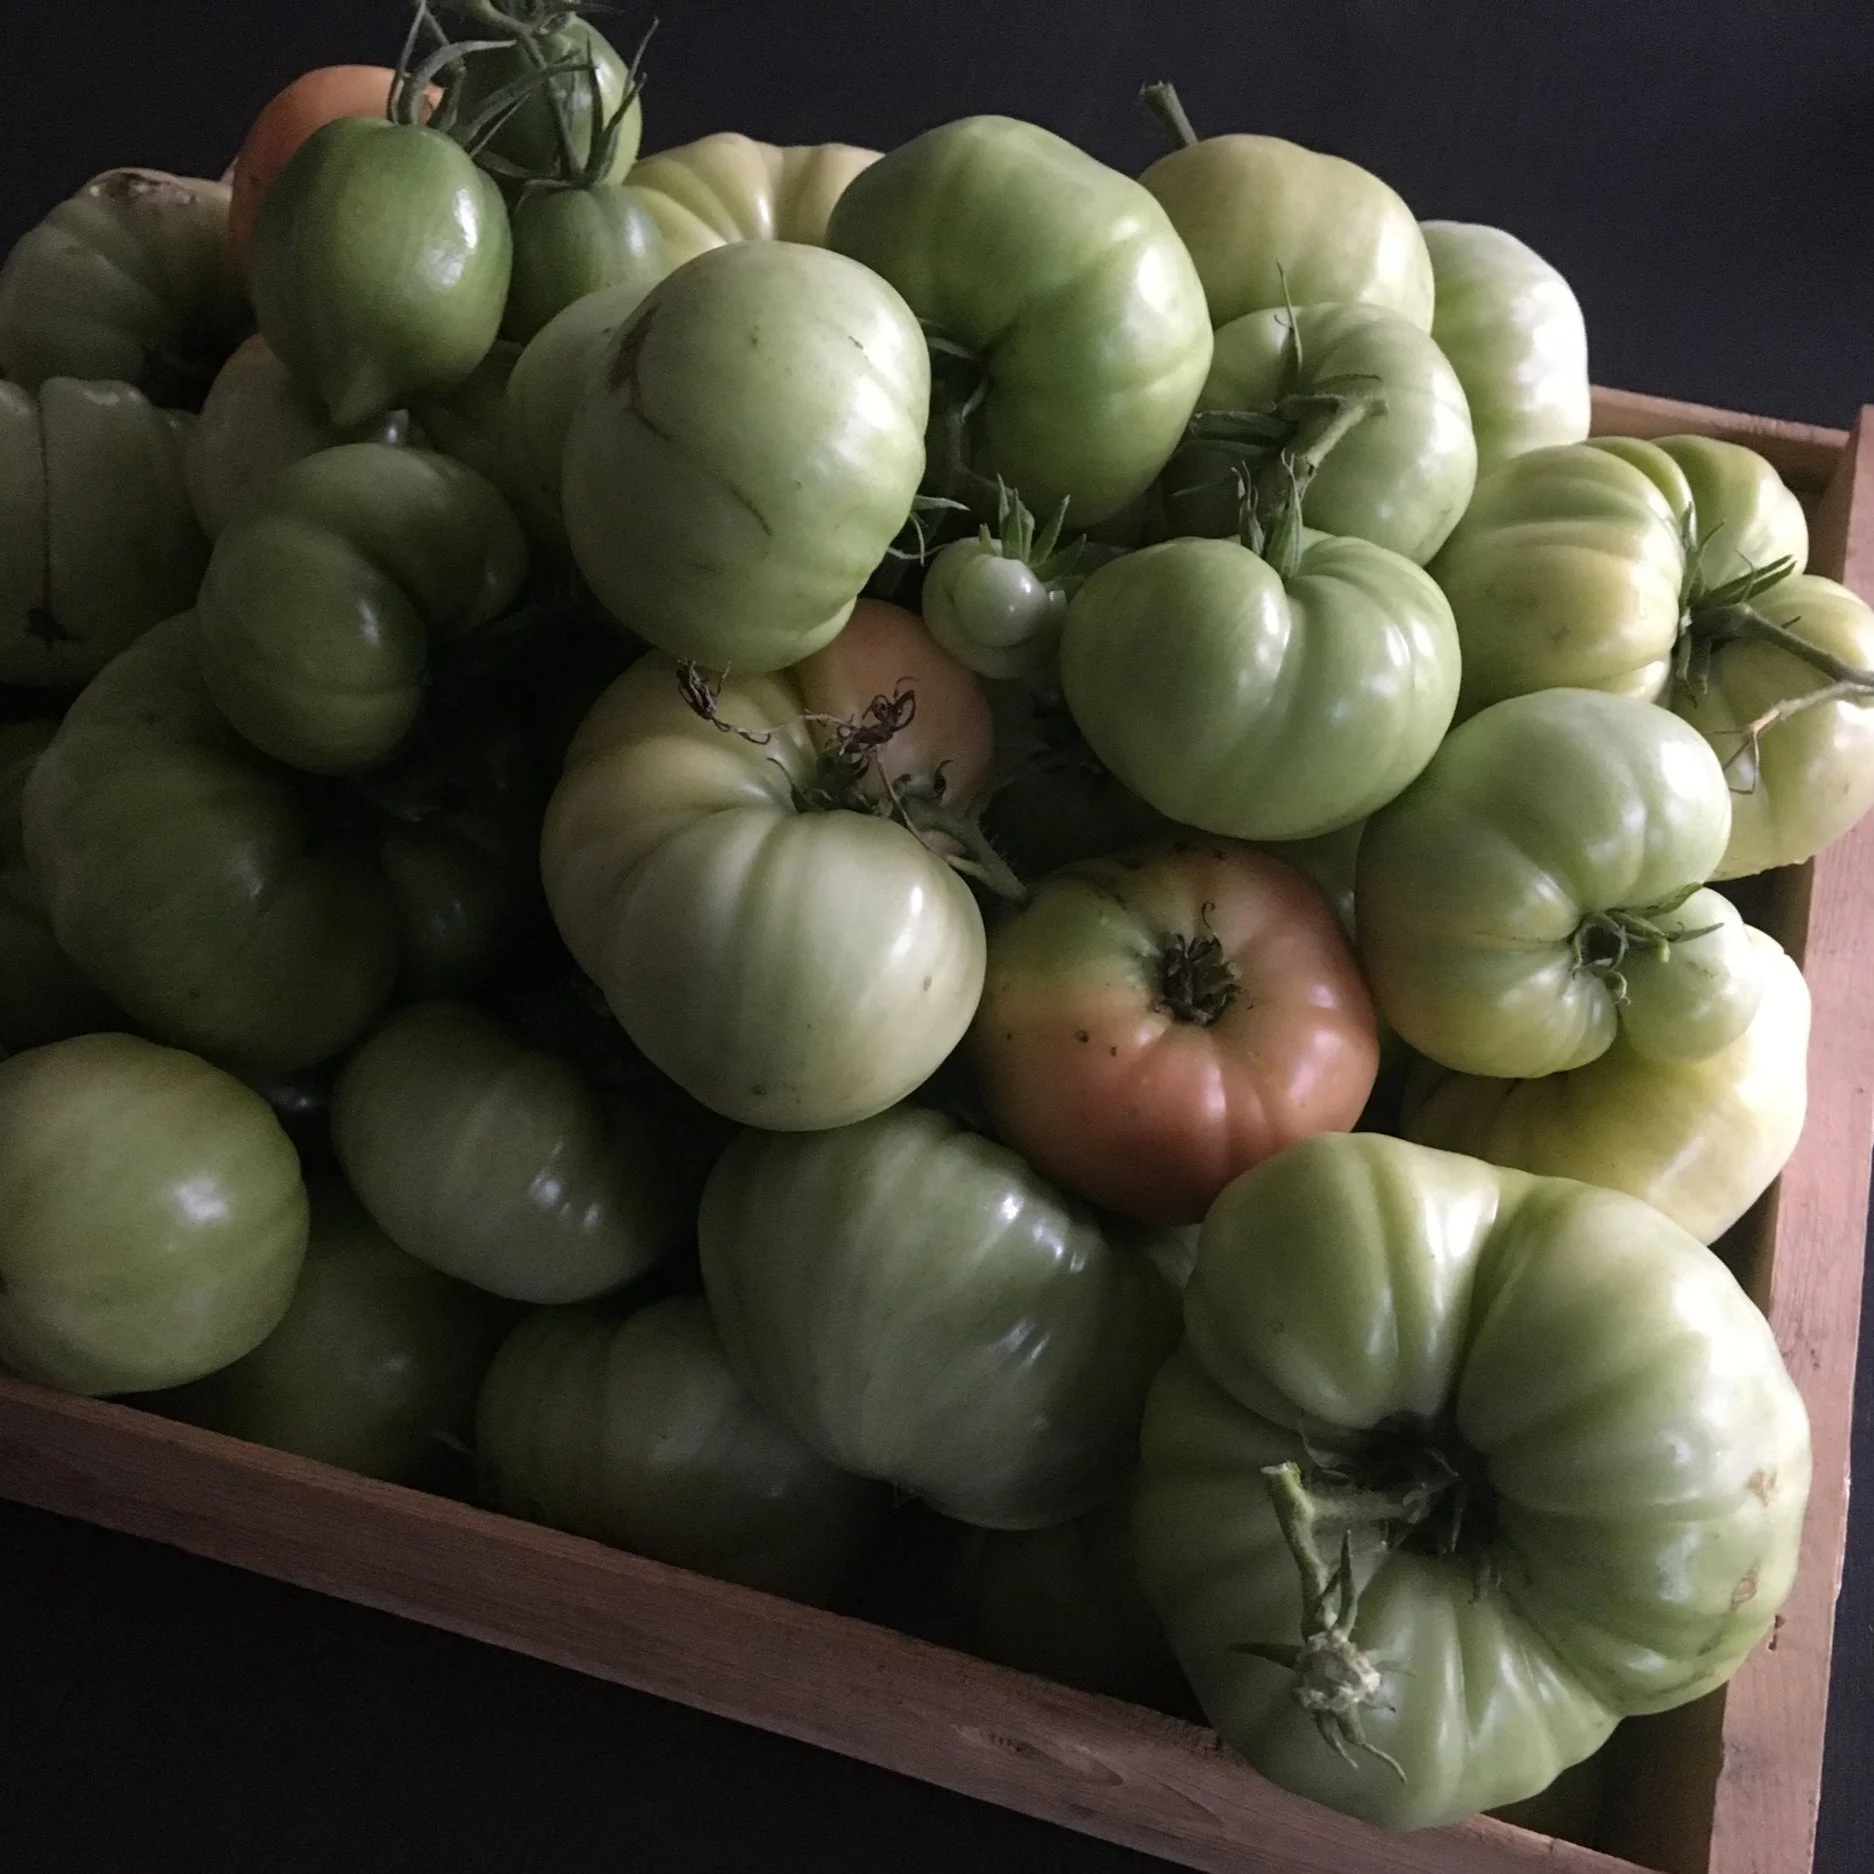
I pick tomatoes that are a mature size, as well as small, undeveloped tomatoes.
What to Pick
I pick everything:
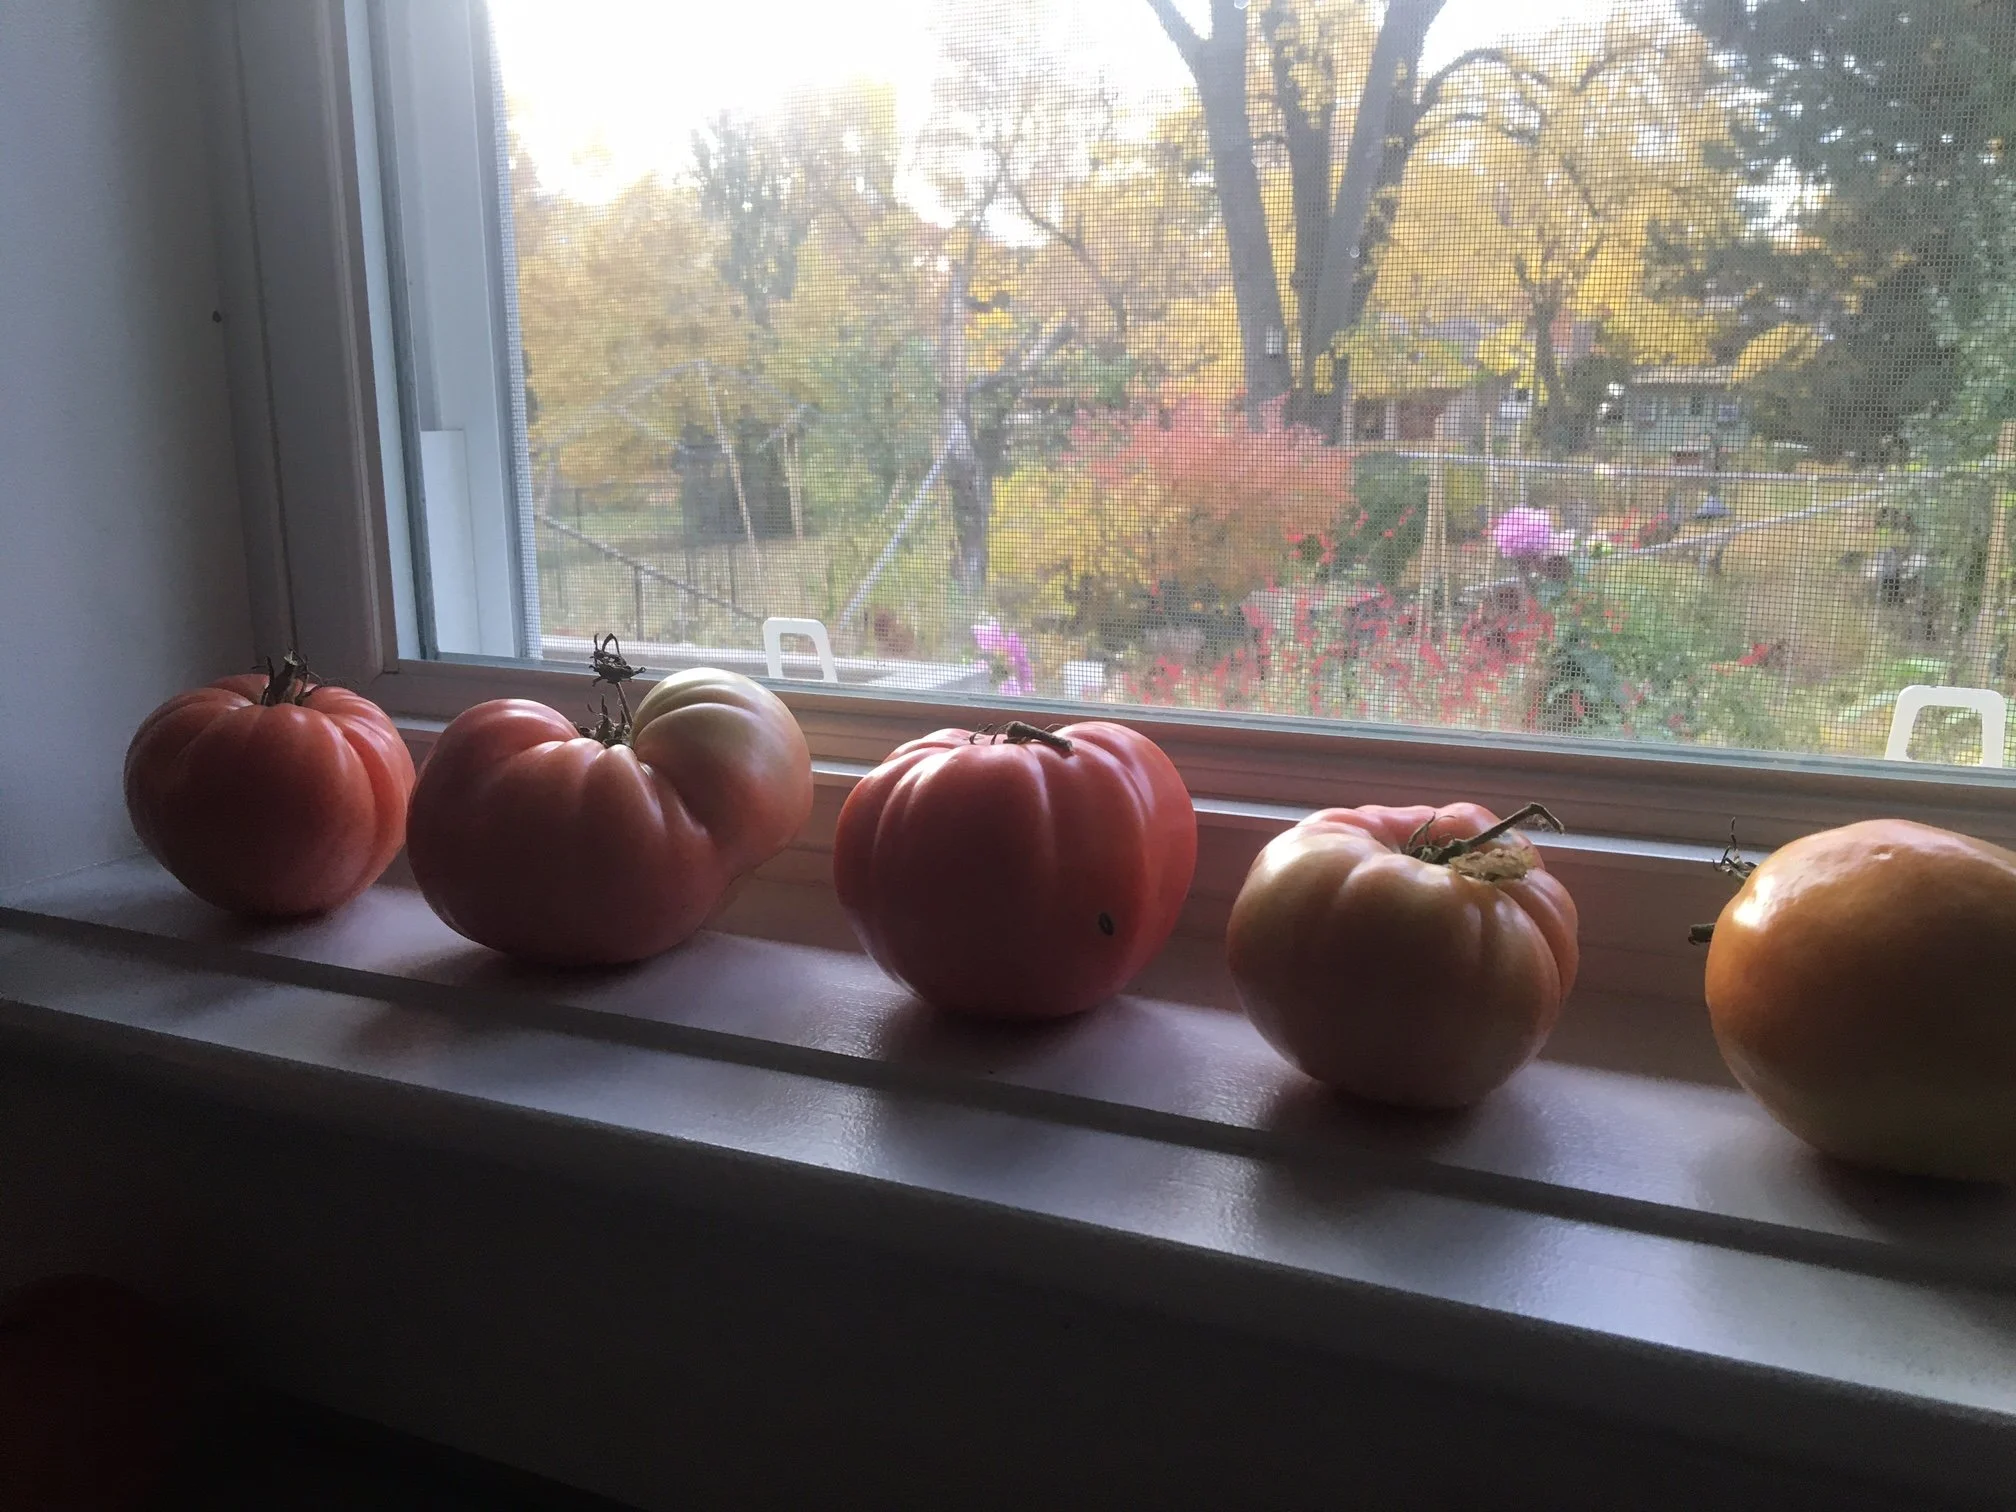
I leave tomatoes that are already colouring up on the kitchen windowsill.
Tomatoes that are a mature size to ripen indoors.
Tomatoes that are small and not fully developed to cook or use in preserves (see my green tomato mincemeat recipe below).
How to Harvest Green Tomatoes
I pick larger tomatoes individually, leaving a small bit of stem attached. The reason that I like to leave a bit of stem attached is that with some tomato varieties, it’s easy to tear the skin while trying to remove the stem.
I leave cherry- and grape-type tomatoes on the stem and harvest the whole cluster.
Another approach is to harvest the whole plant. Cut off entire branches – or even cut off the stem at ground level, leaving the unripe green tomatoes on the plant.
Grow a Container Vegetable Garden
And get an early harvest of crops that usually take too long!
You Control the Ripening Speed
Small tomatoes that are not close to the final size won’t ripen well, but can be used in the kitchen.
Mature tomatoes give off ethylene gas, which causes them to ripen to ripen more quickly. All we have to do is tweak how much of this gas stays around the tomato.
You can stagger the ripening of your green tomatoes using two things:
Temperature. At warmer temperatures ripening happens more quickly.
Ethylene gas. This is the gas the mature tomatoes give off – and which stimulates ripening. If you want to speed up ripening, let the gas accumulate around the tomatoes. If you want to slow down ripening, allow air movement so the ethylene disperses.
How to Ripen Green Tomatoes
I lay out my green tomatoes in plastic trays lined with newspaper.
You don’t need sunlight to ripen green tomatoes.
There are a number of ways to ripen green tomatoes indoors. I lay out my green tomatoes in plastic trays lined with newspaper. (The newspaper prevents smaller tomatoes from falling through the holes; and absorbs juice from any tomatoes that rot.)
I keep the tray in a cool room in my basement. As tomatoes start to show colour, I bring them up to the kitchen to put on my windowsill, where it’s warmer – and where I monitor them more closely as they finish ripening.
If you want to speed up ripening, just capture some of the ethylene gas by putting the tomatoes in an enclosed space. Here are ways to capture some of that ethylene:
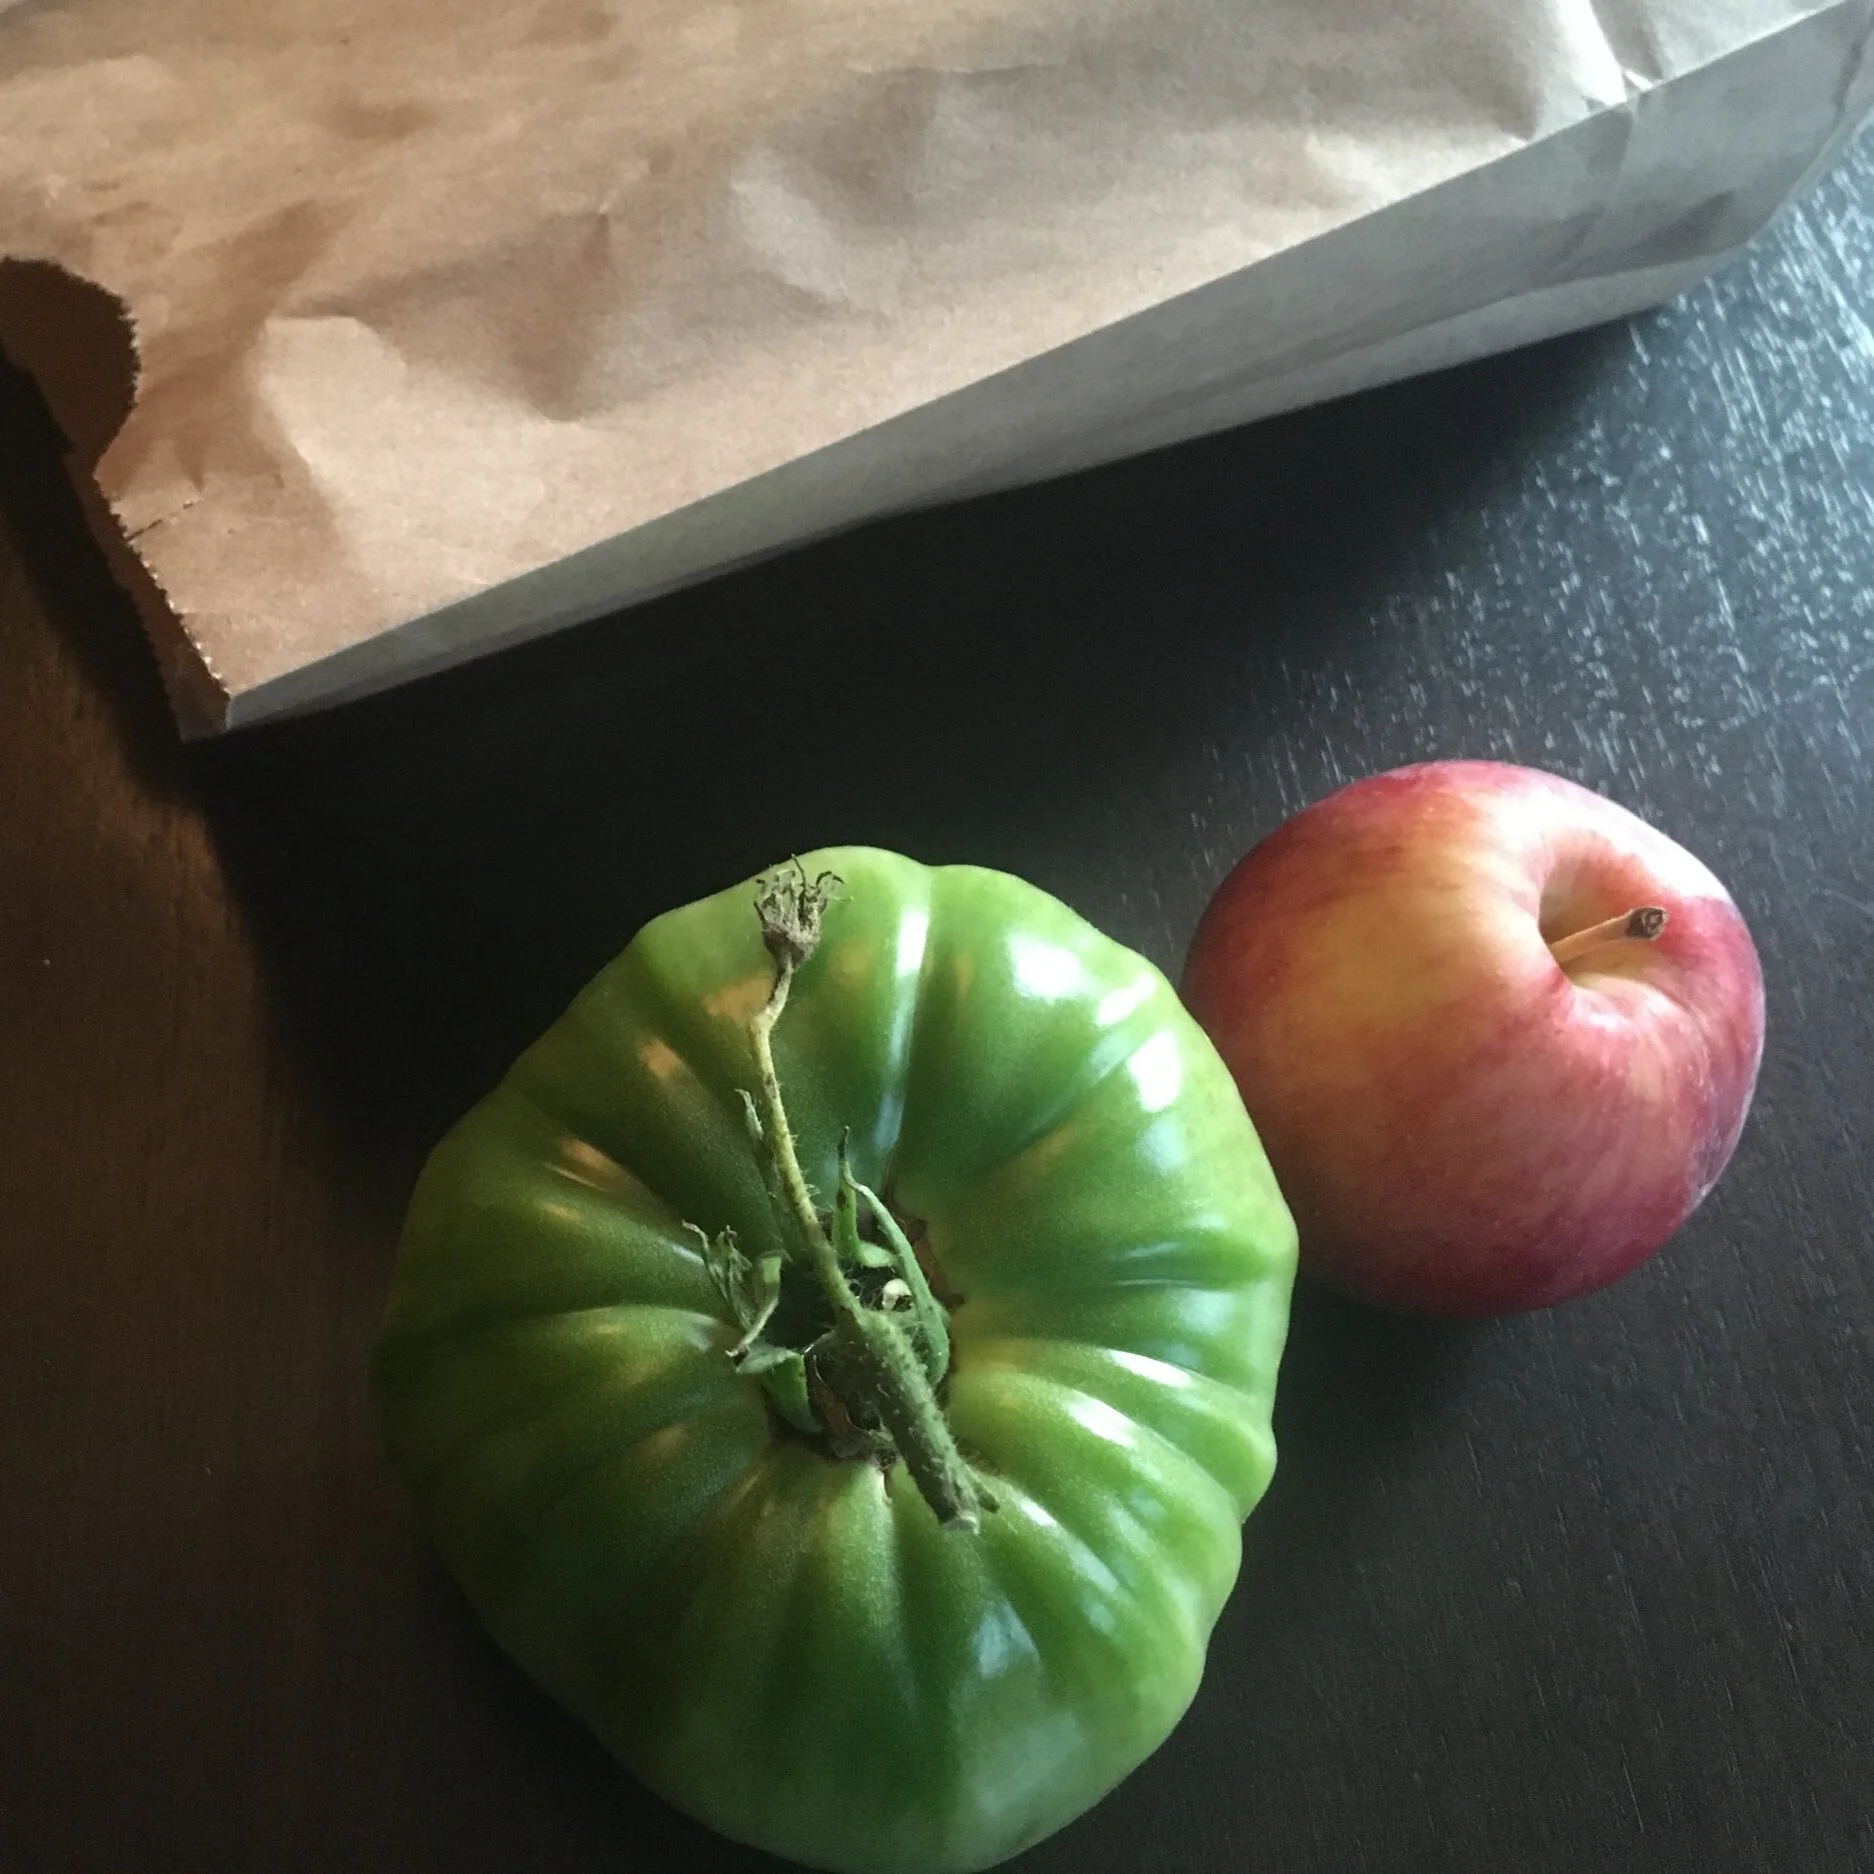
Speed up ripening by putting the tomatoes in an enclosed space. Adding a ripe apple or banana speeds it up more.
Place them in a closed drawer.
Place tomatoes in a closed paper bag (preferable to plastic, which doesn’t breathe at all).
Lay them out in a tray like I do—or on a shelf—and cover with a sheet of newspaper.
Wrap individual tomatoes in newspaper.
If you’ve left on pieces of stem, just be careful not to let the stem puncture any other tomato.
The Banana Trick
Bananas and ripe apples give off ethylene, so you can put a banana or apple in with tomatoes to provide more ethylene and speed up ripening. (I find I don’t need to do this, they ripen fast enough for me.)
Hanging Tomato Plants
If you’ve harvested entire stems or entire plants, simply hang the stems or plants in a cool, dark area and let the tomatoes slowly ripen.
I’m not a fan of this approach because as the tomatoes ripen, they detach from the stem and…splat!
As tomatoes start to show colour, I bring them up to the kitchen to put on my windowsill.
Varieties Suited to Indoor Ripening
A thick-skinned tomato variety that lasts me until spring.
You can ripen all types of tomatoes indoors, but thick-skinned varieties are best for longer-term indoor ripening.
Thin-skinned beefsteak varieties are more prone to rot. It doesn’t mean you can’t ripen these ones indoors – it just means they’re less likely to last long into the winter.
Green Tomato Ripening FAQ
What else can I do with green tomatoes?
I love green tomato fried in the skillet in bacon fat, sprinkled with salt and garlic powder. Some years I make a green tomato mincemeat. You can also make lactic-acid fermented green-tomato pickles – same idea as sauerkraut and brined dill pickles, except using green tomatoes.
Should I wash green tomatoes after picking them?
I don’t. Some people wash them in a bleach solution to disinfect them. Sounds like a lot of bother to me…and I like to keep gardening simple. I wash them once they are ripe, just before I use them.
Can I ripen green tomatoes indoors in the summer too?
Yes! I’ve had large 2-3 pound tomatoes, and just as they ripen a squirrel came along and ate off a corner. It would have been better to pick these before they were fully ripe, and ripen them indoors.
Can you really get them to last until April?
Green tomatoes with cracks and blemishes often rot, so sort them out of your tomato harvest and cook them instead of trying to ripen them.
Yep! The trick is to grow a “keeper” tomato variety. I grow one that came to me from my Dad’s friend Dino. It’s small and thick-skinned...not the juiciest tomato, not the most flavourful tomato – but I can make bruschetta with my own fresh tomatoes in early spring. Not bad!
What about tomatoes that have cracks or blemishes on them?
Tomatoes with cracks and blemishes will not keep for a long time. If they are close to colouring up, you can try to ripen them – just watch closely so you’ll see if they begin to rot around the damaged area. Otherwise, use these tomatoes in one of your green-tomato recipes.
Want to Store More of Your Own Food?
Storage Crop Ideas for Your Vegetable Garden
Here are 25 storage crops you can grow in your garden.
More Tomato Articles
Tomato Interviews
More on Growing Vegetables
Articles: Growing Vegetables
Courses: Grow Vegetables
Propagate Blackberries by Tip Layering
Propagate your blackberry plants with tip layering.
By Steven Biggs
A Simple Way to Grow Your Own Blackberries
What is the easiest way to make more blackberry plants?
It's called "tip layering."
In mid-summer, as their long, arching canes reach the ground, blackberry plants often propagate themselves by tip layering.
If you want to make more blackberry plants, it’s an easy way to do it. I once tip-layered a single blackberry plant into a 30-foot stretch of blackberries along a chain-link fence!
This article tells you about this simple approach to propagating blackberries.
What is "Layering"?
I once tip-layered a single blackberry plant into a 30-foot living blackberry-plant wall along a chain-link fence.
Layering is when roots form on a stem while it's still attached to a parent plant.
Many plants naturally layer when low-lying branches touch the soil. (I find currant "layers"—rooted currant branches—in my currant patch. Find out more about how to grow and propagate currants.)
Some plants don't layer as easily, and gardeners can help the process by:
Wounding the stem where it will contact the soil
Applying a rooting hormone
Pinning the stem to the ground (or burying a portion of it)
Once it has its own root system, the rooted layer can be detached from the parent plant.
What is "Tip Layering"?
Tip layering is when the tip of a stem touches the soil and forms roots. (It's sometimes called "tip rooting.")
Unlike blackberry stem cuttings, which need ongoing care, blackberry tip layering is a hands-off blackberry propagation method.
Landscape with Fruit
That’s easy to grow in a home garden!
How Blackberry Plants Grow
A blackberry plant has long arching stems, called canes. The canes grow upwards, and when they get tall enough, they start to bend. They keep growing, and the tip of the can will often bend over and touch the ground.
Once the tip of the blackberry cane touches the ground, it will grow roots. This cane has reached the ground and will stop getting longer, and instead form roots.
Once the tip of the blackberry cane touches the ground, it will grow roots. When the roots are well developed, you can cut the cane to detach it from the parent plant, and you now have a new blackberry plant.
Other Cane Fruit for Tip Layering
Purple and black raspberries can also be propagated by tip layering.
(Red and yellow raspberries are different. They send out lots of suckers and grow into a patch. To make more red and yellow raspberry plants, simply dig up plants around the edge of the patch.)
Training to Prevent Tip Layering
Tip layering is an easy blackberry propagation method. But you can have too much of a good thing…
I've seen enthusiastic gardeners inadvertently allow and an impenetrable thicket of new blackberry plants to form!
Where you don't want additional plants, train the canes to keep them off the ground. If you have a fence, simply tie them to the fence. Or put in a few stakes to which you can tie the canes to keep them above the ground.
Pruning Blackberry Plants
One other thing to keep in mind as you grow blackberries is that the canes only live for two years.
Year 1: Stems grow upwards from the base of the plant, and as they get tall enough, arch over
Year 2: The stems produce fruit
So if you want to keep pruning simple, at the end of the growing season, remove any canes that have produced fruit.
FAQ Blackberry Tip Layering
What time of year do you propagate blackberries?
The blackberry canes often begin to tip layer on their own mid-summer, as the canes get long enough to bend over and touch the ground.
Are there other types of layering?
Yes. Along with the basic layering and tip layering we talk about above, there is:
Serpentine (compound) layering, where we make several layers on a long stem by burying several sections of it.
Stool (mound) layering where a shrub or tree is cut to ground level, causing it to send up multiple shoots, which are then mounded with soil. This gives multiple, rooted stems. (It's what I use to propagate my apple rootstock.)
Air layering, where soil or a damp medium is wrapped around an above ground portion of stem to induce root formation. (I sometimes use this if want to root a long, gangly fig branch. Find out more about fig propagation.)
Why grow so many blackberry plants?
For blackberry daiquiris, of course.
More on Growing Fruit
Succession Planting: Here's How You Can Harvest Vegetables Season Long
By Steven Biggs
Succession Crops are the Ticket to an Uninterrupted Harvest
"Succession planting" is when we grow more than one crop in the same space over the growing season. We grow a succession of crops.
As one crop finishes, the succession crop takes its place.
Many crops mature before growing season is done, leaving time to plant a second (or even a third) crop. This means we can follow our spring crops with warm season crops and fall crops.
A "succession crop" is just a fancy name for the crop(s) that come after the first crop is done.
Succession planting works in large gardens, small gardens—and even containers!
If you are interested in the idea of a continuous harvest, keep reading: This article explains how you can use the same garden space for more than one crop.
Plan for an Uninterrupted Harvest
As you plan your vegetable garden, there's more than one way to achieve successive harvests. See how you can slot these planting methods into your garden.
Find out more garden planning and layout ideas.
Different Crops - One Follows Another
A common succession planting method is follow one crop with another one. For example, when the summer harvest of green beans is finished, a new crop of kale for winter harvest takes its place.
Different Crops - At the Same Time
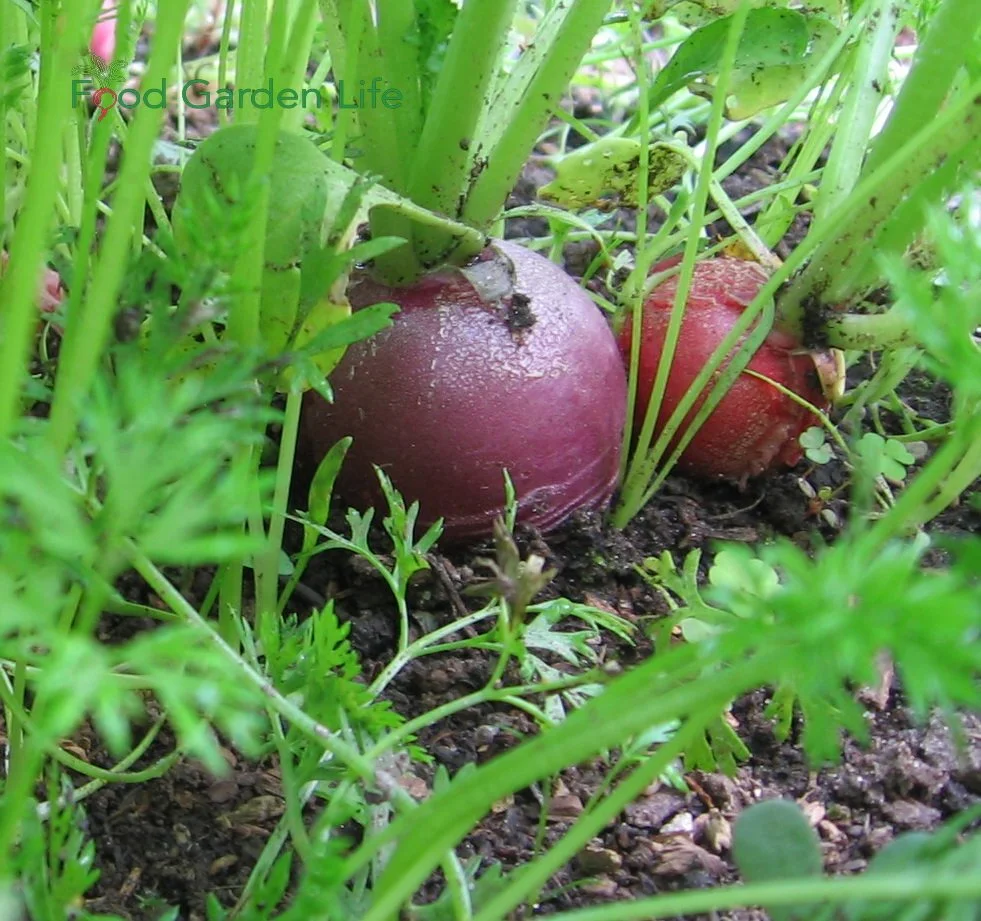
Planting carrots and radish together.
Planting two different crops at the same time is not really succession planting, but it's worth mentioning here because it's a useful idea in garden planning, and can be a good way to get multiple harvests from the same space.
Some people use the term companion planting to describe this idea.
Here are examples:
Fast-growing crops with slower crops: My favourite fast-slow combo is to plant beets in the same space as radish. The radishes grow much more quickly than the beets. So you'll have harvested the radishes by the time your beet seedlings need more space. (And don't forget...beet greens are edible too!)
Sun-lovers with Shade-lovers: Another example of putting two crops together is pairing a tall plant with a shade-loving plant. In this case, summertime lettuce (which lasts longer in shade) under tomatoes.
Grow a Container Vegetable Garden
And get an early harvest of crops that usually take too long!
Same Crop - Staggered Plantings to Spread out the Harvest
By staggering plantings of a crop you can get a longer harvest window. This is especially helpful if you grow lettuce or other leafy greens that bolt quickly.
Unless you’re a market gardener, you probably don’t need an entire row of lettuce ready at once. So only plant part of the row. Then, a couple of weeks later, plant more of the same. And repeat.
Same Crop - Different Maturity Dates
Days to maturity (DTM) is a measure of how long it takes a crop to be ready to harvest. Get a few varieties of the same crop, each with a different DTM so that you have an ongoing harvest. Look for DTM on the seed packet or catalogue.
(The number of days it takes for a crop to be ready to harvest varies with growing conditions, so use DTM as a guide, not an exact planning tool.)
Find out more about seed shopping and lingo such as DTM.
Succession Crops
Succession crops are crops that don’t take the whole growing season to mature. They only need part of a season.
Here are common succession crops:
Bush beans are a common succession crop.
Leafy Greens (plan for successive sowings if you want leafy greens during the summer)
Beets (baby beets for pickling are often from a succession crop of beets planted in the summer)
Cabbage
Carrots
Bush beans
Green onions (I keep an extra bag of onion sets in the fridge, ready as a second crop when I need more green onions)
Kohlrabi
Radish and winter radish
Rapini (I like to plant rapini as a mid-summer succession crop when I harvest garlic in July, because it’s fast-growing and does well in the heat of the summer)
Rutabaga
Summer squash (a good second crop where you start off with early spring greens)
Swiss chard (does well in heat without bolting)
Winter squash
Turnip (I like turnip as a late-summer crop…and you can eat the leaves too!)
Find out how to slow down lettuce bolting.
Interested in growing storage crops? Here are 25 storage crops.
Create Your Own Unique Edible Landscape
That fits for your yard, and your style!
Sowing Summer Crops
Hot summer growing conditions are not always suitable for starting seeds directly in the garden.
That’s because:
In hot, dry weather, place a board over fine seeds to keep in soil moisture and improve germination.
Hot weather can affect germination.
In hot, dry summer conditions a crust can form on some types of soil.
Pest pressures are higher.
Here are tips to plant crop successions in hot weather:
Start transplant in pots, in protected conditions.
For plants that are best directly sown into the garden (e.g. carrots), place a board over the soil so that conditions are more moist for germination
Water regularly because dry conditions really mess up germination.
Transplanting Succession Crops
Summer conditions can make transplanting difficult because transplanting into the hot sun is a big stress for the plant.
So wait for a rainy or cloudy day if possible. At the least, don't transplant in the heat of the day.
Make shade for your transplants using mini hoop houses covered with shade cloth or a light floating row cover.
Or even easier: Put an inverted web tray over top of your transplant for a few days. (The webbed plastic trays from garden centres.)
And then water transplants regularly until they are established.
Lettuce transplants for succession cropping.
One Key to Successful Succession Planting
With intensive growing like succession planting, we’re taking more from the soil. That makes it especially important to manage soil fertility. Feed the soil by amending with compost between crops.
Final Succession Cropping Suggestions
Keep extra seed packets on hand for succession planting!
And don’t forget to grow microgreens indoors over the winter.
Find out how to grow our own microgreens indoors.
More Vegetable Gardening Articles
Courses
Prevent Lettuce from Bolting: 5 Ways to Beat the Bitterness
5 Ways to prevent lettuce from bolting as quickly.
By Steven Biggs
Delay Bitterness and Bolting Lettuce
Once day you're looking at a bed of perfect lettuce plants with juicy, tender leaves. Looks like you have enough lettuce for days.
But before you know it the lettuce heads change shape and start to stretch up in the centre. Your lettuce is bolting.
And with the change in shape comes a change in taste. Bitterness comes with bolting.
But there are ways that you can delay lettuce bolting. This article tells you how.
Bolting Lettuce Plants
It's a normal thing for a lettuce plant to bolt. Lettuce plants start out in leaf-making mode. They make leaves, get bigger, store energy.
But as the lettuce plant gets big enough—and as things around it act as triggers—the lettuce plant changes gears and moves into flowering mode. It bolts.
Lettuce plants are annuals, meaning they have a one-year life cycle. In that one year they flower and make seed.
So your bolting lettuce is a normal thing.
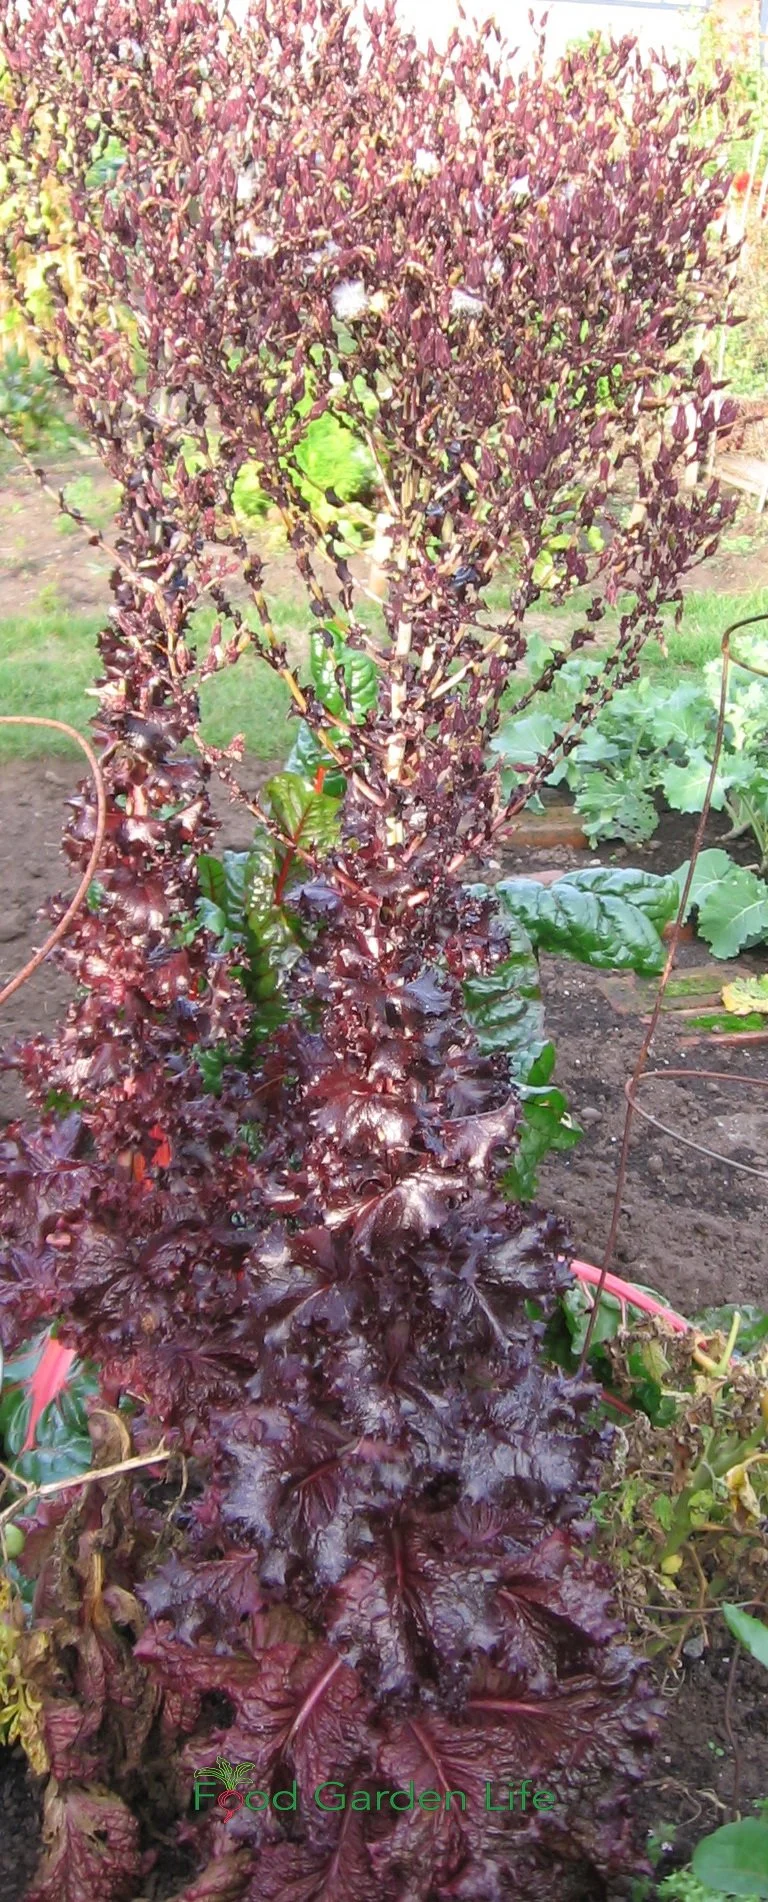
Bolting lettuce plants can get quite tall!
What Bolting Lettuce Looks Like
Bolting lettuce looks a bit like plant yoga as the centre of the leaf rosette begins to stretch upwards. Next, the now-lanky lettuce sends up a flower stalk.
Meanwhile, the leaves become bitter and tough.
What Makes Lettuce Bolt?
Bolting is normal. But lettuce plants don't bolt according to the calendar. A lettuce plant bolts because it's triggered by what's going on around the plant.
Here are triggers:
Heat
Dry conditions
Long days
As you see, lettuce bolts as we get normal summer weather. But you can still enjoy lettuce leaves in the summer using the ideas below.
5 Ways to Delay Lettuce Bolting:
Here are ways to keep growing these cool-season plants during the summer for continuous supply of salad greens:
Choose Slow-to-Bolt Lettuce Varieties
Some lettuce varieties don't bolt as quickly in summer weather. As you're shopping for lettuce seeds, look for a "heat-tolerant" or "bolt-resistant" lettuce variety.
Provide Shade for Summer Lettuce
When conditions are cooler and moister in the spring, lettuce does well in full-sun locations.
But as things heat up, give your lettuce some shade. When it's shadier it's also cooler and there's often more soil moisture.
There are a few ways to grow a shaded lettuce crop in the summer:
Growing lettuce in pots placed in a shady location.
Grow lettuce underneath taller crops that shade it. I grow lettuce underneath staked tomato plants.
Put up a mini hoop tunnel with shade cloth over top of the lettuce.
Grow vining crops such as cucumbers over an A-frame—and grow your lettuce in the shaded space underneath
Grow a Container Vegetable Garden
And get an early harvest of crops that usually take too long!
Mind the Moisture
Well-watered lettuce doesn't bolt as quickly. Water regularly.
If you're growing in rows and can mulch around plants, a generous layer of mulch helps to hold in moisture.
Don't Overcrowd
Prevent lettuce from bolting quickly with heat-resistant varieties, ample moisture, shade, enough space—and a shock treatment!
Stress can cause lettuce to bolt sooner. When lettuce plants are tightly packed into a garden, there's less space for roots, less space for leaves to grow—and less moisture. These stresses can make lettuce plants bolt sooner.
When I sow a bed of lettuce, I seed fairly densely. But as the little lettuce plants grow, I pull out some of the small plants as I harvest. This allows more space between remaining plants.
Shock Treatment
A little shock can temporarily derail the plant's readiness to bolt. Dig up and transplant a few of your perfect heads of lettuce to give yourself a few extra days of lettuce harvest.
A Non-Bolting Lettuce Alternative
Here's another idea for you: Grow a leafy green that won't bolt.
Swiss chard has a two-year life cycle. It's a "biennial."
That means that for the whole first year, the plant makes leaves. It only bolts in its second year.
Create Your Own Unique Edible Landscape
That fits for your yard, and your style!
Let a Few Lettuce Plants Flower
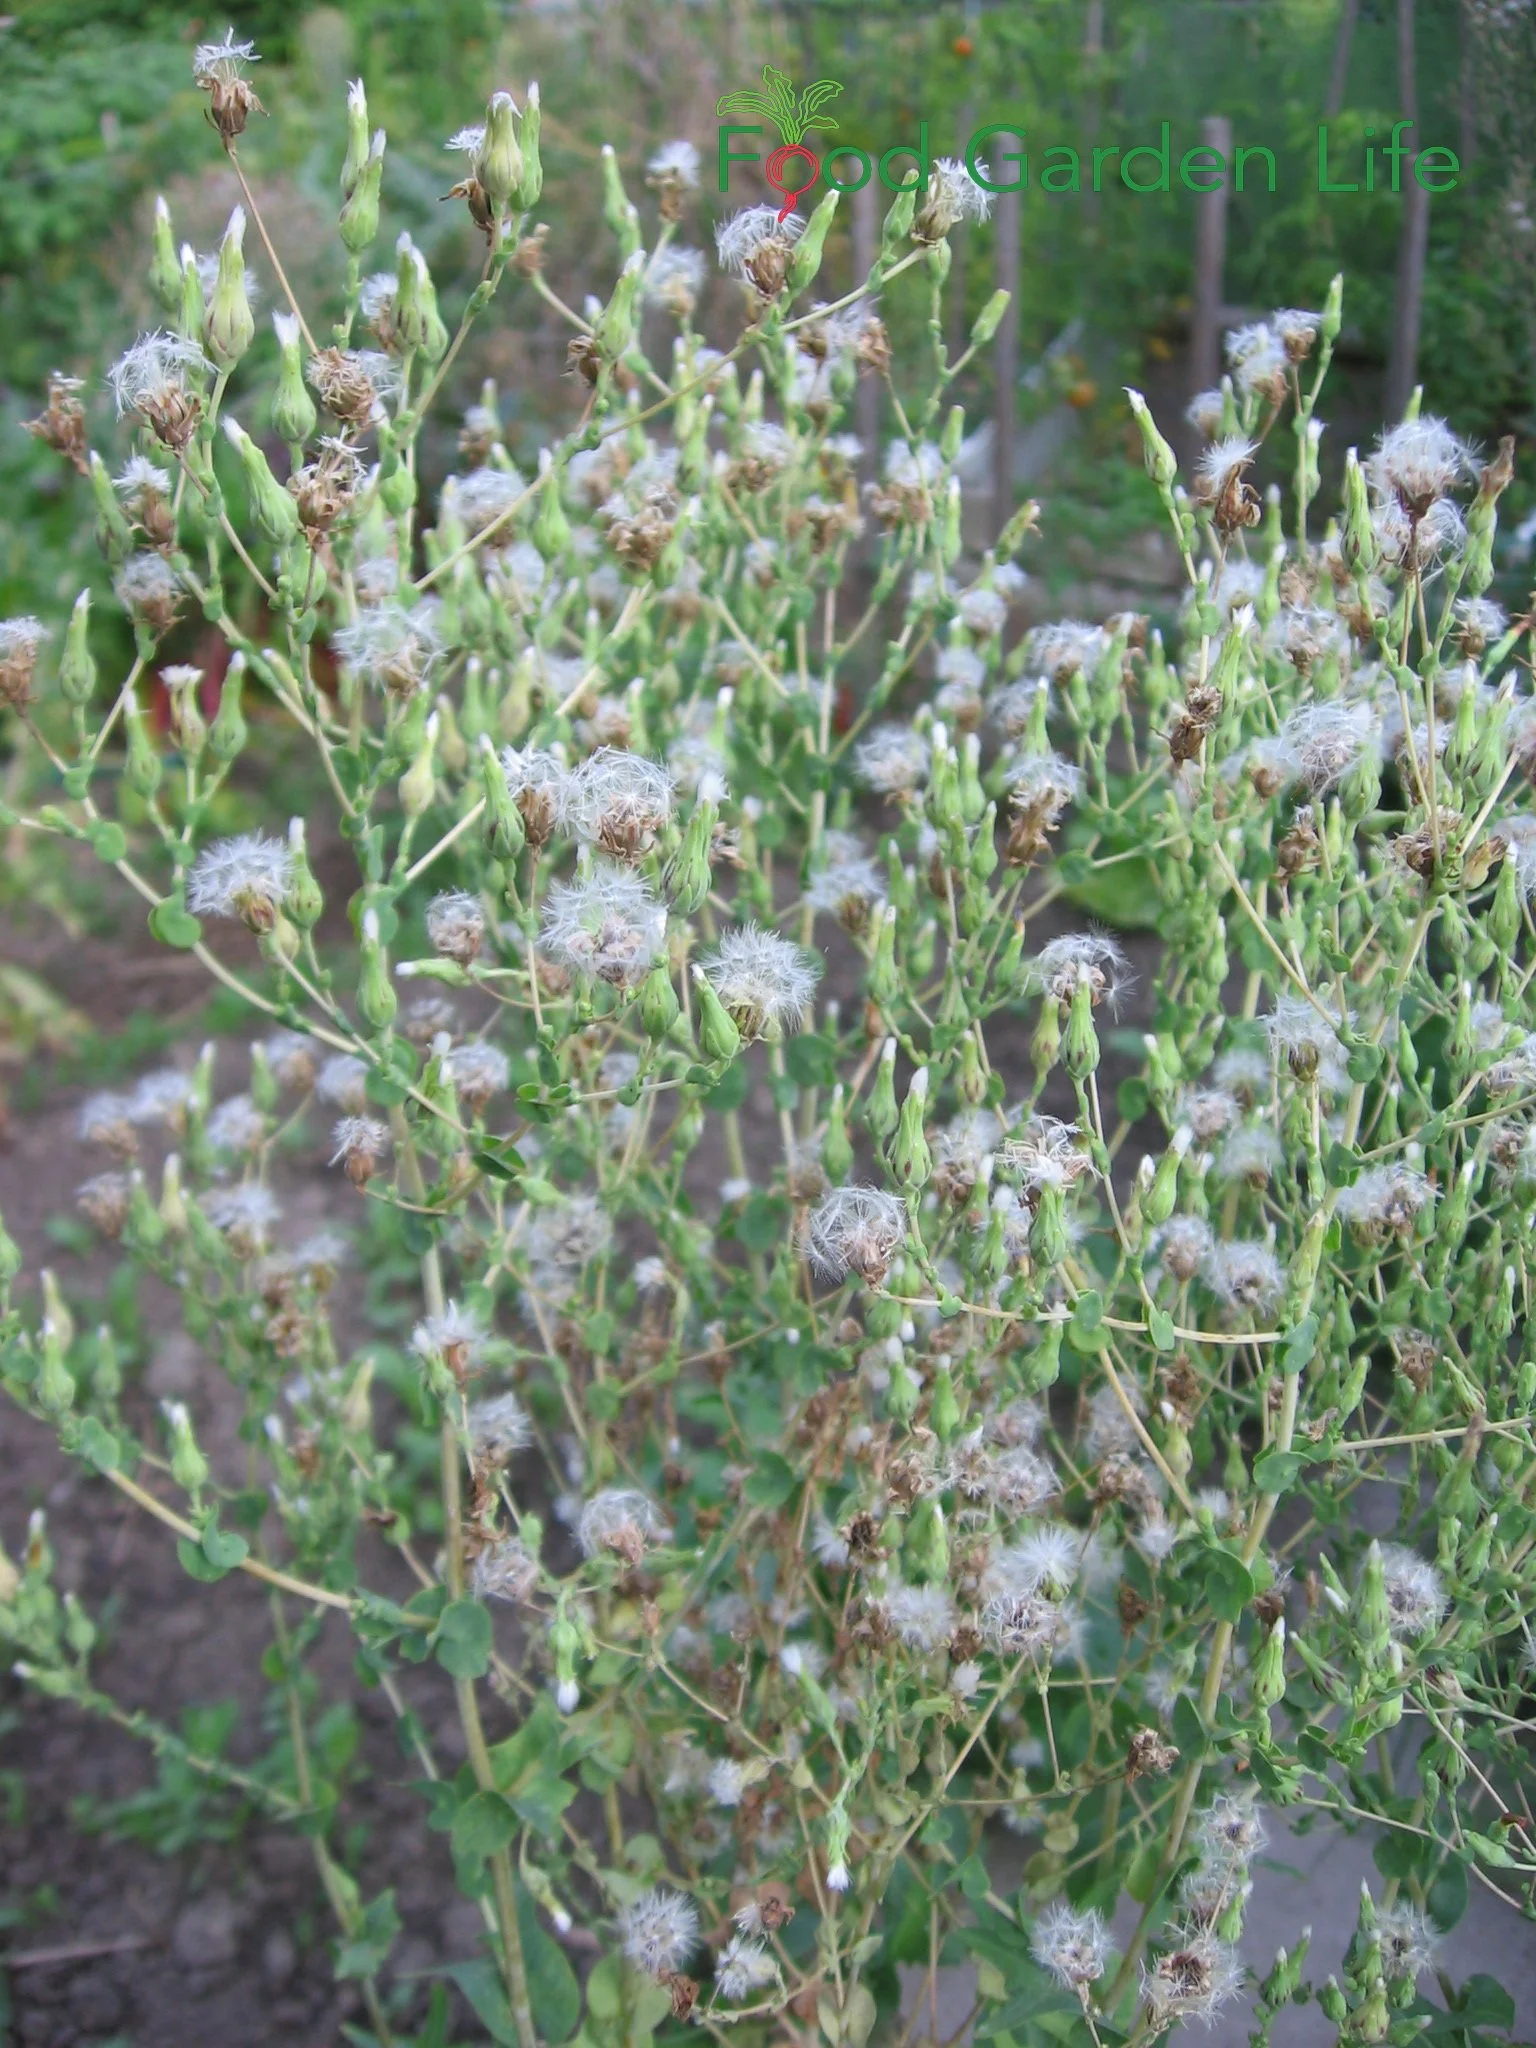
Lettuce producing seeds that float around the garden if left long enough. Grow your own lettuce seed—and attract birds to the garden with lettuce seed.
When the lettuce begins to bolt, I remove most of the plants. But I keep a few.
Here's why to keep a bolting lettuce plant:
Grow your own seeds. You can save the seeds to plant later, or, you can allow the wind to move the floating seeds around your garden.
Attract finches to the garden. I love to watch gold finches swoop in and land on the tall lettuce seed head to dine on the seeds.
FAQ: Bolting Lettuce
Can you eat bolted lettuce?
It's not toxic, but it's hardly palatable. But if you enjoy something that combines bitter and tough, give it a try.
Can you prevent lettuce from going to seed?
Short of killing the plant, you probably can't derail that one-year life cycle that terminates with seed.
But if you follow the steps above, you can delay bolting and seed formation.
What other leafy greens bolt?
Arugula, spinach, cilantro, bok choy, and mustard are common leafy greens that bolt.
More Vegetable Gardening Ideas
Articles
Courses
Want to Water Less and Harvest More? Try Sub-Irrigated Planters
Find out how to make your own sub-irrigated planter (a.k.a. self-watering container).
By Steven Biggs
Wilted by Noon
When I first started container gardening on my garage rooftop, I watered every morning. But in the heat of summer, my plants were parched and wilting by noon.
A sub-irrigated planter is an excellent way to solve the problem of parched plants. We want to prevent wilting, because it’s a sign of stress. Drying out is a stress for the crop.
And that stress can delay (or reduce!) your harvest.
Consistent soil moisture is best. Not sopping wet. Not dry.
And that’s where a sub-irrigated planter helps: It keeps the potting mix consistently moist, but not too wet.
This sort of planter is also known as a SIP, a self-watering container, or a self-watering planter.
Keep reading and I’ll explain how a self-watering system works and how you can make your own.
What are Sub-Irrigated Planters?
Sub-irrigation planters are simply planters with a water reservoir at the bottom. The reservoir is right under the soil.
Through capillary action, water wicks up through the potting mix, giving plant roots a consistent supply of moisture. Then, as the plants use water in the soil (creating a moisture gradient) more water wicks upwards from the reservoir.
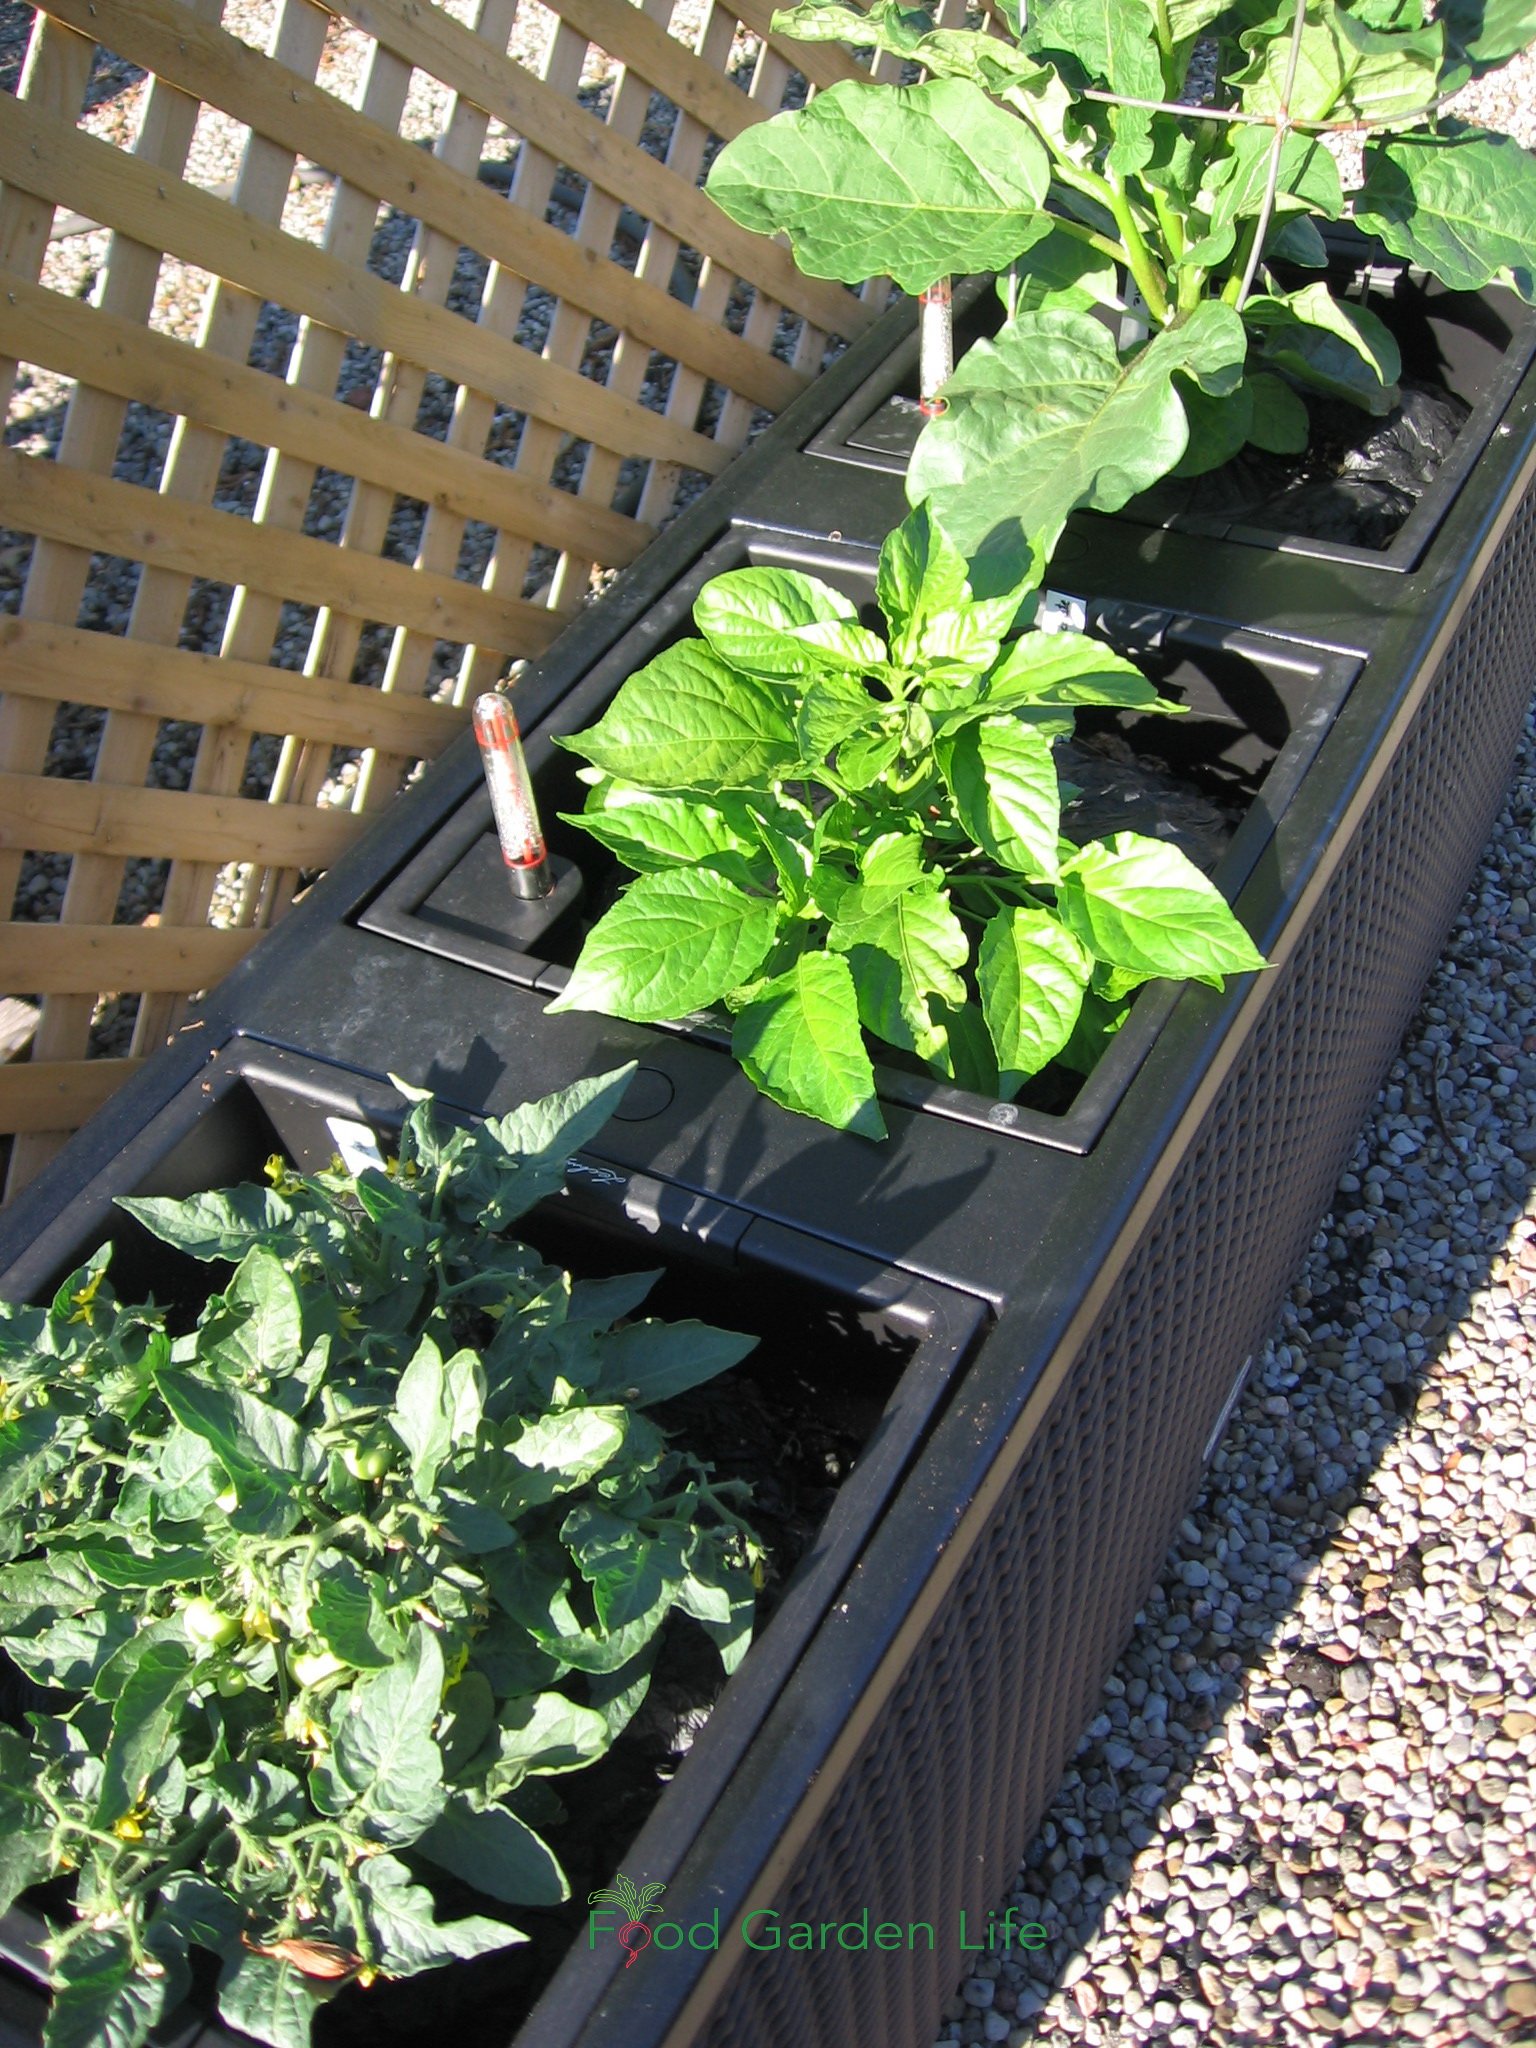
There are many commercially produced sub-irrigated planters available. Some are fairly basic and resemble a normal container. Others have a gauge that shows the water level in the reservoir.
Self-Watering Planters vs. SIPS vs. Sub-Irrigation Planters
These are all different terms used to describe the same thing: Containers that have a water reservoir below, so that moisture can wick up into the soil.
By the way, they are not truly “self-watering.” The gardener must still fill the reservoir. (If you like do-it-yourself projects, you can automate this with irrigation, see below.)
Benefits of Sub-Irrigated Planters
First, though, let’s look at the benefits of these self-watering containers.
Less waste:
There is less waste of water and fertilizer because it's a closed system, with less runoff
Higher yield because:
A continuously moist growing medium means the plant has no water stress (plant growth can slow, or flowers drop when the plant is under stress…)
When gardening in a container, the growing medium is warmer than soil in the garden, and that means that harvest begins earlier
Fewer weeds because:
The soil surface is not regularly moistened from overhead watering, giving dry surface conditions are not as good for weed seeds to germinate
The other reason that the soil surface is not as wet is that the farther you are from the reservoir, the less moist the soil (remember, it's going against gravity!)
Less disease because:
With no overhead watering, there's less splashing of disease organisms from the potting soil onto the leaves
And with tomatoes, SIPS usually solve blossom end rot (which actually is not a disease, but a physiological disorder that's caused by swings in soil moisture)
And the benefit of a SIP system that goes without saying: You spend less time spend watering!
Where to Grow in a Sub-Irrigated Planter
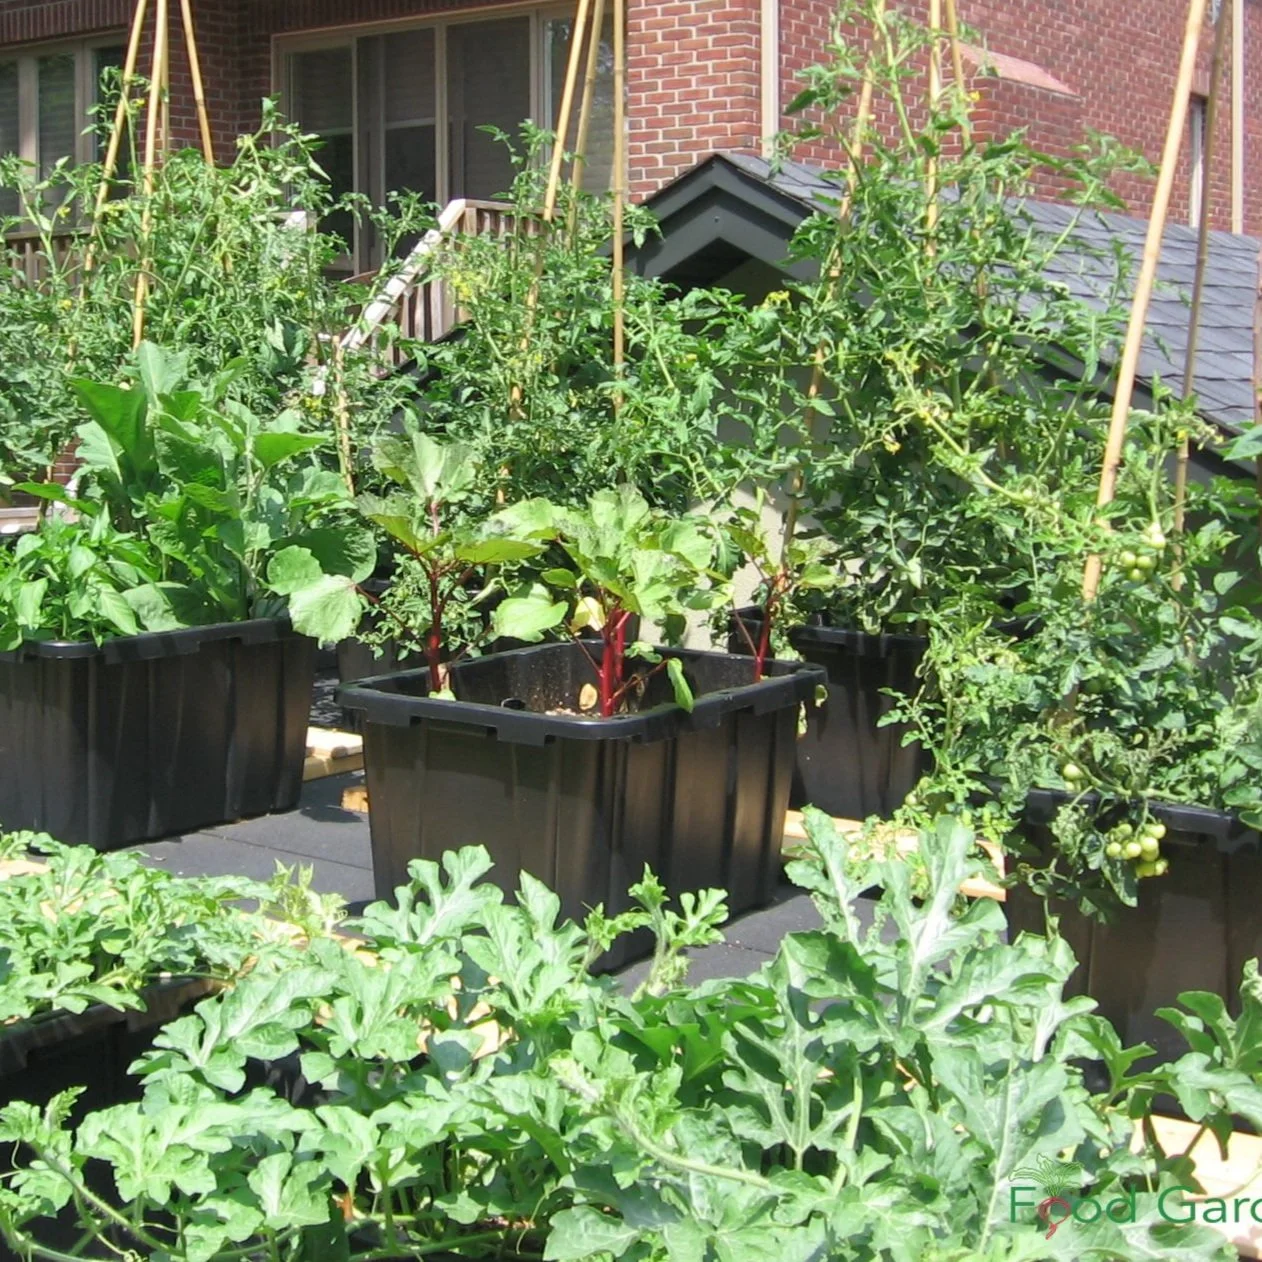
I made a garden on my garage rooftop using sub-irrigated (self-watering) planters.
As with any sort of container garden, a SIP makes it possible to grow on patios, decks, driveways.
You can also use them to grow over top of areas with tree roots or compacted soil.
If you’ve been eyeing up a space next to that water-hungry cedar hedge, this is your solution!
If you’re concerned about soil contamination, making a container garden is a simple solution.
Find out more about soil contamination.
What’s Inside a SIP
Here's what you'll usually find in a self-watering planter.
A water-tight area (the reservoir) at the base of the container (underneath the potting mix)
Something to hold the potting mix above the reservoir area: it could be a false bottom such as mesh, or hollow containers, or tubing
A way to add water to the reservoir (a fill-tube that extends above the soil surface)
A wick (the wick is usually the potting mix itself, but a fabric wick can be used too)
An overflow hole, so that if there's too much water, it can escape
How a Sub-Irrigation Planter Works
Think of how water moves up a sponge. Or put a piece of paper towel in water and watch the water move upwards.
The same thing happens in a self-watering planter.
The water that's stored in the reservoir moves up through the soil.
Create Your Own Unique Edible Landscape
That fits for your yard, and your style!
Plants That Thrive in Sub-Irrigated Planters
Annual vegetable and herb crops do well in sub-irrigation planters.
Avoid plants that are susceptible to root rot when overwatered. (For example, I grow potted lemon trees, and they hate “wet feet,” soil that says consistently wet. Read more about potted lemon trees.)
Potting Soil for Sub-Irrigated Planters
Choose a potting soil with good wicking properties. Do not use garden top soil or sand.
Sometimes this is easier said than done...because you won't find "wicking" on potting soil labels.
(A bargain isn't always a bargain when it comes to potting soil. If you see discounted bags at big-box retailers, be wary.)
The large compressed bales of potting mix made for commercial growers have a more consistently good quality. If in doubt, start with these.
If you're making your own peat-based potting mix, here’s an important point:
There are different qualities of peat. The darker peat from lower down in a bog is not as good at wicking as the lighter coloured, "blond" peat that comes from the top of a bog. Blond peat isn't always available at garden centres; you might need to go to an outlet that supplies commercial growers to find it.
Make Your Own Sub-Irrigated Planter
It's fairly simple to make your own self-watering planters.
Below is a series of pictures from a batch of planters I made for my garage rooftop garden.
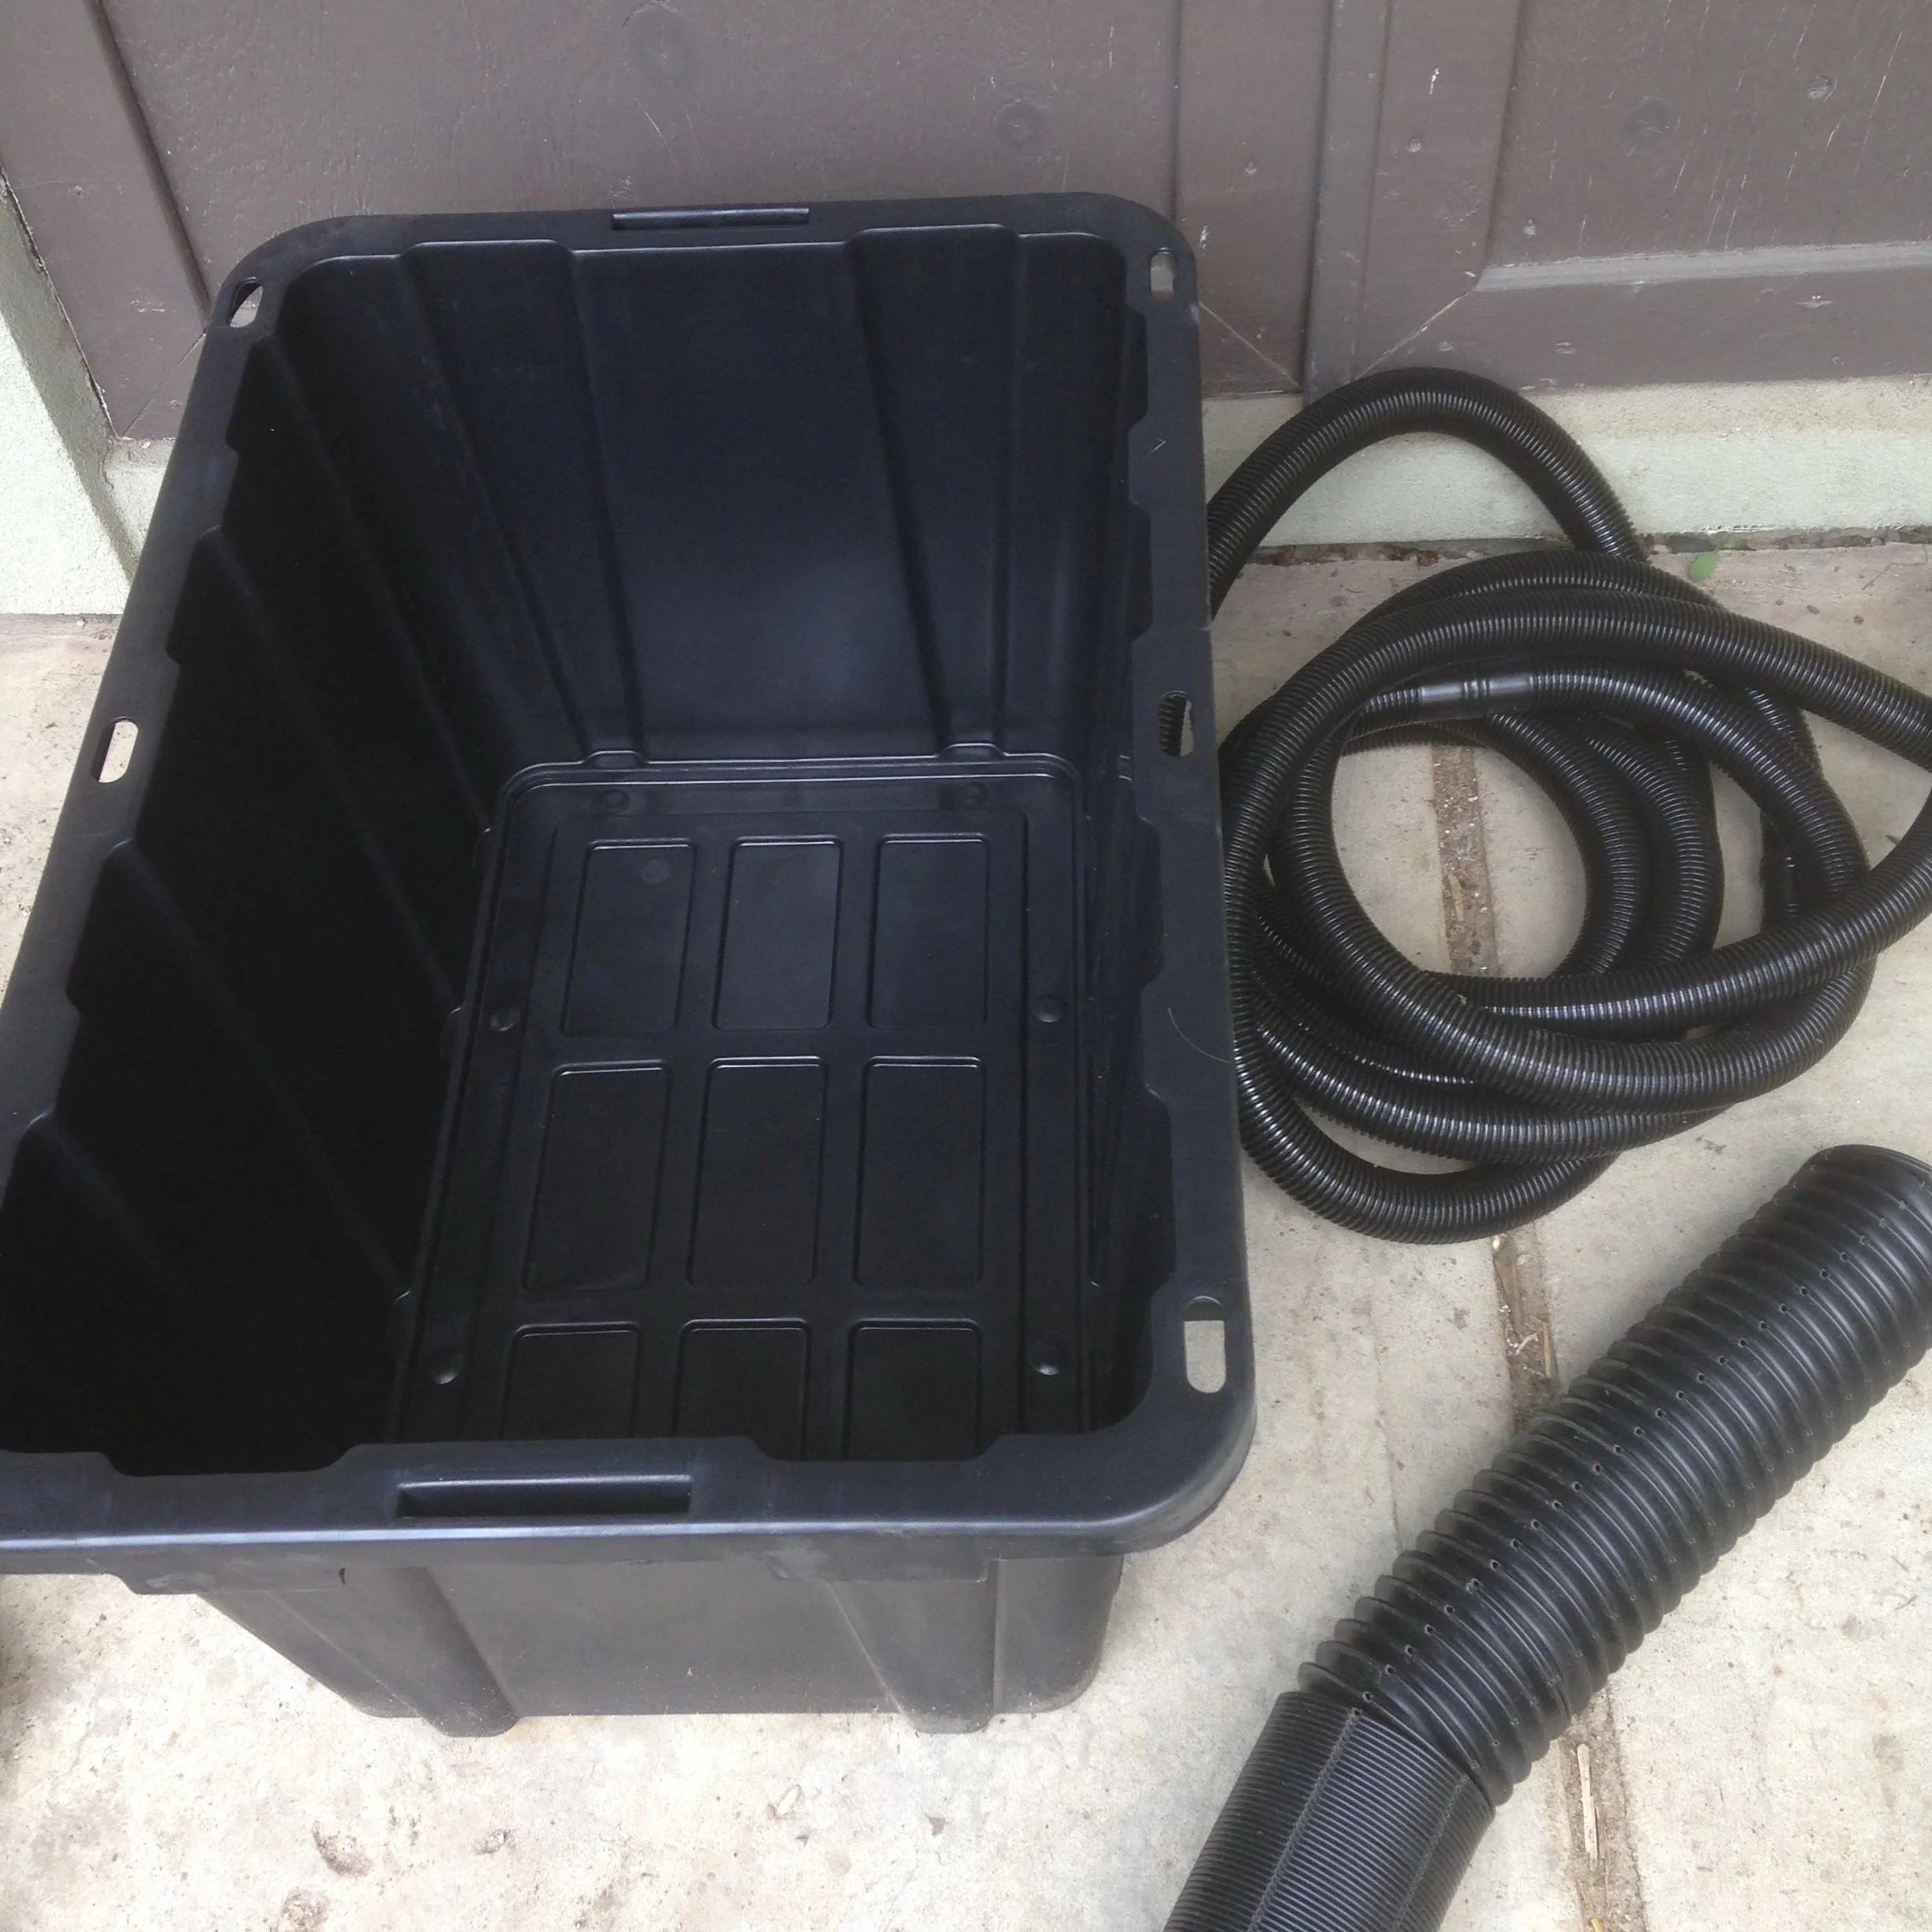
The materials I used were inexpensive, and available at a hardware store:
Plastic storage bin
Weeping tile (4” bendable plastic drain used around the foundation of buildings…the term used for this seems to vary by region)
Dishwasher drain pipes
Landscape fabric
The tools needed to make these were:
Drill to make overflow hole
Saw or utility knife to cut the weeping tile and dishwasher drain pipe
Scissors to cut the landscape fabric
At the time I made these, I spent about $20 per planter, a fraction of what commercially available self-watering planters cost.
Making a Planter, Step by Step
Supplies to Make a Sub-Irrigated Planter
Plastic storage bin
Weeping tile (4” bendable plastic drain used around the foundation of buildings…the term used for this seems to vary by region)
Dishwasher drain pipes
Landscape fabric (not shown)
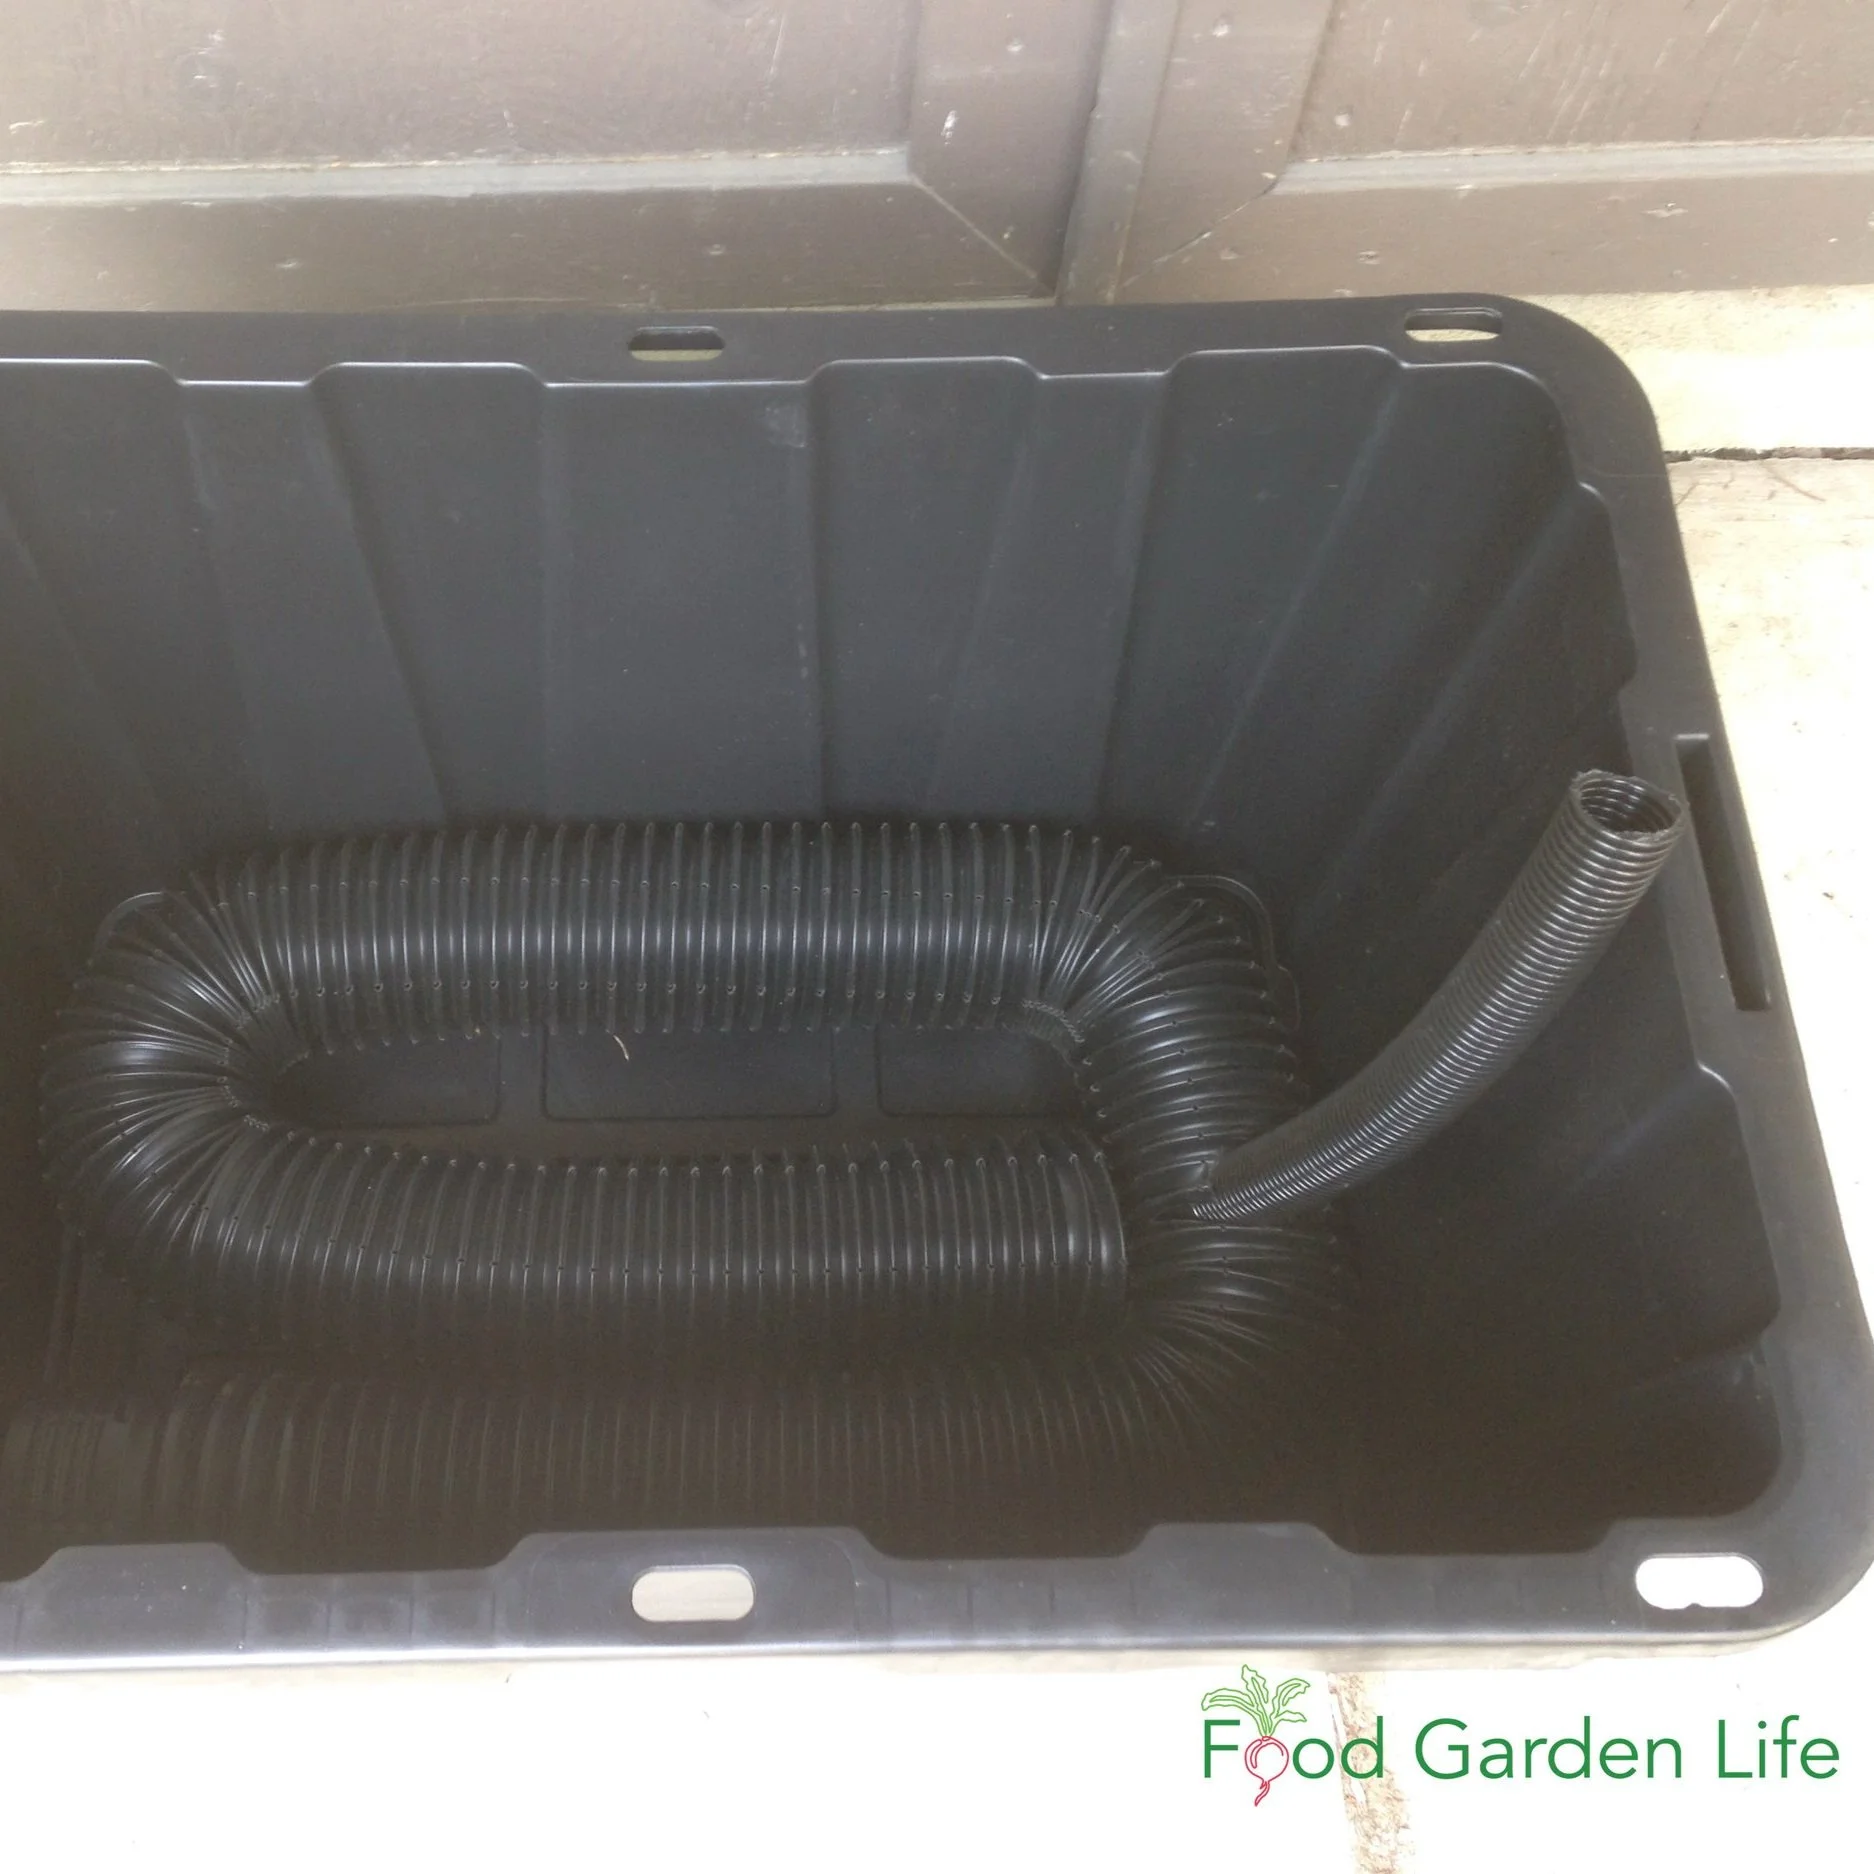
Weeping Tile with Fill Tube
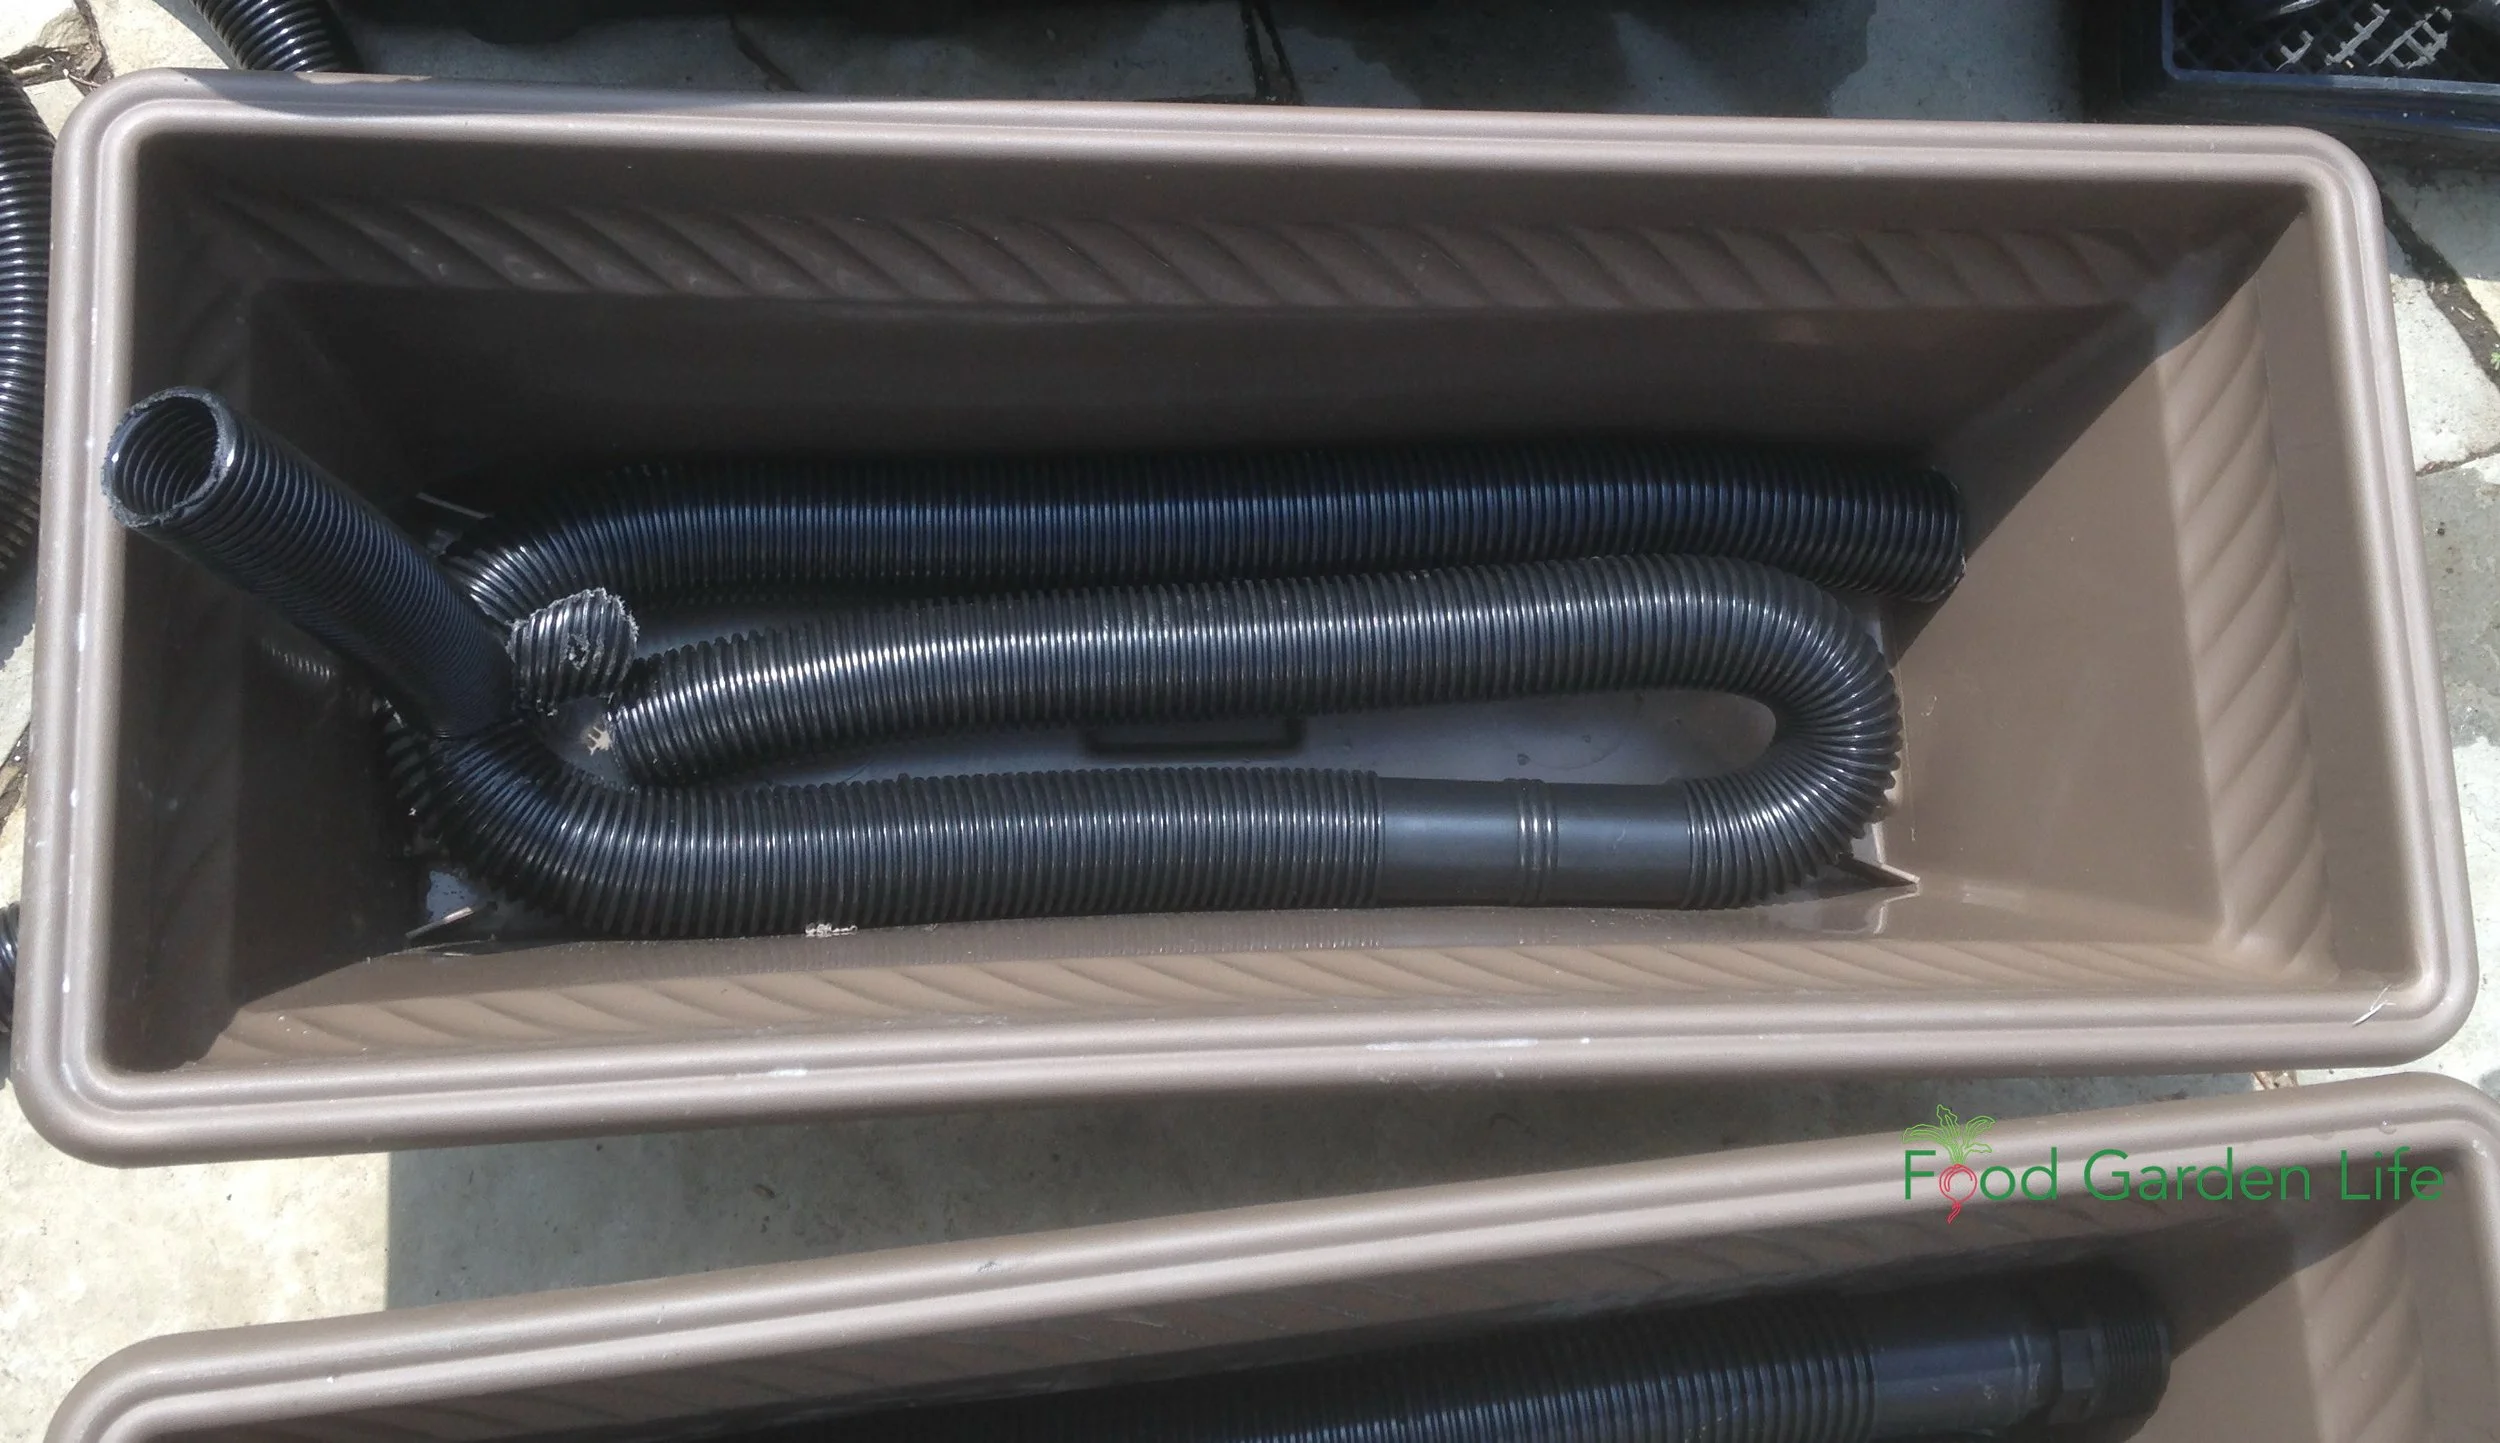
Weeping tile coiled around the bottom of the bin.
A hole cut into the weeping tile with a utility knife allows a piece of dishwasher drain hose to be installed as a fill tube.
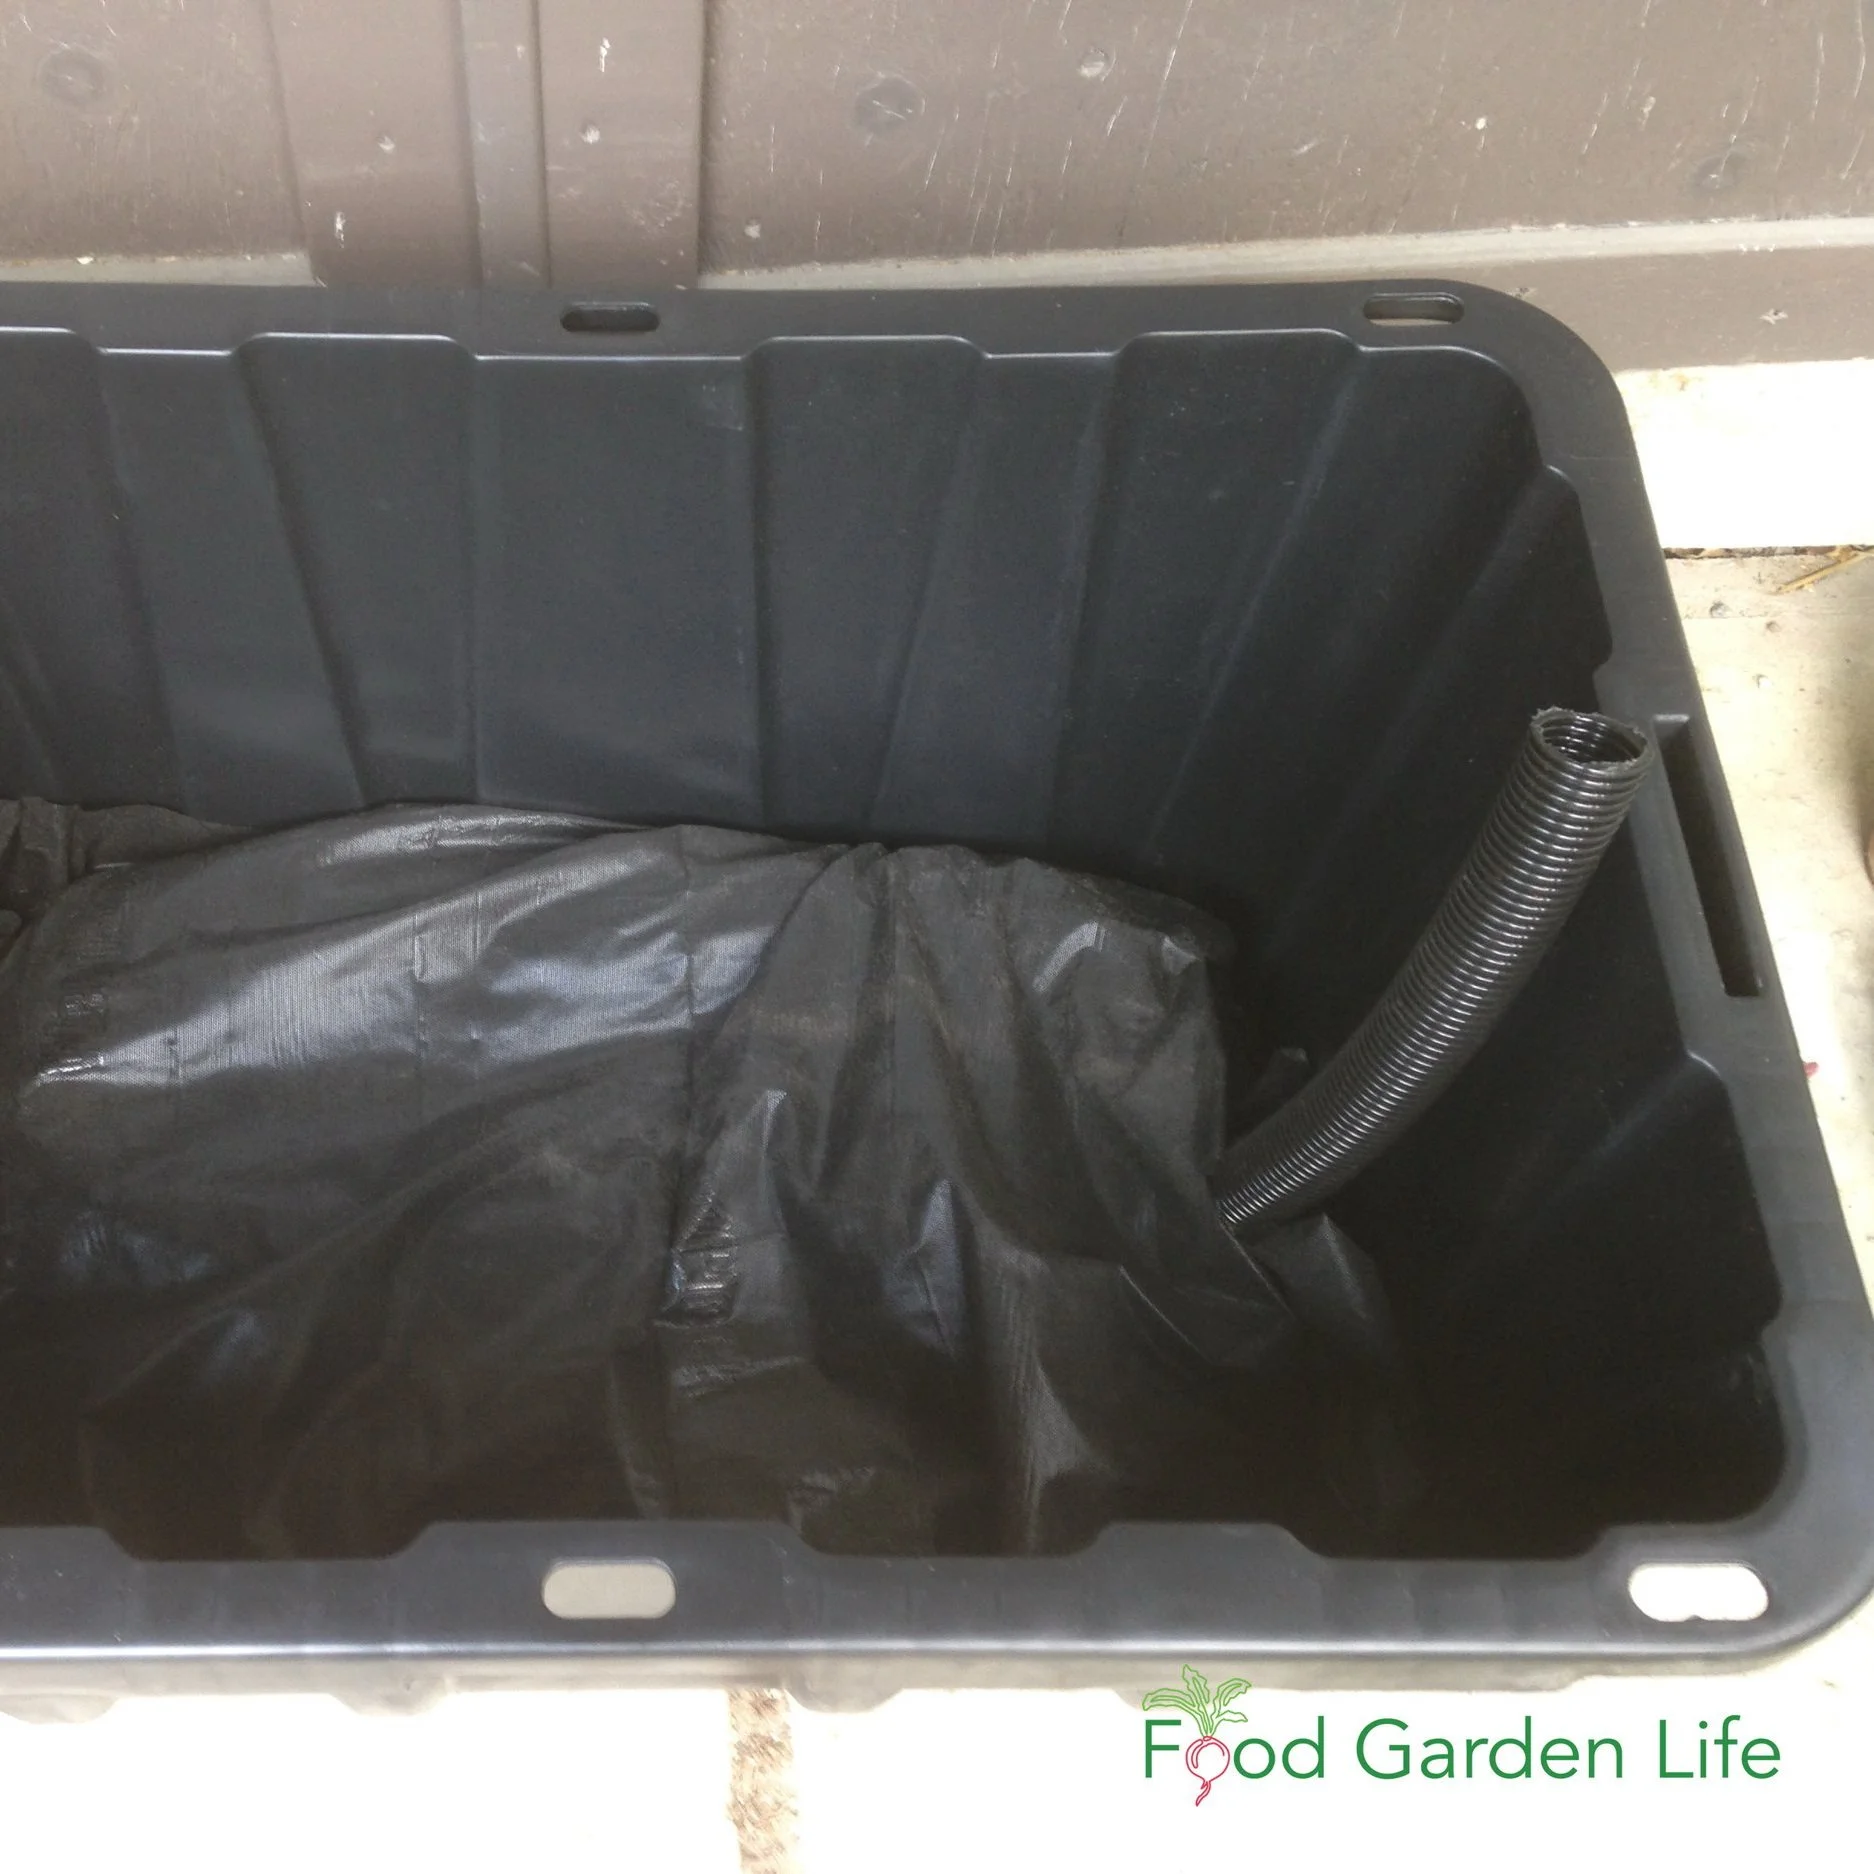
Landscape Fabric
The reservoir space created with the weeping tile is covered with landscape fabric so that potting soil doesn’t fill up the weeping tile.
Don’t Forget This!
Drill a drainage hole near the top of the weeping tile.
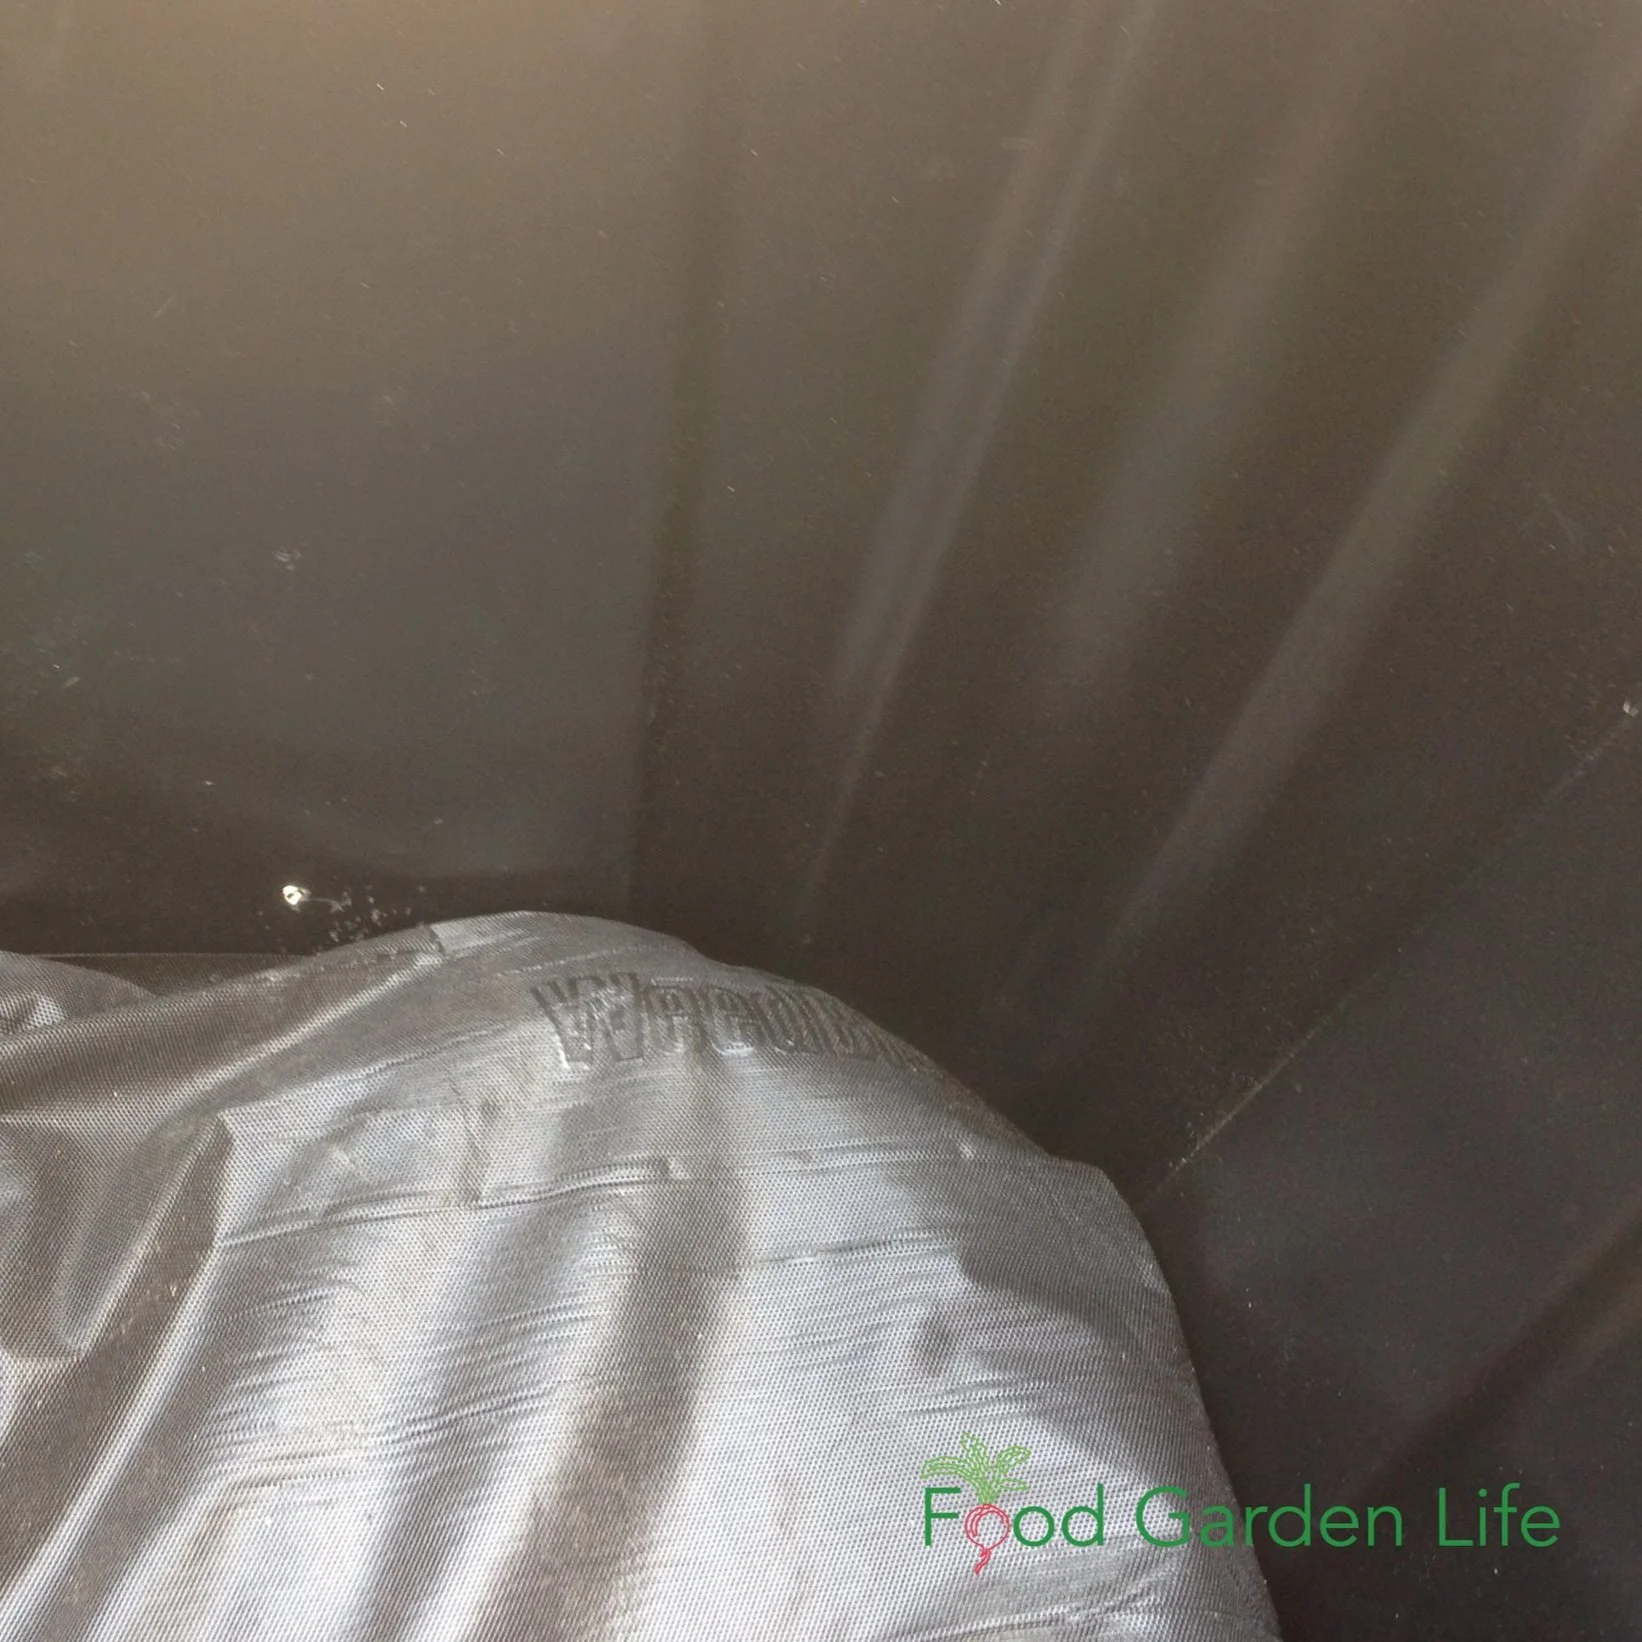
The hole shown here was too small…and was blocked by a piece of perlite, so i had to drill a bigger hole.
Recycled Items to Make a Self-Watering Planter
I've also made self-watering systems using materials from the recycling bin, or things we already had on hand.
Here are examples of items you can use:
For the Water-Tight Reservoir
Retrofitting a large plastic pot to make a sub-irrigated planter. The reservoir is made from old flower pots, which are covered with wire mesh. The wick (not shown) is fabric. The mesh is covered with landscape fabric so that the potting soil does not fill up the reservoir.
A water-tight container such as a pail
Or, a liner to make a water-tight area in a container with holes (for example, pond liner or construction plastic)
To Hold the Soil Above the Reservoir Area
Drainage pipe
Downspout extenders
Downspouts
Weeping tile
Upside-down flower pots
Landscape fabric, or old t-shirts
For a Fill Tube
Water bottles
Dishwasher drain hose
Pop bottles (“soda” bottles if you’re in the US)
PVC pipe
Retrofit Containers into a Sub-Irrigated Planter
A hypertufa planter with sub-irrigation.
You can retrofit any traditional pot into a sub-irrigation system…even if they have holes in them.
Use a liner to make a water-tight reservoir area at the bottom, and then create an overflow hole.
Planter Maintenance
Potting mixes lose structure over time as the organic matter decomposes. Plan to refresh the potting mix periodically. How often you need to do this depends on the mix, and the conditions. Pay especial attention to the soil in the lower area that acts as a wick.
If you're using a fabric wick, check it annually to see its condition. Fabrics made from natural fibres break down fairly quickly.
Sub-Irrigated Planter FAQ
How deep should a sub-irrigated planter be?
Making a sub-irrigated planter from a smaller, shallower planter. This is perfect for shallow-rooted crops such as leafy greens.
A soil depth of about 30cm (12") is usually lots. Remember, gravity is working against the wicking action...and when the soil is very deep the water doesn't wick all the way to the top.
The larger the plant you’re growing, the larger the volume of soil that you'll need. A smaller container with a 15 cm (6") soil depth can be fine for many smaller crops, such as leafy greens. If you're growing something that gets larger, for example bush-type tomatoes, a larger volume of soil is suitable. (That's why I used the storage bins in the example above. Along with determinate tomatoes, we use them for okra, peppers, and eggplant.)
Can I cover the soil on a self-watering planters?
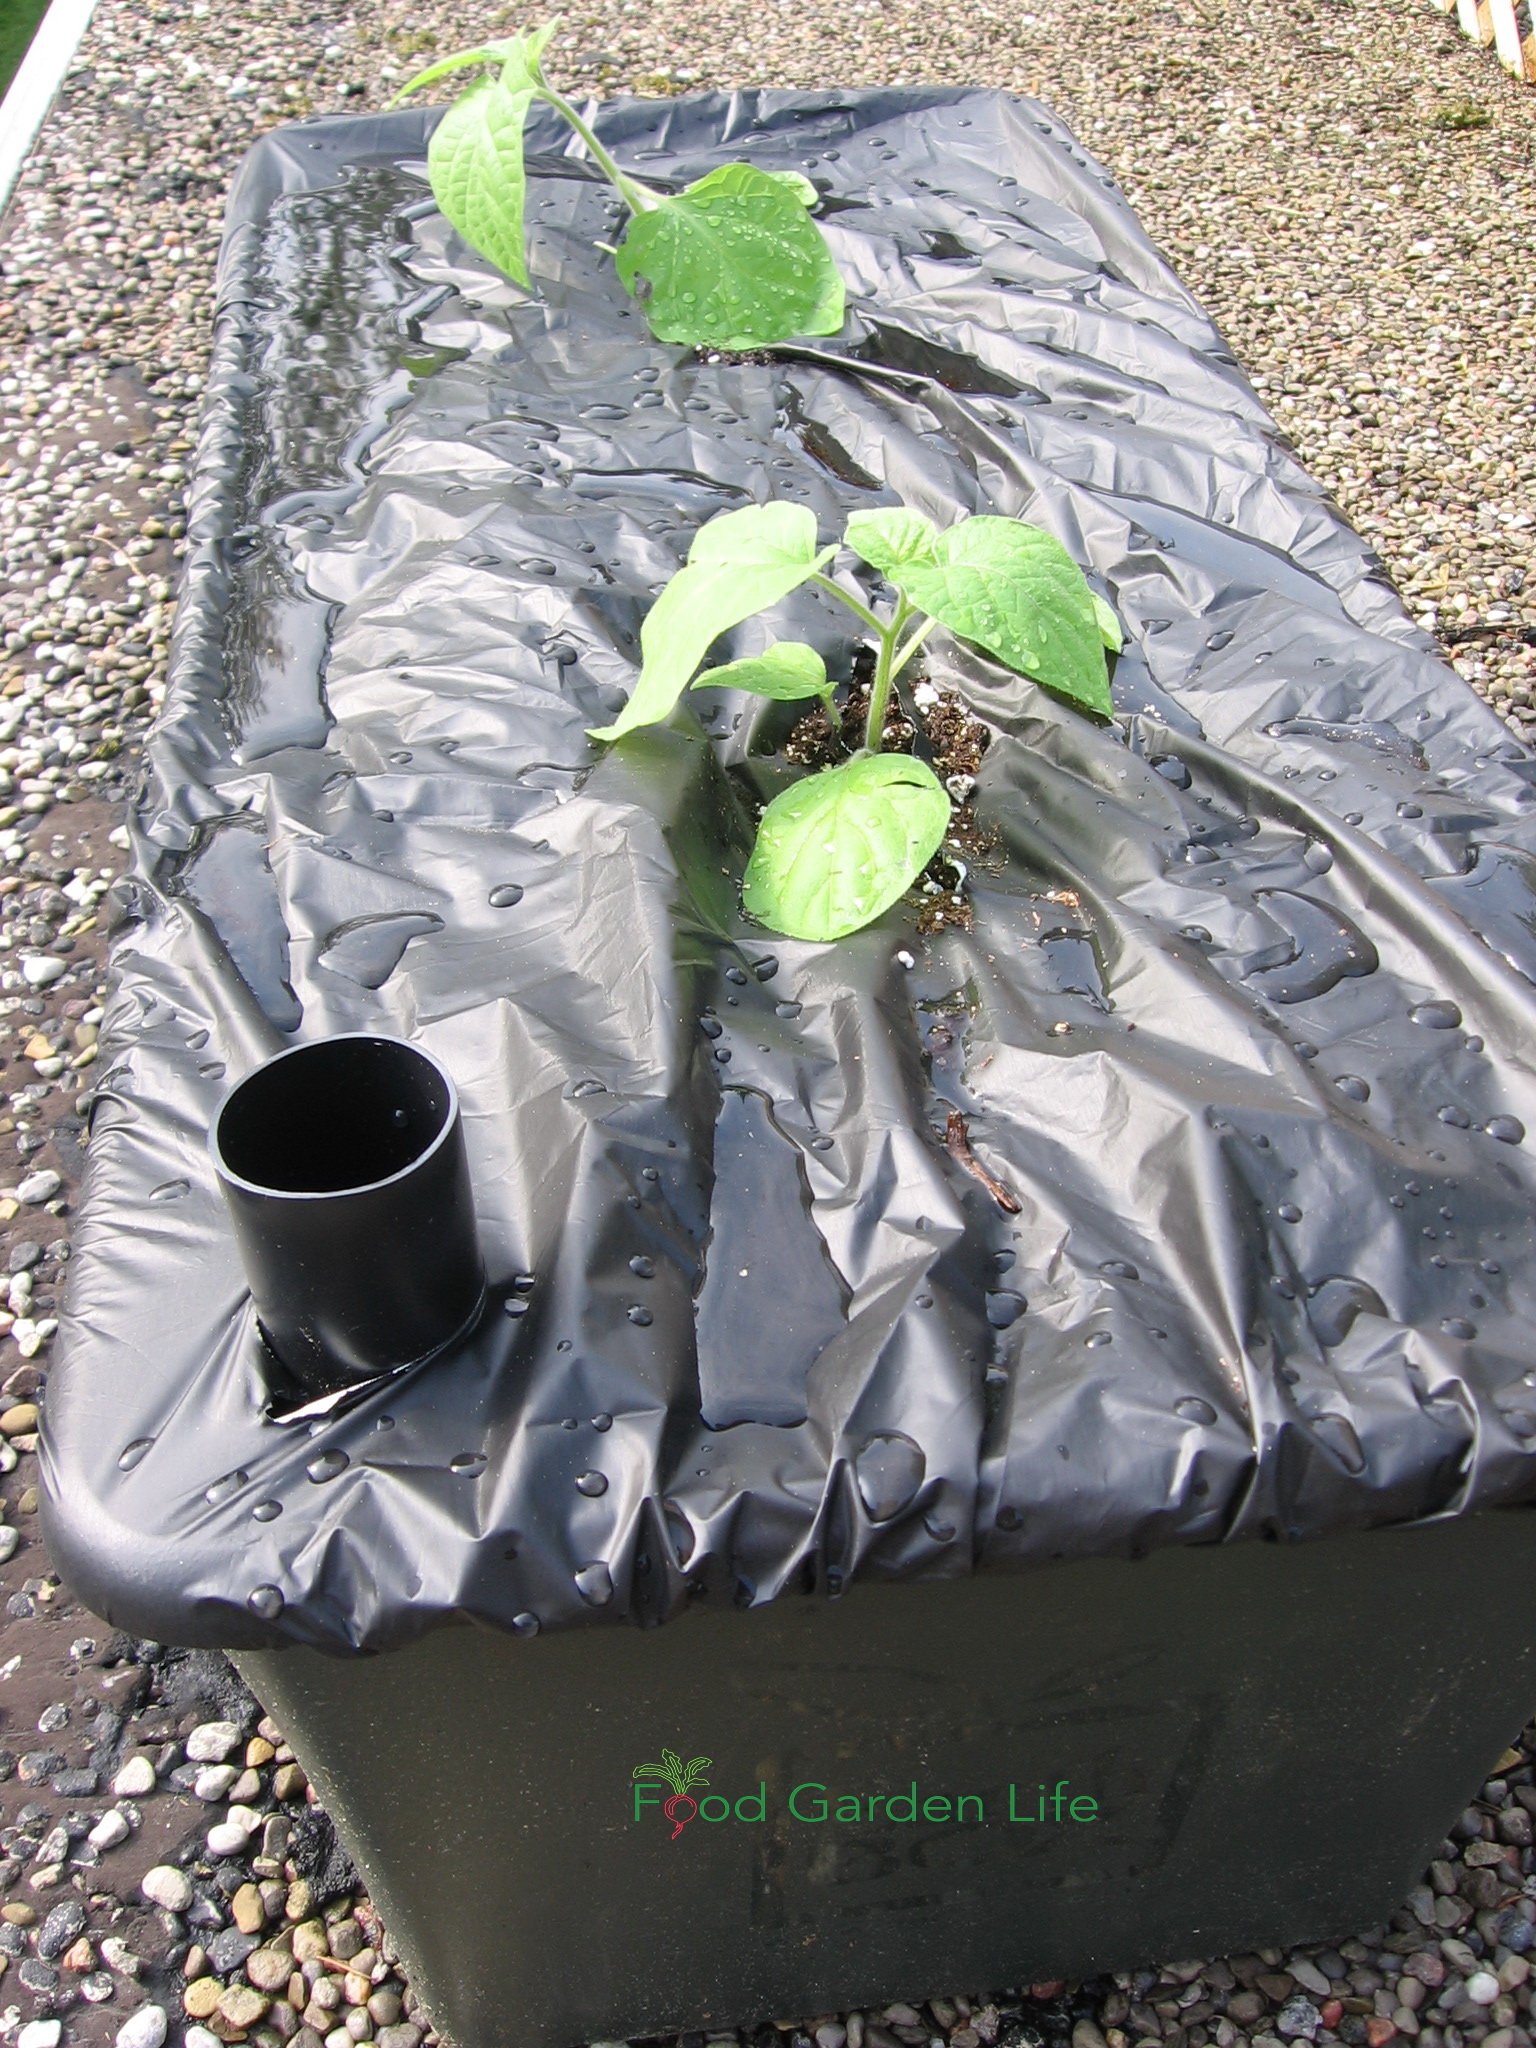
Plastic mulch over the soil holds in moisture and deters squirrels from digging up transplants in the spring.
Yes. A plastic mulch holds in moisture and stops weed seeds from germinating. There are biodegradable plastic mulches that last for a single growing season.
Lay the mulch over the potting mix, and then tuck it in tight at the sides. Once it's snug, you can cut and X in it with a sharp knife, and then plant into the X.
A springtime challenge for us is squirrels digging up newly transplanted seedlings from our planters. A simple solution is the plastic mulch, which seems to deter digging. (Soil is out of sight, and it’s out of their wee little squirrel minds.)
Or, if you don't like the look of the plastic, burlap works well too. (It's a natural fibre, so doesn't hold in as much moisture, but it deters digging and reduces growth of weed seeds.)
What about watering plants in a SIP from above?
This is fine. It will keep the soil surface moister, so there's more chance of weed seeds germinating. But there's nothing wrong with this...other than it can be much slower than filling using a fill tube.
Can I reuse the soil in my self-watering planter?
Over time, as the organic materials in soil break down, potting soil loses its structure. When is has less structure (fewer bigger particles and fewer air pores) it doesn’t wick as well.
So for best wicking, fresh potting mix work best.
But...replacing potting mix every year is both wasteful and expensive. I usually mix in some new soil mix every year, about 20 per cent.
What is an Earthbox?
It is a well-known brand of sub-irrigated planters.
Is a “global bucket” a sub-irrigated planter?
Yes. I suggest you search online to find out more about this easy-to-make pail-in-pail SIP planter that has a reservoir.
What is a wicking bed?
With a wicking bed, we're taking the same ideas we use in a sub-irrigated planter—just on a larger scale. Now we’re talking about a raised bed. A wicking bed has a water reservoir, fill tube, and overflow just like a SIP does.
If you’re researching wicking beds, you’ll see that the names SIP and wicking bed are often used interchangeably. For me, if it’s a moveable planter, it’s a SIP. If it’s a permanent bed, it’s a wicking bed. But don’t sweat the lingo—as long as you understand how it works inside.
Find out more about wicking beds.
Are there any things to watch for with SIPS?
Yes, salt build-up. Normally, excess salts that can accumulate near the soil surface wash away with watering, and then drain from the bottom of a container. But with a SIP, we’re not washing down salts with water, and any runoff is captured.
That means it's a good practice to flush out your SIPs in the spring. Water heavily from the top, enough to cause lots of water to drain through the overflow holes and carry away excess salts.
How can I automate watering in my self-watering planter?
An irrigation spaghetti tube goes into the fill tube on the SIP.
You can set it up with automatic irrigation that refills the reservoirs.
You want what’s called “spaghetti tubes,” small tubes that run from an irrigation line. One tube goes to each planter. (This sort of system is often used to irrigate container gardens, with “drip emitters” at the end of each spaghetti tube to regulate how much water comes out and onto the soil surface in the container.)
But when you’re setting up spaghetti tubes and drip emitters for a SIP garden, just put the tube and drip emitter right into your fill tube, so that when you turn on the irrigation, you’re replenishing the water in the reservoir—not wetting the soil surface. (That way, less water is lost to evaporation, and you’re not creating conditions suited to weed-seed germination.)
Experience will teach you how long to leave on the water supply to fill up the reservoir.
More on Growing Vegetables
Articles and Interviews
Course
Get great ideas for your edible garden in Edible Garden Makeover. Planning. Design. Crops. How-to.
How to Make a Wicking Bed
Harvest more and water less when you grow in a wicking bed. Find out how to make a wicking bed.
By Steven Biggs
Make Your Own Wicking Bed
Harvest more. Water less.
Wicking beds are a great way to maximize the use of space in a small garden. They also save time for busy gardeners.
What’s a Wicking Bed?
A wicking bed is simply raised bed with a reservoir—a water storage area—at the bottom.
They work the same way that sub-irrigation planters (a.k.a. SIPS or “self-watering” pots) work.
Find out more about sub-irrigated planters.
Water wicks upwards from a reservoir below into the soil above through capillary action.
Keep reading to find out how to make a wicking bed.
Less Plant Stress
When plants get thirsty—when there is “water stress”—it can have a big effect on yield.
Because wicking beds prevent water stress, the increase in yield can be considerable. Of course, no one minds the time saved by having to water less frequently.
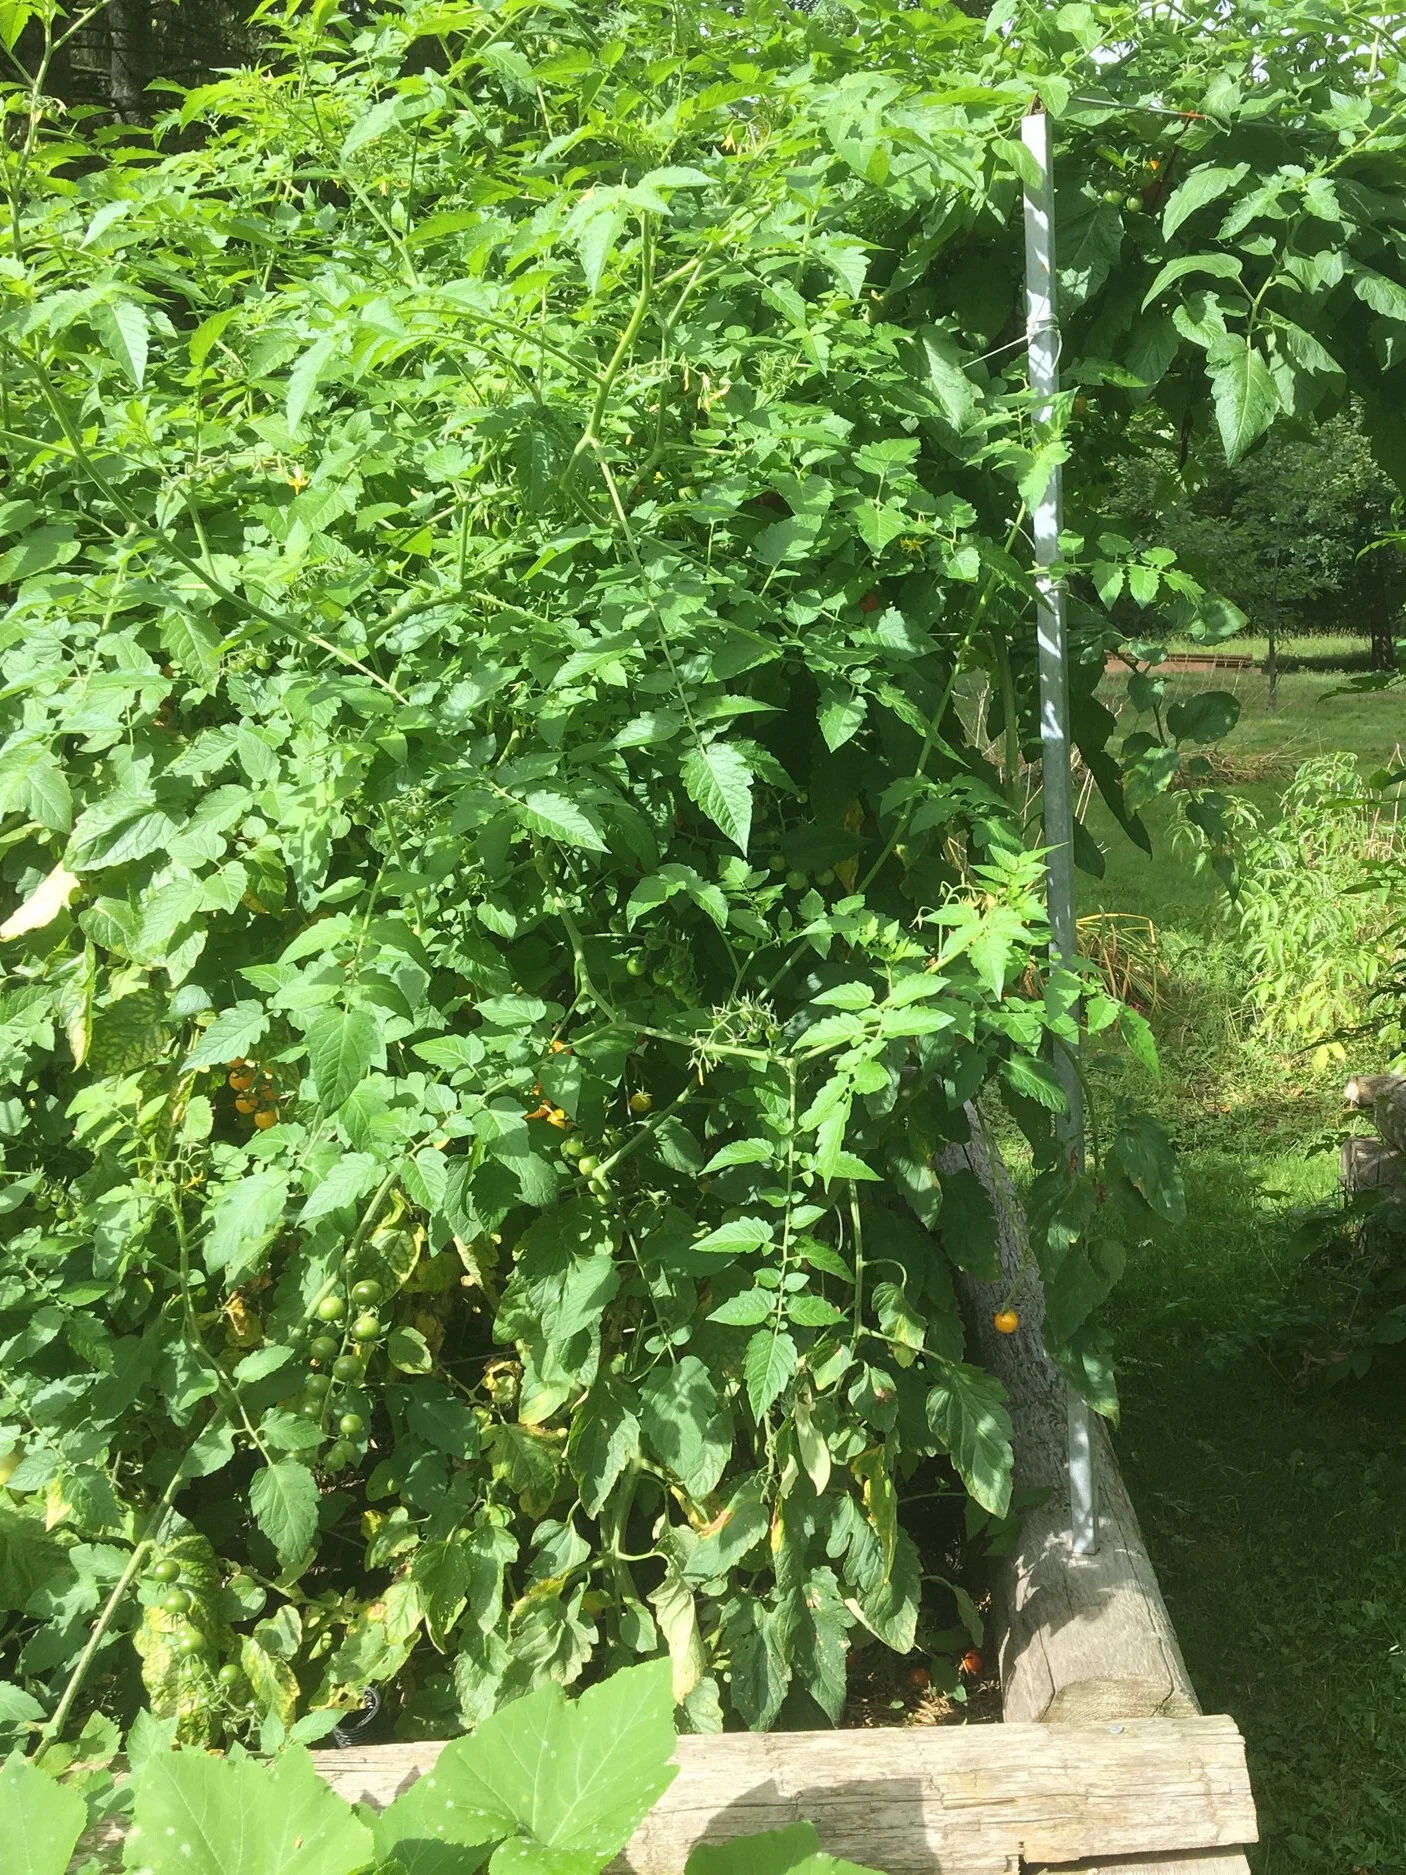
Even in the heat of summer, when the tomato plants are quite big, we water our wicking beds about once a week.
We turbo-charged our backyard tomato production using wicking beds.
Another Reason to Use a Wicking Bed
Our neighbour’s large black walnut tree is beautiful. But walnut trees give off a compound called “juglone.” And juglone affects the growth of many plants…including tomatoes.
We tried growing tomatoes in the backyard many times…and they always died.
BUT MY DAUGHTER Emma had a vision of a tomato plantation in our backyard, near that walnut tree.
I wondered if we could solve the problem by growing in wicking beds, because the tomato roots would never get into the juglone-contaminated soil below.
It worked—and we now grow tomatoes right under the walnut tree.
Create Your Own Unique Edible Landscape
That fits for your yard, and your style!
Make Your Own Wicking Bed
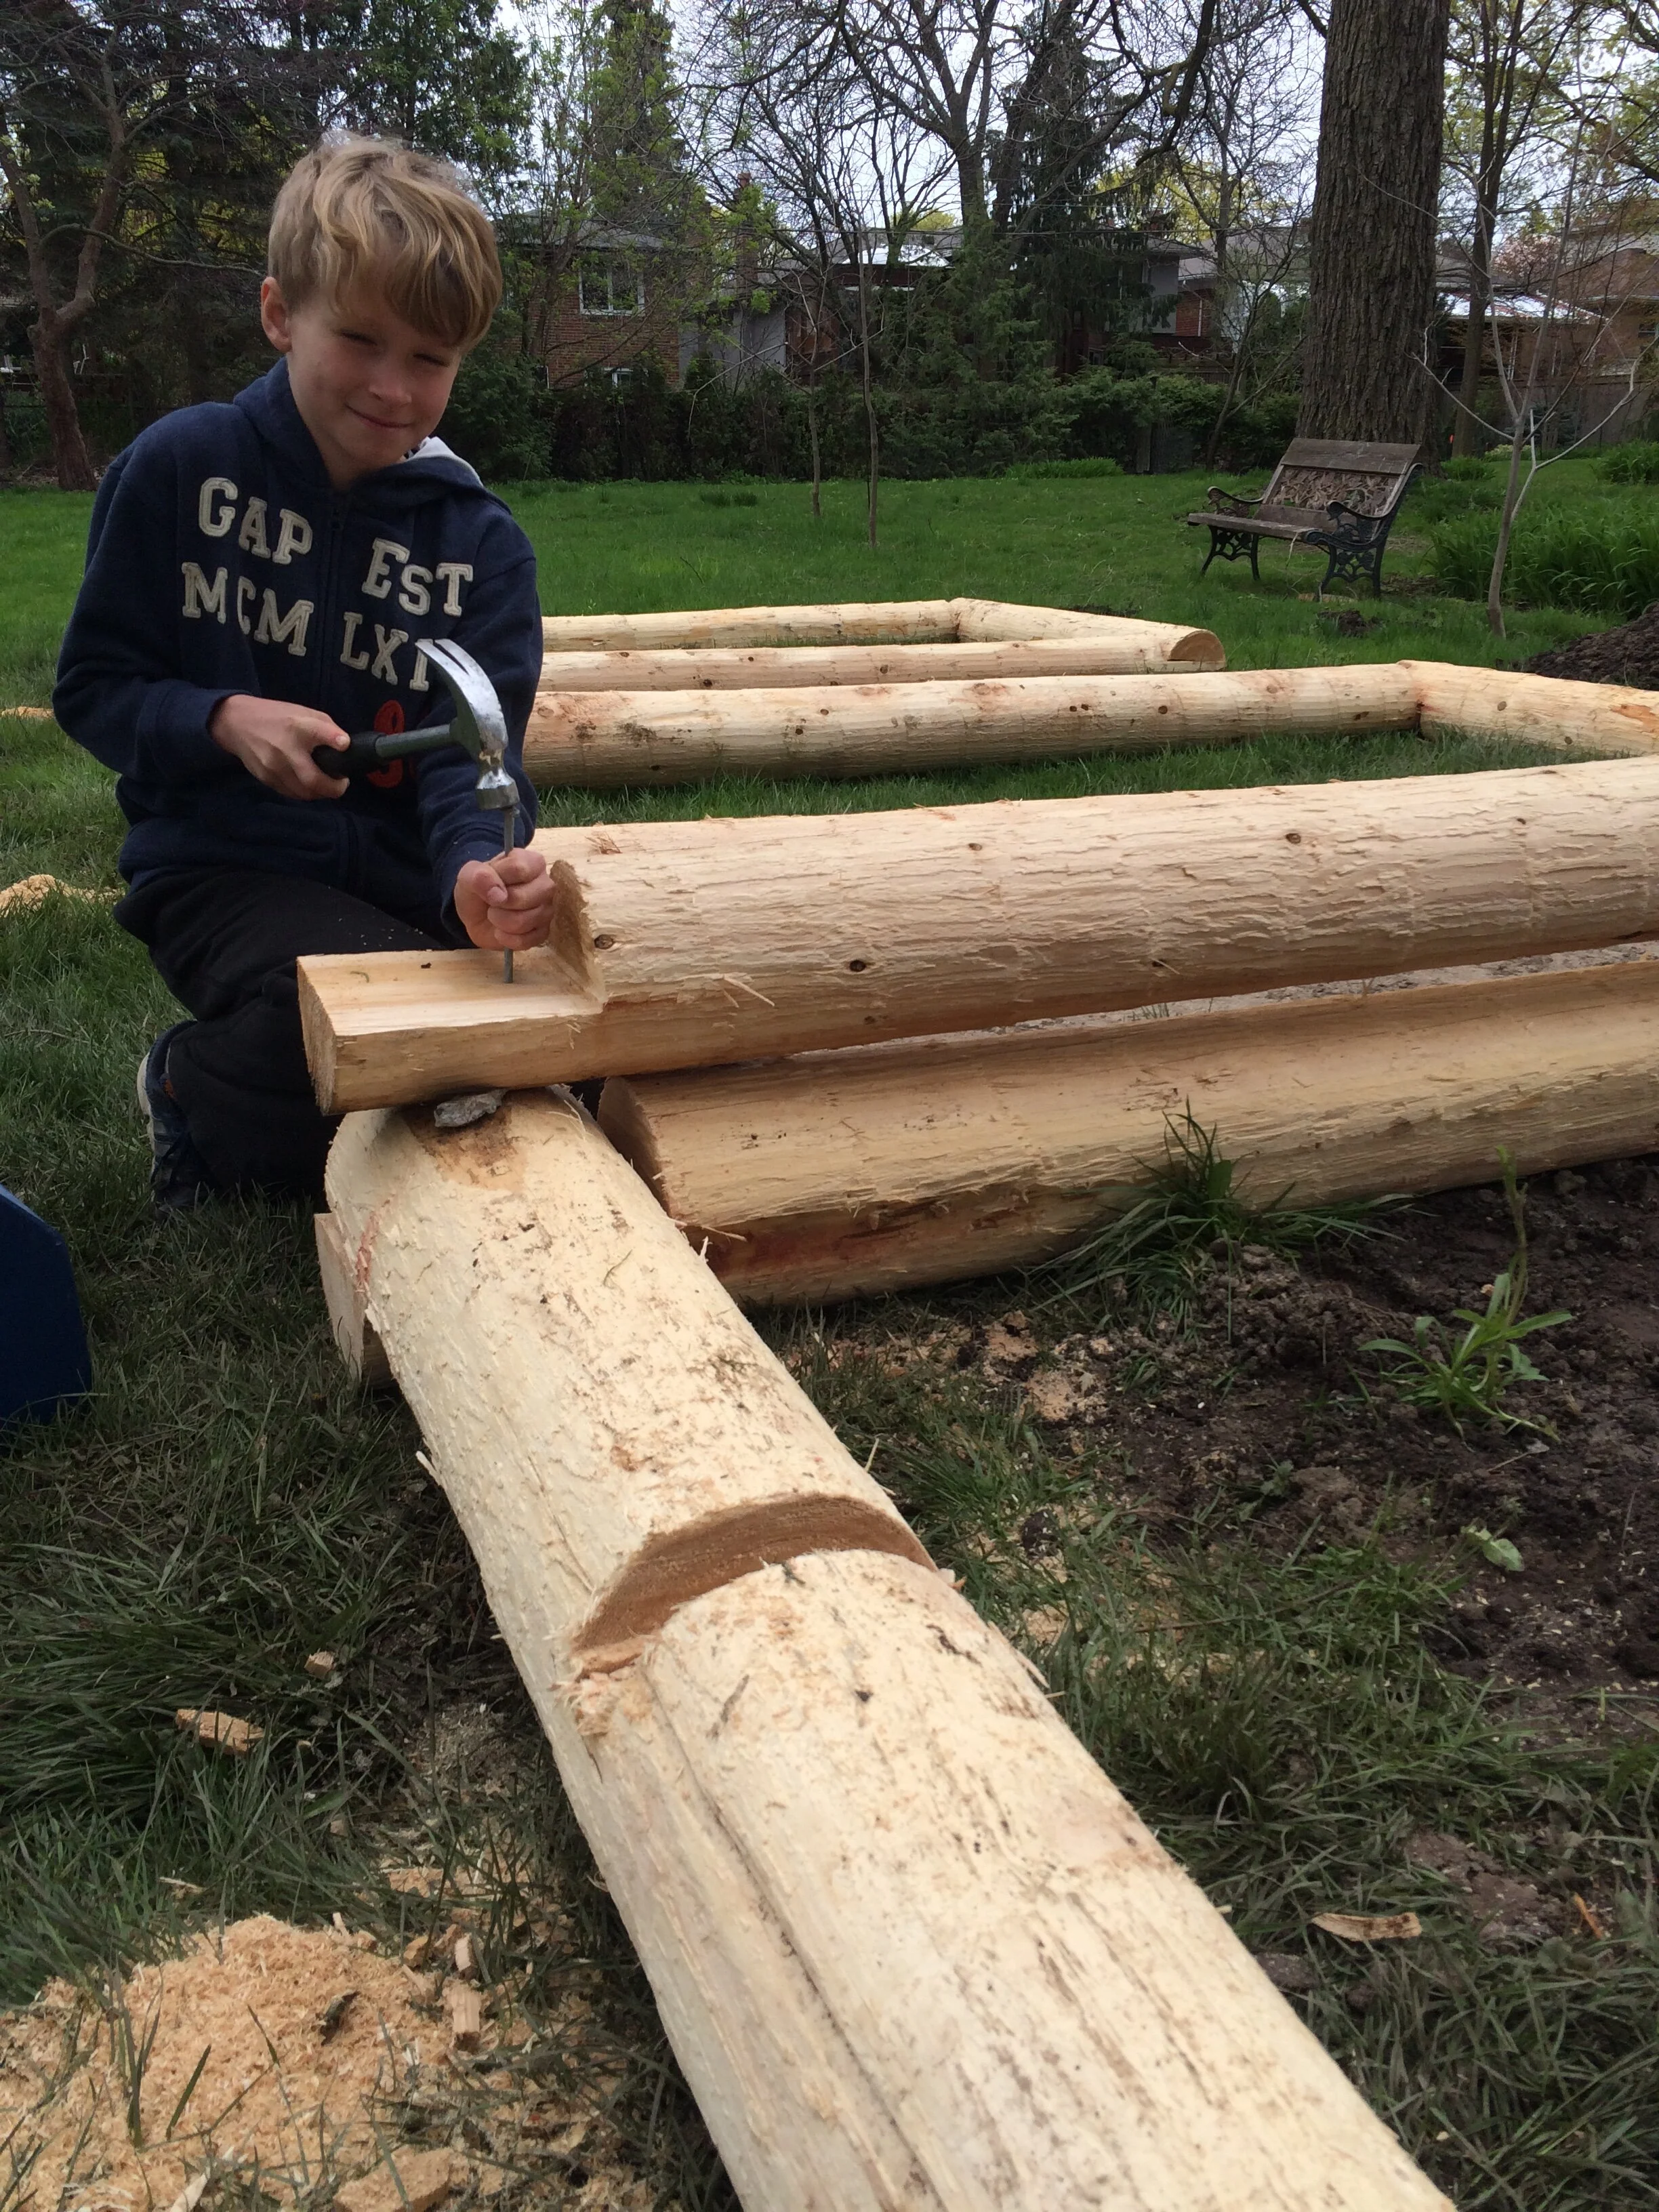
Be creative with the materials you choose. We decided to use cedar fence posts to make our wicking beds.
Below are photos of wicking beds that I made with my kids using cedar fence posts.
I chose cedar fence posts because they are long-lasting and not much more expensive than dimensional lumber.
Beds made with dimensional lumber often sag outwards over time...and I’m not interested in rebuilding my wicking beds any time soon.
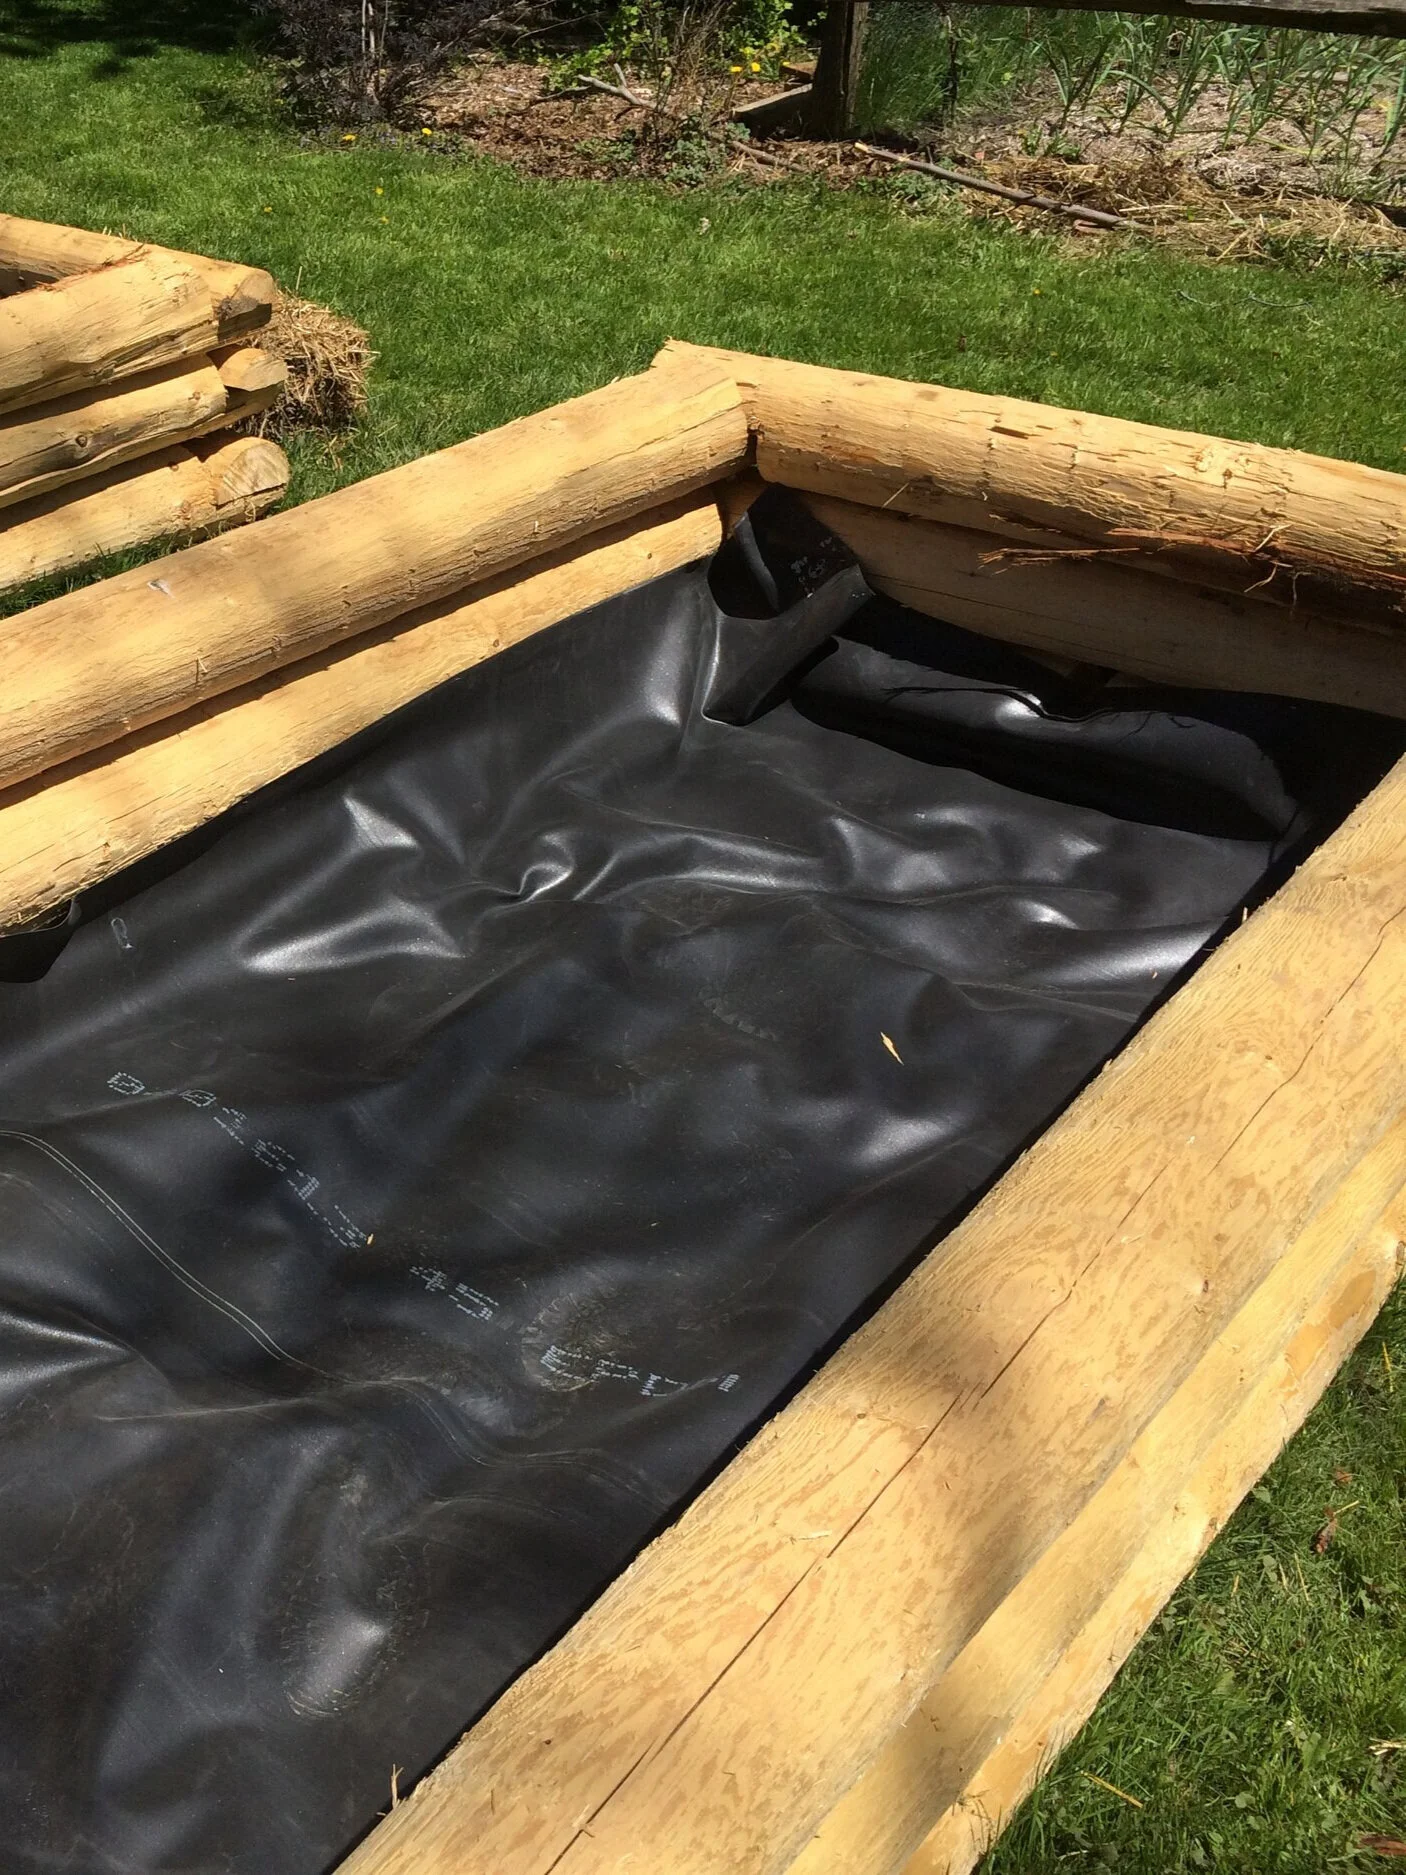
I chose pond liner to create the reservoir because I already had pond liner here.
Be Creative
Be creative! You might want to make a wicking bed from salvaged material—or maybe you want a bed that ties in with the aesthetic in your landscape.
On the practical side, I’ve see wicking beds made from large plastic bins and from recycled lumber.
On the ornamental side, I think red brick would look smashing! One day…
Materials List for My Wicking Bed
Cedar fence posts.
Pond liner. The pond liner holds water in the bottom of the bed. Once the sides of the liner are bent upwards and fixed into place, it creates a shallow water storage area at the bottom of the bed--about as high as the weeping tile.
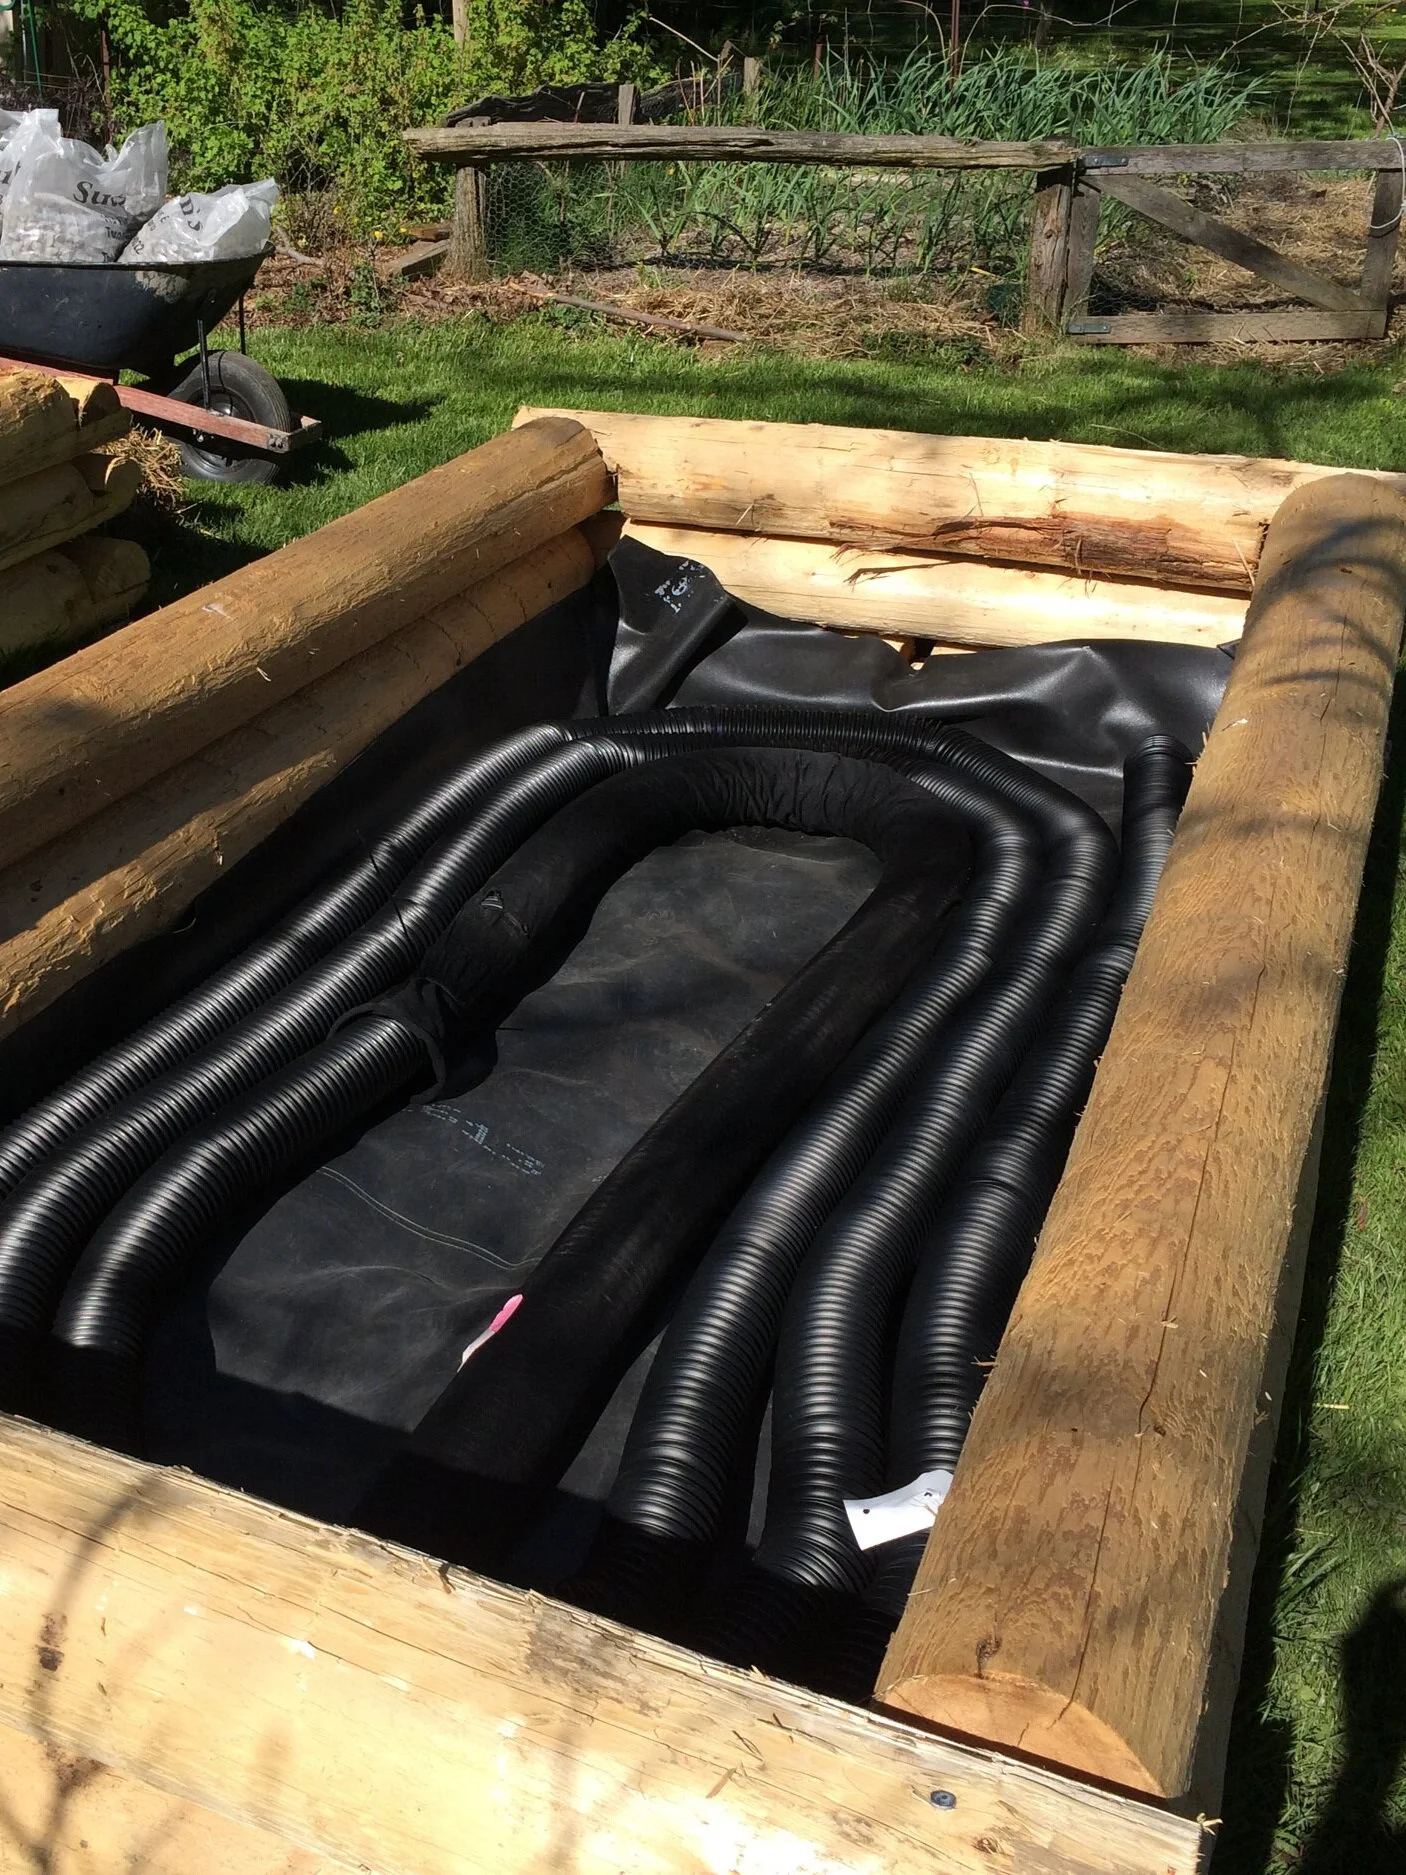
Weeping tile.
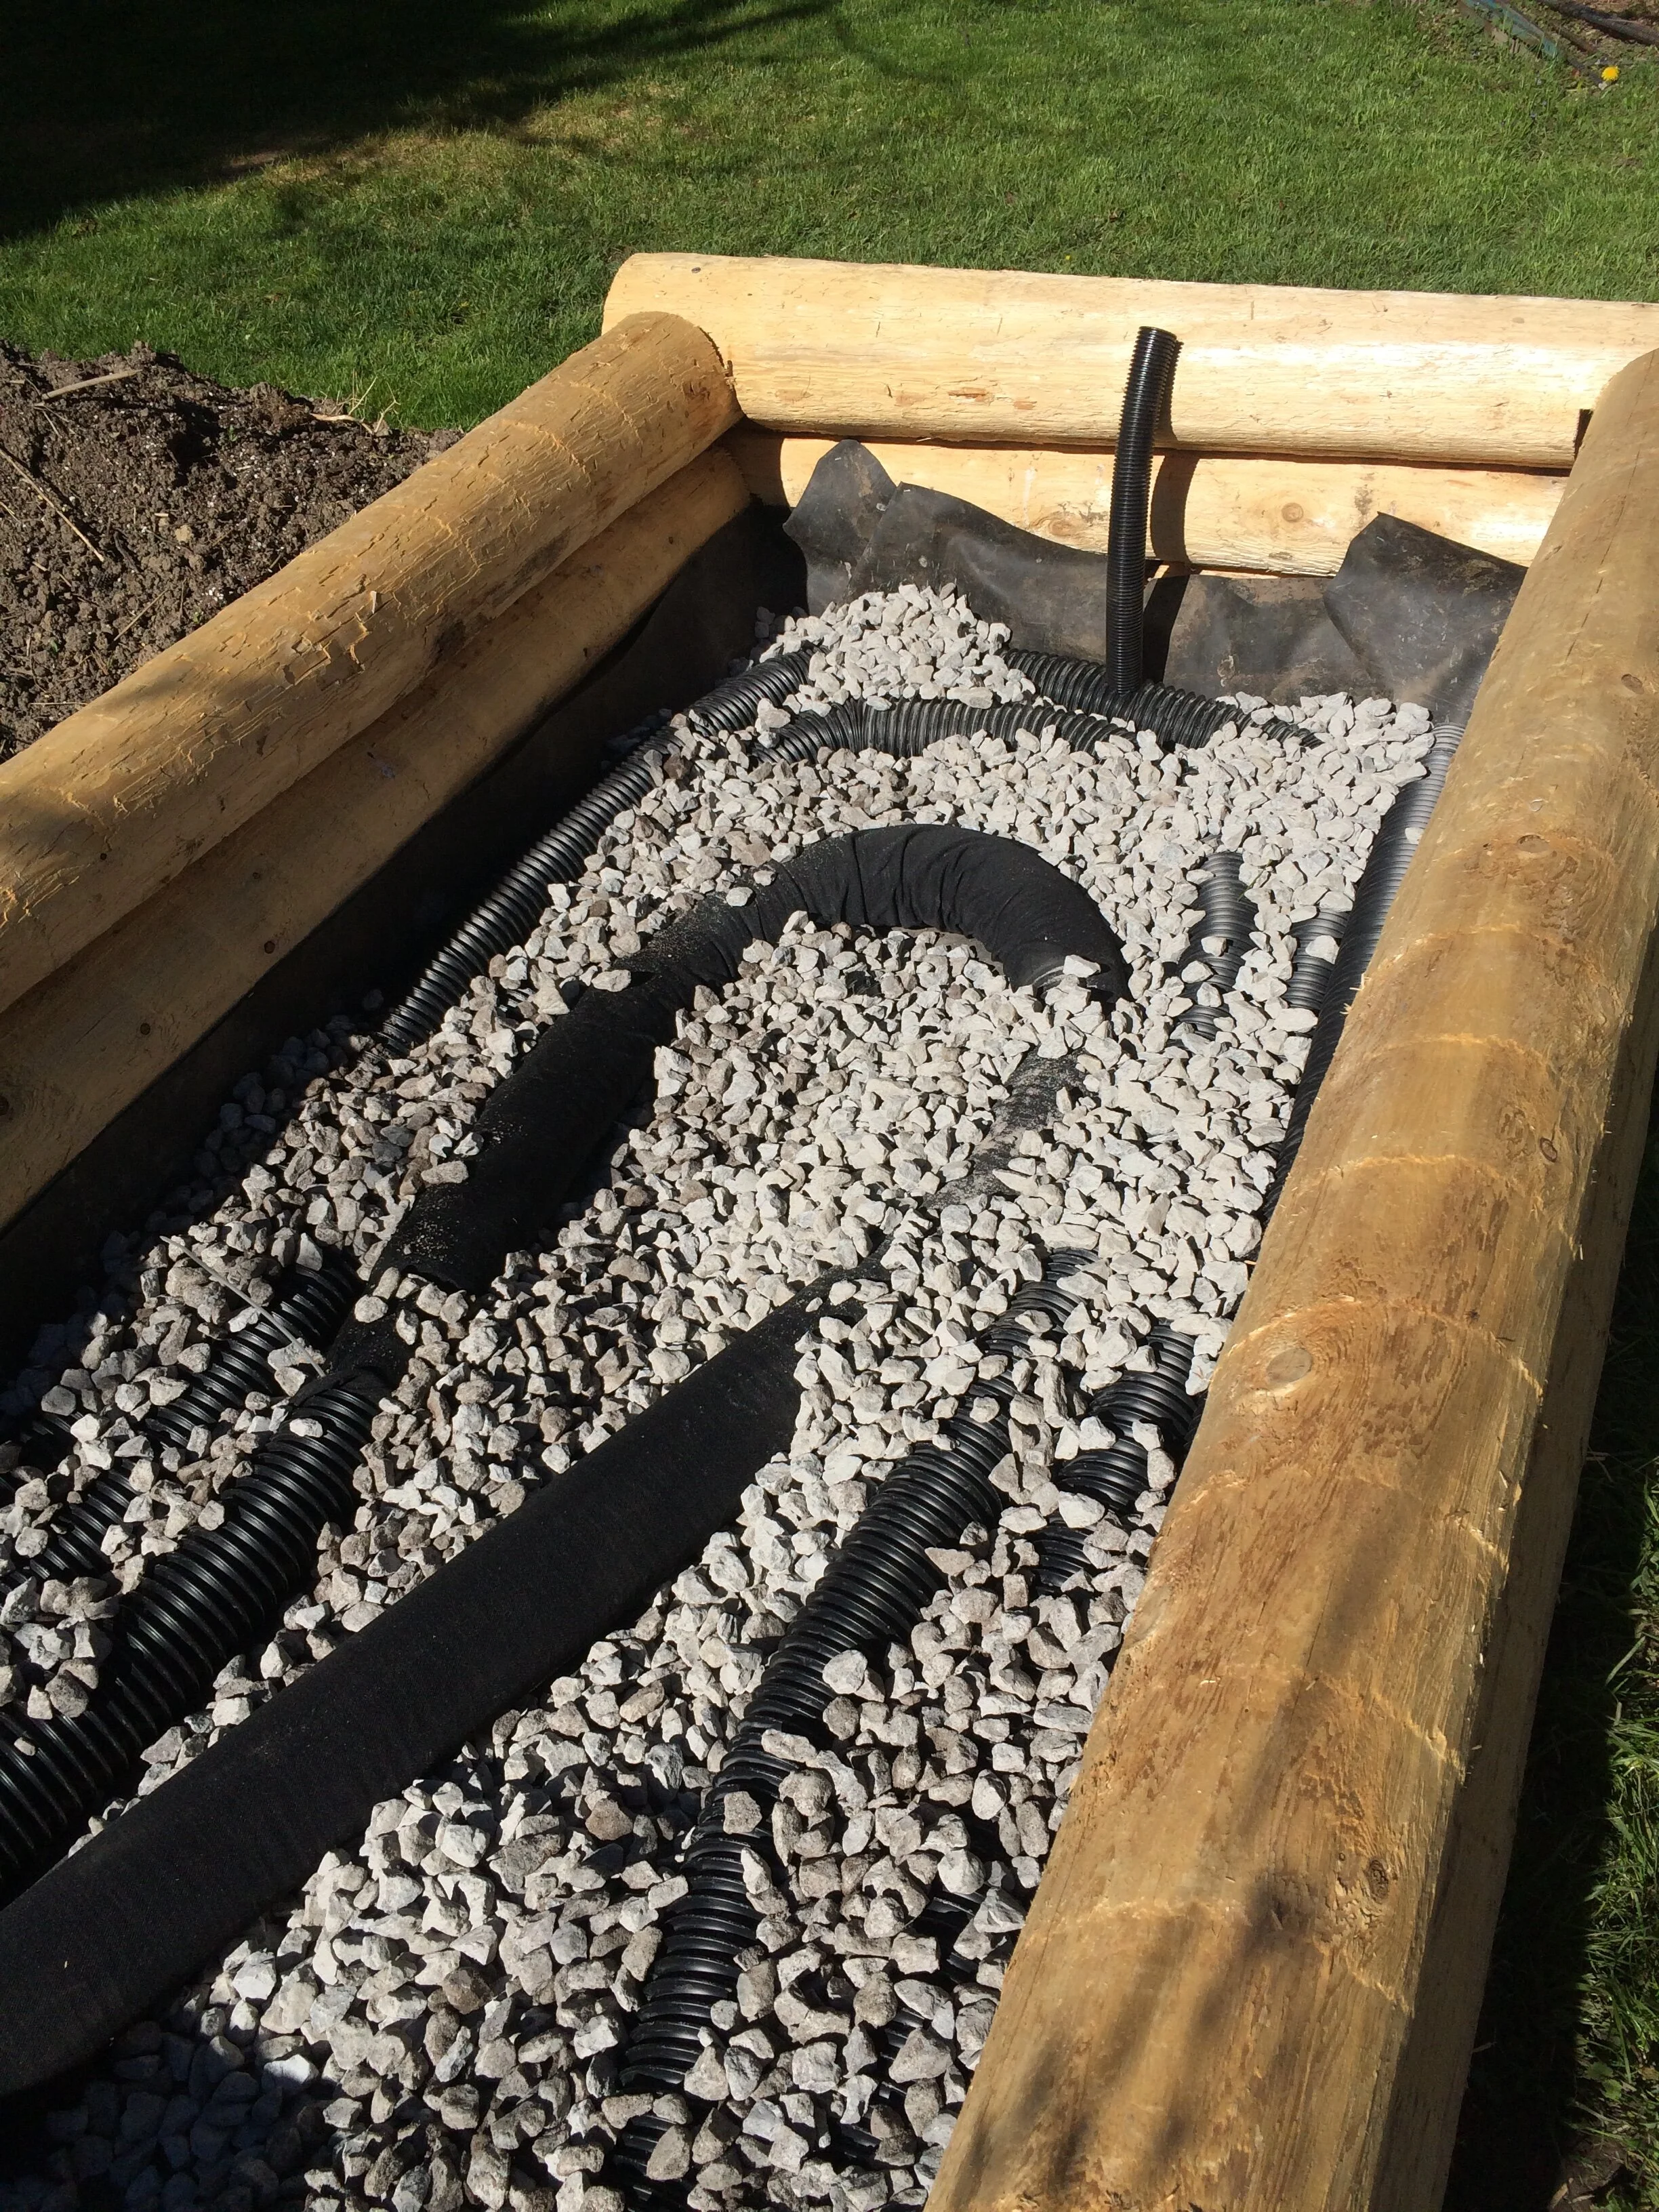
3/4” gravel. Use “clear” gravel, which means that it does not have smaller pieces of gravel that will fill up the spaces in between. That way the space is available to hold water.
Dishwasher drain tube. To create a fill tube.
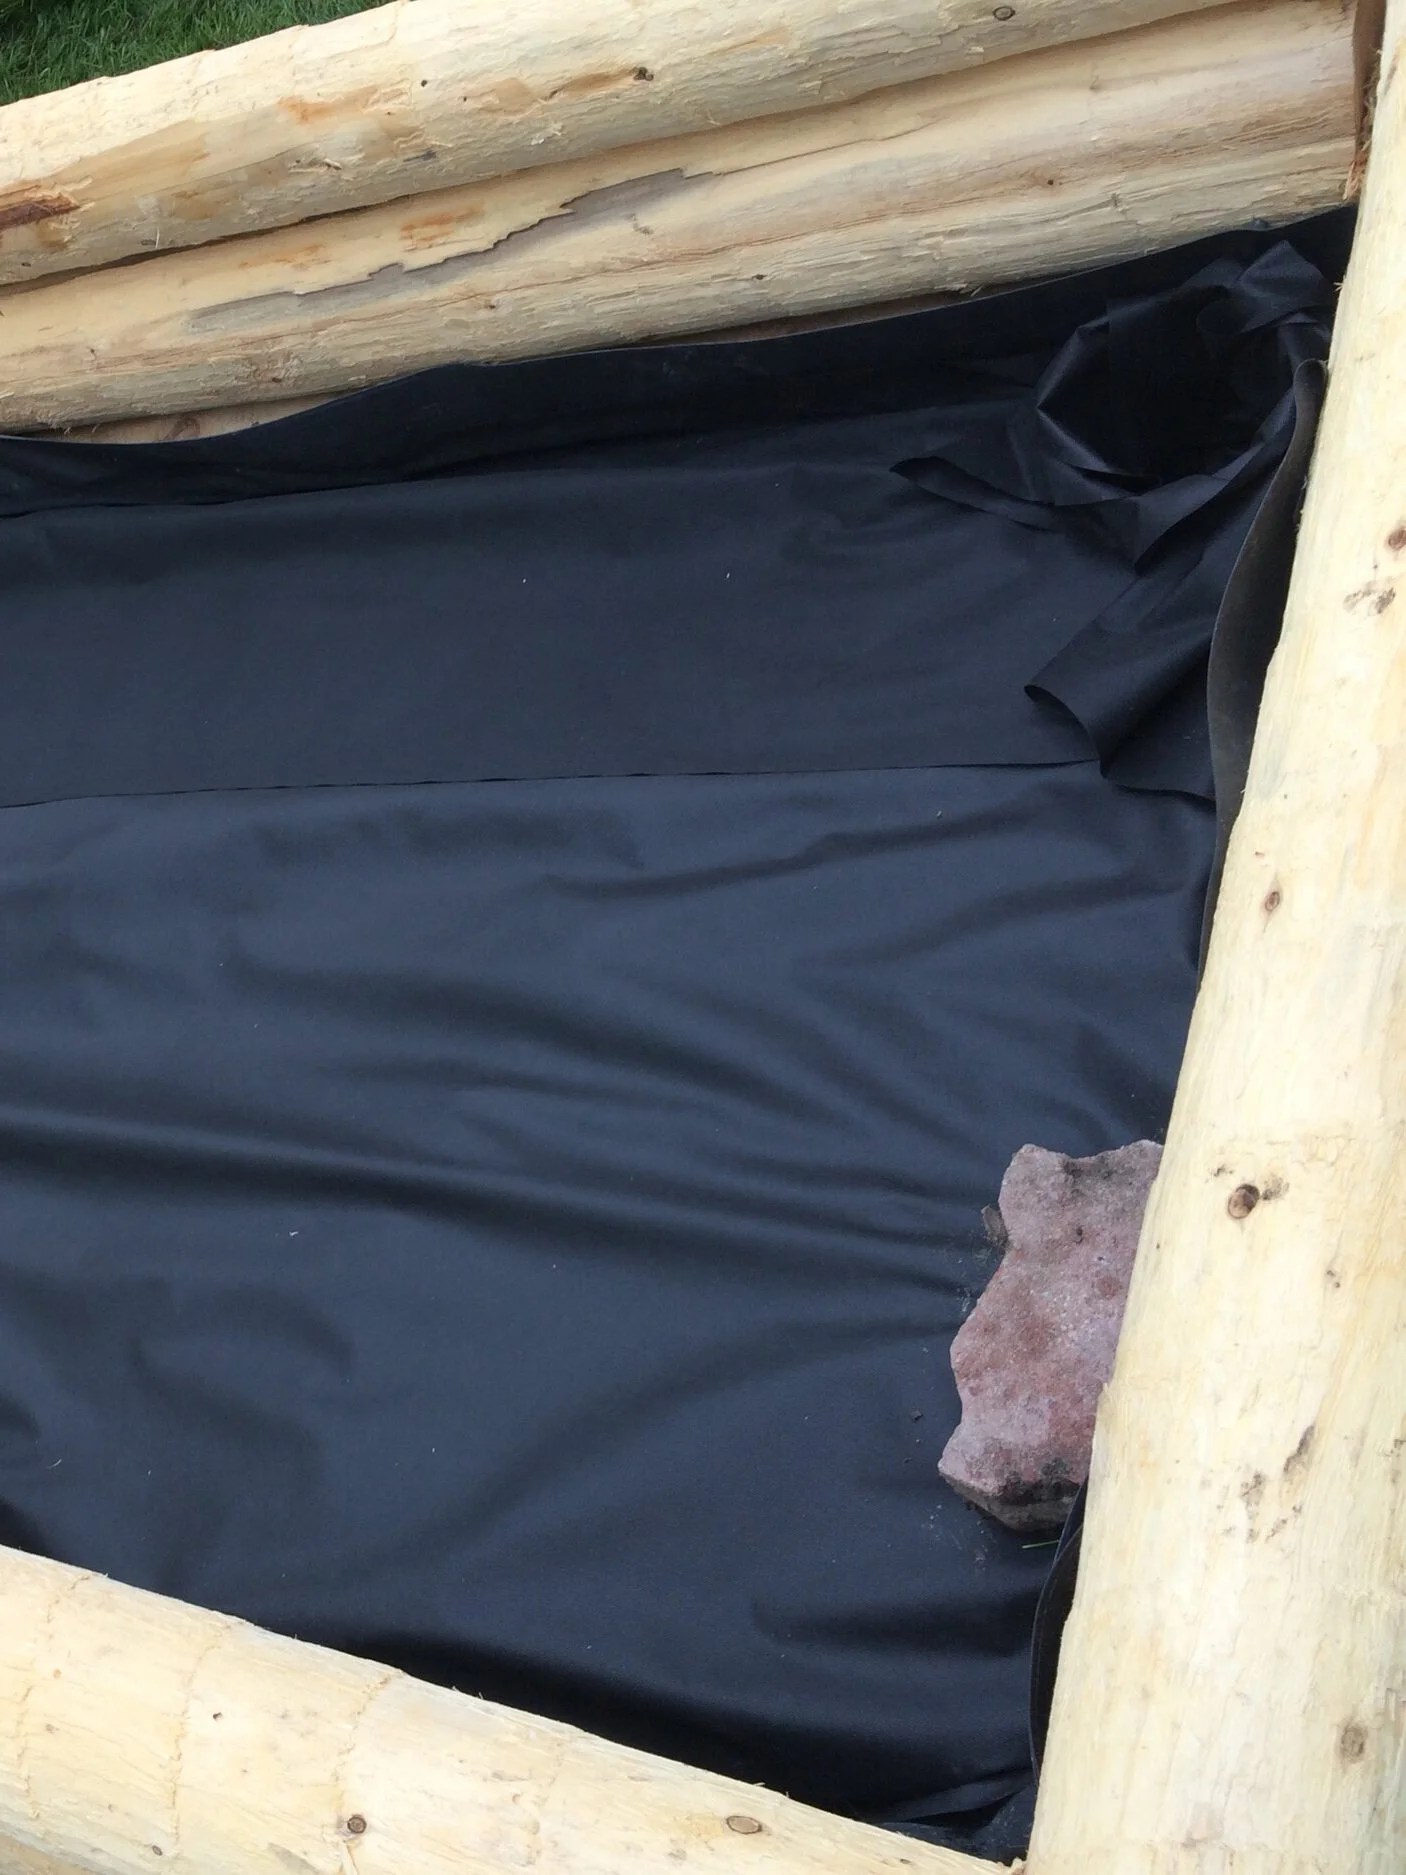
Landscape fabric. Its purpose is to keep the soil from filling up the piping and the spaces between gravel.
Steps for Making a Wicking Bed
Cut posts to length and notch the ends.
Place notched posts directly on the ground. Level the ground first.
Nail spikes into the corners of the posts to keep them in place.
Install liner at the bottom by placing it on the ground, and up about 8-10 inches at the side. Secure temporarily with staples, to keep it in place until the gravel pins it into place.
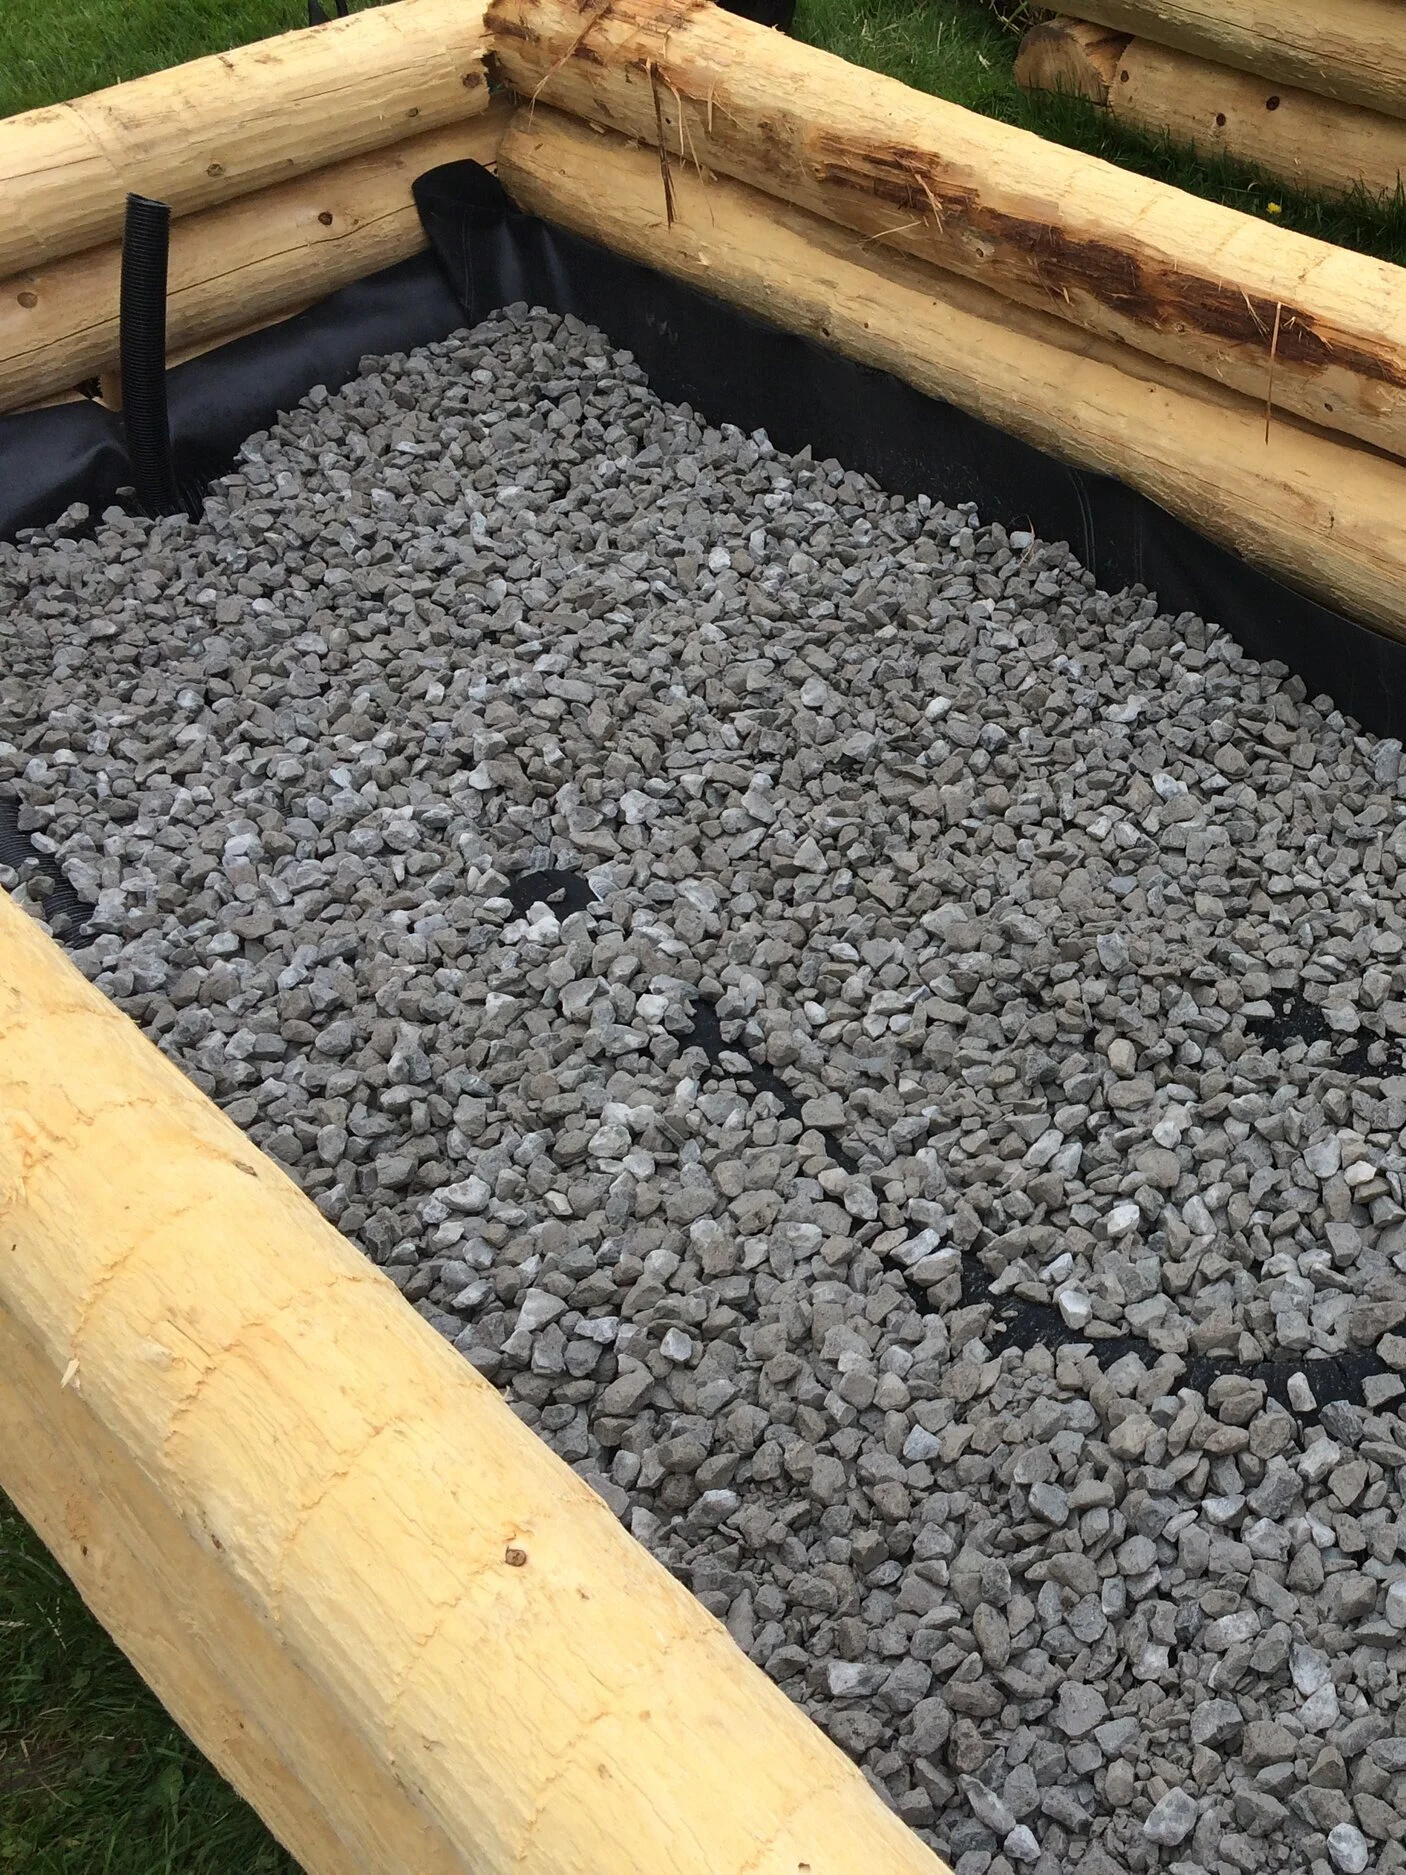
Place coils of weeping tile in the bottom. The tile permits water to quickly move through the reservoir, and it also holds up the soil above.
Add gravel. It supports the weight of the soil above, while the spaces between the pieces of gravel fill with water. Water moves upwards through the gravel by capillary action.
Note the fill tube at the far end, a piece of drain hose installed into the weeping tile. This permits filling of the reservoir with a hose after soil has been added.
Cover with landscape fabric to keep soil out of the reservoir area. Note the depressing in the top-right corner: While in theory water wicks up the gravel, I also created this soil-filled wick that dips into the reservoir.
Approximately one foot of soil works well. If there is too much soil, the water will not wick all the way to the top.
Watering my Wicking Beds
I know that there is enough water in the bed as I'm filling it because once the storage area is full of water, I see water coming out of the side of the bed. It's low-tech—but it works.
One More Reason for Wicking Beds
Soil contamination is another reason to consider growing in a wicking bed. Soil contamination can be a concern in areas where there is a history of industry, and also on former orchard lands where sprays with heavy metals might have been used.
Find out more about soil contamination and what to do about it.
Another Way to Add Growing Space in a Small Garden
Straw-bale gardening is a great way to grow on paved areas and areas with poor soil.
Find out more about straw-bale gardening.
More on Growing Vegetables
Articles and Interviews
Courses: Edible Gardening
Tomato Staking Guide: How to Support Tomato Plants
Support those tomato plants! This guide tells you how to stake, trellis, train, and cage tomatoes so you can fit in more plants and get a great harvest.
By Steven Biggs
Tomato Stakes, Cages, Trellises
Support tomato plants. Pick a method that suits your garden and your style of gardening.
Joe stakes his tomato plants.
I don’t.
My neighbour Joe’s backyard is all garden. Full-on tomato production. He fills it with row after row of tomato plants, neatly staked, pruned, and trained.
My garden is maxed out on tomatoes too. But my tomato patch looks entirely different from Joe’s.
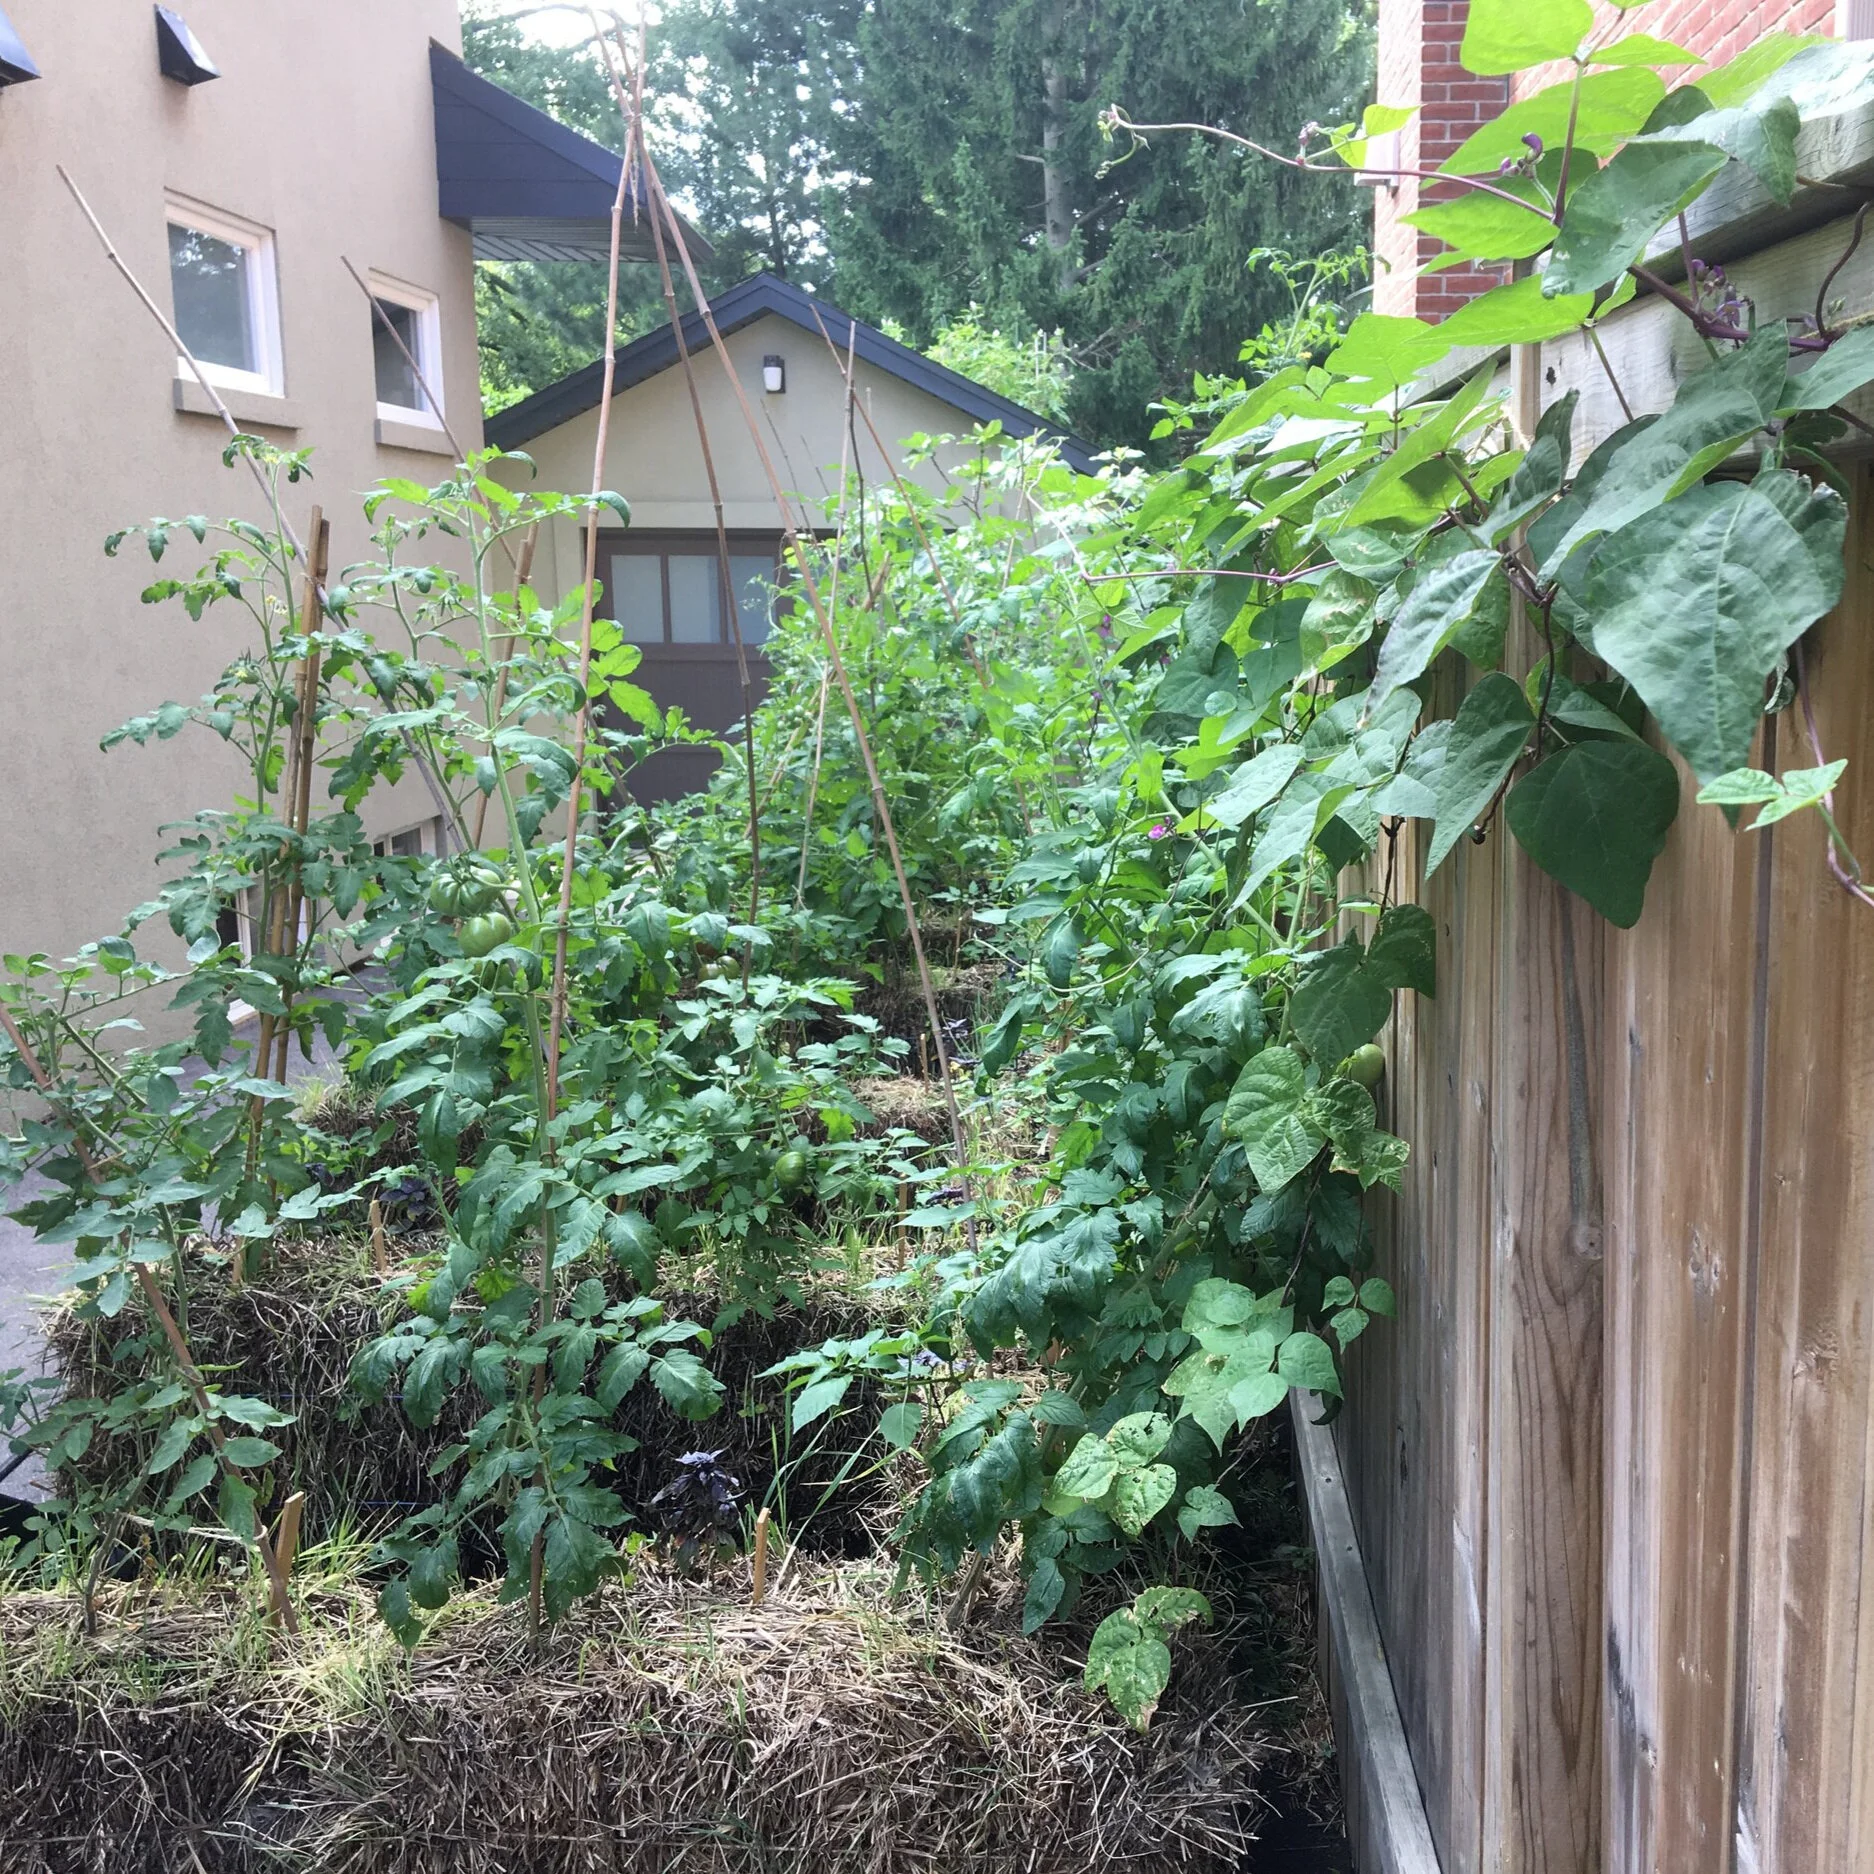
I grow some tomato plants in cages. The tomato plants on my driveway (where I can’t hammer in a stake) are supported by a trio of stakes in a teepee formation.
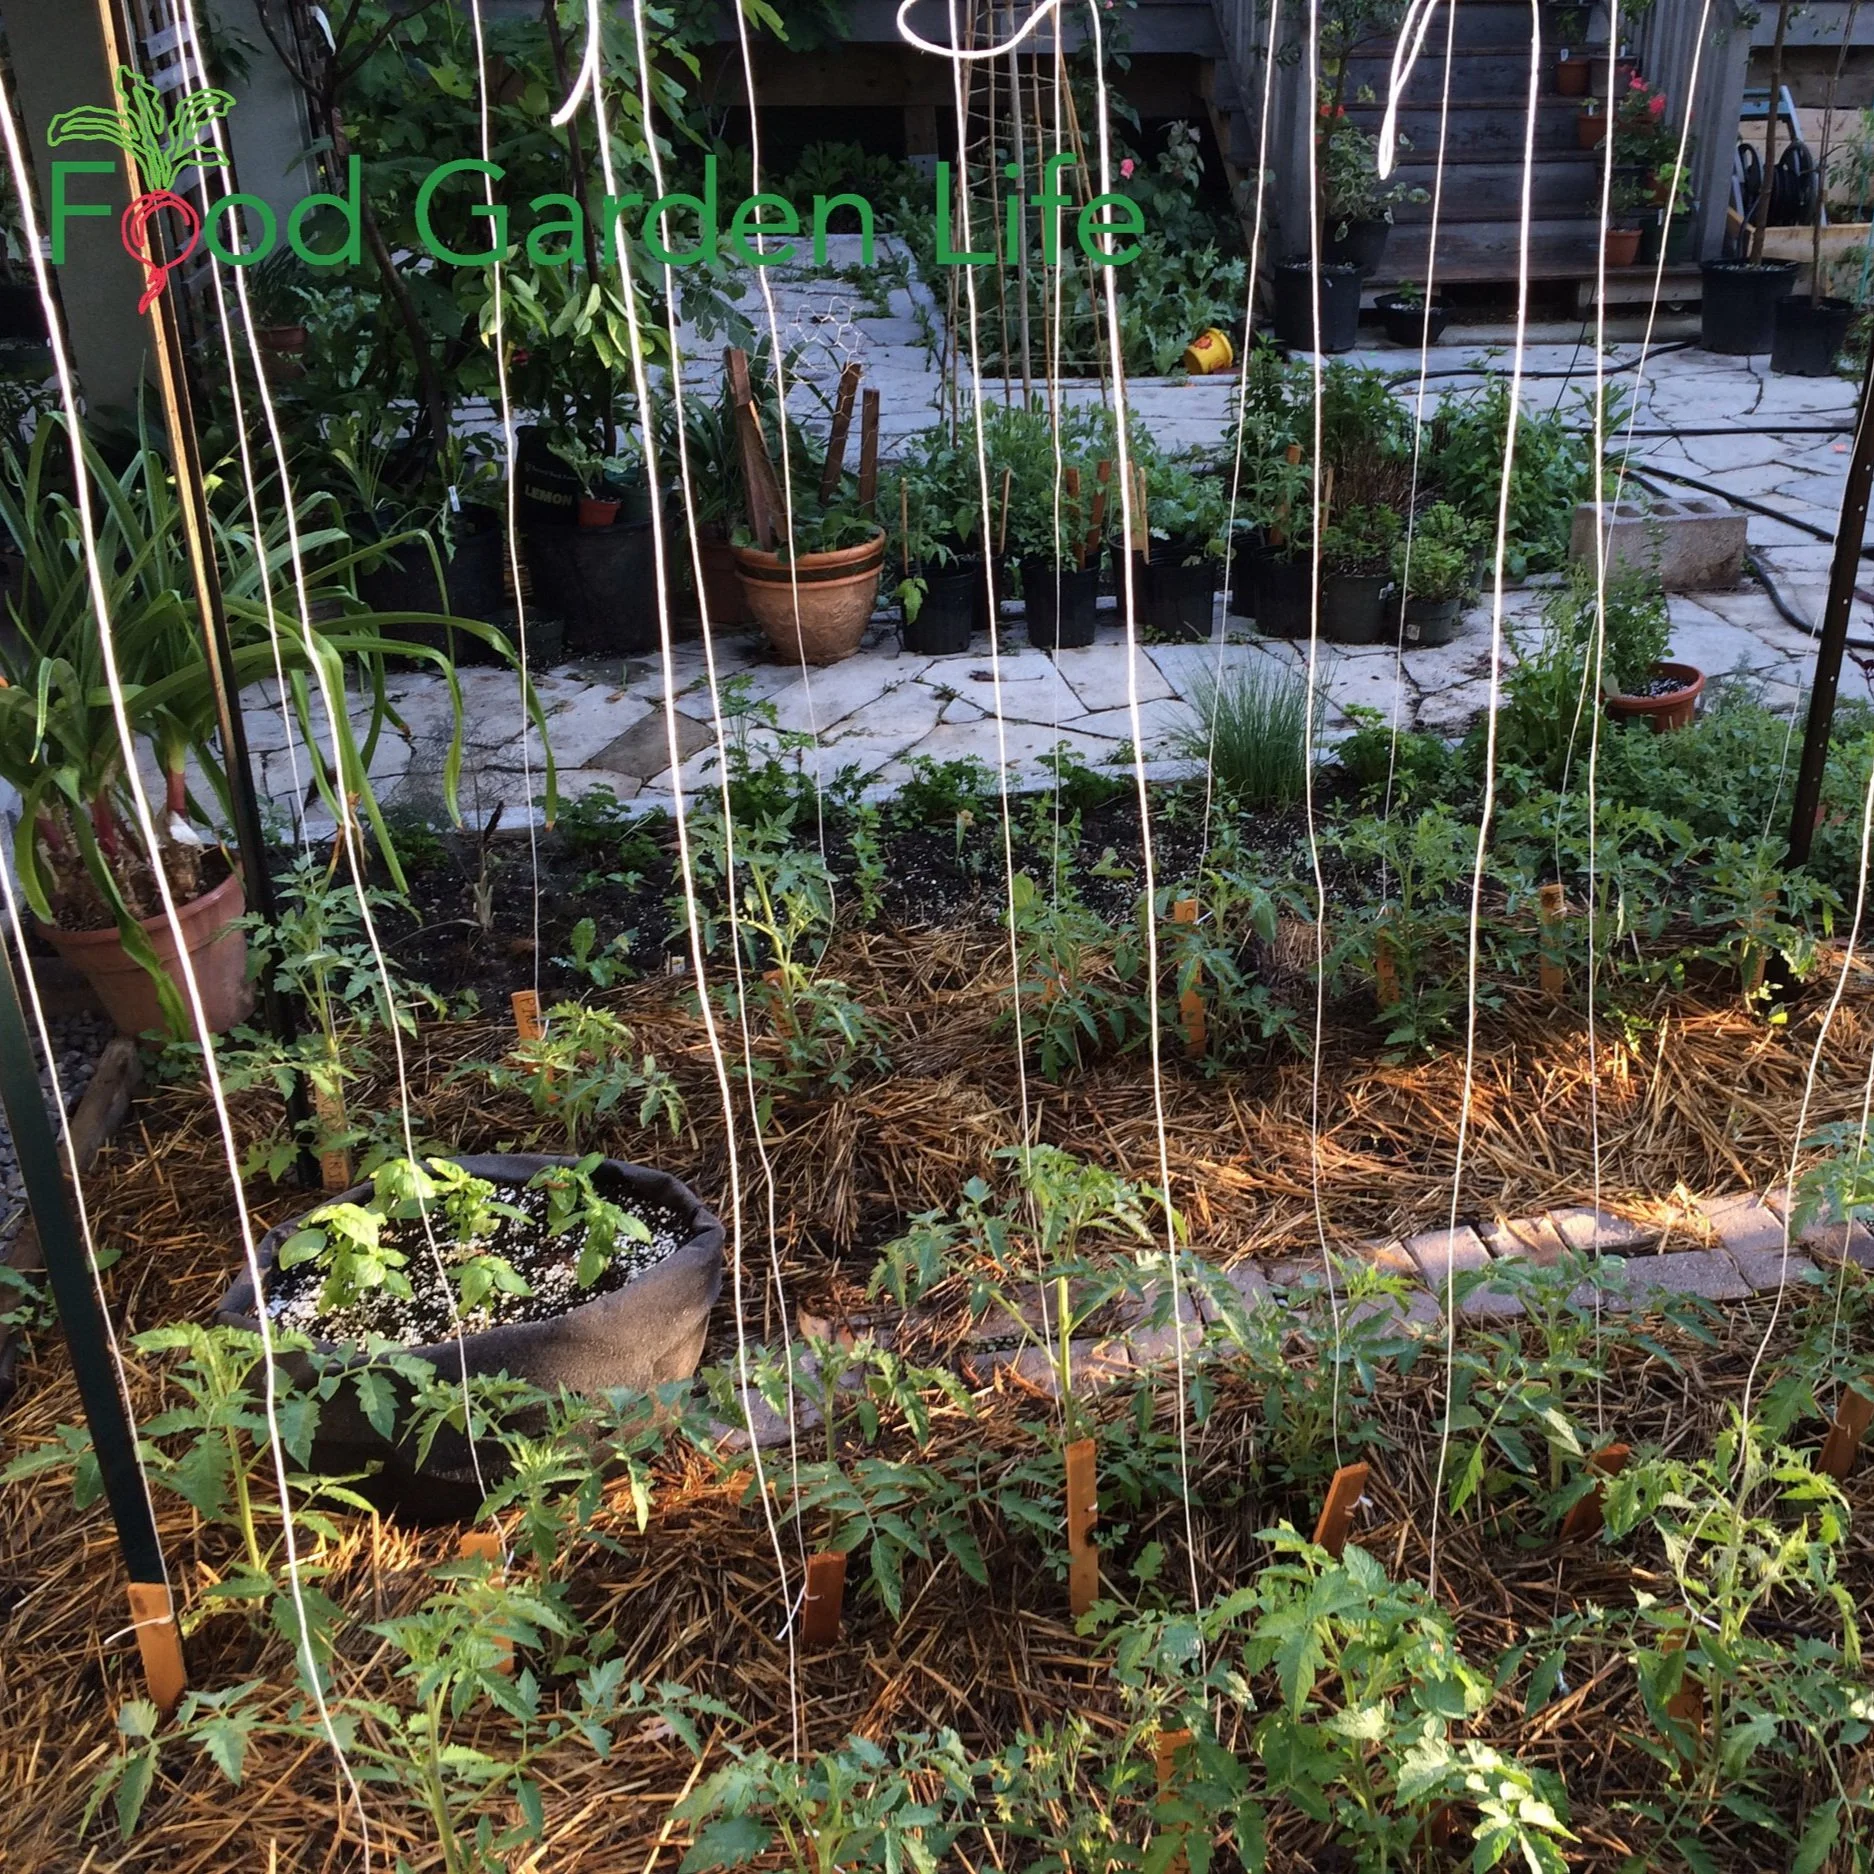
In another area, I grow tomatoes up twine.
Joe and I both grow our tomato plants in ways that suit our garden layout and approach to gardening.
This guide to staking and supporting tomato plants will help you pick a method that fits your garden.
To Stake or not to Stake
When tomato plants are staked or supported, the fruit isn’t touching the soil.
The easiest way to grow tomato plants is to simply let them sprawl on the ground.
This is how tomatoes are often grown on a field scale. Take a road trip to a tomato-growing region such as Leamington, Ontario, and you’ll see fields with tomato plants sprawling on the ground.
There are reasons for home gardeners to support tomato plants:
When tomato plants are staked or supported, the fruit isn’t touching the soil, meaning clean tomatoes, and less chance of rot and insect damage
Upright plants take up less space…so if you stake tomatoes, you can fit more plants into your garden
An upright tomato plant has more air circulation around the leaves—and that reduced the chance of disease
In my garden we have a high-density approach to growing tomatoes because my daughter grows over 100 varieties in our urban yard. We grow them much more densely than many gardeners, but it works well because we support and prune the plants.
Tomato Support Depends on Plant Type
The type of tomato plant you grow affects the need for staking and pruning.
“Dwarf” tomato plants are quite compact and usually don’t need any pruning or support. Great for container gardeners!
“Bush” tomato plants (also called “determinate” tomato plants) get to a certain height and then don’t get any taller. The harvest window is shorter. Great if you want a concentrated harvest for sauce-making or processing. Stake or cage determinate tomato plants to increase planting density and to keep tomatoes off the ground.
“Indeterminate” tomato plants keep getting taller and taller all summer long. Great if you want an ongoing harvest. This is the sort of tomato plant often grown in commercial tomato greenhouses. Prune and support indeterminate tomato plants to optimize production—and know that they can get very tall by the end of the summer.
Tomato Staking and Support Ideas
There are lots of ways you can stake and support tomato plants. Pick one that suits your garden and the amount of time you want to spend tending your tomato crop.
Here are ideas for supporting your tomato plants:
Staked tomato plants with wooden tomato stakes.
Tomato Stakes
Tie your tomato plant to a stake. A lot of gardeners keep one main stem, pinching off side shoots (called suckers). See ideas for tomato stakes below.
Tomato Cages
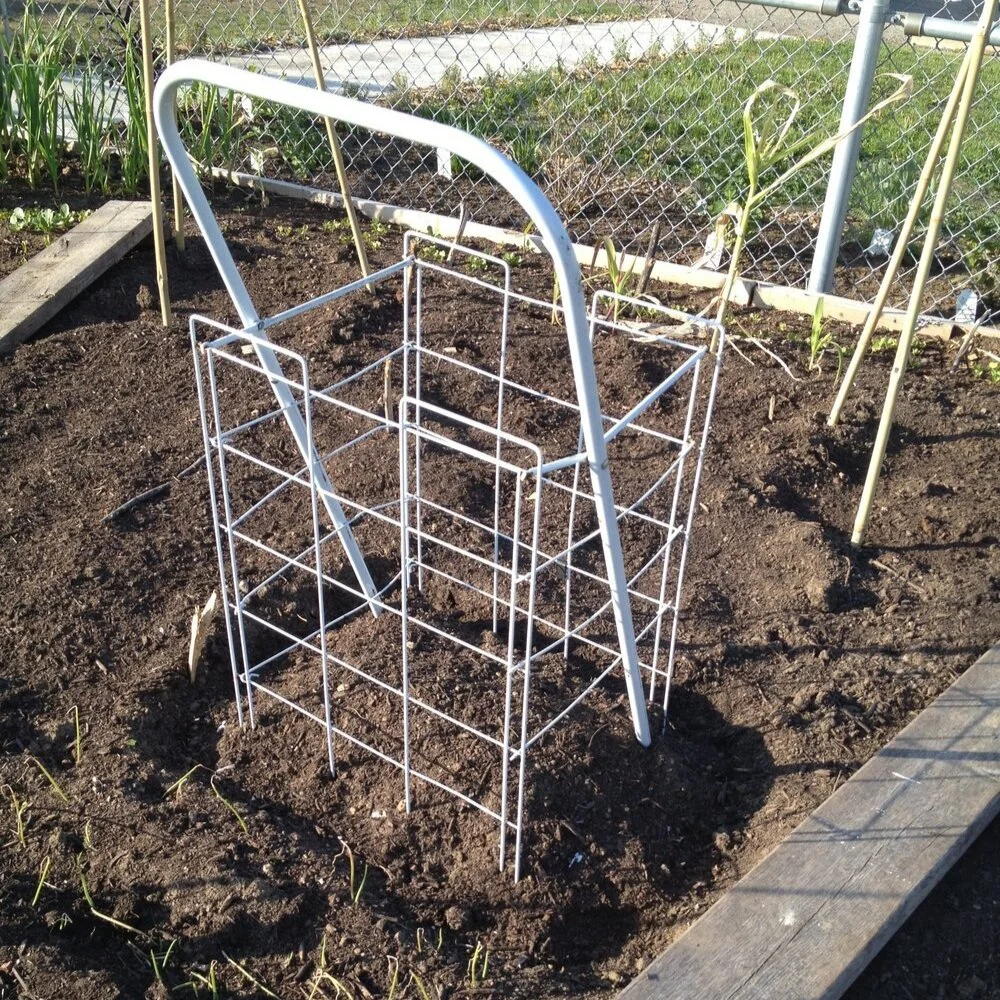
Grow the tomato inside a supportive cage-like frame. Plants in cages can be wider—so having more than one main stem is common. See below for a tip on making your own tomato cages.
Grow Tomato Plants up Twine
Visit a commercial tomato greenhouse and you’re likely to see tomato plants growing up a piece of twine suspended from above.
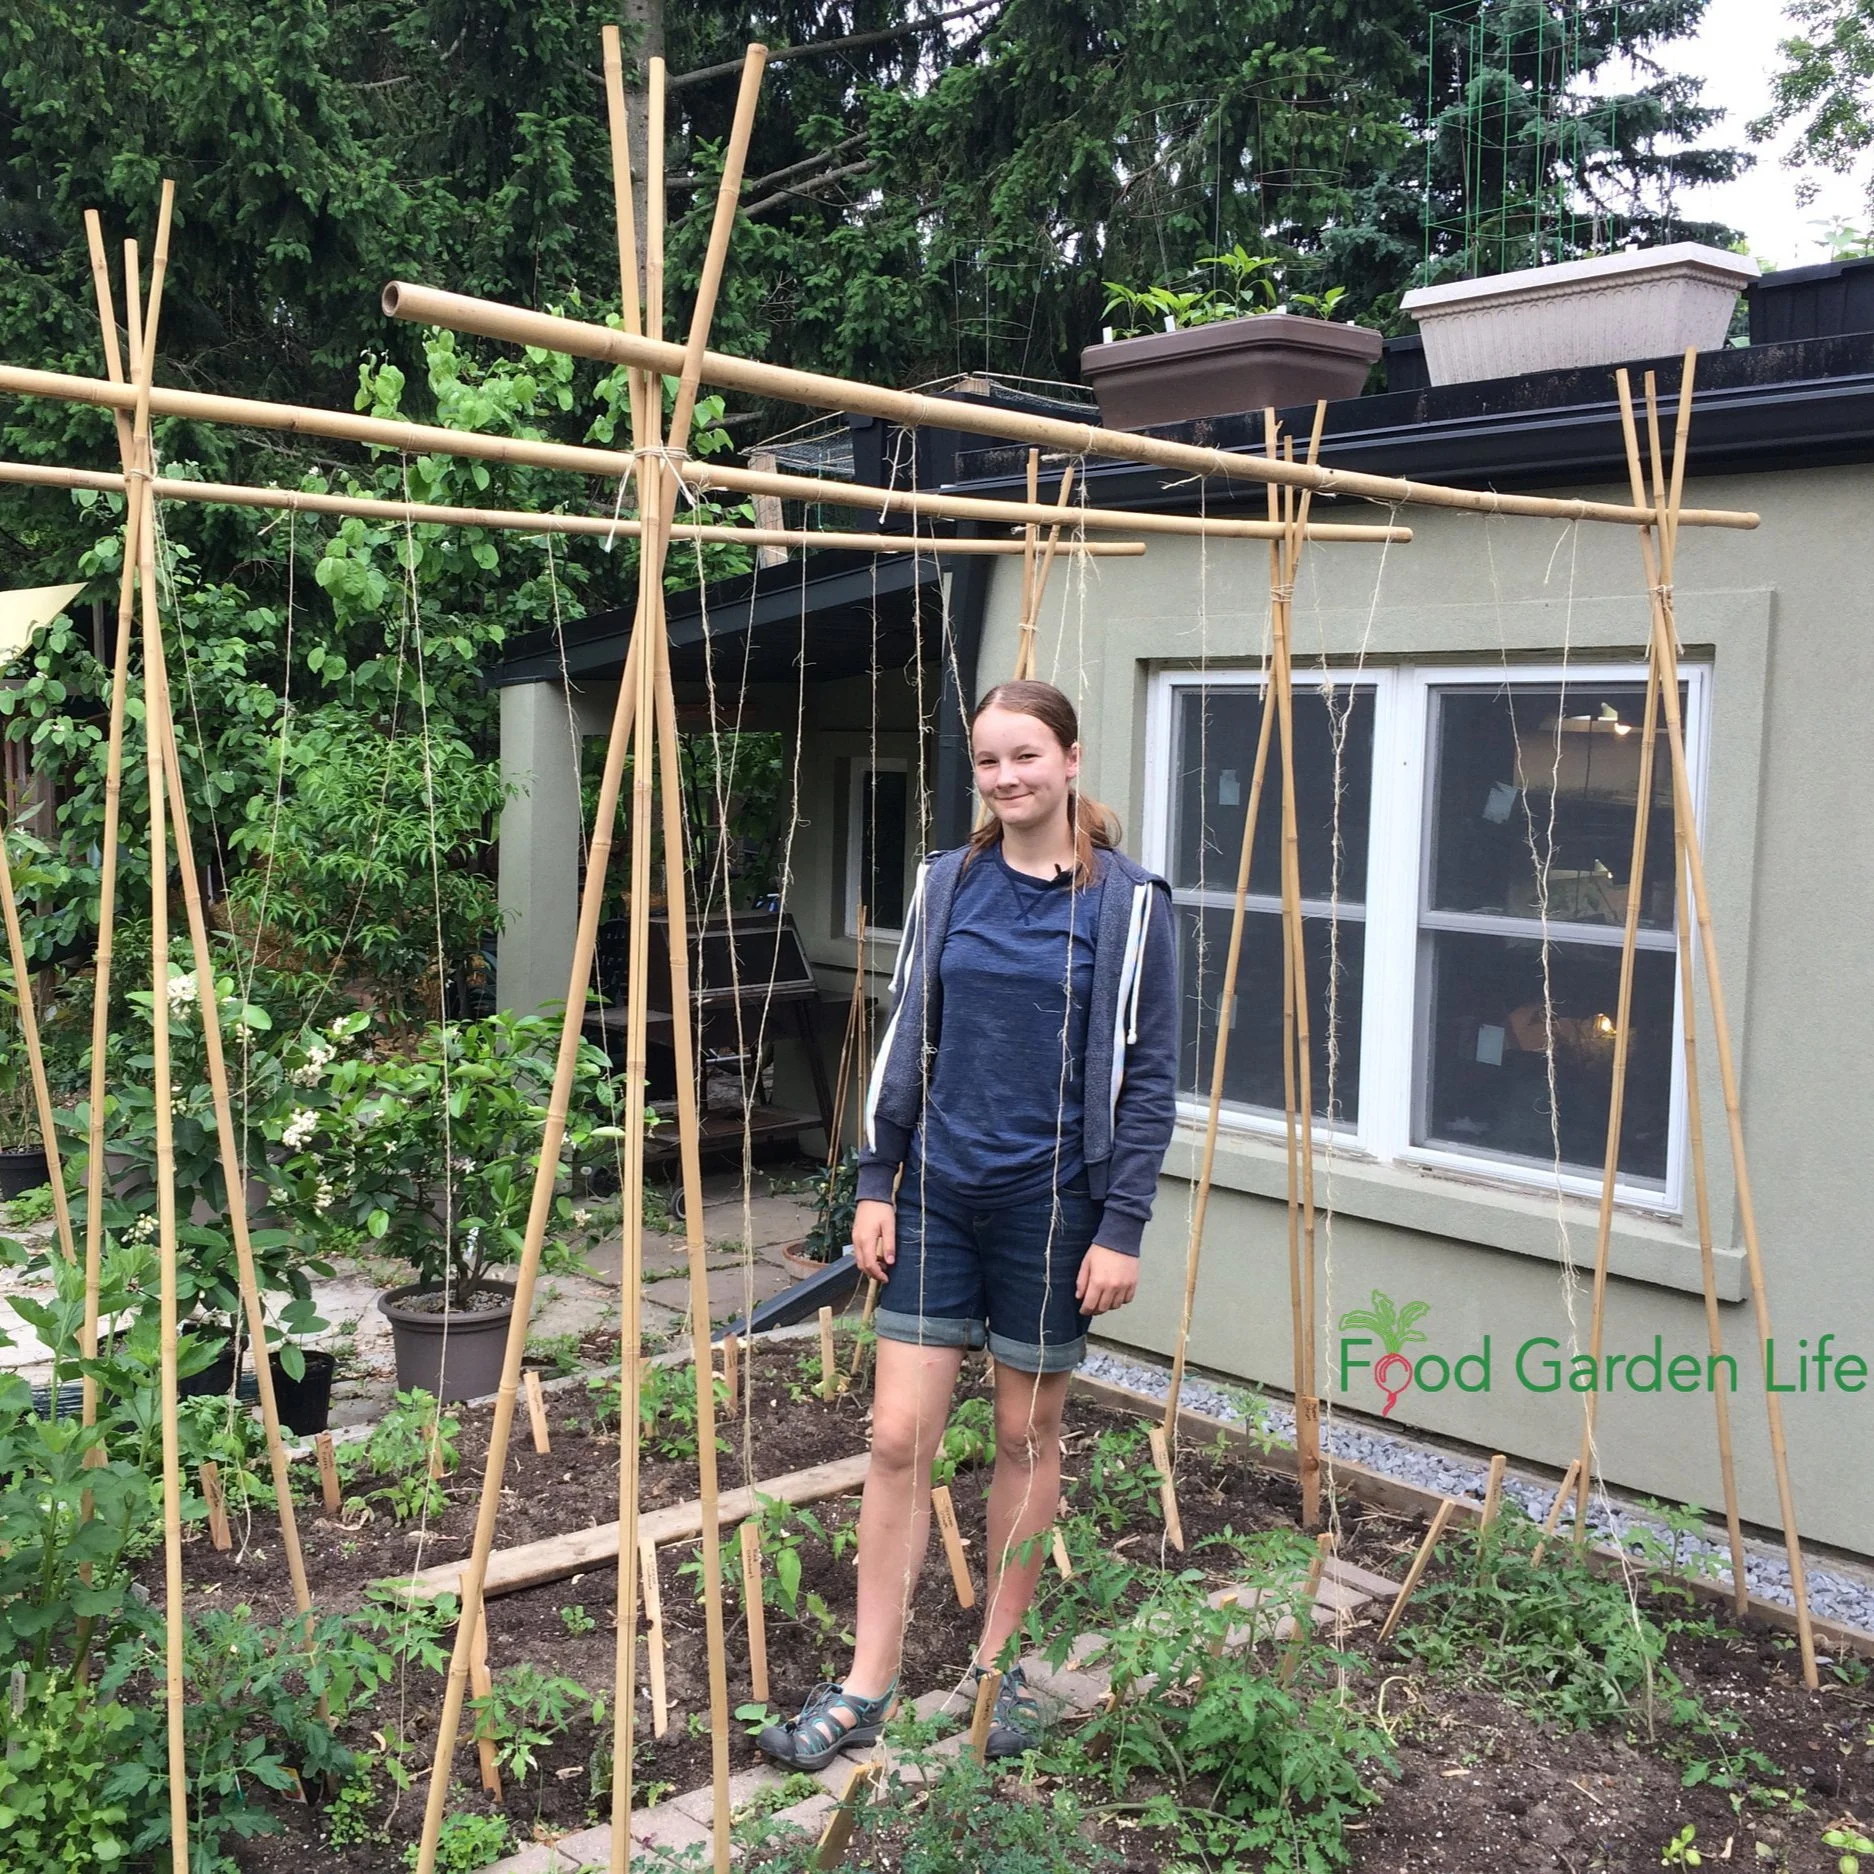
We use a variation of this twine method in our garden, where we make tall A-frames with bamboo, and run a horizontal pole between them—six feet up in the air. Then we dangle pieces of twine from the horizontal pole, and train our tomato plants up the twine. This way we can space our tomatoes very closely together so that we can fit more tomato varieties into the garden.
We make tall A-frames with bamboo, and run a horizontal pole between them.
Then we dangle pieces of twine from the horizontal pole, and train our tomato plants up the twine.
Florida Weave for Tomatoes
The “Florida Weave,” where twine supported by two end stakes is woven around the tomato plants for support.
In this method of supporting tomato plants, we weave the tomato stems between horizontal rows of twine. Start by putting stakes at both ends of your tomato row. As plants get taller, keep adding rows of twine, and weave the stems between them.
Grow a Tomato Arch
If you have an archway in your garden, use it for tomato plants.
Indeterminate tomato varieties get taller, and taller, and taller. As they reach the top of the arch, you can train them down the other side.
Tomato-Staking Tip
Don’t get hung up on supporting tomatoes the “right way.”
There are many ways to do it—and you just need to pick one that suits the way you want to garden and the type of tomato plants you’re growing.
Make Your Own Tomato Cages
Make a tomato arch with cattle panel wire.
A lot of the so-called tomato cages sold at garden centres are just too small to be useful. And if you find larger cages, they can cost you an arm and a leg.
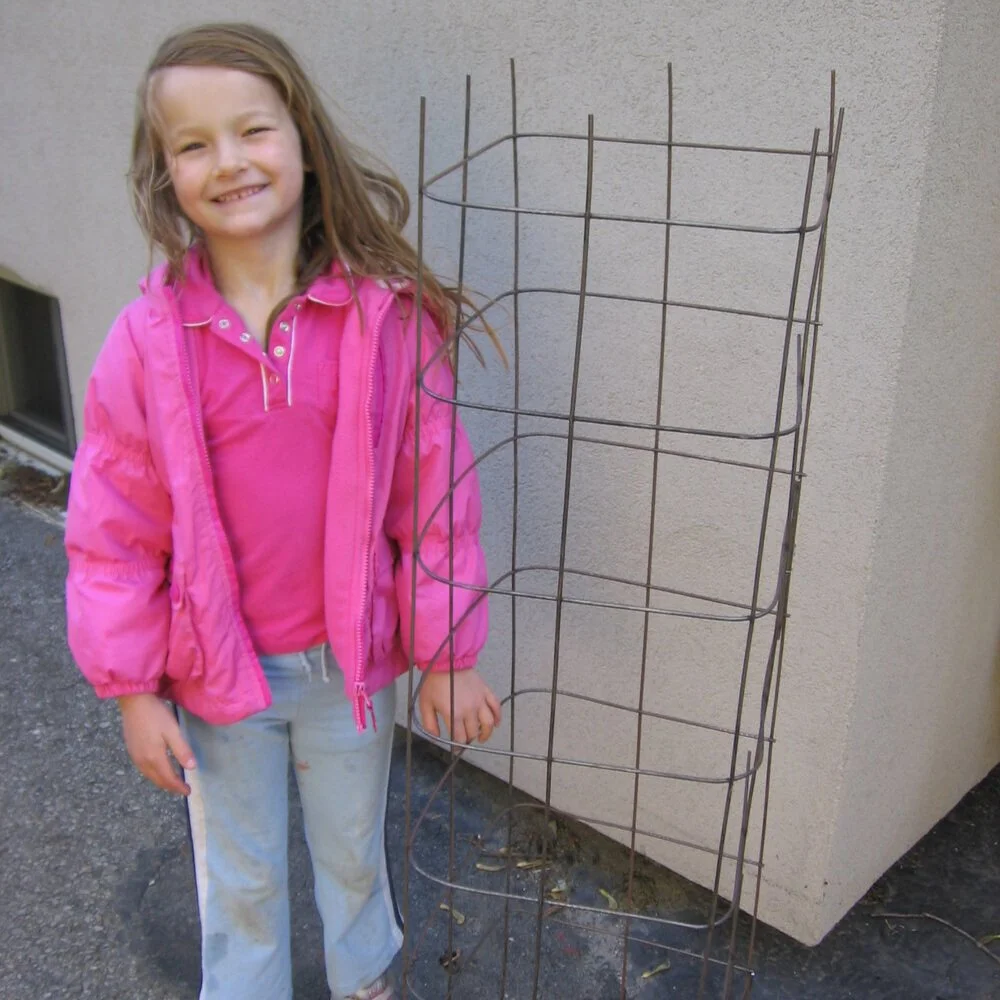
We make our own tomato cages from the sheets of wire mesh used to reinforce concrete.
Cut the 4’ x 8’ sheet into two 4’ x 4’ sections (bolt cutters work well)
Then, bend the mesh into a cage
The bending takes effort as this is a strong material (I find that it works best if I place a board over the line I want to bend along, and then stand on the board as I bend the wire upwards)
These homemade tomato cages are long-lasting. Our oldest ones are over 15 years old and going strong.
If you’re creative, you might come up with other materials to make your own tomato cages. I’ve seen old bundle buggies used!
Be creative! A bundle buggy as a tomato cage.
My daughter Emma and I made our own tomato cages by cutting and bending wire mesh.
Tomato Stake Ideas
Bamboo stakes are an option for staking—but be sure to get large enough stakes as smaller ones might be too flimsy.
I’m not a fan of the flimsy plastic-coated stakes sold at garden centres.
There are lots of other things you can use to stake tomato plants. Here are ideas:
Iron rebar
Iron t-bars
Lumber (1x2 and 2x2 stakes are common)
Bamboo
Metal pipe
Bamboo and wood rot over time. But they widely available and relatively inexpensive.
My favourite Tomato Stake
My favourite tomato stake is iron rebar. Here’s why:
It’s long lasting
It’s thin, making it easier to push into the ground by hand (iron t-bars last a long time too…but need hammering into the ground)
As it oxidizes, it becomes brown and blends into the surroundings (compared to the hideous brightly coloured stakes I sometimes see for sale)
Create Your Own Unique Edible Landscape
That fits for your yard, and your style!
Best Twine for Training Tomato Plants
If you opt to grow tomato plants up twine, keep in mind that by the end of the season, a tomato-laden plant weighs a lot. We’ve used natural-fibre twines such as just and sisal some years—but they aren’t always up to the task for the whole season.
If you can find it, get a tomato twine. Such a thing exists; it’s what’s used in commercial tomato greenhouse operations.
How to Stake Tomato Plants in Straw-Bale Gardens
The tomatoes in this driveway straw-bale garden are supported with bamboo tripods.
If the concept of straw-bale gardening is new to you, read this article.
Straw bales break down as the summer progresses. That’s what we want. But the result is that what seems like a firmly anchored stake in the spring will move (unless you drive the stake deep enough that it goes right through the bale and into the underlying soil.)
In our driveway straw-bale garden, we make tripods out of lumber or bamboo, tied together at the top. If the base is spaced out and balanced, they support tomato plants all summer.
How to Support Tomatoes in Containers
Determinate tomato plants in containers will probably need some sort of support, such as the cage shown here.
If you’re growing dwarf tomato plants, they likely won’t need support.
But if you’re growing determinate tomato plants, you’ll probably want to support them. I find that cages work well.
Note: When growing in containers, the shorter the better. That’s because if the plants and stakes are too tall, there’s a chance of the container tipping over in the wind.
The Great Tomato Debate
In our book No Guff Vegetable Gardening, my co-author Donna and I made up the following table to help gardeners think about a tomato support method that works in their garden.
Tomato Support FAQ
How often should I prune and train my tomato plants?
Ideally you don’t want to let suckers get too big before pruning them out…it’s a waste of energy that would be better spent growing tomatoes! In the summer when they’re actively growing, check them once a week. (But don’t sweat it if you miss a week.)
What should I do when the tomato plant gets taller than the stake?
Pin this post!
Find a taller stake, or bend over the top of the plant and allow some stems to grow from down below.
Should I leave one stem or more than one stem?
It’s up to you. But here’s what I do: For tomatoes on twine, I leave only one stem. In a cage, I allow 3 or 4 to grow because the plant has more space.
What should I use to tie the tomato plant to the stake?
I use a natural-fibre twine such as sisal or jute because at the end of the season I can compost it or let it fall to the soil where it decomposes.
Here are more ideas for tying tomato plants to stakes:
Dad used to cut up black garbage bags into strips because it made a soft tie that didn’t damage the tomato stem
My neighbour Sally used strips of old panty hose as tomato ties
You can buy purpose-made ties…but don’t waste your money
Will the tomato cage tip over when the plant gets big?
Can do. I drive one stake into the ground and secure a corner of the cage to it. That prevents any tipping as the plants get bigger.
More on Tomatoes
Check Out These Tomato Guides
Hear Experts Share Tomato Tips
More on Edible Gardening
7 Vegetable Garden Layout Ideas To Grow More Food In Less Space
Course: Edible Landscaping
How to Grow Tomato Seeds Indoors
A complete guide to growing tomato seeds indoors. Tips, supplies—and what to avoid.
By Steven Biggs
Learning How to Plant Tomato Seeds
When I was 10 years old my grandfather helped me sow tomato seeds. My first yellow-fruited tomatoes.
I had the perfect teacher. Dido was a life-long gardener and retired market gardener.
He was visiting us from Calgary that spring. We didn’t have much in the way of seed-starting supplies at our place. So he just grabbed an unused wash basin. We put a couple of inches of potting soil in it, sprinkled seeds on top. And then a thin layer of soil.
I gave lots of yellow tomatoes to the neighbours that summer!
His no-fuss approach to gardening coloured mine. There are lots of great supplies, gadget, and tricks…if you want. But you can also keep gardening—and growing tomato seeds—really simple.
In this article I share ideas about how to grow tomato seeds in a way that suits your situation.
Choose a Tomato Variety
Find out how to grow tomato seeds in a way that suits your situation.
Before planting, select a variety that gives you what you want.
Here are things I think about as I choose tomato varieties:
Colour
Size
Taste
How long it takes to mature
Plant stature
Disease Resistance
How I use the tomatoes (sauce, sandwiches, packed lunches)
Storage properties (there are storage—a.k.a. “keeper” tomatoes!)
Find out about “keeper” tomatoes.
Get tomato-choosing tips in this article by my tomato-crazy daughter, Emma.
When to Start Tomato Seeds Indoors
Grow tomato seeds indoors to get a head start on the growing season. These seedllings are growing in a wooden mandarin crate.
We grow tomato seeds indoors to get a head start on the growing season. That head start gives us an earlier harvest.
When it comes to timing, the date of the last spring frost is our guidepost. You’ll often see this date called the “last frost date” or “average last frost date.”
Find out the average last frost date for your area, and then count backwards 6 to 8 weeks.
For example:
The average last frost date around here is mid May. So working backwards 8 weeks, I know that I should be starting tomato seeds indoors around mid March.
This is not an exact science.
So don’t sweat the exact date. Aim for approximately 6-8 weeks. But don’t start too early, because you could end up with leggy seedlings.
Create Your Own Unique Edible Landscape
That fits for your yard, and your style!
Supplies for Growing Tomato Seeds Indoors
The supplies you need to grow tomato seeds depends on your approach to gardening. As I mentioned above, you can keep it pretty simple.
Cell packs are a good option if you’re growing a lot of seedlings.
Here are basic supplies:
Potting soil
Pots or containers (ideas below)
Labels
Seeds
Optional goodies:
Heat mat
Fan
Dome or cover
Containers for Starting Tomato Seeds
You can buy purpose-made containers for starting seeds. Or you might already have things you can reuse for seed-starting. (Horticulture creates a lot of plastic waste…and a bit of creativity with seed-starting containers is a great way to generate less waste.)
Here are ideas for seed-starting containers for tomatoes:
Plug trays are an option if you want to start lots of seeds.
Cell packs (the plastic containers with multiple holes, often used for bedding plants – a good option if you’re growing a lot of seedlings)
Plug trays (trays with a number of smaller holes, more commonly used in commercial greenhouses)
Pots
Crates (I’ve used wooden mandarin orange crates)
Newspaper pots (paper pots wick moisture and dry quickly, so adjust your watering accordingly)
Egg cartons (like egg shells below, too small for growing tomato plants to the final transplanting size, but if it’s all you have, they’re OK for getting seeds started before transplanting into a bigger pot)
Egg shells (There are lots of cutesy pictures online of seeds growing in egg shells. My suggestion is don’t bother, they’re impractical)
Newspaper pots are easy to make. They can be planted directly into the garden as the roots grow right through the newspaper.
If you’re using biodegradable, natural-fibre pots (peat pots are common, and I’ve even seen pots made from cow manure) a word of caution: Bury the entire pot when planting in the garden, or the whole thing is a wick, wicking water away from plant roots.
Soil for Starting Tomato Seeds
Top Tip: Don’t use garden soil.
That’s for two reasons: First, many garden soils have a structure that packs down, preventing little roots from growing. The other thing is that garden soil can harbour diseases that kill young tomato seedlings.
Use potting soil.
You might see potting soils specifically for seed-starting. These are made with ingredients that are more finely ground, so that there are no chunks of material blocking the way of little germinating seeds.
You don’t need the finely ground potting soils.
A general-purpose potting soil is fine. (A finely ground soil mix is important for commercial growers who need uniform, optimal seed germination; but in a home garden we usually have more seeds than we need, so having the odd coarse chunk in the potting soil is no big deal).
If the soil is dry, moisten it before using it.
Light for Your Tomato Seedlings
Lights for growing tomato seedlings. I use fluorescent lights. Note that the trays are propped up to be as close as possible to the lights.
Good light is important for growing compact plants. When there’s not enough light you end up with leggy plants that topple over.
There are lots of lighting options. The simplest and least expensive is to grow seedlings in a bright window (south facing is best.)
If you don’t have a bright window, you can start seeds under lights. There are many types of lights available.
Here’s the thing to know: Your tomato seedlings don’t need the same light as an indoor hydroponic vegetable crop.
You’re not trying to create perfect conditions to grow a plant right through to harvest. The lights just need to be good enough to give you healthy, fairly compact tomato transplants.
So save yourself some money and don’t go overboard on lighting.
My lighting for growing tomato seedlings is fluorescent shop lights. You don’t need full spectrum lights, nor do you need the strongest lights. Remember: You’re growing a young plant to transplant outdoors – where it will spend the rest of its life in sunlight.
Some light are adjustable, allowing you to move the lights close to the seedlings. Mine aren’t, so instead, I prop up trays of plants closer to the lights by putting something underneath them.
Use a timer so that you don’t have to remember to turn the lights on and off every day. I leave mine on for 16 hours a day.
Landscape with Fruit
That’s easy to grow in a home garden!
Planting Tomato Seeds
Fill your container loosely with potting soil, leaving a bit of space at the top.
If you’re planting an individual seed, place it on top of the soil
If you’re planting a number of seeds in one container, space them out on top of the soil
Then place a thin layer of potting soil over the top. You don’t need to put much potting soil over the seed: Cover with a depth of soil similar to the seed width…up to about one-quarter inch. (Too deep and they might not grow.)
Then tamp very gently and water.
What we’re trying to do by covering with soil and tamping is to make sure the seed is in contact with soil, which helps with uniform germination.
(NOTE: A lot of people “bottom water” seedlings. This just means sitting a container in water so that water wicks upwards. The reason is that a strong jet of water from a watering can can move around seeds and soil. So feel free to do the bottom watering if you like, although I find that watering gently, by putting my finger over the tip of the watering can to slow the flow of water, is enough to prevent making a potting soil sinkhole.)
Tomato Seeding Density
Depending on how many plants you’re growing and how much space you have, you can seed more or less densely:
Grow 2-3 seeds per pot, and then thin out extras as the plants begin to grow.
Low Density
If you have lots of space and aren’t growing a lot, give each seed its own pot or section within a cell pack. One seed per pot takes up far more space initially. But if you want to keep things very simple, this is a good way to do it because it can cut out the step of transplanting later on.
Remember that a bigger pot dries out more slowly; water them accordingly so they aren’t waterlogged.
Tip: It’s rare to have every single seed germinate. To avoid having empty pots where seeds haven’t germinated, place 2-3 seeds per pot, and then thin out extras as the plants begin to grow.
High Density
If you want to start more seeds in less space, plant a number of seeds together in a container, and then separate and transplant them as they get bigger.
Labelling Tomato Seeds
A tray of labelled tomato seedlings.
If you’re growing more than one variety, label them as you plant them. There are years I was sure I’d remember what was what…and I forgot. You can buy purpose-made plastic labels; or, if you want to use less plastic, wooden popsickle sticks or wooden tongue depressors work well (but don’t last all summer.)
Hygiene
Damping off disease can wipe out a whole crop of seedlings quickly. It’s a fungal disease that moves around your growing area along with runoff from watering plants. It gets there in contaminated soil and on previously used equipment and pots.
The easiest way to avoid damping off is to use disease-free potting soil and clean supplies. If you make your own potting soil using compost, consider sterilizing it. Many commercial potting soils are made with peat and inert ingredients—and these tend to be disease free.
New pots and cell packs are likely disease free, but if you’re reusing pots and cell packs, sterilize them. First, scrub off any soil that’s caked on. Then dunk them in a solution of 10 parts water with 1 part bleach, and then let them air dry. (Note: This is a strong smelling solution, so I do this outdoors or in my garage.)
How Many Tomato Seeds to Grow
Planting extra tomato seeds is cheap insurance against plants lost to accidents.
I always grow extra plants.
Then I share leftovers with friends.
Conditions for Germinating Tomato Seed
Temperature
Find a warm spot to germinate tomato seeds. Pictured here: Germinating a flat of tomato seeds beside a heat duct near the basement ceiling — a warm location.
Room temperature is fine for germinating tomato seeds, but you can speed things up and get a more uniform germination if the temperature is warmer.
Here are ways to give your seeds warmer conditions:
Place them on a heated floor
Set them on top of a hot-water radiator
The fluorescent fixtures in my light tray give off heat, so if I put seed containers on the rack above
Some appliances give off heat – check to see if the top of your fridge is warm
Or get a heat mat (a water-resistant heating pad for plants)
Once a half to three quarters of the seeds are up, I remove the container from the heat.
Humidity
The seedlings on the left are uncovered, to get air circulation. The seeds on the right are covered with a plastic cover to keep the humidity high during germination.
As a seed germinates, it needs moist surroundings until it grows roots and can take up water on its own. If it dries out at this vulnerable stage, it’s game over.
The air in centrally heated homes over the winter is often quite dry. You can keep the humidity higher right around the seeds by covering them. I use the clear plastic domes designed to go over top of plant trays. Or, cover a tray with a sheet of glass or plastic; or cover an individual pot with a plastic bag.
Light
Don’t worry about light while germinating tomato seeds.
So in summary, as you’re getting your tomato seeds to germinate, think warm and humid. (In a previous house, I’d germinate my seeds atop a shelf in the basement, near the heat duct at ceiling level, where it was nice and warm.)
Conditions for Growing Tomato Seedlings
Once your tomato seedlings are up and growing, the best conditions are different from what we want when germinating seeds.
Light and Temperature
As seedlings begin to grow, we want bright light and cooler temperatures. That’s because with warmer temperatures, growth is lanky. With cooler temperatures (combined with bright light) the plants will be more compact and sturdy.
See if there’s a cooler spot near a window. In my case, my grow lights are in the basement, in a room that is cooler than the rest of the house. It’s perfect for growing tomato seedlings.
Humidity and Air Circulation
High humidity while seed germinate is good. But as the plants grow, we want lower humidity and some air circulation, which reduces the chance of fugal diseases. The moving air also gives stronger stems. (Some people use a fan to improve air circulation.)
So in summary, once the plants are growing, you want cooler, brighter conditions than for germination.
Caring for Tomato Seedlings
Water
It’s easy to kill seedlings by overwatering them.
Keep the soil moist, but not sopping wet.
If in doubt about the amount of moisture in the soil, use your finger. (Whatever you do, don’t waste your money on a gadget that tells you soil moisture!)
(If you forget to water and your seedlings flop over, there might still be hope. I remember the seedlings I grew with Dido: we came home one day and they were flopped right over…looked like they were doing yoga. He shrugged and watered them—and they sprang back up within an hour.)
Feeding Tomato Seedlings
Check your potting soil mix to see if it contains fertilizer. Some do. And if it contains fertilizer, you might not need to feed.
Otherwise, once your plants have a few leaves, you can begin to feed them. I use a water-soluble fertilizer.
Don’t overfeed. It can damage delicate seedling roots. (I feed at half of the rate recommended on the label.)
Note: Don’t worry about feeding before the seedlings have a couple of sets of leaves. They’re still drawing from stored energy in the seed.
Thinning and Repotting
Transplant tomato seedlings after they get “true leaves.” These plants are beginning to grow true leaves.
If you planted a few seeds together in a container, once they get big enough to handle, you can separate them and give them more space.
Transplant tomato seedlings after they get “true leaves.” (The first leaves that appear are “seed leaves” so it’s the third and fourth leaves that are the true leaves. You’ll quickly see the difference.
I use a popsicle stick or pencil to tease apart soil and gently lift up a seedling and its roots. (There are purpose-made gadgets for this…not necessary.)
When picking up seedlings, hold them by the leaves. That’s because it’s very easy to crush the stem. (If you crush a leaf, it can grow a new leaf…if you crush the stem, it’s game over.)
Transplanting Tomato Plants in the Garden
Moving tomato seedlings outdoors to a cold frame in the spring so that they are hardened off for planting into the garden. If the light is bright, we cover the top of the cold frame with something to shade the plants below.
When it’s time to move your tomato seedlings to the garden, there’s one last thing to remember. Your seedlings have grown in the house, in moderate conditions. Once they’re outdoors, the light is brighter, the temperature swings, and there’s wind.
So we “harden off” seedlings, which simply means we get them used to outdoor conditions. We do this by putting the plants outdoors, in the shade, for a few hours each day. Give them a longer stint in the sun each day, and keep doing this for at least a week.
FAQ - How to Grow Tomato Seeds
Can I plant tomato seeds directly in the garden?
Yes, but your harvest will be weeks behind plants started indoors. (Tomato plants sometimes come up on their own in the garden where tomatoes fell to the ground the previous year…but the harvest is late.)
Should I soak my tomato seeds?
No, it’s not necessary.
Can I save my own seed?
Absolutely. It can be as simple as smearing some seeds on a paper towel, or you can clean them more through a fermentation process. In our household, I do the former, while my daughter does the latter.
Note: If you save seeds from hybrid tomato varieties, the seeds you end up with will be different from the parent plant. If you plan to save seeds, look for “open pollinated” varieties.
Is it too late if I start my tomato seeds only 4 weeks before the last frost?
No, but your harvest won’t be as early.
Can I start my tomato plants 10 weeks before the last frost?
Yes, but when they’re started indoors early, there’s more chance of ending up with lanky plants, unless you have very good growing conditions. If I had a greenhouse, I’d consider starting a few plants earlier—for an earlier harvest.
Where can I find the average last frost date for my area?
The easiest way is to do an online search. Some seed companies list dates, as do some master gardener groups and extension agencies.
More About Growing Tomatoes
Hear Tips from Tomato Experts
One More Idea…
We always grow microgreens indoors over the winter. It’s a perfect crop to grow under lights with your tomato seedlings.
Find out how to grow microgreens indoors.
Course: Make an Awesome Edible Garden
Guide to Blanching in the Vegetable Garden
How to Blanch Celery, Cauliflower, and Other Vegetables. Blanching in the garden refers to covering up part of all of a plant to exclude light.
By Steven Biggs
How to Blanch Celery, Cauliflower, and Other Vegetables
One word, two meanings!
For many people, blanching vegetables means a quick dip in boiling water before freezing them. This type of blanching slows down or stops the enzymes that cause colour and flavour loss.
But there’s another type of blanching, and it’s something that we do right in the garden.
Blanching in the garden refers to covering up part of all of a plant to exclude light. Without light, it grows differently.
The result is a milder tasting and more tender crop.
Keep reading to find out what crops you can blanch—and how to do it.
Common Crops
These are crops that are commonly blanched in the garden. You can grow them without blanching, but blanching improves the quality.
Asparagus
Cardoon
Cauliflower
Celery
Endive and Escarole
Leek
Rhubarb
Different Ways to Blanch
Soil hilled up along a row of leek plants.
Depending on what you’re growing, and how you want to grow it, there are a few ways to blanch vegetables in the garden.
Remember, blanching just means excluding sunlight. Here are some ways to do it:
Cover the plant (e.g. inverted pots)
Hill the plant with soil
Wrap something around the plant (e.g. cardboard or newspaper)
How Long?
The plants are blanched for a few days to weeks before harvest – not the entire life of the plant.
Crop Blanching Tips
Asparagus
If you’ve ever seen white asparagus, these are spears that have been blanched by hilling with soil. It’s a delicacy in Europe, less common in North America.
Cardoon
Blanching cardoon plants by wrapping them in fabric.
I’ve heard of people growing cardoon in a trench…but it’s a pretty big plant needing a pretty big trench. Instead, wrap mature plants 2-3 weeks before harvest, leaving the top of the older leaves exposed, but the base covered. The idea is that the inner leaves are white and tender. Some people use cardboard, but I think the most elegant cardoon blanching I’ve seen was burlap coffee sacks.
Cauliflower
With cauliflower we blanch the head. White-headed cauliflower is blanched to keep it bright white. It is still edible if you don’t blanch it…but can develop a yellow or green tinge, and get a stronger flavour.
Blanching cauliflower by tying together leaves to cover the head.
As the developing heads begin to expand, tie leaves around them to keep out the light. Don’t wrap the leaves too tightly over the small head as it will need space to expand. I’ve heard of people using paper bags, but if there are leaves there, it’s easier and less wasteful.
There are also “self-blanching” types of cauliflower, with leaves that naturally grow around the developing head. Some of these varieties still benefit from additional wrapping.
Celery
With celery we blanch stalks for 2-3 weeks leading up to harvest, keeping the leaves at the top exposed. Blanching helps reduce bitterness and lighten the stalk colour.
Blanching celery with waxed milk cartons that have the top and bottom cut out.
As with cauliflower, there are also “self-blanching” celery types. These have a lighter colour and milder flavour.
Hilling soil around the stalks is one way to blanch celery. Grow celery in a trench, and then gradually fill in the trench with soil leading up to harvest. If you use soil, first wrap the stalks with newspaper, so you don’t get lots of soil between the stalks.
You can also blanch celery by tying paper around the stalks, covering with waxed cardboard milk cartons or tall narrow tins that have both ends removed, or surround the stalks with boards.
Blanching celery plants with boards.
Grow a Container Vegetable Garden
And get an early harvest of crops that usually take too long!
Endive and Escarole
A board propped up over a row of endive or escarole is an easy way to blanch it.
Many people grow endive and escarole for the bitter taste. But you can blanch them to reduce the bitterness. Cover entire plants for a week before harvesting.
For individual plants, cover with a clay pot or a paper bag. For a whole row of plants, place a board over the row.
Leek
The base of leek plants can be blanched to give tender white flesh. In late summer, hill the base of the plant with soil, or wrap to exclude light. As with celery, leeks can also be grown in a trench that is gradually filled in as the plant gets taller.
Rhubarb
Blanch rhubarb by cover up plants with an inverted bushel basket as they begin to grow in spring.
When rhubarb is blanched it produces tender, elongated stalks that have a bright pink-red colour.
To blanch rhubarb, put an inverted bushel basket over the plant in the spring, as it begins to grow.
Why Not Blanche a Weed!
While a weed for many, dandelions are a kitchen staple for others. Our springtime menu includes dandelion frittata or a mixed salad with dandelion leaf pieces.
But dandelion, like its kin in the chicory clan, can be very bitter. The solution is to blanch dandelion. Simply cover with an inverted clay pot or a board – and you’ll be rewarded with tender, translucent, and mild-tasting leaves.
Blanching Challenges
Blanch dandelion by covering with an inverted pot or a board.
Blanching is easy to do. The biggest challenge is remembering to do it in time.
Another challenge is lightweight covers that blow away on windy days. If you use terracotta pots, they’re heavy enough to stay in place. But plastic coverings can blow away. The solution is to weigh them down with a brick or rock.
Top Blanching Tip
Put a note on your calendar to remind you to blanch your crops ahead of time.
Garden Blanching FAQ
Is Blanching Optional?
You don’t have to blanch these vegetables to eat them. But blanching gives a milder tasting, more tender, and more attractive vegetable.
What is “Self-Blanching?”
Some varieties don’t need help from gardeners with blanching. For example, with cauliflower, self-blanching varieties have leaves that grow to cover the head. Self-blanching celery has stalks with a mild flavour that don’t require blanching.
Why Grow Varieties that are not Self-Blanching?
You might be wondering why bother growing varieties that need blanching when self-blanching varieties are available. As you choose varieties, self-blanching is one trait to consider, along with other things such as having different harvest windows, price, and availability.
Looking for More Ideas?
Gardening Courses
Grow Vegetables in Straw Bales
Straw bale vegetable gardening is an easy way to create more growing space.
By Steven Biggs
Make More Growing Space with Straw Bale Gardens
I started straw bale gardening to solve a problem.
The problem? We needed more growing space for my daughter Emma’s 100-plus tomato varieties.
We have a big yard for the city. But there’s a black walnut tree that makes much of the yard unsuited to growing tomatoes.
(That’s because black walnuts give off a compound that kills the tomato plants…and a number of other plants too.)
With a long and ugly driveway that could fit a couple of school buses, Emma and I began to imagine a tomato plantation on the driveway.
In this post I’ll talk about how to use straw bales to make gardens on paved areas or over soil that’s not great for gardening.
Straw Bale Driveway Garden
Straw bales are an easy way to create a near-instant garden on paved surfaces and areas with poor soil. That’s because the straw bale is both the growing medium and the container.
Here’s how it works: As the straw bale decomposes, it creates an ideal growing medium that is well aerated and holds lots of moisture. It’s like a big sponge. It’s perfect for plant roots – better than many garden and container soils.
In short, you’re composting a bale of straw, and growing your vegetable plants in it at the same time.
Straw Bale Gardening: Top Tip
Our straw bale driveway garden
The most important thing to remember is that bales should be “conditioned” before you grow in them.
Conditioning means kick starting the microbial action. And you know when it’s working because as the microbes start to break down the straw, the temperature inside the bale goes up. We don’t plant in it yet…it might be too warm for our plants.
As the temperature comes down, your bale is ready to plant. Some people use a thermometer. I stick in my finger. It’s not an exact thing.
I allow 3-4 weeks for this conditioning process. It might be less if you’re somewhere warmer than me.
Since the bales in our driveway garden are for heat-loving tomato plants that we put out in late May, we start conditioning the bales late-April to make sure they’re ready for the planting date. I just work back four weeks from my planting date.
Straw Bale Garden Setup
Emma conditioning the newly arrived straw bales.
Before your bales become heavy from watering them, it’s a good time to think about how you want to arrange them. There’s no right or wrong, it depends on your situation:
If you’re planning to use a long soaker hose, you might want them in a long line.
If you’re gardening with kids, arranging them in a square makes for a nice hidoute once the plants get bigger
If you’re watering with a hose, arrange the bales so you can easily move amongst the bales with the hose
How to Orient Straw Bales
Once you know how you want to arrange the bales, think about how you’re orienting them. You can place them so that the loops of twine are on the top and bottom – or the twine is at the sides. Both ways of orienting the bales are fine.
But here’s how I do it: When positioned so that the twine is at the sides, the straw within is mainly oriented vertically. Bales positioned this way absorb more water, so it’s less likely to run off of the side of the bale.
How to Condition Straw Bales
To condition the bales – which just means getting the microbes working – we need 2 things:
Water
Nitrogen
In this picture the bales are oriented with the twine at the top and bottom of the bales. We now prefer to have the twine at the side for easier water penetration.
Place a nitrogen source on top of the bales and water well. The goal is for the water to soak into the bale and move some of the nitrogen into the bale. Use a low pressure and volume so that water doesn’t flow over the sides of the bale (and take the nitrogen with it).
More on the nitrogen source: When you’re looking at the numbers in the fertilizer formulation, you want the first number, the nitrogen, to be higher than the others. For example, blood meal is 12-0-0. That’s what I usually use.
Other years I’ve also used a high-nitrogen organic fertilizer derived from guano, and a lawn fertilizer.
Here’s how I condition straw bales with blood meal:
I water well every day for the first week.
Starting on the first day, and again every other day, I put a 2 cups of blood meal on the bale BEFORE watering (so the water moves some of the blood meal into the bale).
I give 3 applications of blood meal.
As we get into week 2, the bale should be warming up nicely inside!
After 2 weeks, fertilize the bales with a balanced, all-purpose fertilizer.
During this conditioning process, the temperature can go up to about 50°C (120°F), and then it drops. You can plant in the straw bales once the temperature has dropped below about 26°C (80°F)
Grow a Container Vegetable Garden
And get an early harvest of crops that usually take too long!
Straw-bale Garden Plant Layout
Plant densely to make the best use of space in your straw bale garden.
Wondering about plant spacing in a straw-bale garden? Because a well-managed straw bale garden provides plants lots of moisture and an excellent growing medium, you can plant densely.
We aim for two or three tomato plants per bale. Around those tomatoes we sow bush beans and leafy greens.
Something else to think about with straw bales is that you can plant into the side of the bale too. We’ve grown dwarf tomato plants out the side of bales, while at the top are normal determinate and indeterminate varieties.
How to Support Plants in Straw Bale Gardens
Because there is a paved surface below, and because the bales decompose and start to collapse over the summer, regular staking is not an option.
Here’s what I do instead of staking:
Use 3-4 stakes positioned over the bale to create a self-supporting tee-pee.
Put the bales next to a fence and grow vining crops up the fence.
Looking for tomato-staking ideas? Find out how to stake and support tomato plants.
Straw Bale Garden Planting and Care
How to Plant in Straw Bales
When I show pictures of straw bale gardens to groups, I’m asked where the soil is. There doesn’t have to be soil, because the straw is the growing medium.
When transplanting, use a trowel to pry an opening into the bale. Then place the transplant into the opening, and close up the opening. Be sure to cover the transplant roots with straw so they remain moist.
With large seeds like beans, we just insert them right into the bale. Again, no soil necessary.
When direct seeding smaller seeds onto a straw bale, a thin layer of soil is helpful. We add about an inch of soil over the top of the bale if we’re seeding leafy greens. Use a potting soil or good garden soil that won’t cake with frequent watering.
Straw Bale Garden Fertilizer and Water
Once your bales are conditioned and planted, feed with a balanced, all-purpose feed and keep them well watered. Because the inside of the bale remains well aerated, excess water is not likely to harm the plants. But excess water will wash away nutrients.
If there are not many bales in your garden, hand watering might be fine.
For larger gardens, drip irrigation or a soaker hose works well. Position the soaker hose to sprays downwards, into the bale.
Grasses and Mushrooms on Straw Bales
It’s normal to get mushrooms growing on straw bales. It means you’ve created good growing condtions.
Don’t be surprised to see little grass-like plants and mushrooms growing on the bales. These are good – it means you’ve created good growing conditions.
The grasses are any residual grain within the bale that germinates and grows. They won’t out-compete your crops. Just pull them off.
Straw Bale FAQ
What do you do with Straw Bales After Harvest?
After a year of growing I use the straw to mulch gardens, on pathways, and in my compost pile.
How Many Years do Straw Bales Last?
I’ve sometimes used bales a second year. How fast a bale decomposes varies with your weather conditions. Friends in warmer areas report that one year is the maximum for them.
What if the Twine Breaks?
Broken bales? No problem. In this straw bale garden the tall sections are tomato cages filled with loose straw from broken bales.
If possible, tie it back together; or use a new, longer piece of twine to tie together the bale. If that doesn’t work, you can pack straw into a cage or pot instead.
As you carry the straw bales, try to do it in such a way that the twine does not slide off the side of the bale.
Do Straw Bales Leave Marks?
Yes. Straw bales can darken paved surfaces.
I don’t recommend using them on wood because it creates conditions that could speed up the decay of the wood.
One year I had them against a board fence, and it resulted in dark marks on the fence – so I now position the bales a couple of inches away from the fence.
What About Hay Bales?
Hay bales can also make an excellent growing medium, but there are a couple of reasons they’re not used as frequently as straw bales:
Hay often includes lots of grass seed – not something you want to introduce to your garden
Hay is often more expensive than straw
What are the Best Plants for the Straw-Bale Gardening method?
You can grow a wide range of vegetable crops in straw bales.
Heat-loving crops benefit from the warm root zone in the bales
Root crops develop very well in the well-aerated growing medium
Leafy greens grow well and can be planted underneath other crops such as tomatoes
Cascading plants such as nasturtiums (for edible flowers!) can drape down over the side of the bales
Where can I Buy Straw Bales?
Straw bales are fun for kids.
I used to bring home loads of bales in my minivan. And my family hated all the prickly little bits of straw it left everywhere. So now I just get straw delivered.
To find a farmer, use an online classified advertising website.
And if you have kids: Get straw bales earlier than you need them – for your kids. Straw bales are like giant, biodegradable Lego blocks.
Don’t Straw Bales attract Rats?
The mention of straw has some people wondering whether straw bale gardens will be overrun with rats.
It’s a good question. Not in my experience.
The thing to remember with rats and mice is that they’re looking for food, shelter, and water.
A bale on a paved surface doesn’t give them burrowing room. Doesn’t give them water. Doesn’t give them much food.
What’s more likely to attract rats is bird baths, bird feeders, leaving out pet food, and improperly stored garbage. (On that note, gardening itself, and growing plants with seeds and fruit that are food for rodents, attracts rats.) Remember too, that they’re already abundant in many areas – just not out and about at times that we see them.

