
How to Make a Wicking Bed: A Raised Garden Bed that Keeps the Soil Moist
By Steven Biggs
Harvest More and Water Less with a Wicking Bed Garden
The potting mix in the wicking bed will wick moisture up to where plant roots can get it.
Wicking beds are a great way to maximize the use of space in a small garden. That's because this sort of raised bed keeps the soil continuously moist.
And that continuously moist soil is great for your crops.
With ample soil moisture, you can plant more densely. And with ample moisture, your crops produce more for you.
There's one other benefit of a wicking bed: You spend less time watering. Instead of frequently watering by hand or setting up a sprinkler, now you can fill up your wicking bed with water...occasionally.
Want to water less often? Want crops that thrive because they get consistent soil moisture? Keep reading to find out how to make this type of self-watering garden bed.
What's a Wicking Bed?
A Raised Garden Bed with Plumbing!
A wicking bed is simply raised bed with a water reservoir (a water storage area) at the bottom.
Water moves upwards (it "wicks") from the reservoir into the soil layer above. This "wicking" is the same ideas as what happens in an oil lantern as oil moves up the wick.
Wicking beds work the same way as sub-irrigated planters (a.k.a. SIPS or “self-watering” pots): Water wicks upwards into the soil above through capillary action. But while a sub-irrigated planter is often small enough to be picked up and moved, a wicking bed is a large, stationary raised bed.
Continuous Moisture Means Less Plant Stress
And Higher Yield
When there isn't enough moisture in the soil for plants, it's a stress.
And that stress affects yield.
Because the soil in a wicking bed remains moist, the plants don't have water stress. Without that stress, the increase in yield can be considerable.
(Of course, no one minds the time saved by having to water less frequently!)
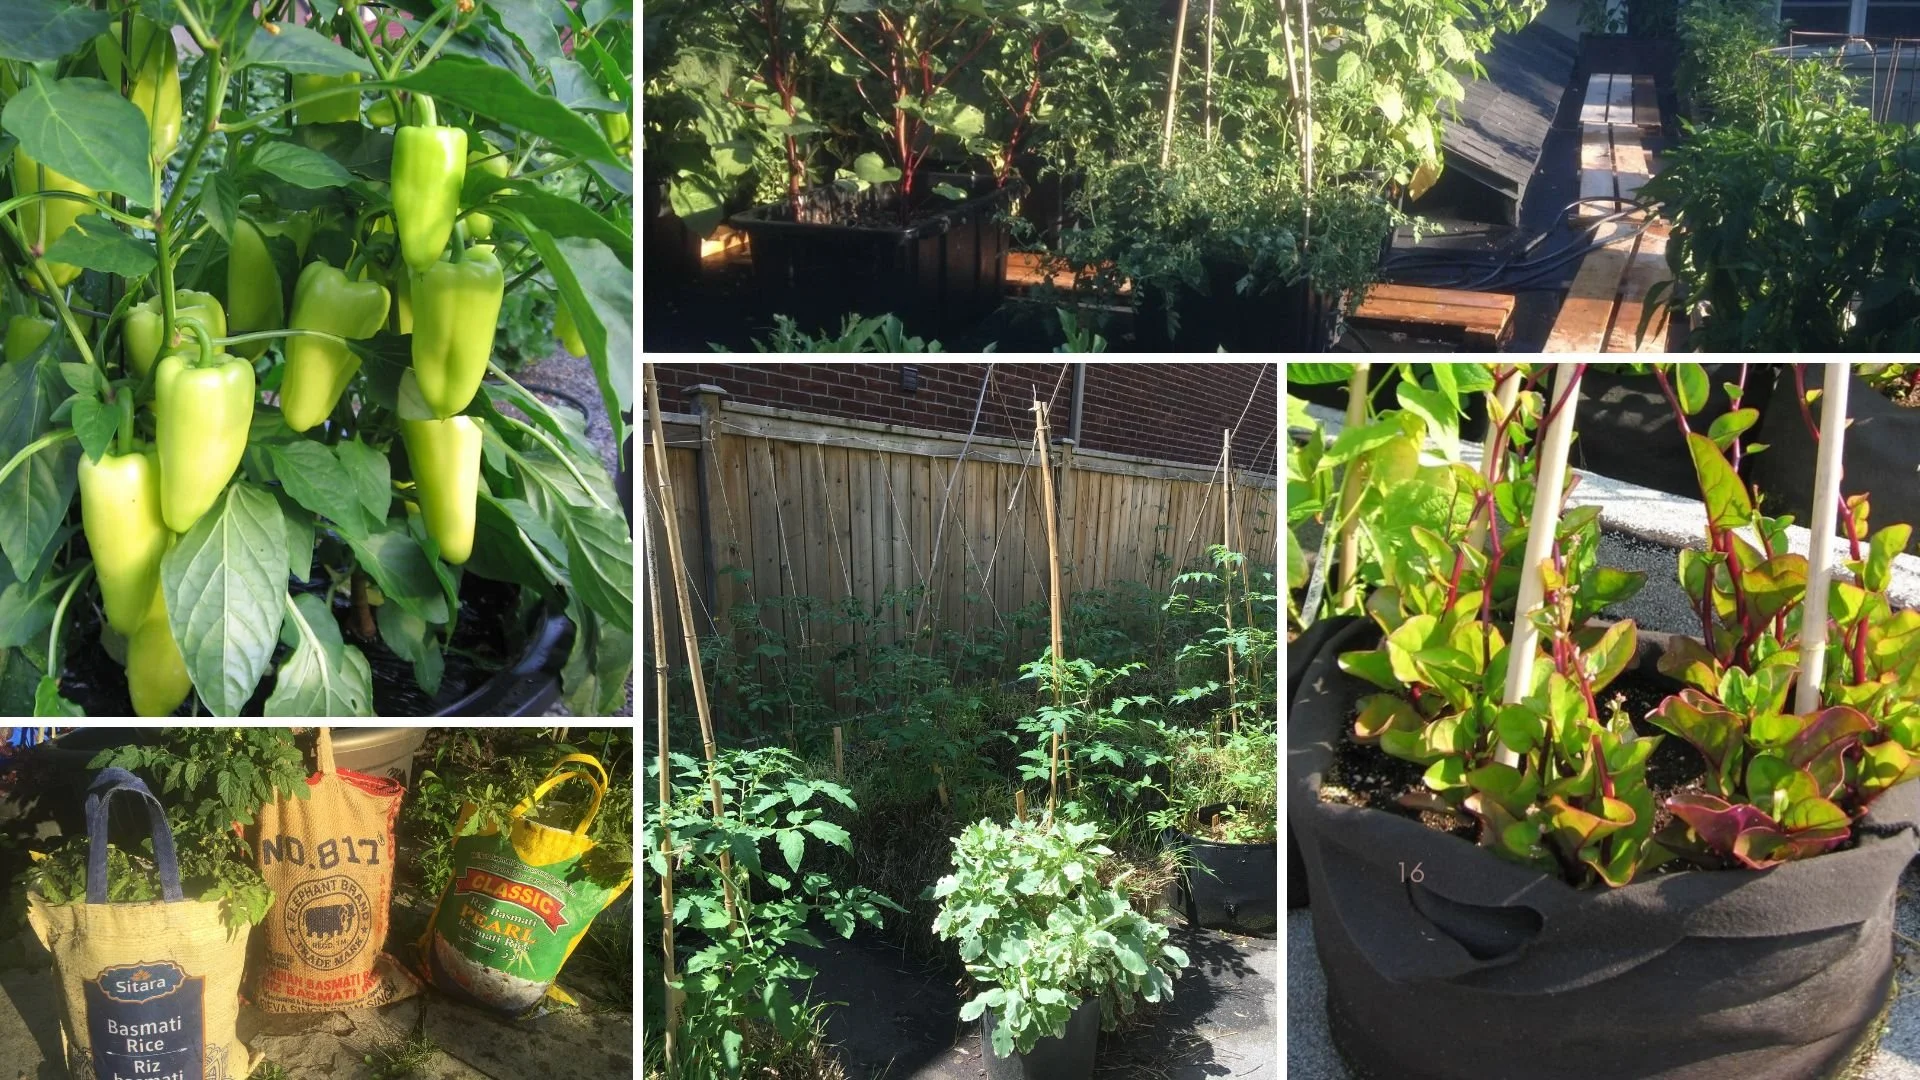
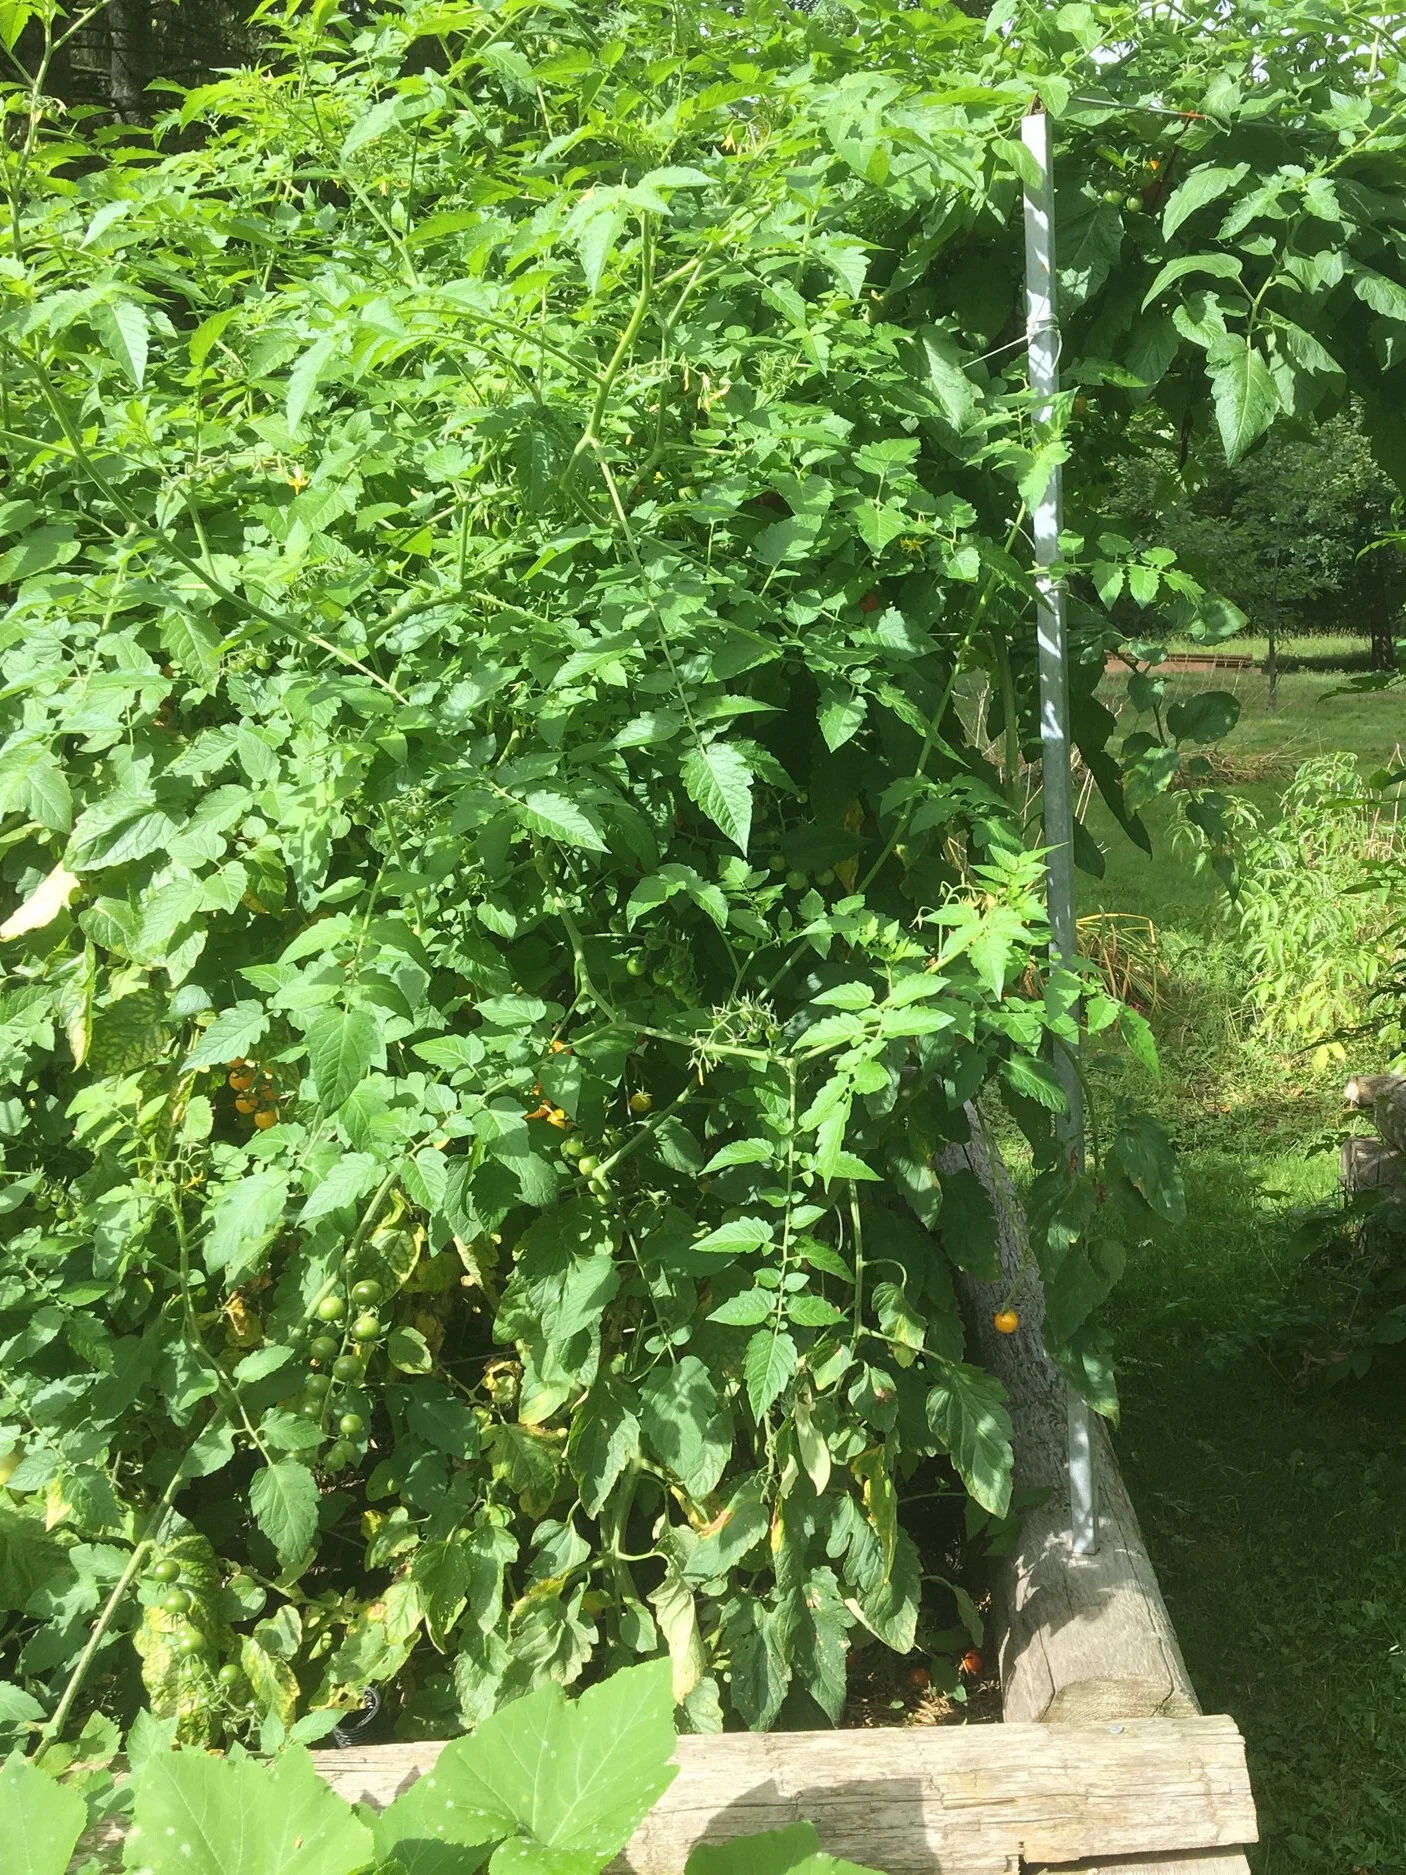
Even in the heat of summer, when the plants are quite big, we water our wicking beds about once a week.

We turbo-charged our production by growing our vegetable plants in wicking beds.
Another Reason to Use a Wicking Bed
Edible Gardening near Black Walnut Trees
Our neighbour's large black walnut tree is beautiful. But walnut trees give off a compound called “juglone.”
And juglone affects the growth of many plants…including tomatoes.
We tried growing tomatoes in the backyard many times…and they always died.
We solved the problem by growing tomato plants in wicking beds. That's because the tomato plant roots never get into the juglone-contaminated soil below.
Find out about juglone-tolerant plants for gardening near black walnut trees.
Want to Ace Your Container Garden?
Find out about top crops, how to choose the right soil, feeding your plants, and what to look for as you're choosing containers. More on Vegetable Container Gardening Class.
Make Your Own Wicking Bed
Wicking Bed Design - Be Creative!
Be creative! You might want to make a wicking bed from salvaged material—or maybe you want a bed that ties in with the aesthetic in your landscape. (I think a red-brick wicking bed would look nice in my garden! One day…)
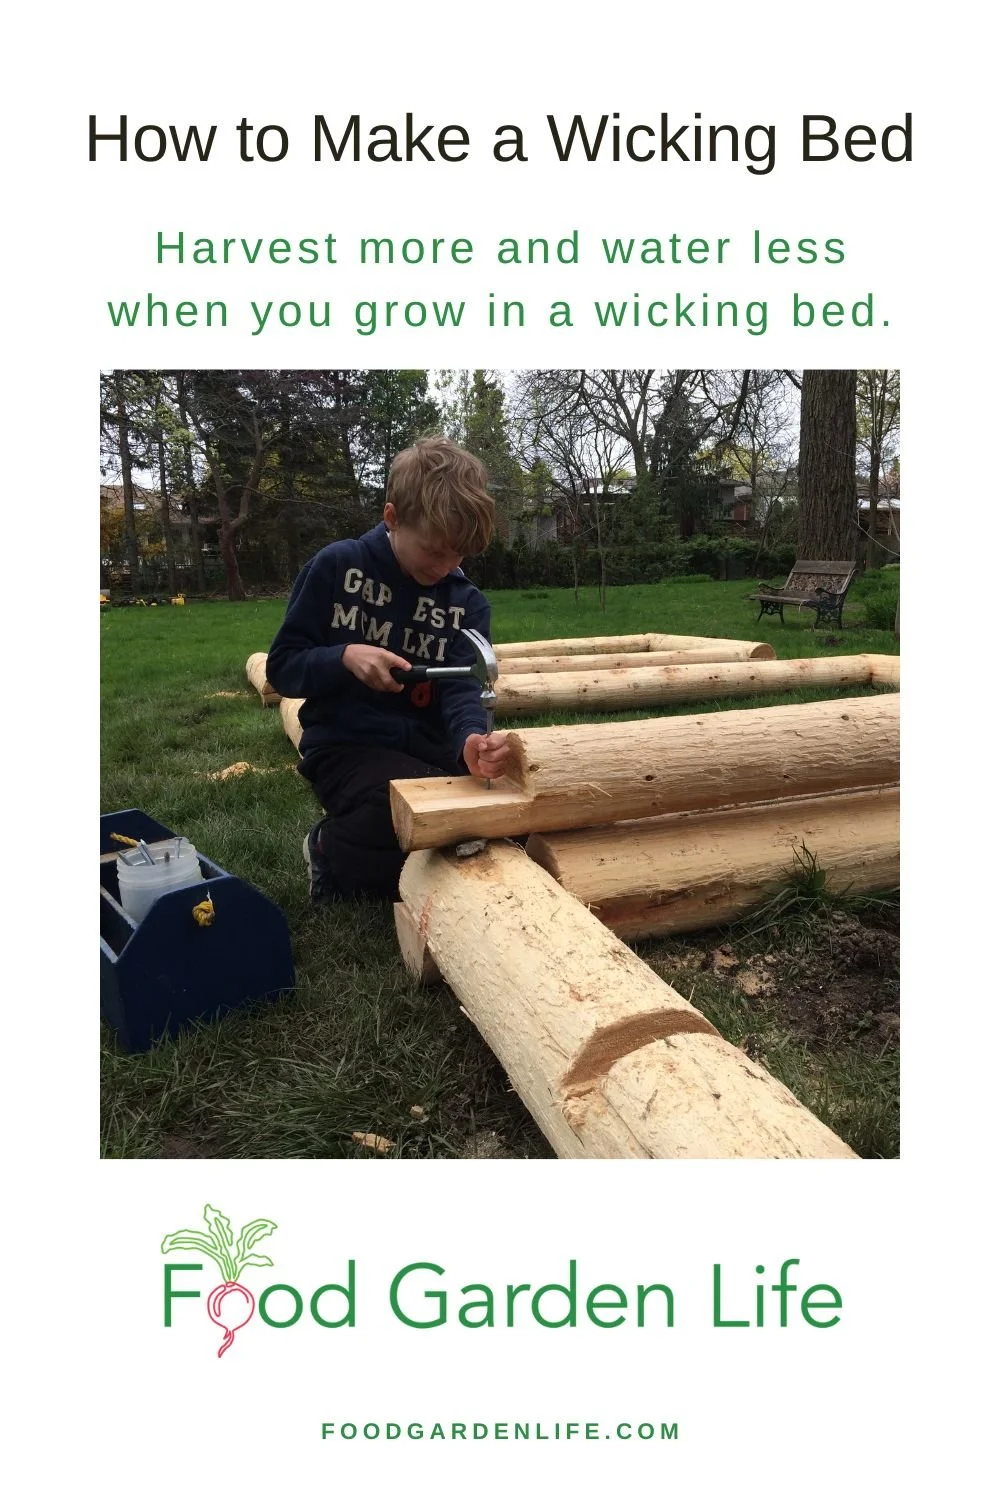
Later in this post you'll see photos of wicking beds that I made with my kids. I used cedar fence posts. But there are all sorts of materials you can use to make them.
Not sure what to build your wicking beds with? Here are thoughts to start with:

Be creative with the materials you choose for your wicking beds. We used cedar fence posts to make our wicking beds.
Find something that ties in with the aesthetic in your garden
Choose materials that are good value
See if you have materials on hand that you can reuse as you make your beds
Here's why I chose cedar fence posts:
They are long-lasting and not much more expensive than dimensional lumber
I didn't use treated lumber because it's not suitable for edible gardening
I didn't use dimensional lumber because raised beds made with dimensional lumber often sag outwards over time
I used pond liner to create the reservoir because I already had liner from a former pond
Wicking Bed Workings
The Raised Bed
There are many materials you can use to create the frame for your wicking bed.
I've seen wicking beds made from:
Large plastic bins
Intermediate bulk containers (IBCs)
Cinder blocks
New lumber
Recycled wood
The Reservoir
The bottom of your wicking bed must hold water. It's the water reservoir.
If you're making the wicking bed from a container that is closed at the bottom (for example, an intermediate bulk container), you won't need to line the bottom of the bed to create the water reservoir. (Instead, you'll drill a hole at the top of the reservoir level for excess water to drain away.)
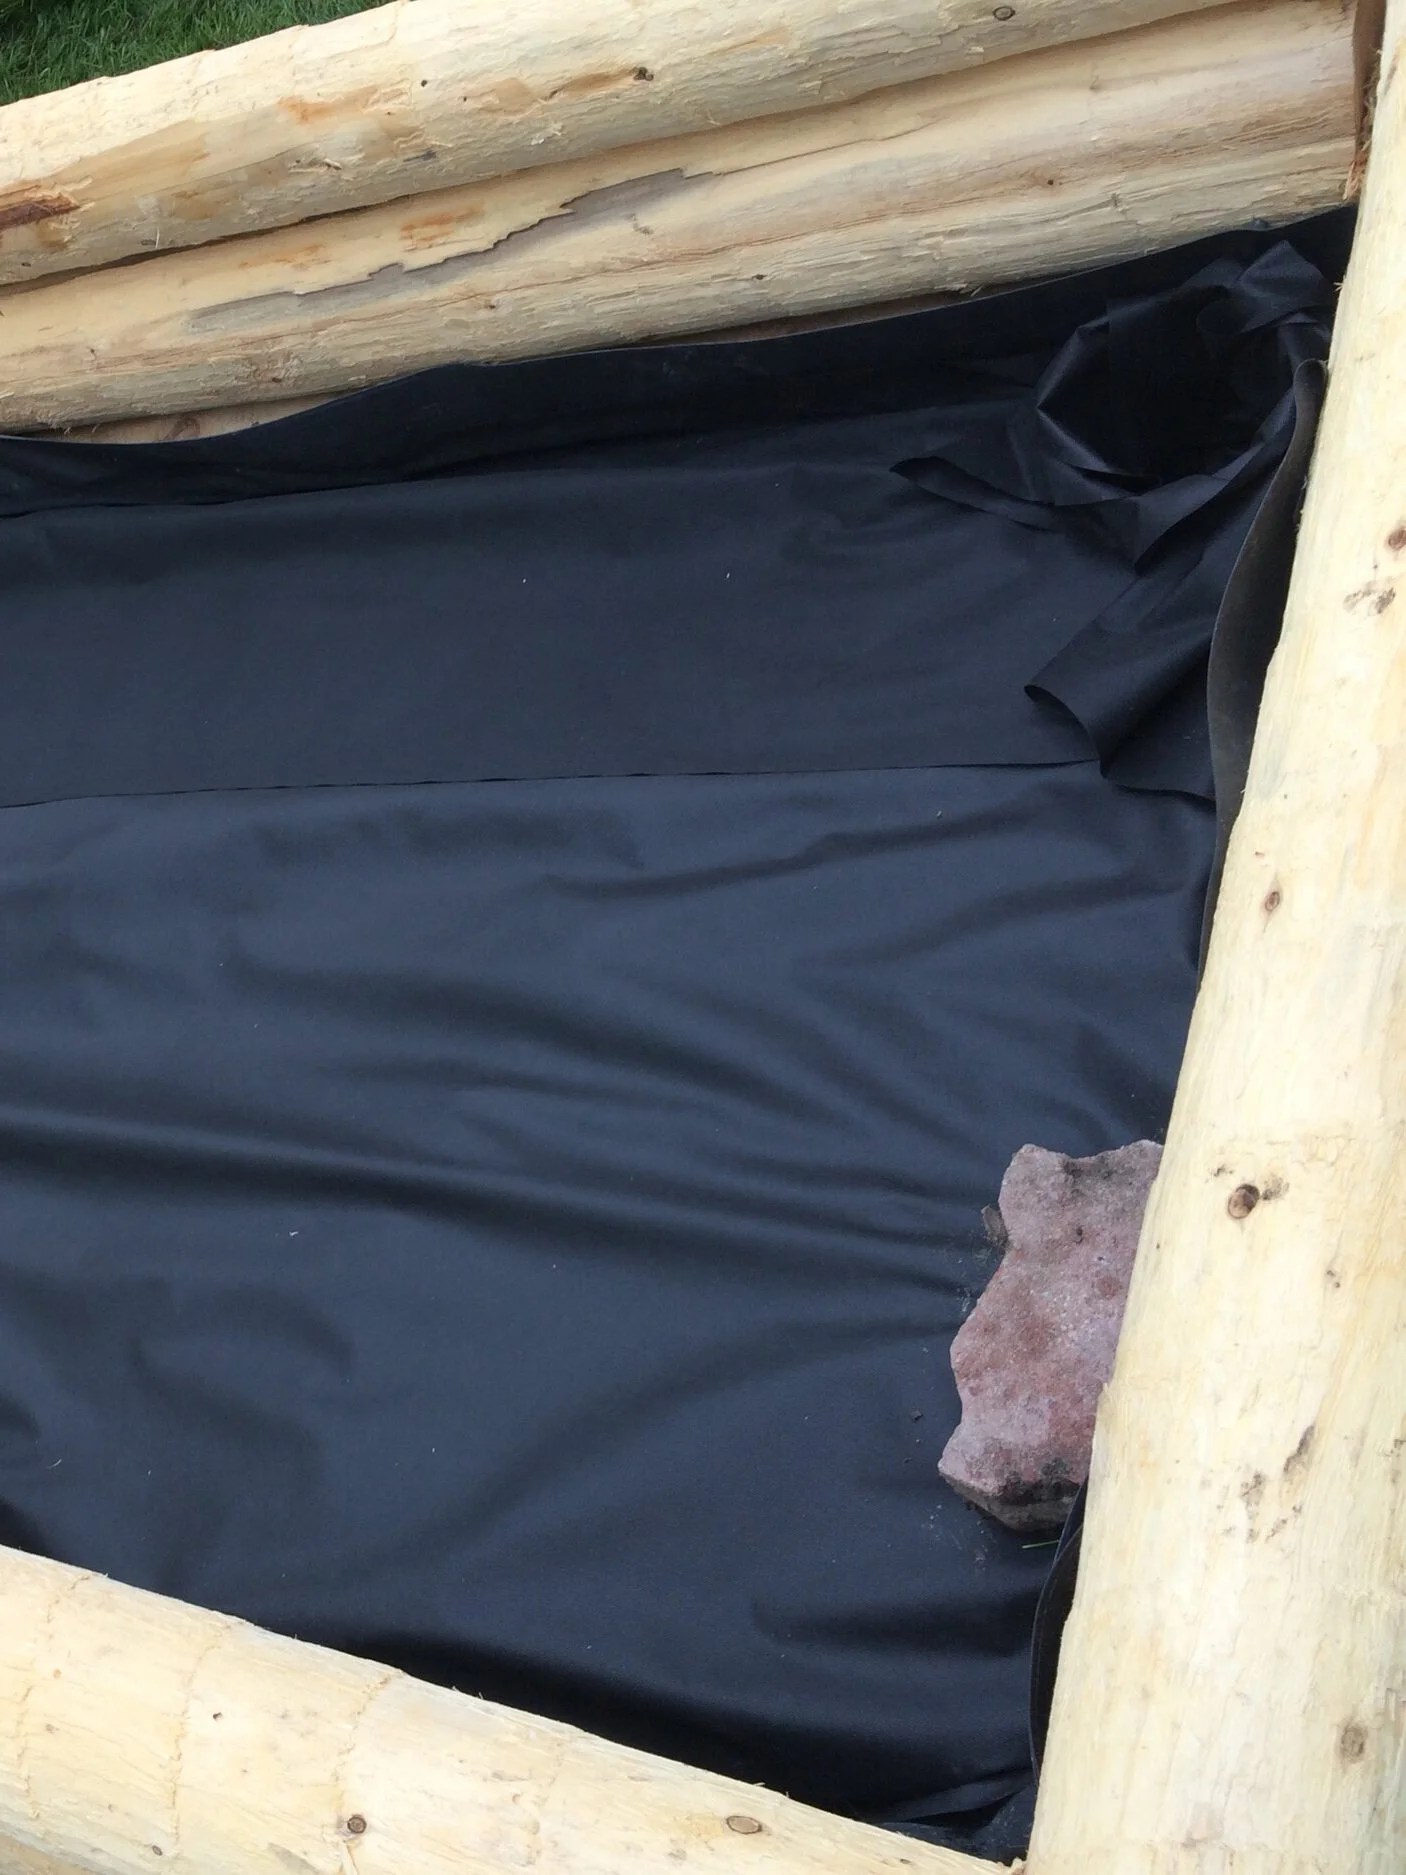
If you make a wicking bed from wood or stone, it won't be sealed at the bottom. So you'll need to create a reservoir at the bottom to hold water. Do this by lining the bottom of the bed with some sort of liner. Choose a material that is durable enough so you won't need to take apart your wicking bed to repair a puncture. Pond liner is very durable, and widely available.
The Plumbing
A wicking bed has a "fill tube" that extends up above the soil layer. You might also see this called the "inlet pipe."
Down below, the fill tube reaches into the reservoir area. This tube is how you add water to the reservoir. Simply put your hose into the tube and leave the hose running until the reservoir is full.
Ideas for what to use to make a fill tube:
Dishwasher drain hose (that's what I used, as it's big enough that I can put the hose into it when filling the wicking bed)
PVC pipe (sometimes called a PVC inlet pipe)
Downspout
You also need to have some way for excess water to escape once the reservoir is full. So that your plants don't have wet feet after heavy rain or if you fill it for too long!
In other words, once the reservoir is full, any additional water drains from the bed.
Ideas for an overflow:
In the case of my own wicking beds, the liner only extends up to the height of the reservoir level, so and excess water drains out behind the liner and through the cedar posts...no fancy fittings or overflow tube required
For IBCs and rigid beds, drill holes at the desired overflow level
Some gardeners also install an overflow pipe or overflow tube through the hole...looks a bit more tidy
The Wick
The water moves upward from the reservoir into the soil mix through capillary action. In other words, it wicks.
But for it to wick properly, it has to be able to move up and along something. Luckily, gravel works well. So gravel is often used to fill the reservoir area.
This might sound strange to you, filling an area intended for water with gravel. But there can be lots of open space between particles in some types of gravel...and that space is perfect for holding water.
The type of gravel available to you depends where you live. Some people use pea gravel. Around here, it's easy to get what's called 3/4" "clear" gravel which has only large rocks. That's what you want. Make sure the gravel doesn't also include fine particles too, because fine particles fill up the space that we want for the water.
A layer of landscape fabric over top of the gravel prevents soil from filling up the spaces in the gravel.
The Soil
Don't cheap out on soil. It's critical.
The soil must have good wicking action. Capillary action.
And to have that, it should have lots of air spaces within it.
So don't use straight top soil. It often packs down too much. A high quality potting mix or soil amended with lots of organic matter is better suited to making a wicking bed.
IMPORTANT POINT ON SOIL: The water will only wick upwards so far. That means if the soil is too deep, water won't wick all the way to the zone where your plant roots are. Aim for a soil depth of 30-40 cm (12-16").
Other Options
There are many ways to make a wicking bed, so if you research the topic don't be surprised when you find all sorts of variations.
Plumbing! If you're a do-it-yourselfer, you might be interested in hooking up a water supply and shut-off! I've seen videos where people demonstrate this sort of set-up, using the same sort of plumbing supplies used for toilets. When the water level gets low, this sort of system automatically refills the reservoir.
Weeping tile. A perforated pipe or drain tile in the bottom area along with the gravel permits water to quickly move through the reservoir. It also means you don't need as much gravel. You’ll see weeping tile in the pictures of my wicking beds, below.
Materials List for My Wicking Bed
Here's what I used to make wicking beds.
Cedar fence posts.
Pond liner. The pond liner holds water in the bottom of the bed. Once the sides of the pond liner are folded upwards and fixed into place, it creates a shallow water storage area at the bottom of the bed—about as high as the weeping tile.
Weeping tile.
3/4” gravel. Use “clear” gravel, which means that it does not have smaller pieces of gravel that will fill up the spaces in between. That way the space is available to hold water.
Dishwasher drain tube. To create a fill tube, sometimes called an inlet pipe.
Landscape fabric. Its purpose is to keep the soil from filling up the weeping tile and the spaces between gravel.
Soil. I used a mix of high quality potting mix blended with compost.
Steps for Making a Wicking Bed
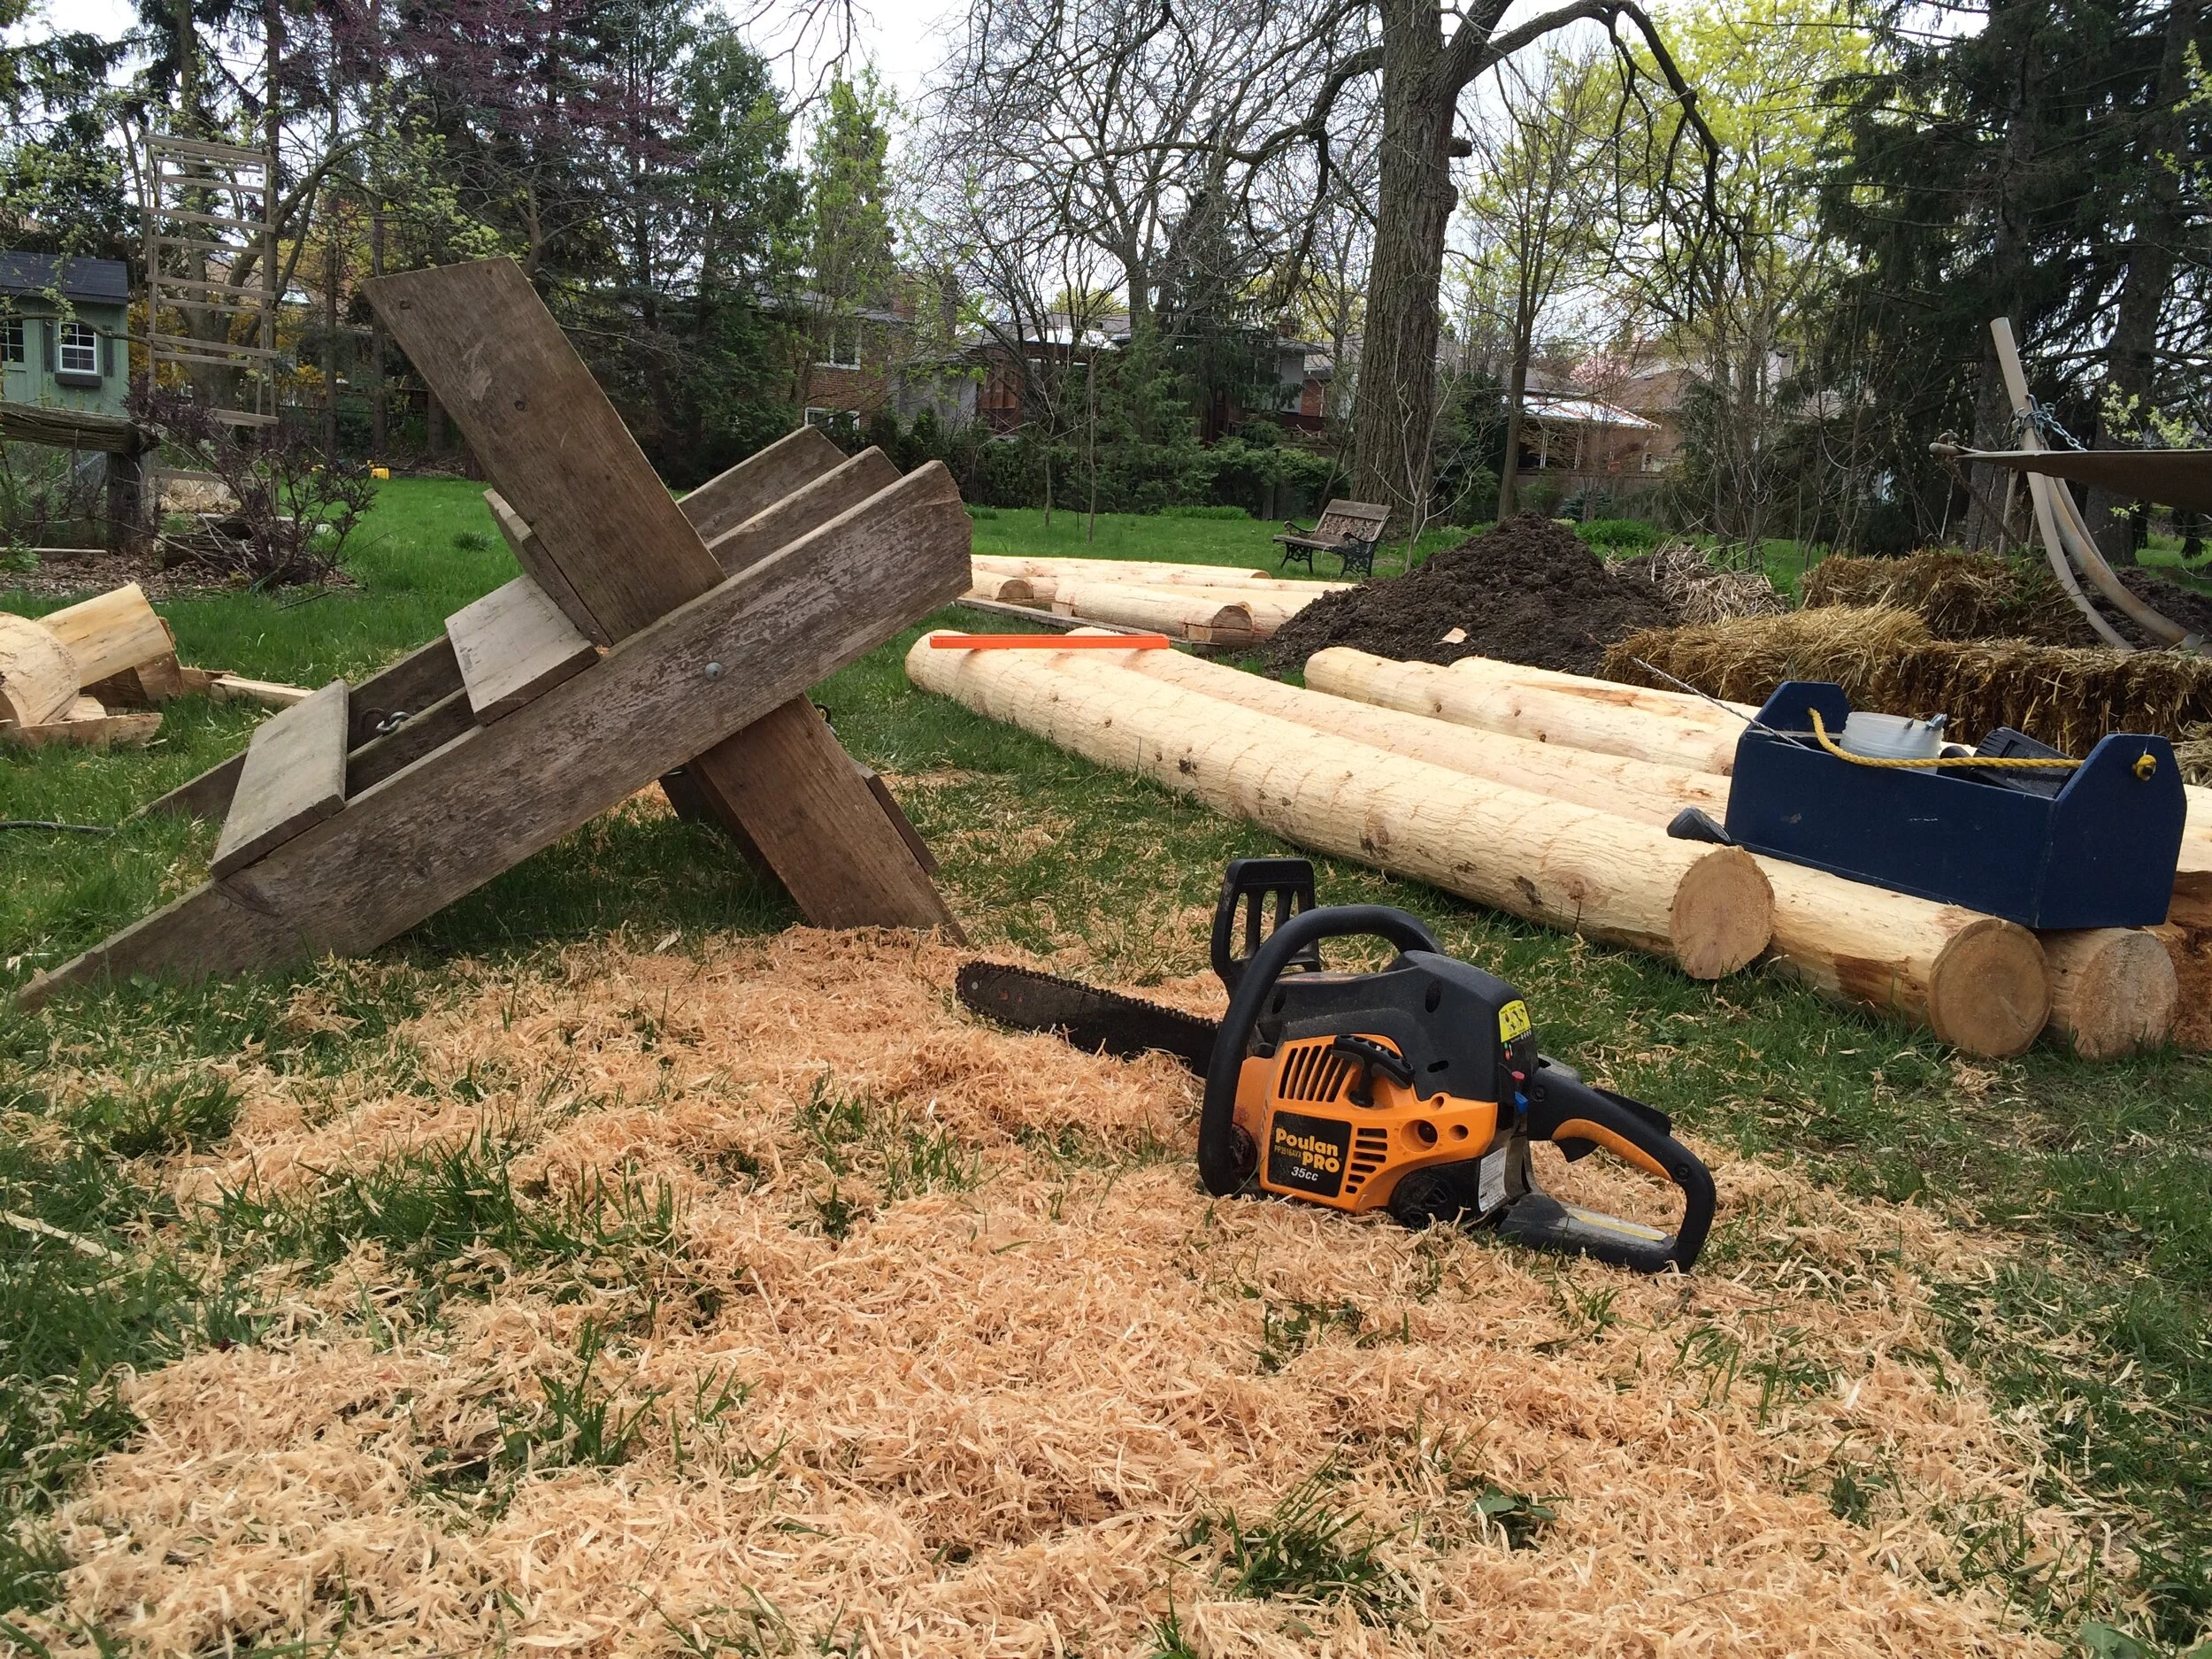
Cut posts to length and notch the ends.
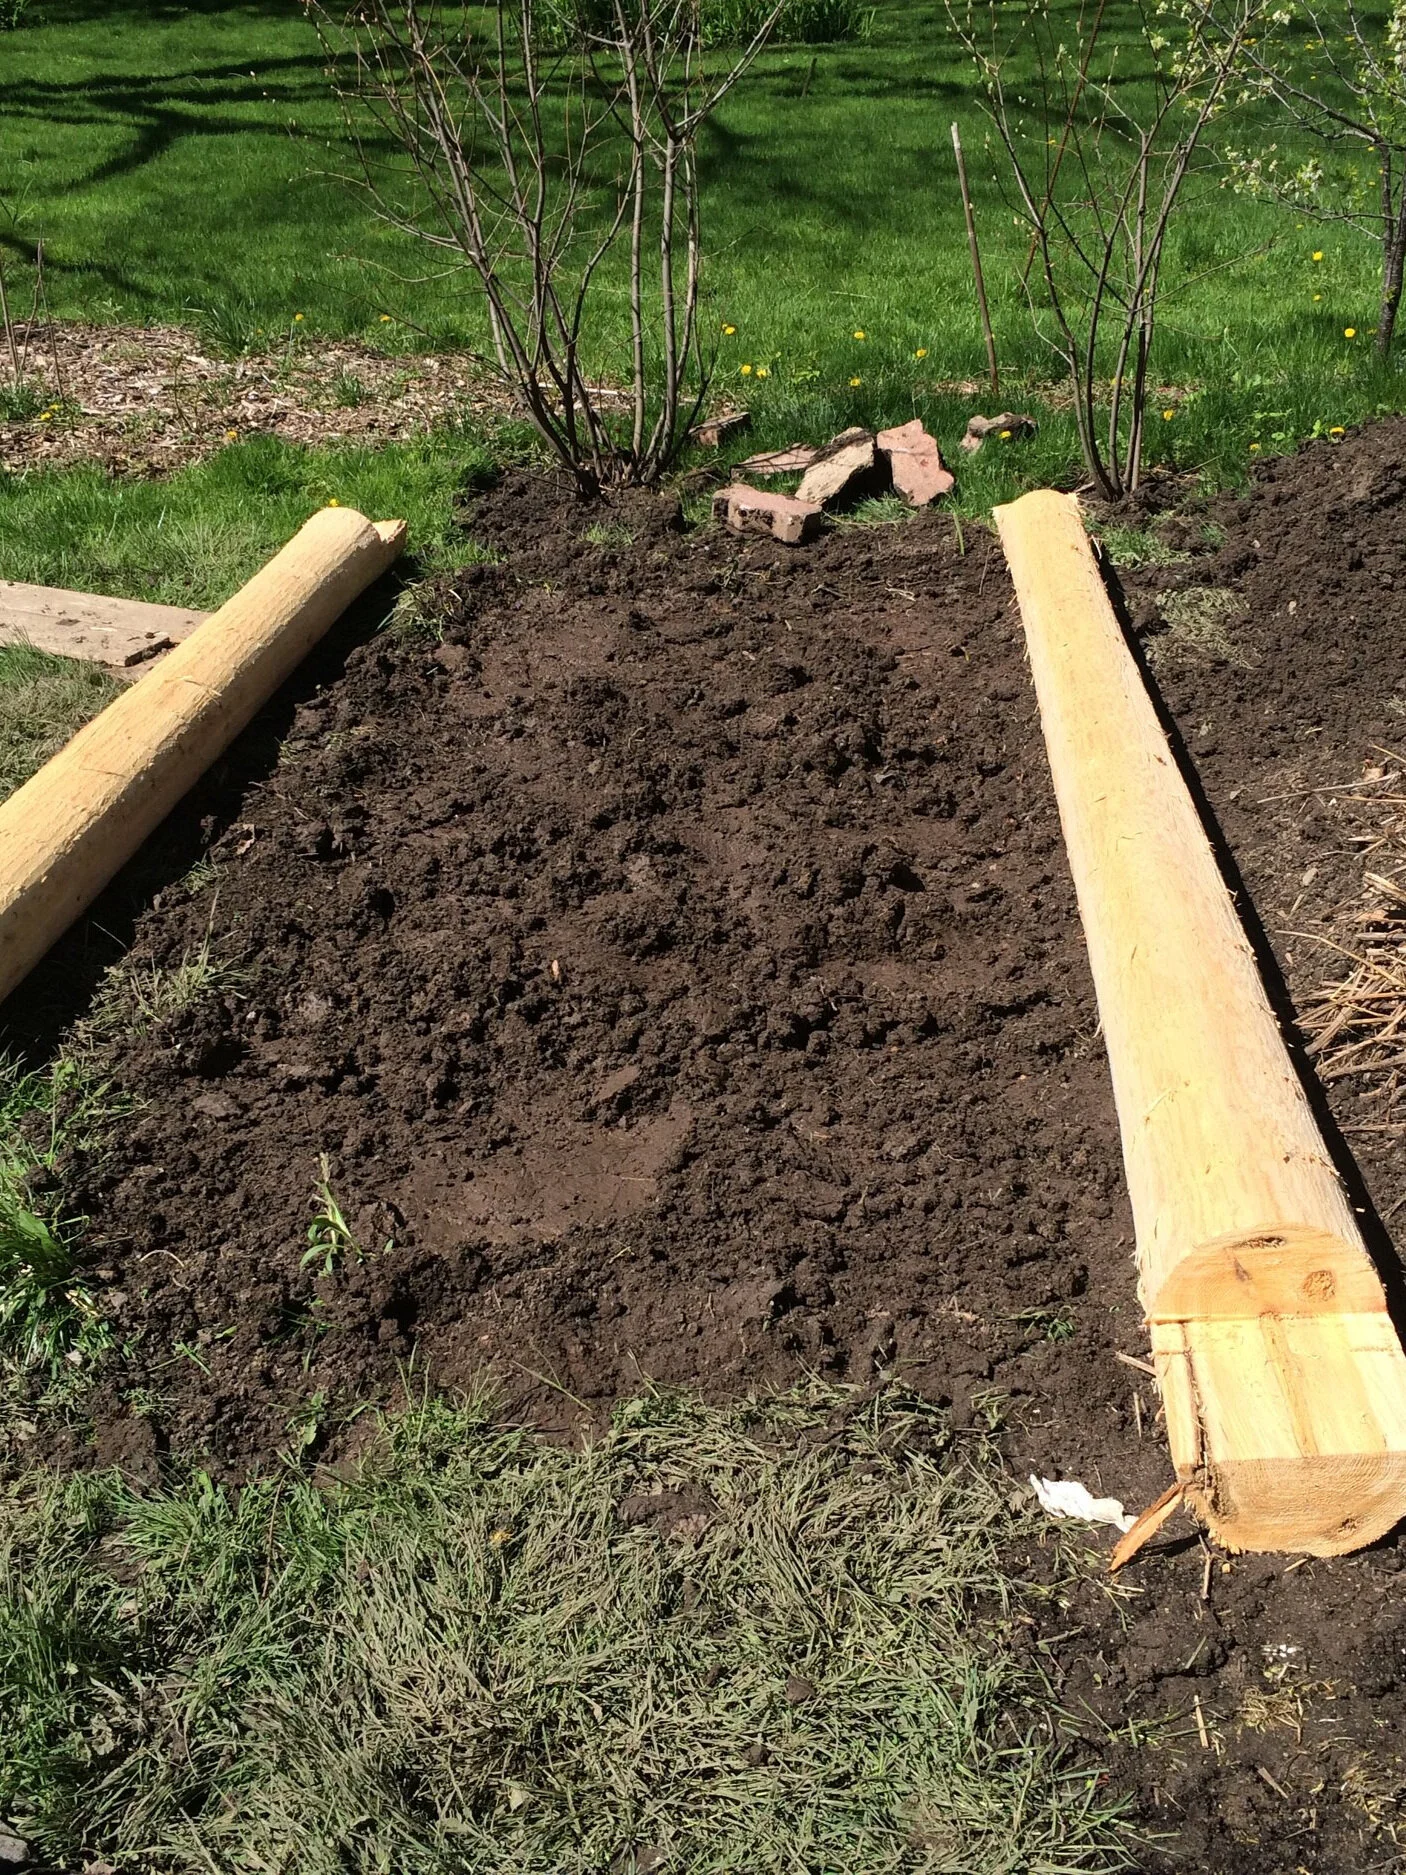
Place notched posts directly on the ground. Level the ground first.
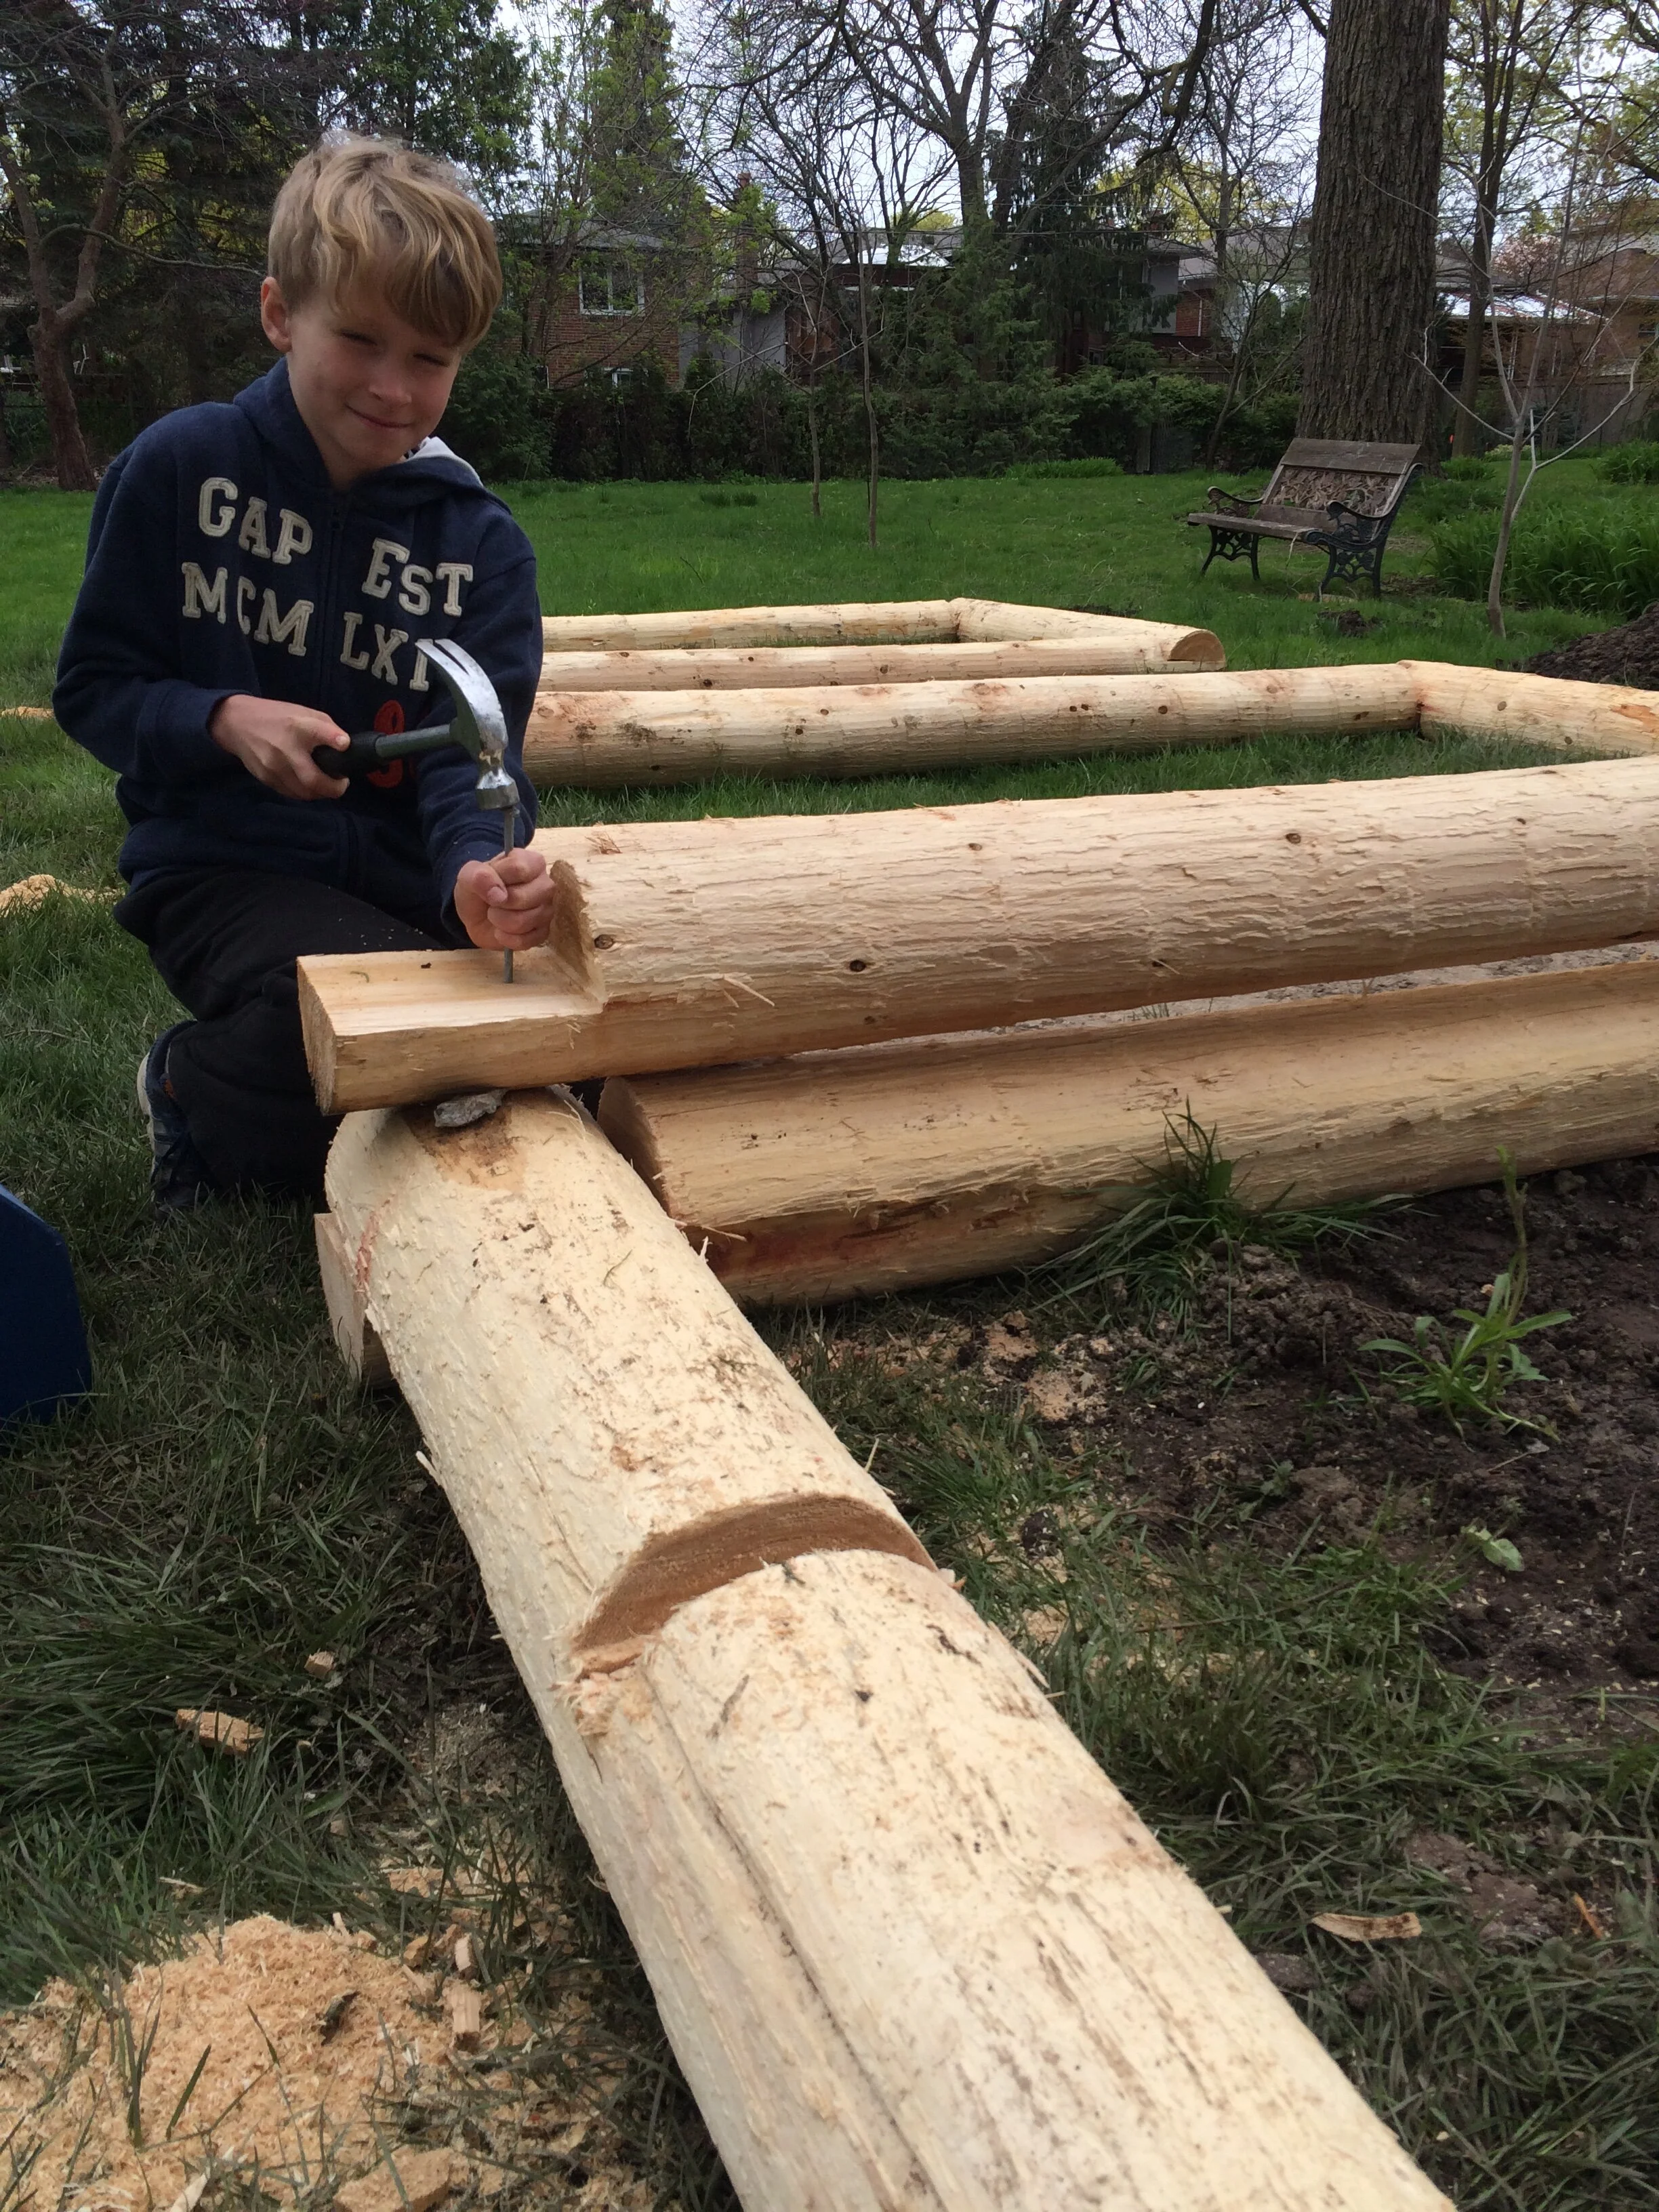
Nail spikes into the corners of the posts to keep them in place.
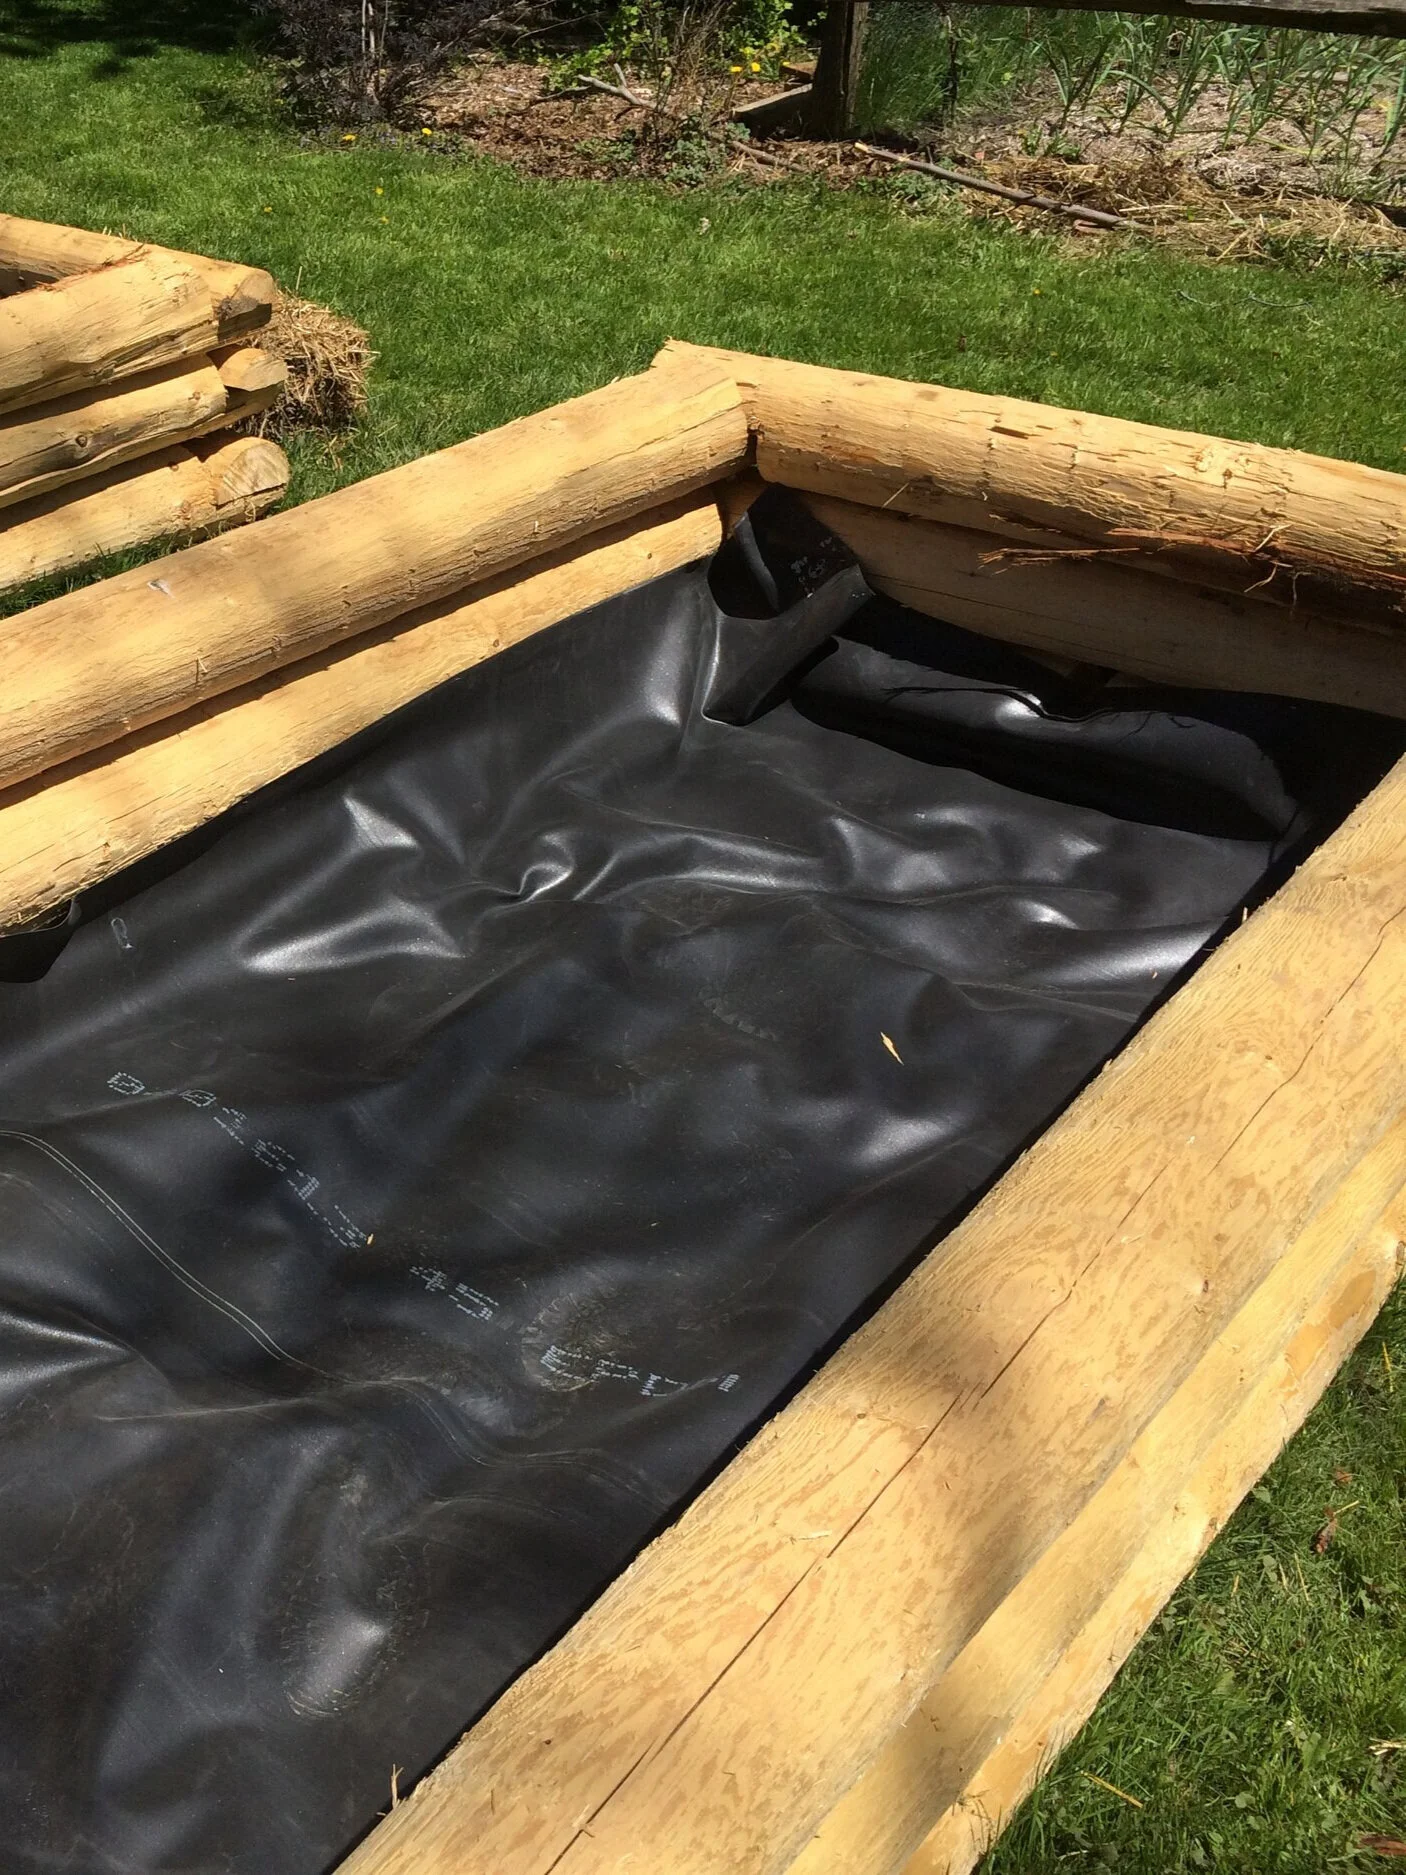
Install liner at the bottom by placing it on the ground, and up about 8-10 inches at the side. Secure temporarily with staples, to keep it in place until the gravel pins it into place.
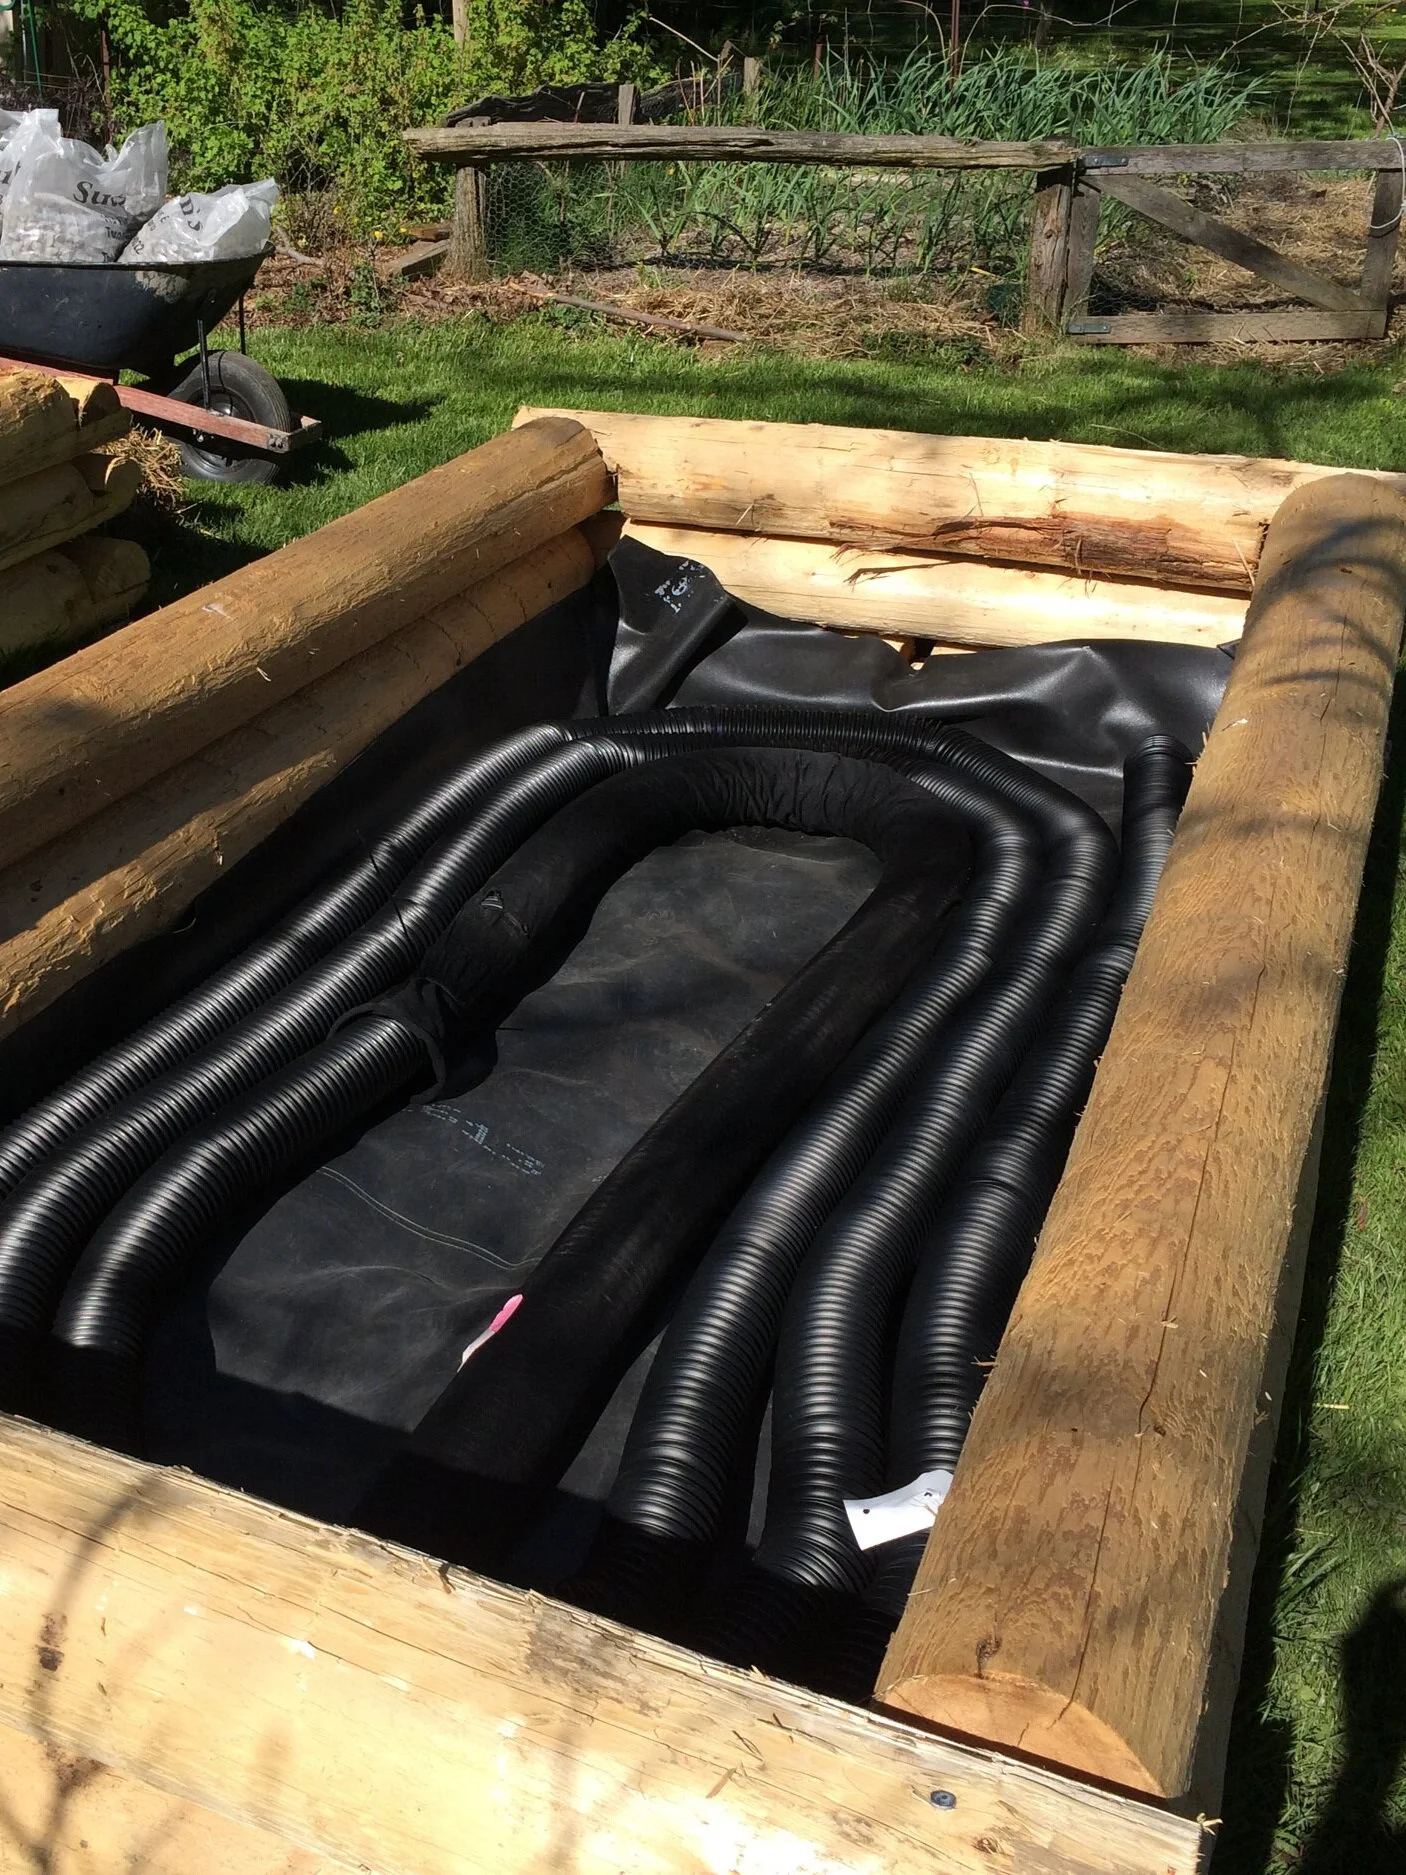
Place coils of weeping tile in the bottom. The tile permits water to quickly move through the reservoir, and it also holds up the soil above.
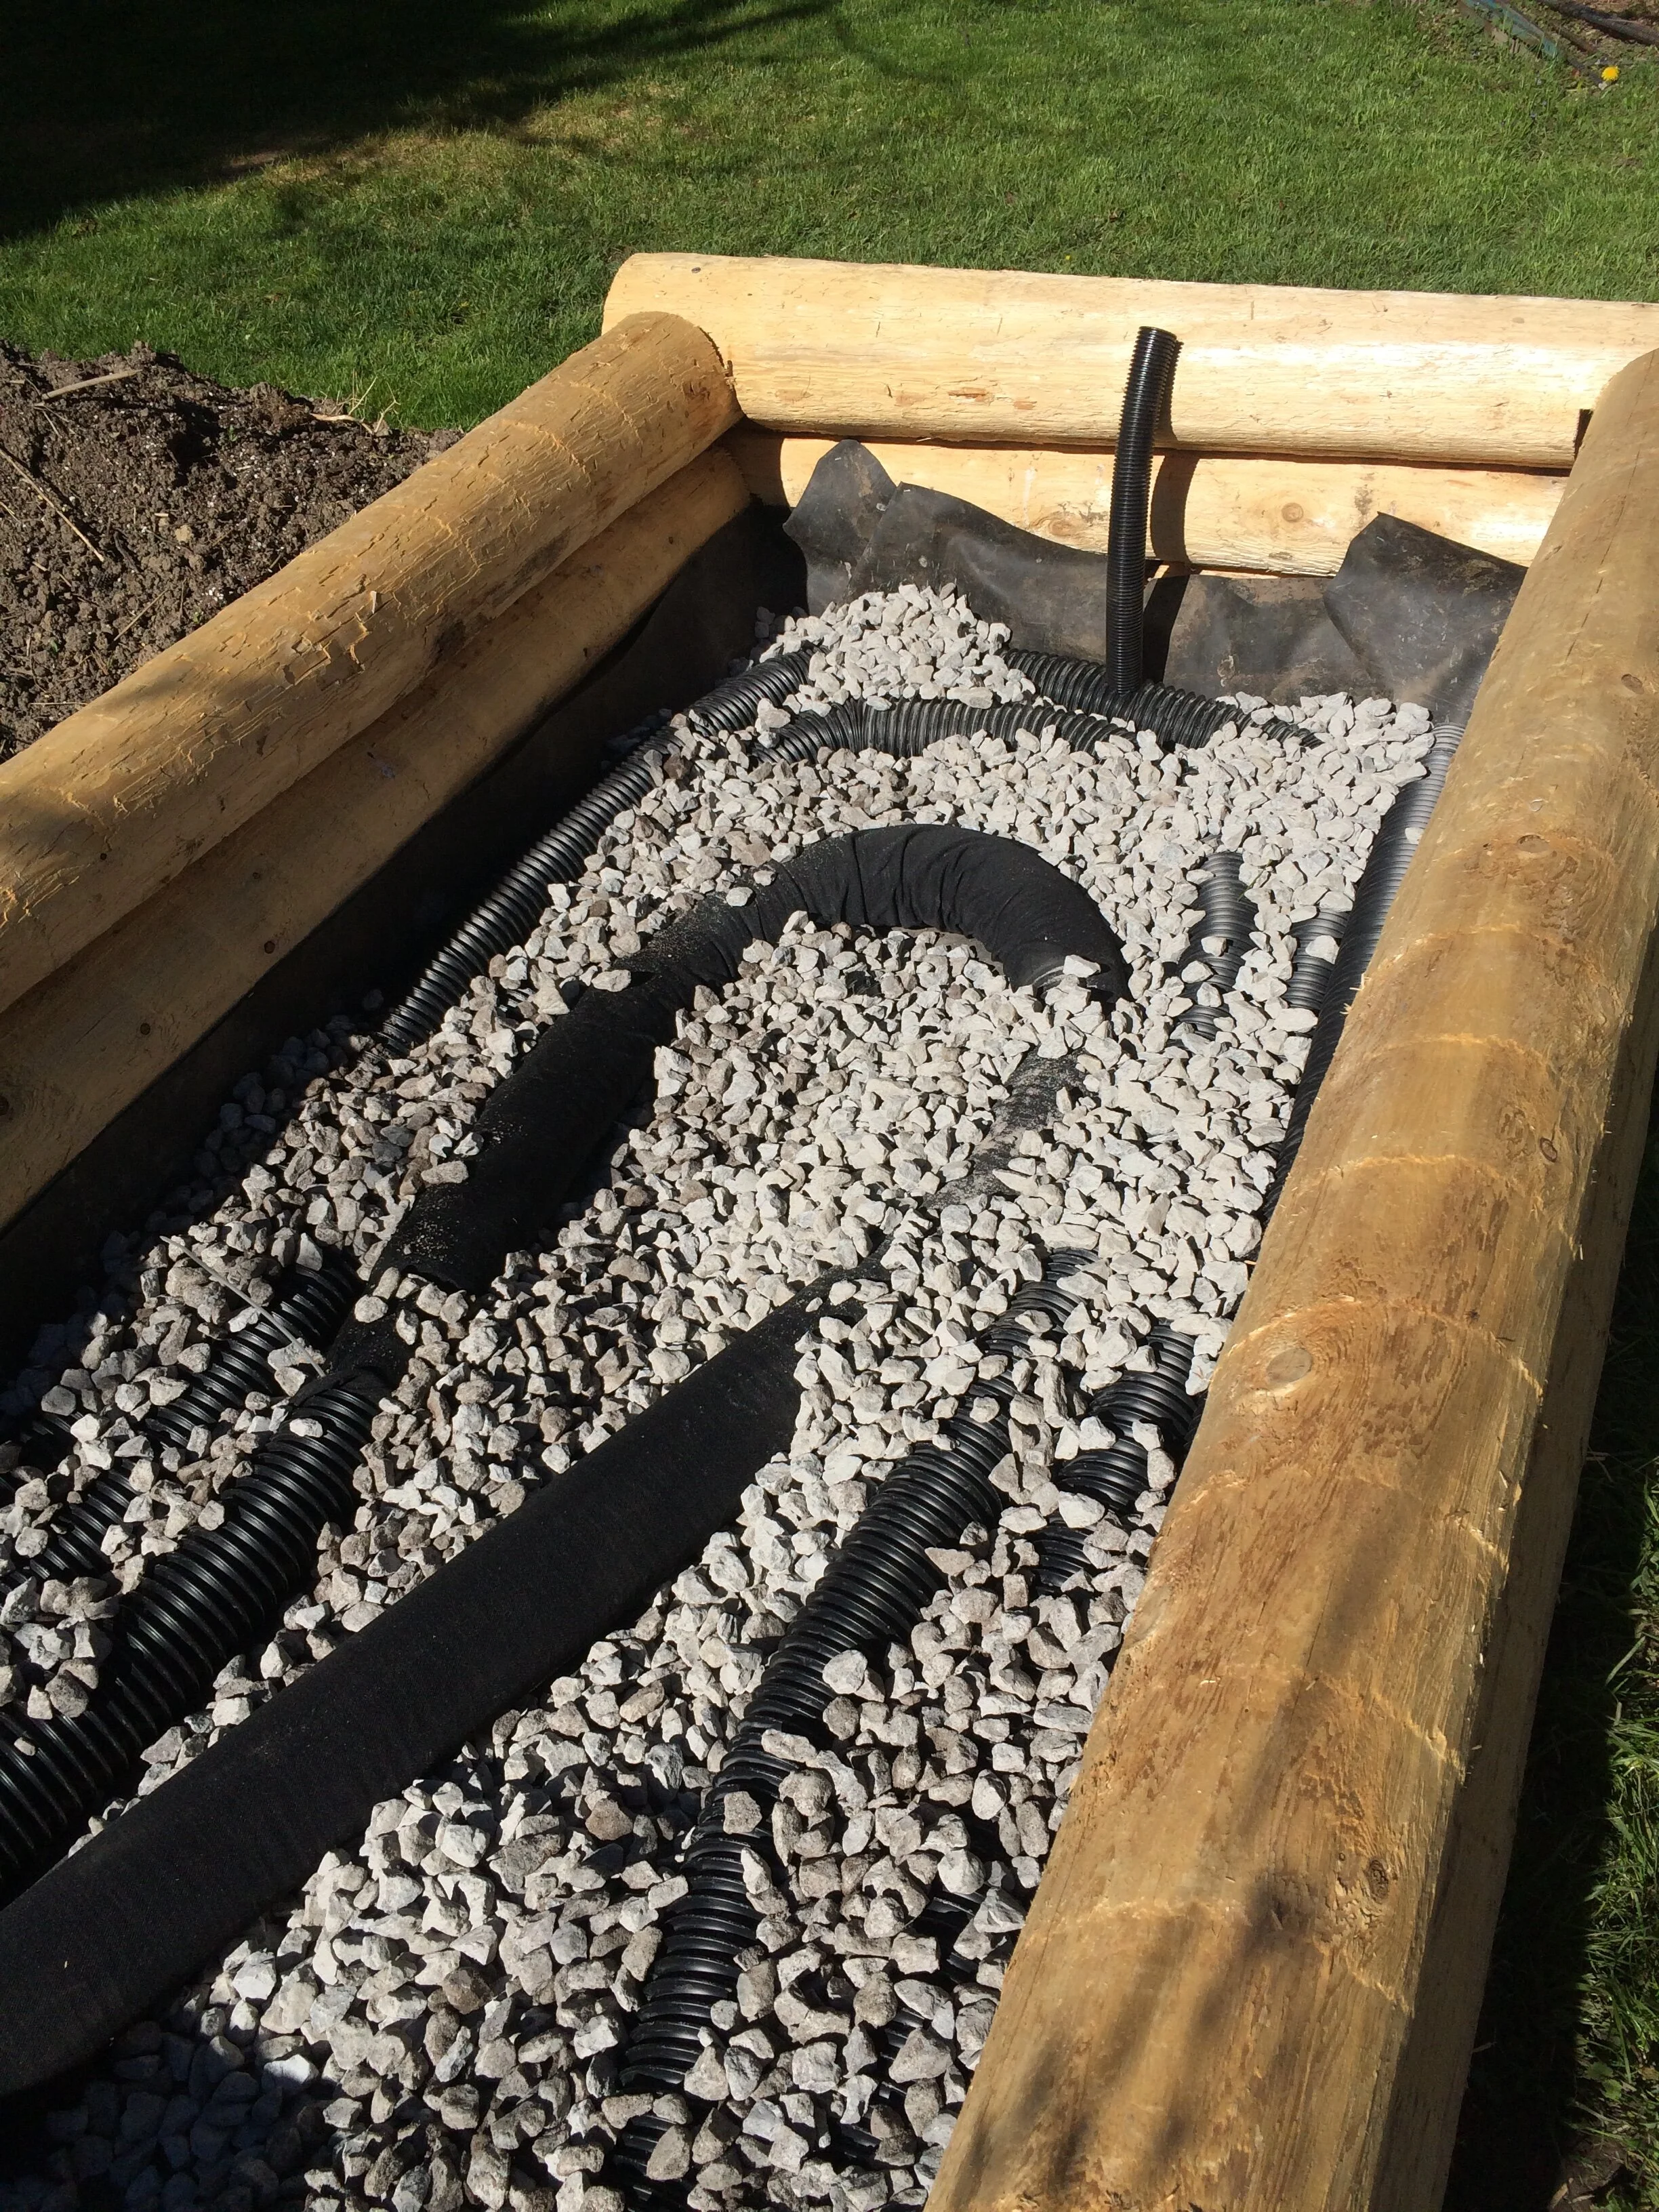
Add gravel. It supports the weight of the soil above, while the spaces between the pieces of gravel fill with water. Water moves upwards through the gravel by capillary action.
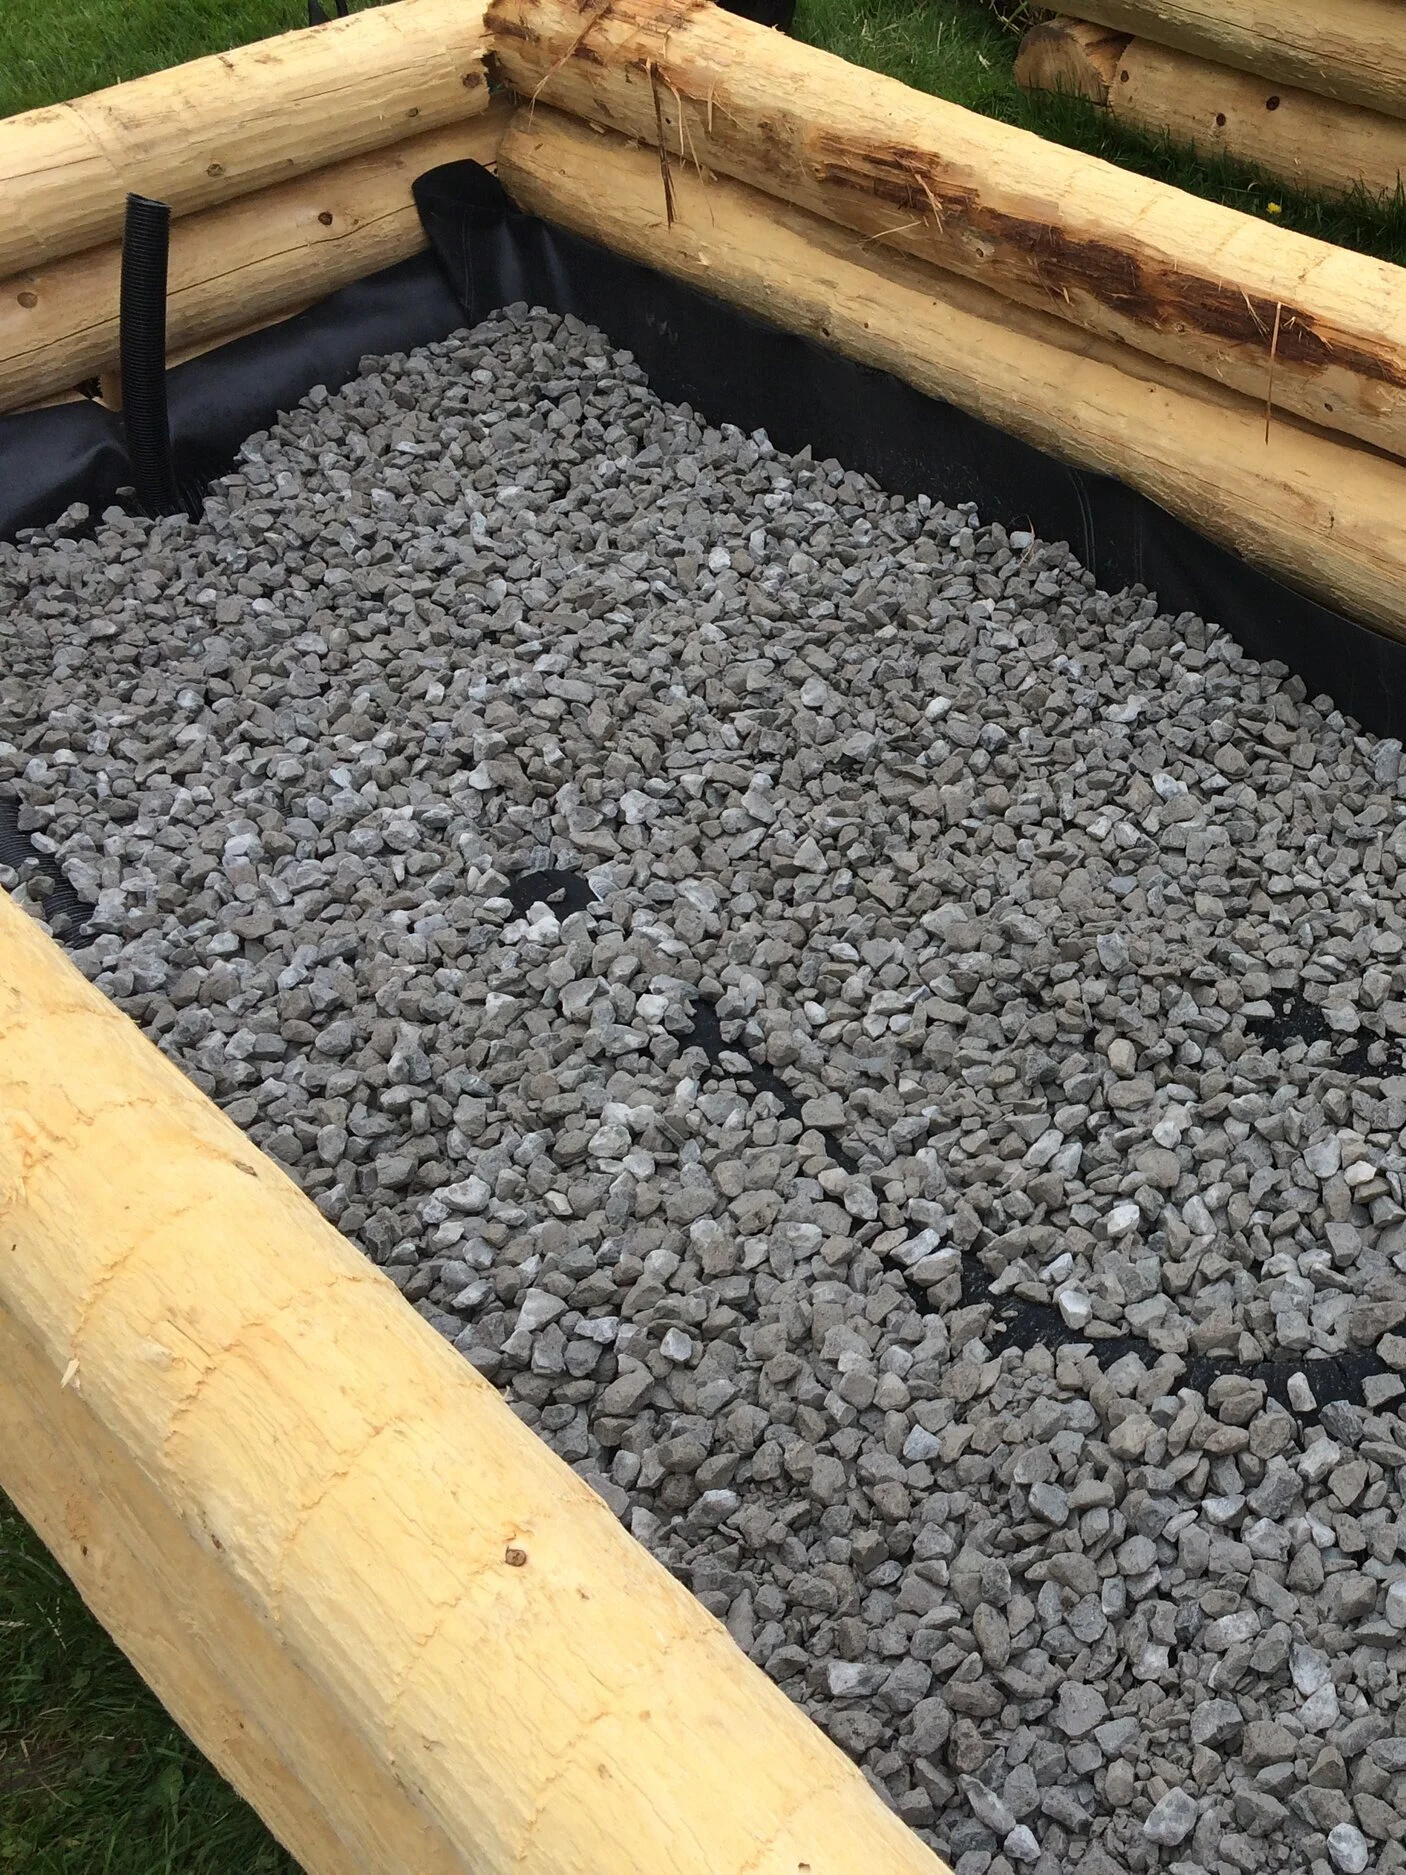
Note the fill tube at the far end, a piece of drain hose installed into the weeping tile. This permits filling of the reservoir with a hose after soil has been added.
Cover with landscape fabric to keep soil out of the reservoir area. Note the depressing in the top-right corner: While in theory water wicks up the gravel, I also created this soil-filled wick that dips into the reservoir. Not necessary, so I wouldn't do it again.
Soil depth: 30-40 cm (12-16") of soil works well. If there is too much soil, the water will not wick all the way to the top.
Pin this post about how to make a wicking bed.
Watering my Wicking Beds
I know that there is enough water in the reservoir when I see water coming out of the side of the bed. It's low-tech—but it works.
One More Reason for Wicking Beds
Soil contamination is another reason to consider growing in a wicking bed. Soil contamination can be a concern in areas where there is a history of industry, and also on former orchard lands where sprays with heavy metals might have been used. Or, like me, it could be from a nearby black walnut tree.
Find out more about soil contamination and what to do about it.
FAQ Wicking Beds
I’m already doing raised bed gardening. Can I retrofit my existing raised beds with this system of irrigation?
Yes, you can retrofit an existing raised garden bed to turn it into a wicking bed. But be prepared to first empty out the bed…so it means some digging!
I want my wicking bed to be a metre (3’) high. So it’s less bending for me while I’m gardening. Is that OK?
With wicking beds, less is more. Too much soil, and the water doesn’t wick all the way to the top of the soil. 30-40 cm (12-16”) soil depth is best for wicking.
If you want a taller raised bed, consider an elevated bed, on legs. (Like a sub-irrigated planter on stilts!) Then you can have the easy access you want, and the wicking won’t be compromised by excessive soil depth. And as a bonus, you won’t spend as much money on soil!
Here’s one other consideration: If you’re transplanting sizeable plants into a deep wicking bed, and don’t mind top watering for a bit until the roots reach a soil depth where there’s moisture from wicking, then maybe you don’t need to worry about soil depth.
Can it freeze in the winter? Does this work for raised bed gardening in Canada?
It’s fine for gardening in Canada and other places with cold climates. We use wicking beds in our urban garden here in Toronto.
Find This Helpful?
Enjoy not being bombarded by annoying ads?
Appreciate the absence of junky affiliate links for products you don’t need?
It’s because we’re reader supported.
If we’ve helped in your food-gardening journey, we’re glad of support. You can high-five us below. Any amount welcome!
Another Way to Add Growing Space in a Small Garden
Straw-bale gardening is a great way to grow on paved areas and areas with poor soil. And you also have a raised garden bed...so less bending required!
Find out more about straw-bale gardening.
More Ideas for Your Vegetable Garden
Find lots more articles about growing vegetables and edible plants in the Grow Vegetables area of this site.
Articles and Interviews
Courses: Edible Gardening
Find out about how to grow lots of vegetables in containers. Find out about potting mix, best types of containers, top crops, and how to care for your plants.

Want to create and edible garden or edible landscape but not sure where to start? Find out how to design a garden, choose plants, and create a functional, beautiful, edible landscape.
About the Author – Steven Biggs
More Articles Courses Free Food-Gardening Guide Donate