How to a Grow a Mulberry Tree
How to grow mulberry in cold climates.
By Steven Biggs
Fowling in Love with Mulberry
My neighbour Hubert handed me a pheasant and a duck from his freezer. I was working for the summer in a rural part of the UK, and regularly saw pheasant when I went out for a jog. Now I’d get to taste one!
As a 20-something-year-old, I’d never cooked either before…and had never even tasted pheasant.
But I remembered reading that the meat is rich and dark, well-suited to a tangy accompaniment.
And I remembered a mulberry tree in a nearby hedgerow.
I’d been grazing fruit from the mulberry tree every time I walked past it. But I had yet to cook the mulberry fruit.
This was my chance! Not really sure what I was doing, I made up a mulberry-Cointreau sauce for basting the roast. The company I had for supper thought it was pretty good.
Roasted fowl with mulberry-Cointreau sauce cemented my appreciation for the taste of mulberry.
Mulberry for Home Gardens
There are many types of mulberry suited for gardens in cold climate. Photo by Grimo Nut Nursery.
Mulberries gets a bad rap. Mention mulberries and many people picture polka-dot-stained sidewalks and bird-bespattered cars. Or experienced gardeners worry that it’s a weedy plant.
Why is it that gardeners always want what’s difficult to grow? Why not appreciate what grows on its own?
This fruit does not play hard-to-get.
Mulberry is a great fit for home gardens because it’s:
Fast-growing
Hardy
Problem-free
Tolerant of many conditions
Very fruitful
And it’s a fruit that you likely won’t find for sale at grocery stores. Too fragile to ship when ripe.
Too bad mulberries get a bad rap for being vigorous growers.…and for the purple stains from falling fruit. They’re a great fruit for home gardens in cold climates.
What does a Mulberry Tree Look Like?
What does it look like? The question should really be, “What does a mulberry tree look like when pruned to feed people, not birds. (More on that below.)
Don’t grow this as a specimen shade tree. There are nicer shade trees out there.
Grow mulberry as a fruit-producing crop – which means you’ll keep it much smaller than if left unchecked.
Types of Mulberry for Cold Climates
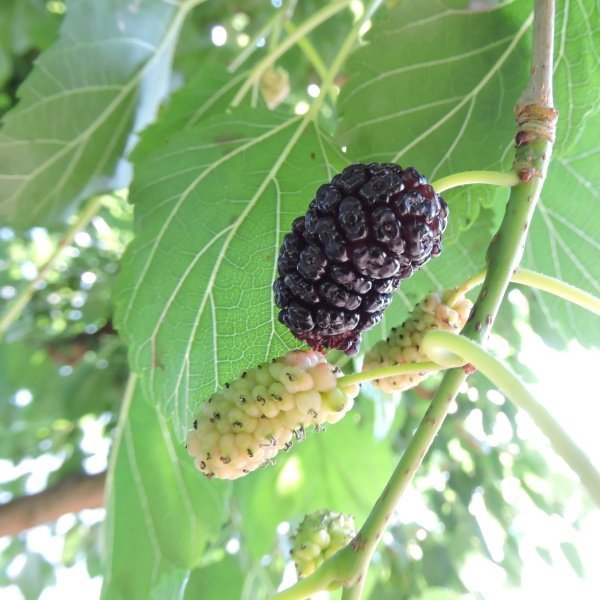
Mulberry names don’t describe the fruit colour. That means a white mulberry tree could be black-fruited, red-fruited, or white-fruited.
If you’re shopping for a mulberry tree, here at the three types you’re likely to find in North America:
• White mulberry (Morus alba)
• Red mulberry (Morus rubra)
• Black mulberry (Morus nigra)
Mulberry names don’t describe the fruit colour. While this ‘Carman’ white mulberry fruit is white, other white mulberry varieties can be purple or black. Photo by Grimo Nut Nursery.
For cold-climate fruit growers, it’s the white mulberry and its hybrids with the red mulberry that are hardiest, some into USDA zone 4.
I’ve read articles in British gardening magazines that disparage the less flavourful white mulberry…but it’s what we have.
White mulberry can grow up to about 15 metres (50’) tall. Because it grows easily from seed—and because birds quickly spread the seeds—feral white mulberry trees are common. (It’s considered a weed tree in some jurisdictions.)
Red mulberry is a native of North America. Pure red mulberry trees are rare because feral white mulberry and red mulberry hybridize readily. Here in Ontario, where red mulberry is native in the south of the province, its threatened by the white mulberry due to their promiscuous hybridizing.
The more diminutive black mulberry, noted for the quality of its fruit, is less hardy, and not suited to northern gardens. It’s suited to conditions in USDA zones 6 and higher.
Other thoughts on selecting a mulberry tree:
There are weeping varieties that get to about 3 metres (10’) tall and can be perfect for small-space gardens (just beware, as there are fruitless varieties of weeping mulberry on the market)
There are dwarf varieties that get to about 6 metres (20’) tall
White-fruited varieties might be the ticket is you’re averse to mulberry stains
‘Illinois Everbearing’ is noted for having a long season of fruiting
Plant a Mulberry Tree
Mulberry trees fend for themselves quite well once established, but here are things you can do to give them a good start.
If you’re planting a container-grown mulberry tree, the first thing to do is look at the roots. Because mulberry is a vigorous grower, it’s common to find roots tightly wound around and knitted together.
Use your fingers to tease apart the roots. We want the roots to grow outwards into the surrounding soil once planted, not continue to grow around in circles.
Water well when first planted and until established.
Pruning Mulberry Trees
Many sources suggest that regular pruning is not necessary with mulberry.
That’s fine if you want to feed the birds.
But if you’re growing the mulberries for yourself, I suggest a different approach: Be aggressive – and do it every year.
Your goal is to create a permanent scaffold of branches that you cut back to every year (see below).
Formative Pruning
Grow mulberry trees in an umbrella shape, so you can reach all of the fruit. Photo by Grimo Nut Nursery.
The best way to get a tree with a well-arranged scaffold is to make it yourself. Get a whip, which is a young, unbranched tree. (You probably won’t find this sort of tree at a garden centre; look for a specialist fruit-tree nursery.)
Then prune that whip so that it grows into a spreading tree. Think short and wide.
Start this pruning process by removing the “leader,” which is the growing tip of the tree. Linda Grimo, at Grimo Nut Nursery, a specialist nursery, suggests, “Stand as tall as you can with your pruners in your hand and clip off the top of the tree.” She explains that this stops it from growing upwards, and encourages the growth of side branches at a height you can reach without a ladder.
Umbrella-shaped mulberry tree in summer. Prune hard to keep berries at picking height. Photo by Grimo Nut Nursery.
Grimo says she likes to grow mulberry trees in an umbrella-shaped scaffold, with side branches (laterals) spaced out around the tree. For ease of getting under the tree to pick, don’t grow the side branches too low on the tree; her preferred height is just over a metre (4’) above the ground.
Annual Pruning
Mulberry trees growing in good soil put on a tremendous amount of growth every year. After formative pruning is complete, prune back almost all of the new growth every year, leaving just 1-2 buds from which the tree can send up replacement shoots.
This harsh pruning doesn’t affect cropping because fruit forms on new growth. “Don’t be afraid, you can’t kill a mulberry tree,” is what Grimo tells concerned first-time mulberry growers.
Prune in late winter, when dormant.
Mulberry Tree Feed and Water
Mulberry trees have extensive root systems, which means that they can do quite well without coddling.
Mulch with compost around the base of the tree to feed the soil and suppress weed growth.
Landscape with Fruit
That’s easy to grow in a home garden!
Mulberry Tree Pollination
Mulberry trees are self-fertile, which means you only need one tree to get fruit.
The small, unremarkable flowers are wind pollinated. (There are even some varieties that set fruit without pollination.)
Mulberry Tree Propagation
Dwarf or weeping mulberry varieties are well-suited to use in small-space foodscapes, even in more traditional gardens.
Mulberry plants grown from seed will be different from the parent plant. Just like apples. There is a juvenile period before a seed-grown mulberry tree will flower and produce fruit, often 5-10 years.
It’s easy to grow from seed. In fact, this is a tree that might just seed itself in your garden.
I don’t recommend growing mulberry from seed, because you don’t know what the fruit quality will be like—and you’ll have to patiently wait through that juvenile stage.
Another unknown if growing from seed: Some mulberry trees are dioecious, meaning male and female flowers are on separate plants…and that could leave you with a tree that doesn’t bear any fruit.
If you want good fruit quickly, start with a known variety. Clonally produced trees—grafts and cuttings—can fruit right away because the clone is from a mature tree, and no longer in the juvenile stage.
Some nurseries propagate mulberry by cutting, some by grafting. For grafting, Grimo says cleft grafts work well. Propagation from cuttings can be more challenging for home gardeners without a misting system, bottom heat, and rooting hormone.
Mulberry Trees in Garden Design
Mulberry trees are quite versatile in garden design. Here are ideas for using mulberry trees in the landscape:
Dwarf or weeping varieties are well-suited to use in small-space foodscapes
Large, minimally pruned mulberry trees can be used for a canopy layer in a food forest
Smaller mulberry varieties can fit a forest-edge niche in a food forest because the tree tolerates partial shade
From a permaculture perspective, mulberry is an interesting option because along with fruit, it can provide poles and animal fodder (see below)
Mulberry for More than the Fruit
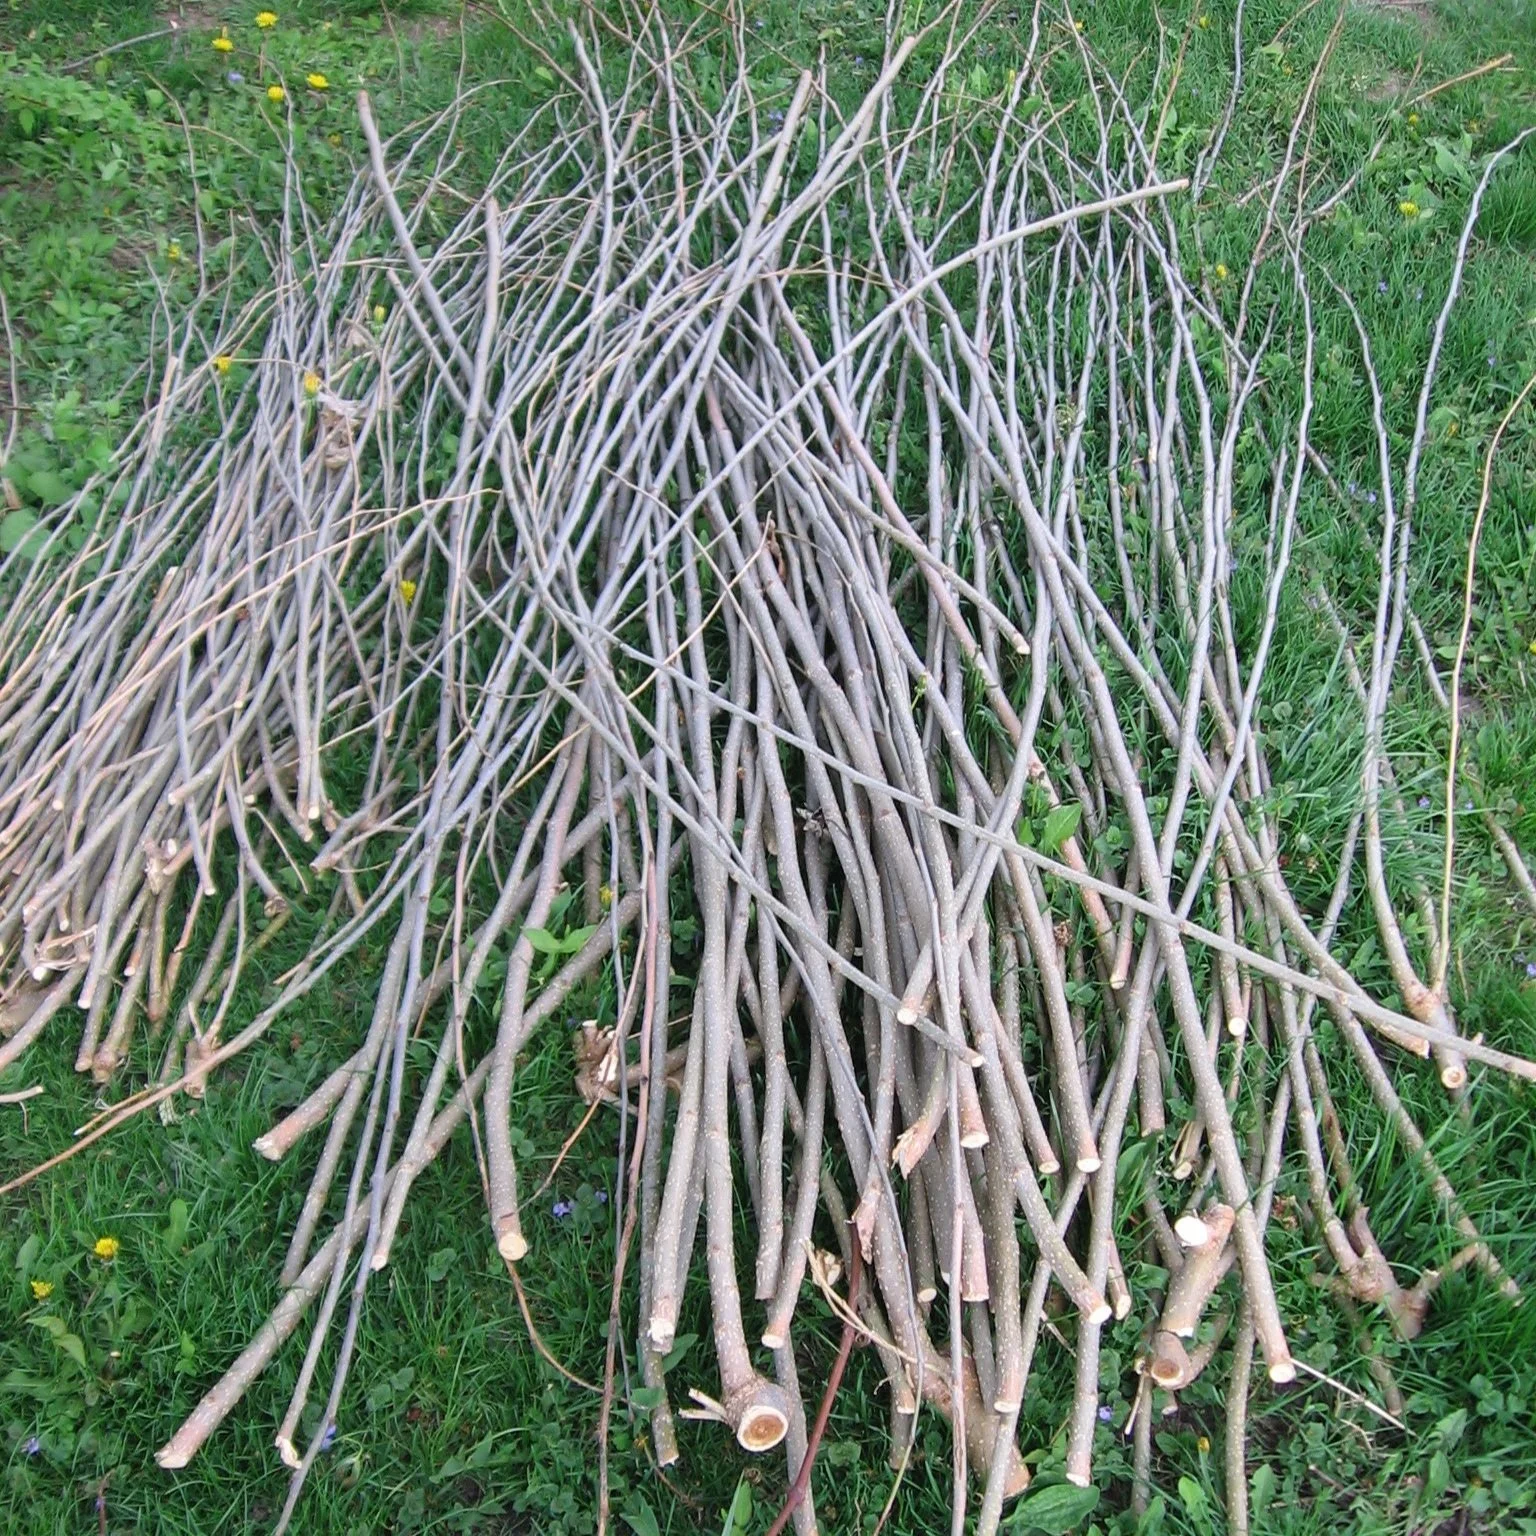
Because it grows very quickly, mulberry is well suited to pollarding and coppicing techniques. Here are branches from my neighbour’s mulberry pollard that I use as poles in the garden.
Mulberry is an excellent tree choice if you’re gardening with a permaculture mindset.
My neighbour Troy used to give his mulberry tree a harsh haircut every year. The long, straight branches made excellent poles that he gave me for staking plants and making trellises.
He grew his tree as a “pollard,” meaning he lopped off all of the growth a few feet above the ground. (Pollarding is often done with catalpa trees, for ornamental purposes.)
The other twist on this idea of using your mulberry tree to produce poles, is to grow it as a “coppice.” Coppicing is when you cut off a tree close to the ground to get it to send out lots of stems. Coppicing has traditionally been used to produce wood for baskets, fences, and fuel.
Mulberry Tree Location
Mulberry trees prefer full sun and rich soil. But they tolerate partial shade and a variety of soils.
And much worse.
To say they’re forgiving of poor conditions is an understatement.
I’ve seen lovely mulberry trees growing between cracks in the pavement. They do amazingly well in inhospitable locations. As I write this I’m looking out the window at the self-seeded mulberry tree in my front garden that I’m training into an espalier. It’s growing right underneath a row of spruce trees, hardly an ideal location. But it persists!
So save the prime real estate in your garden for plants that really need it. Your mulberry isn’t fussy. And, remember, pick a spot where purple spotting is not a nuisance.
The one thing to avoid is standing water. Pick a well-drained location, though occasional wetness is fine.
Challenges
Your mulberry tree will be a bird beacon.
Got a white car? Hanging out clothes to dry?
Then you might want to net the tree to keep away the birds. Netting is easier to do when you’ve grown a compact mulberry tree.
Harvest and Store Mulberries
If you’ve started with a tree grown from a graft or cutting, you might start getting fruit in as little as 2-3 years.
Not all the fruit on a tree ripens at the same time. As they ripen, fruit fall to the ground.
White mulberries can be very sweet, while black mulberries are more balanced, with some tartness. I prefer white mulberries a little bit under ripe—while they’re less sweet. (Remember, a white mulberry tree can have black fruit!)
A couple notes on picking mulberries:
The fruit are fragile, and the juice easily comes out of the fruit when picked…so expect red hands if it’s a dark-coloured variety
Ripe fruit will drop from tree as you pick
A common recommendation when harvesting from large mulberry trees with many unreachable fruit above is to place a sheet on the ground and shake the branches.
The fruit has a short life once picked. There’s a little stem on it – and you can eat it stem and all.
Here are 6 simple ideas to grow lots of fruit in a home garden.
Mulberries in the Kitchen
You can use mulberries raw, use them in preserves, or cook them. Here are ideas:
Mulberry pie
Mulberry wine
Mulberry cobbler
Mulberry liqueur
Dried mulberries (great in a trail mix!)
Mulberry juice
Mulberry FAQ
How fast do mulberry trees grow?
Mulberry trees grow very quickly.
Where do mulberry trees grow?
White mulberry and its hybrids are suited to cold-climate gardens into USDA zone 4. Black mulberry is less cold-tolerant.
Can you grow a mulberry tree from a cutting?
Yes. You can grow mulberry trees from cuttings.
Do mulberries grow on trees or bushes?
Mulberries naturally have a tree form, but you can prune to encourage branching and a bush-like shape.
Can you grow a mulberry tree in a pot?
Cold-climate gardeners who are determined to try black mulberry can grow it in a pot that is stored in a protected area over the winter.
How do you keep a mulberry tree small?
Prune it very aggressively every year.
Do mulberry trees grow near black walnut trees?
Mulberry trees are not affected by the compound “juglone” that is given off by black walnut trees. So if a black walnut tree has limited your growing options, consider mulberry.
Find This Helpful?
If we’ve helped in your edible-gardening journey, we’re always glad of support. You can high-five us below! Any amount welcome!
More on Growing Fruit
Get our free guide with 6 ways to grow more fruit in your garden.
Articles and Interviews about Growing Fruit
Here are more resources to help you grow fruit.
Courses on Fruit for Edible Landscapes and Home Gardens
Home Garden Consultation
Book a virtual consultation so we can talk about your situation, your challenges, and your opportunities and come up with ideas for your edible landscape or food garden.
We can dig into techniques, suitable plants, and how to pick projects that fit your available time.
Mom's Rhubarb Pie Recipe
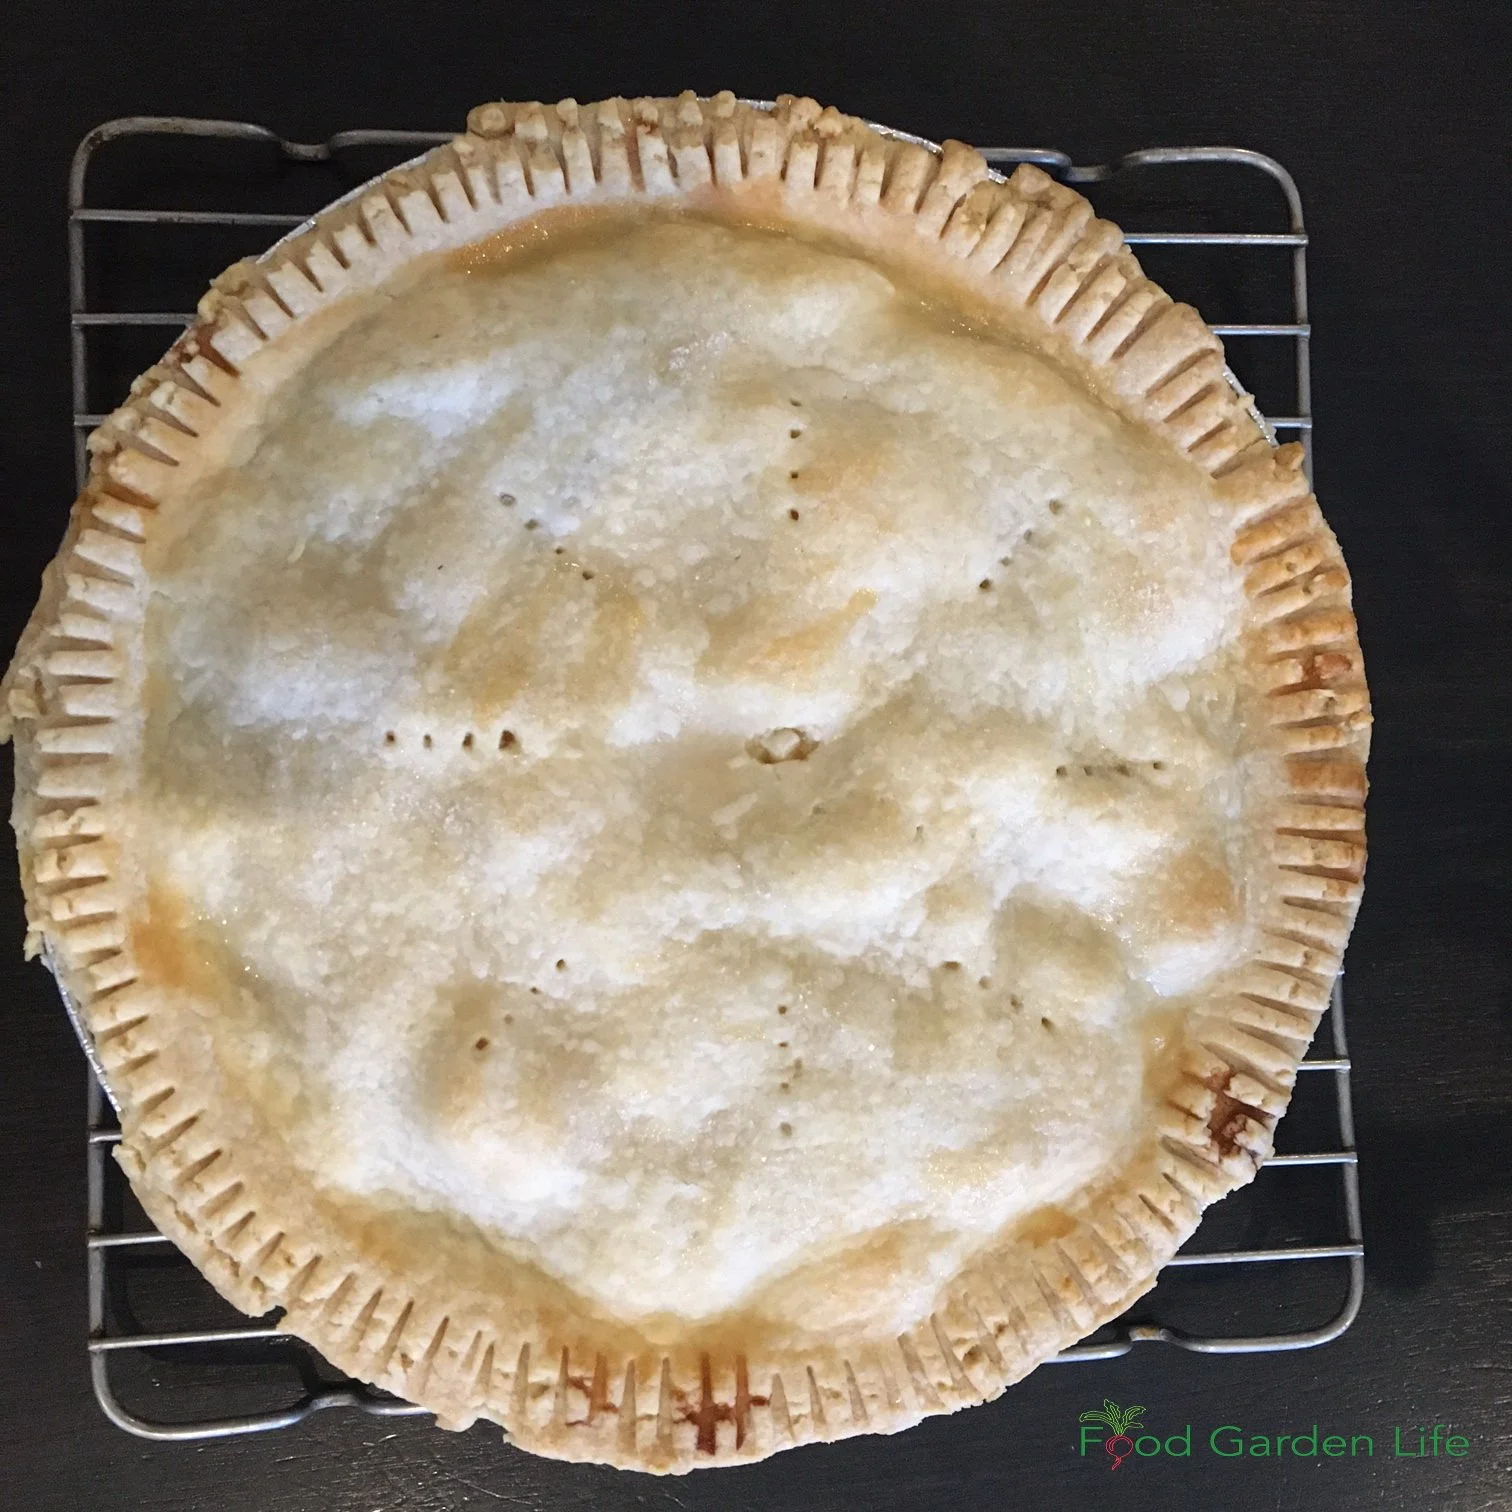
Mom’s rhubarb pie recipe. This is a very good rhubarb pie!
By Steven Biggs
Stalking Out the Best Rhubarb for Pie
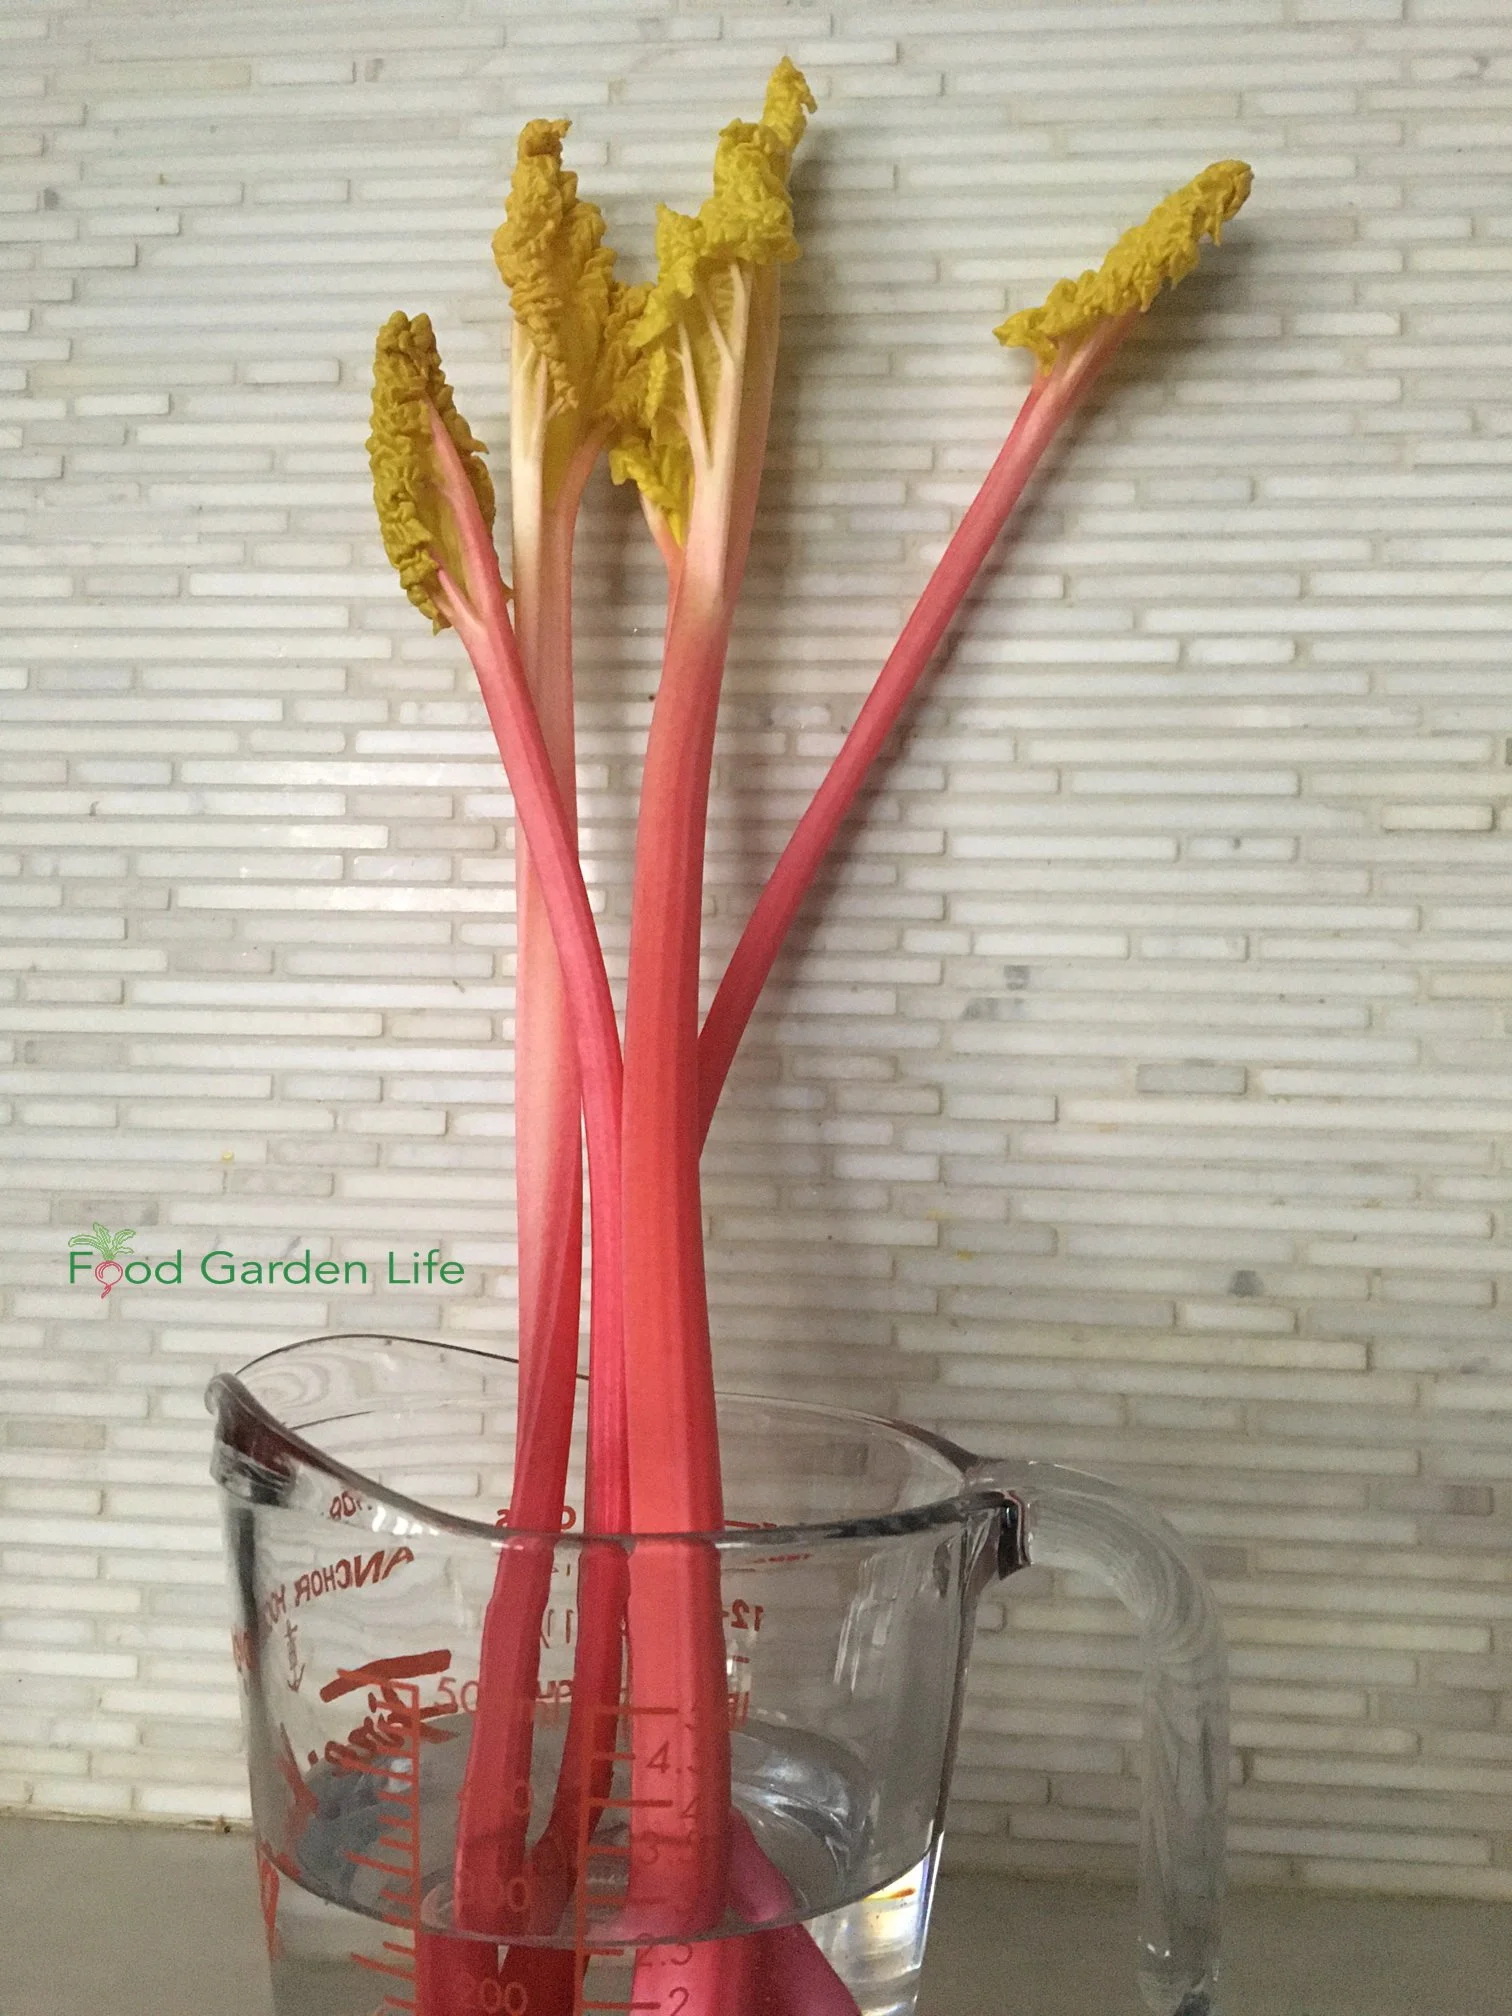
In spring, Mom put an upside-down bushel basket over a corner of her rhubarb patch. The dark, warmer conditions within coaxed longer, rosy-red stalks from the rhubarb roots below.
Those rosy-red stalks made great rhubarb pie.
Ingredient for an Extra Special Rhubarb Pie
Mom’s spring-forced rhubarb made great pie because when you force rhubarb—when you grow it in warmer, dark conditions—you get stalks with a bright red colour. It’s quite different from the stringier, greenish-red stalks you get from rhubarb exposed to sunlight.
Along with the colour, the other thing about forced rhubarb is that it’s more tender. Cooked into a pie, it’s melt-in-your-mouth tender.
So I recommend forced rhubarb if you want an extra special rhubarb pie.
If not, though, regular rhubarb still makes great rhubarb pie. I share Mom’s recipe below.
Where to get Forced Rhubarb
Rhubarb I forced in my basement.
Force it yourself: You can force it in the garden, like Mom did—or you can even force it indoors over the winter.
Find out how to force your own rhubarb indoors over the winter.
Depending where you are, you might also be able to buy forced rhubarb in the winter and early spring.
Another Special Ingredient for Rhubarb Pie
Mom always added orange zest to her rhubarb pie. It’s a pairing that I love. I think they’re made to go together. The orange zest doesn’t blunt the tanginess of the rhubarb or disguise the flavour.
Because I grow potted citrus here in Toronto, I experiment with other types of citrus zest. Yuzu and Meyer lemon zest both work very nicely with rhubarb.
Hear about cold-hardy citrus such as yuzu.
Find out how to grow a potted Meyer lemon tree.
The Rhubarb Pie Crust
Mom used vegetable shortening. My wife, Shelley, swears by lard, like her grandmother taught her to use.
I’m not too sophisticated when it comes to pastry…but I appreciate a good one. If I’m in a rush, I just buy a pre-made pastry shell.
These days I have a rolling pin, but in my first kitchen, I rolled my pastry with a quart beer bottle. (Labatt 50 in case you’re wondering!)
Pastry-Related Tip
Something that I think works very nicely with rhubarb pie is sugar granules on the crust. It looks nice—and fits well with the sweet-and-sour in a rhubarb pie.
Here’s what to do:
Before you pop your pie into the oven, brush the top with milk, and then lightly sprinkle sugar over the top.
Serving Rhubarb Pie
Keep it simple.
Vanilla ice cream or whipped cream are all that I’d pair with rhubarb pie.
I was once served rhubarb pie with chocolate ice cream. Yuck! It hid the rhubarb flavour.
Soggy Bottom Crust and Rhubarb Pie
When I was learning to make pie, Mom explained why she liked to start off her rhubarb pie at a higher temperature. The higher temperature was to make sure the bottom crust isn’t soggy.
Because there’s a lot of moisture in rhubarb, it’s common to get a soggy lower crust. A blast of higher heat when you first start baking helps prevent that.
Rhubarb Pie Recipe
Ingredients
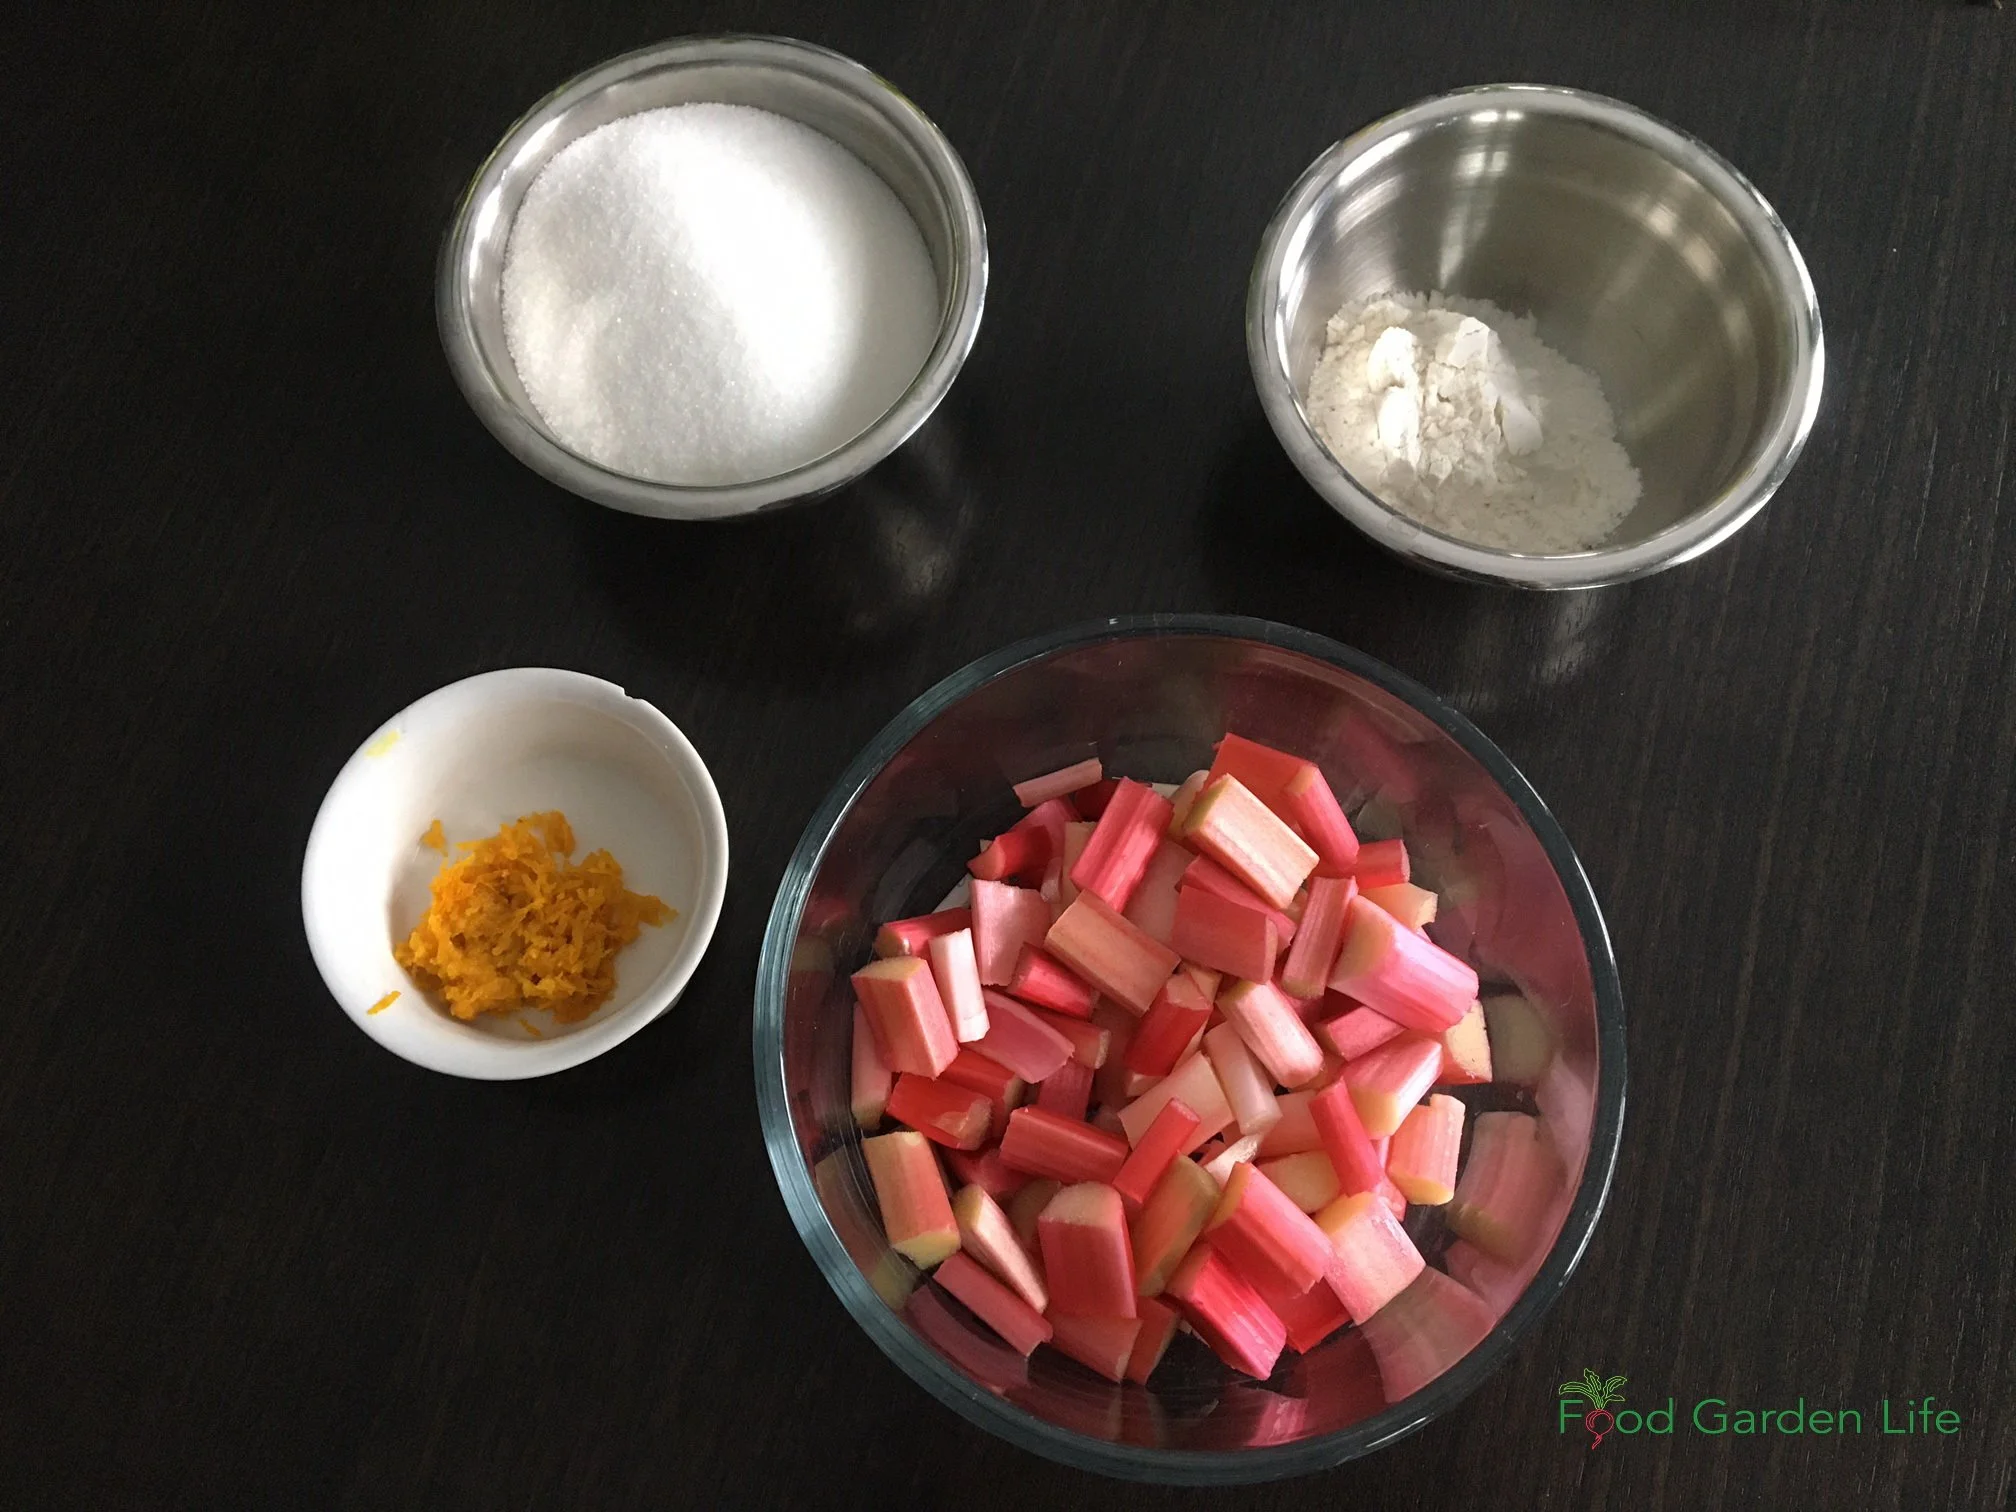
Only 4 ingredients in this easy-to-make rhubarb pie recipe.
4 cups chopped rhubarb
1 cup sugar (I actually prefer pie with ¾ cups of sugar, but Mom used a cup)
¼ cup flour
Zest of half an orange
Directions
Chop rhubarb into 2 cm (3/4”) pieces
Mix together ingredients
Place in a pie shell
Put on the upper crust (crimp well with a fork because this is a juicy pie, and you don’t want that precious juice coming out the side!)
Use a fork to poke some vent holes in the upper crush
Bake at 450°F for 10 minutes
Turn down the temperate to 350°F and bake 30 more minutes
More on Rhubarb
Hear farmer Brian French explain how he forces rhubarb.
Find out how to force your own rhubarb.
Did You Know?
Rhubarb looks great in an edible garden. My neighbour Chris planted it next to his pond because of the large tropical-looking leaves and the charming flowers.
If the idea of a garden that has edible plants woven into it, you might be interested in my Edible Garden Makeover masterclass.
More Food Gardening Resources
Course
Create your own edible oasis…including a patch of rhubarb. Edible Garden Makeover guides you through creating an edible garden you love.
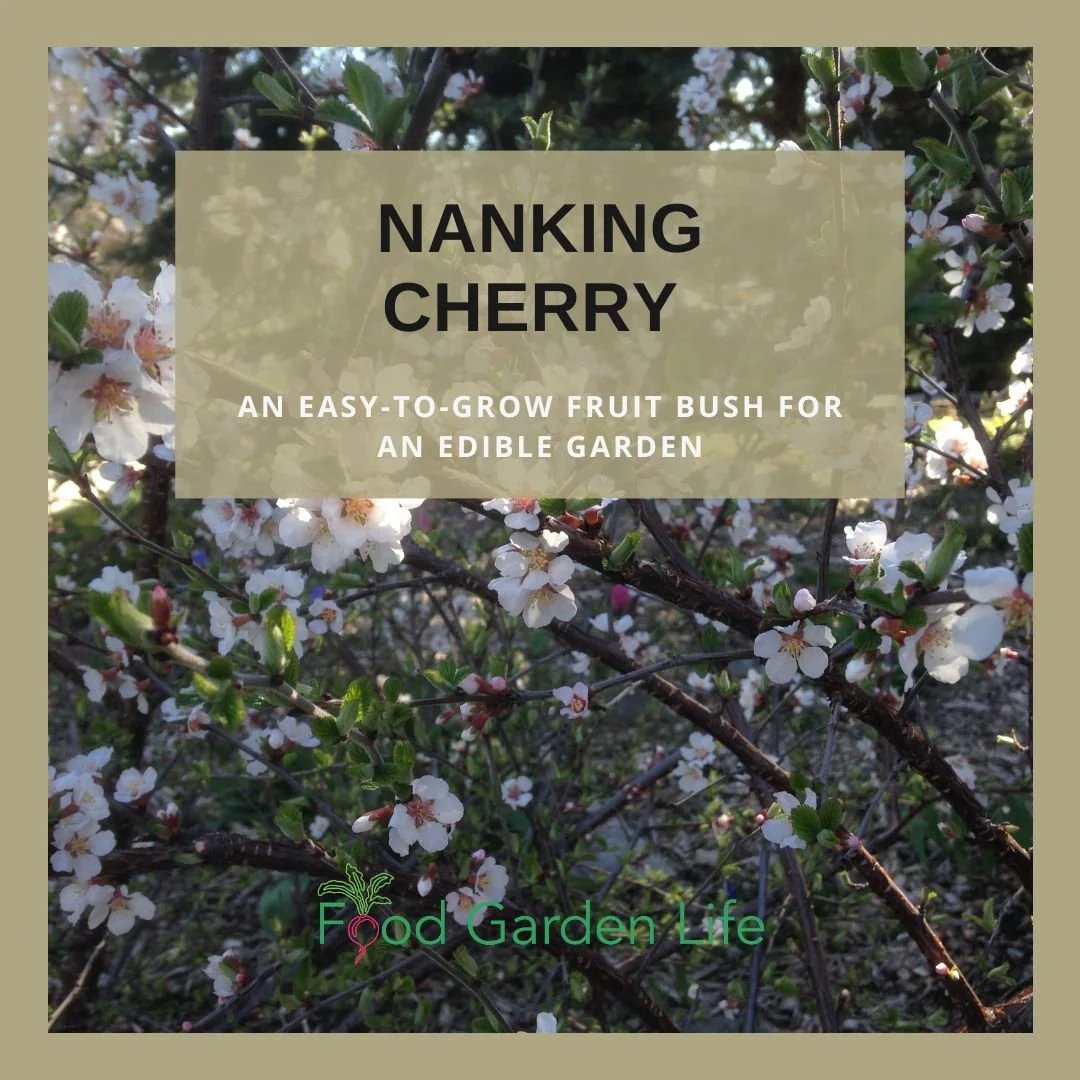
Guide to Growing Nanking Cherry: An Easy-to-Grow Bush Cherry
Guide to growing Nanking Cherry, an easy-to-grow cherry bush.
By Steven Biggs
Grow Nanking Cherry
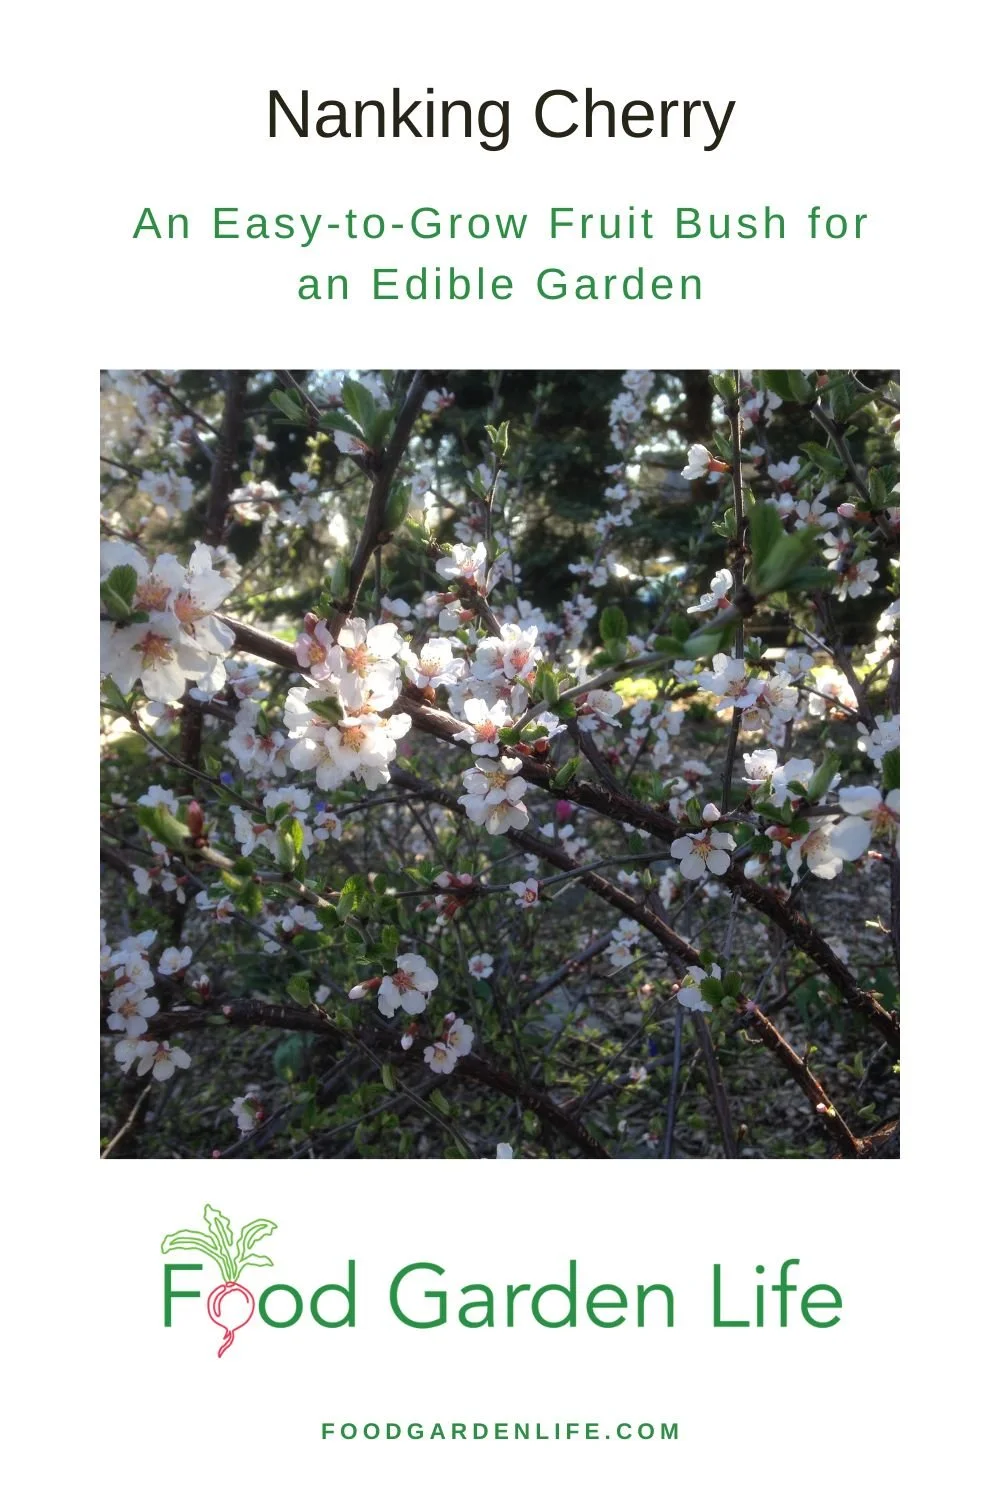
The Nanking cherry bush has a spectacular bloom early in the spring.
“Dad, someone’s taking a picture of your garden,” shouts one of the kids. It’s early May, so I know which plant will be in the photo.
The Nanking cherry, a.k.a. Prunus tomentosa. Even though our front garden is a party of spring flowering bulbs, when the Nanking cherry is blooming, it steals the show.
The Nanking cherry bush is like a stop sign. Pedestrians going past our house change gears from a brisk walk to a full stop and then take photos.
Spring isn’t the only time it looks great: it looks great again as the fruit colours up. And unlike cherry trees, where you have to look upwards, this cherry bush is at eye level.
Perfect Fruit for a Home Garden
Nanking cherry is ideal for a home food garden because it’s compact, ornamental, and easy to care for. By comparison, many fruit trees require a fair bit of pruning and pest and disease management. And they take more space.
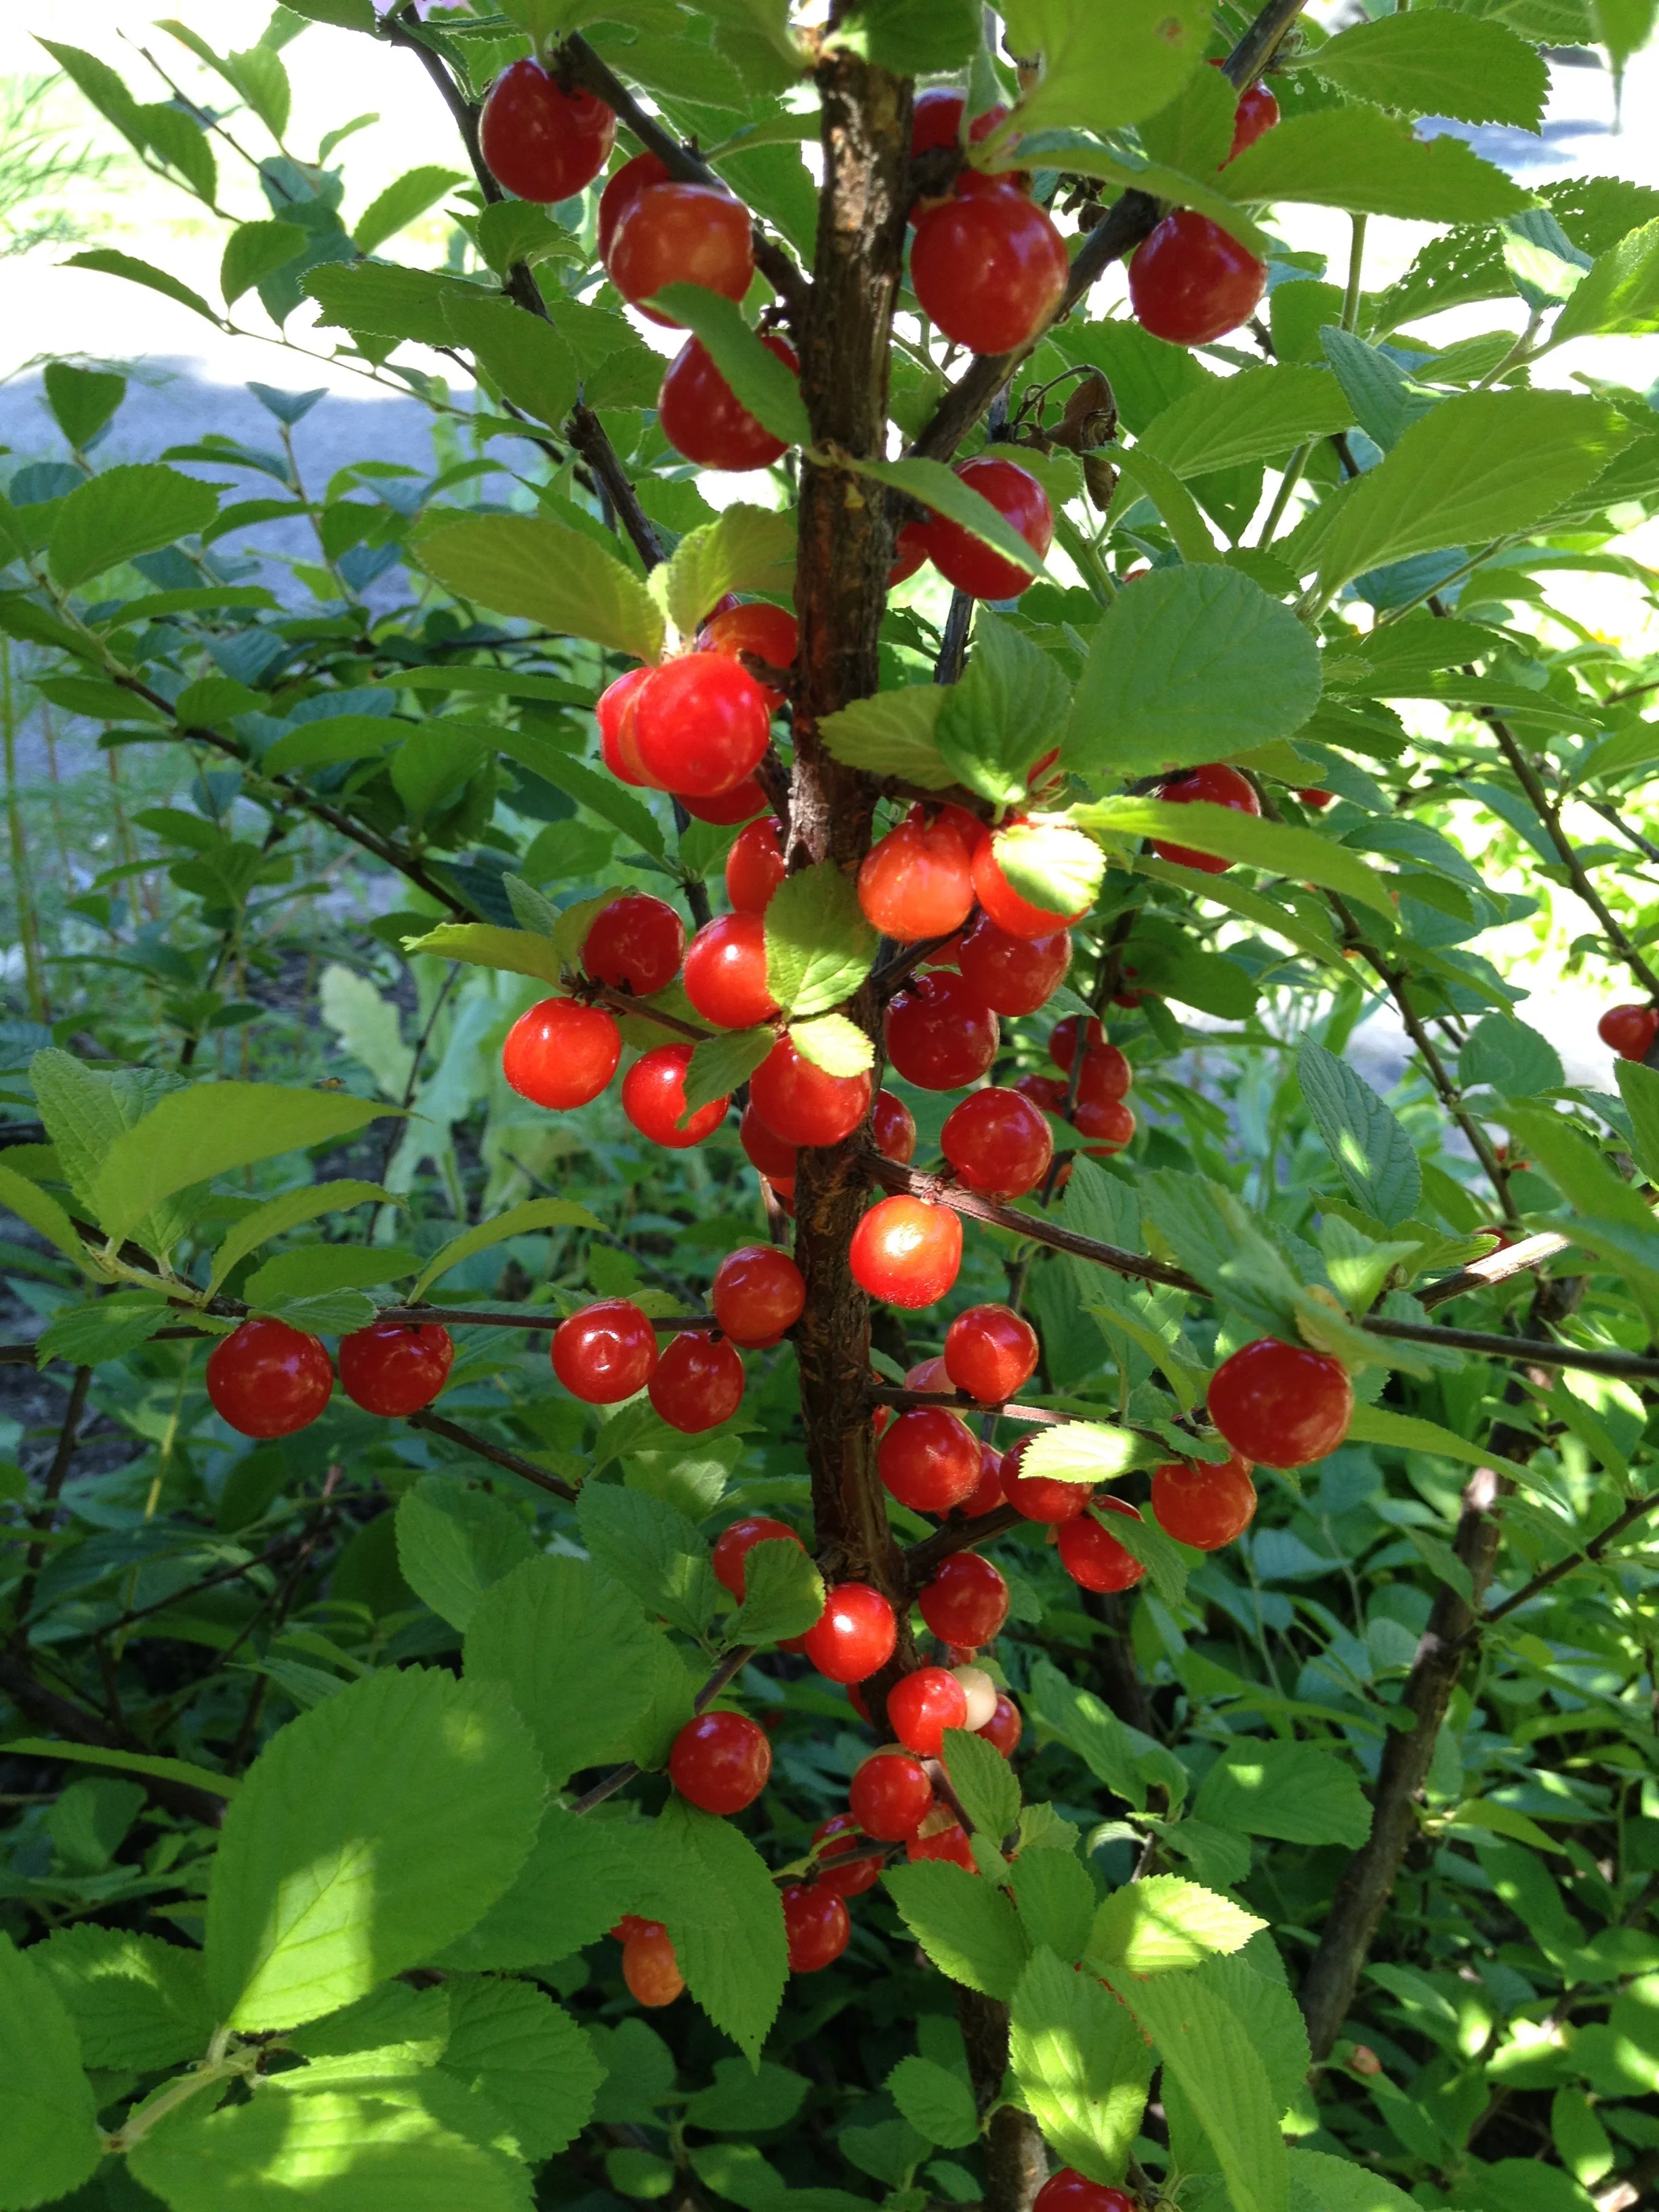
The small, bright-red cherries are juicy. I’d place the taste somewhere between sweet and sour cherries.
Where to get Nanking Cherry
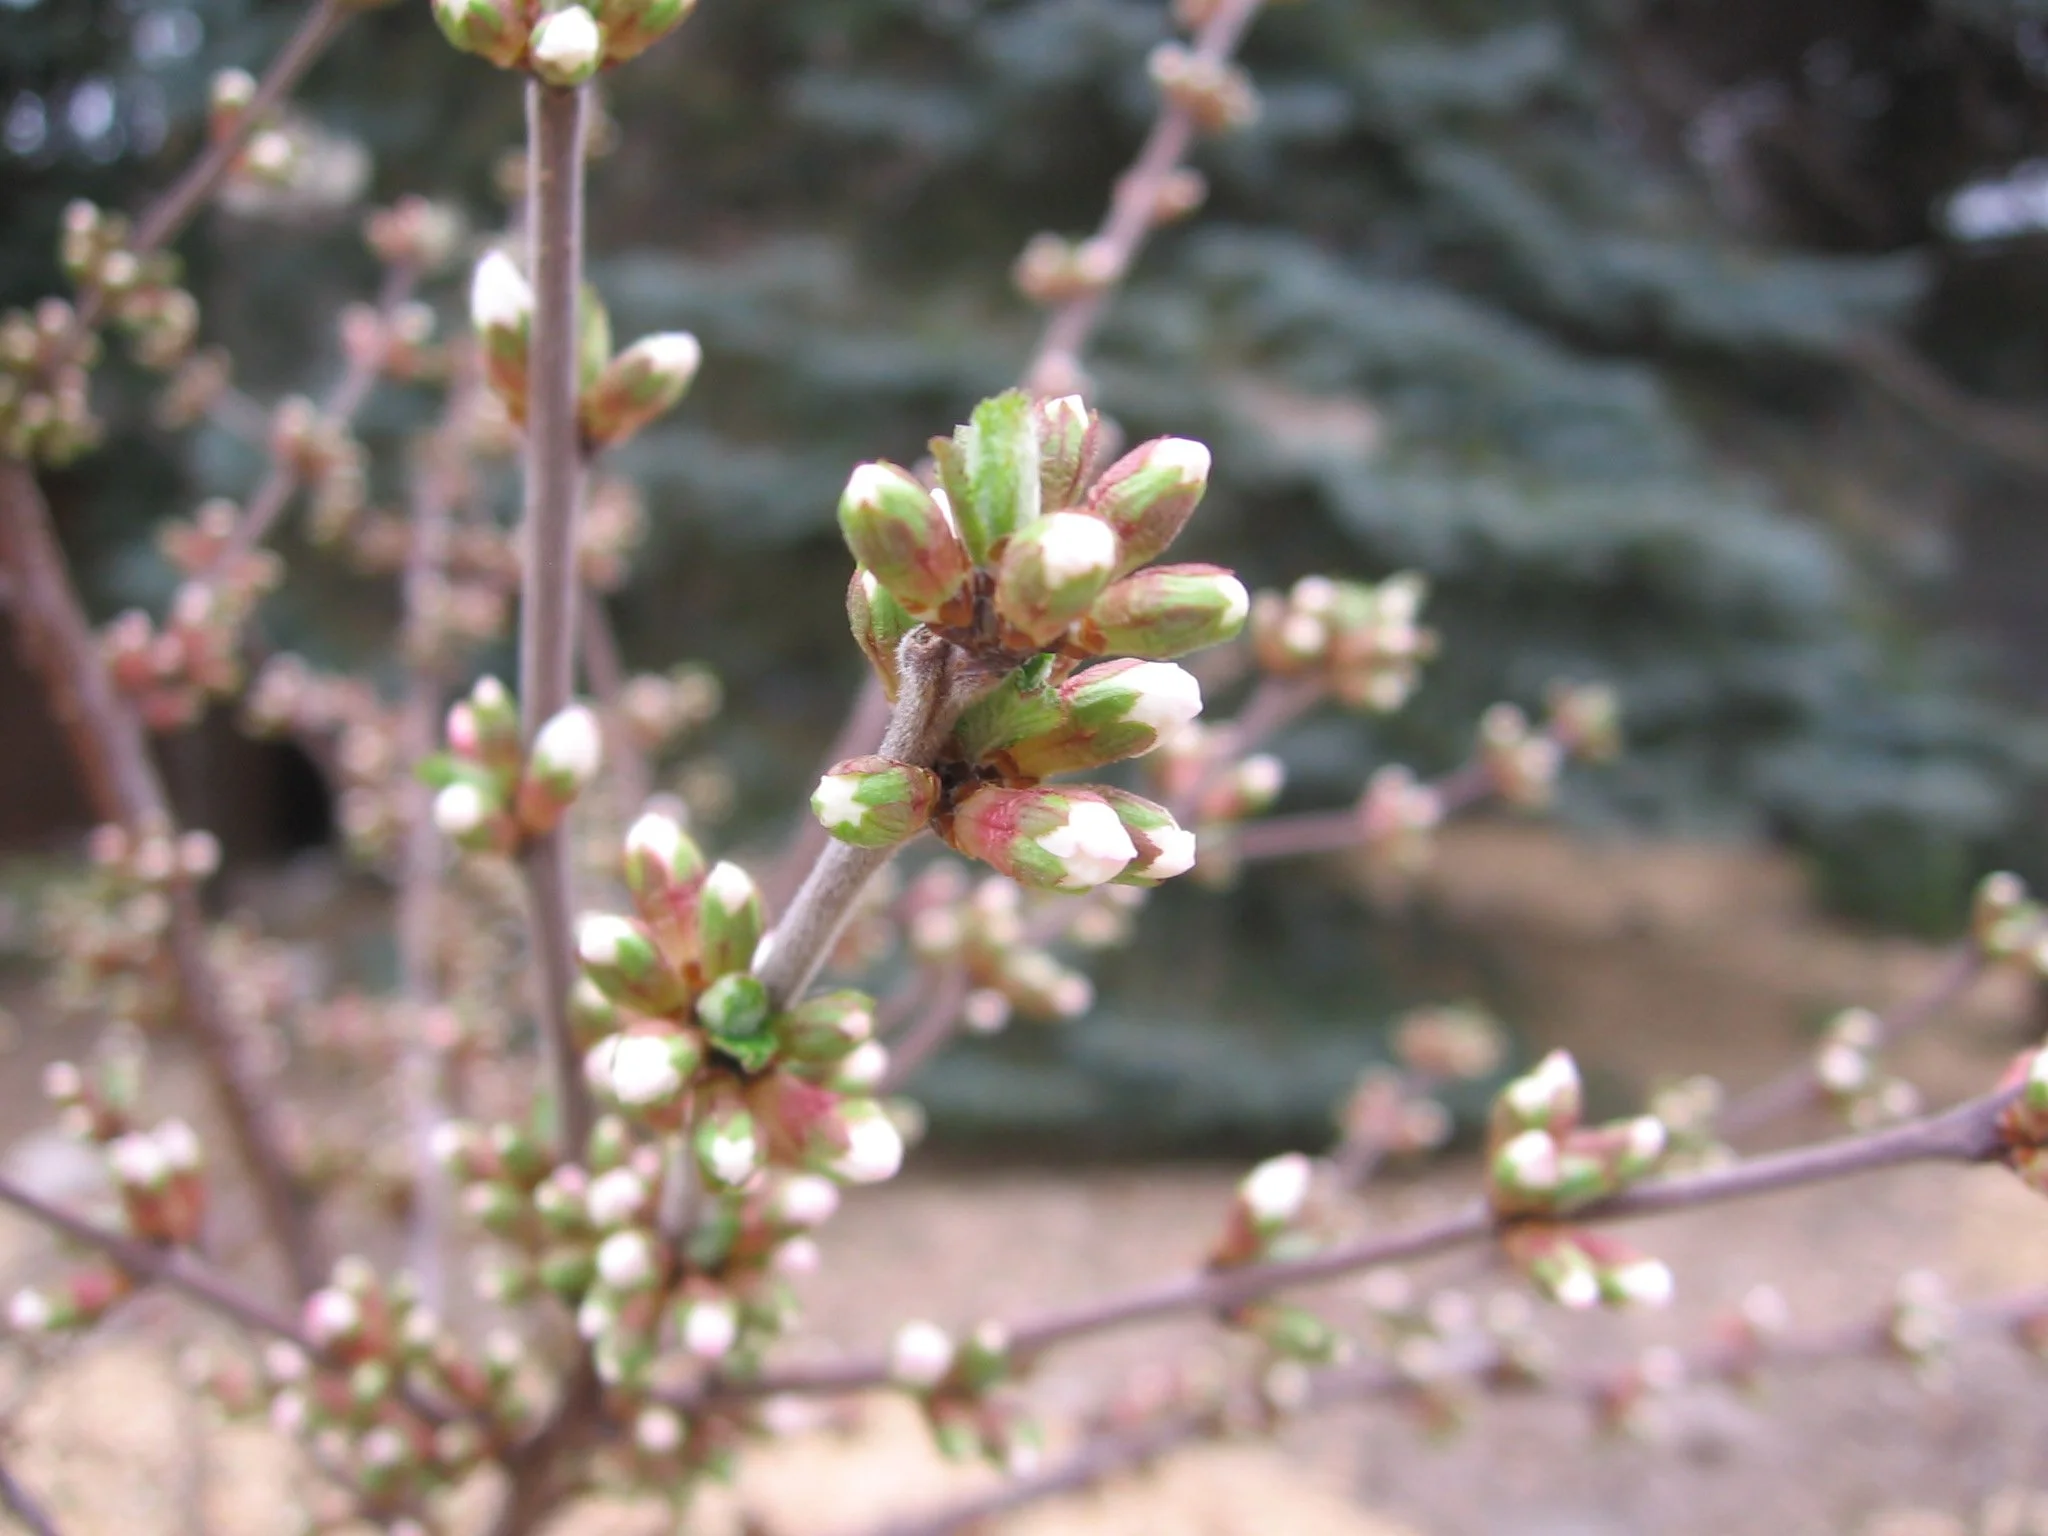
Nanking cherry flower buds
When I teach about edible landscapes, most students haven’t heard of Nanking cherry because it’s not too common in the horticultural trade. It’s a pity because this is such a fantastic home garden fruit bush.
Look for a nursery specializing in fruit and cold-hardy plants. Or, better yet, find somebody who is already growing it, because many of the seeds that drop around the bush will grow.
(I once mentioned this to my class and was asked by students if that meant I had extras to share. I did. And I took in a tray of small cherry bushes the following class.)
By Seed
While many fruit trees and bushes are propagated commercially by cuttings or grafting, Nanking cherry is commonly seed grown. You can grow them from seed at home:
Look for small Nanking cherry plants growing from seed near a mature, fruit-bearing bush.
When saving seeds to grow, don’t let them dry out too much
In the fall, place seeds in damp potting soil
Store potted seeds in a cold location until spring (a fridge or animal-free shed or garage is fine)
In spring, watch them grow!
When you grow from seed, the seedlings will all be genetically distinct, so expect some variability between plants. Seed-grown plants often flower in less than five years.
Cuttings
If you have a Nanking cherry plant that you really like, you can also propagate it from cuttings. Root softwood cuttings in early summer, as fruit ripens, or root cuttings from dormant hardwood in the spring. High humidity and rooting hormone increase the percentage of cuttings that root.
Create Your Own Unique Edible Landscape
That fits for your yard, and your style!
Layering
Another way to propagate Nanking cherry is by layering. This is the practice where a low-lying branch is covered with soil until it grows roots and can be detached from the main plant. I find it’s often enough to simply to pin a low-lying branch to the soil by covering it with a brick.
Nanking Cherry Varieties
Red-fruited, white-flowered varieties of Nanking cherry are the most common in the horticultural trade.
There are not a lot of improved varieties available commercially. At the time of writing this, I’ve just ordered one called ‘Pink Candles.’
Along with the common seed-grown, white-flowered, red-fruited Nanking cherry varieties, look for:
White-fruited varieties
Pink-flowered varieties (like ‘Pink Candles, above)
Cold-Climate Cherry
If you’re gardening in a cold zone, Nanking cherry withstands cold winters and hot summers. My grandfather grew Nanking cherry in Calgary, a mercurial climate if ever there was one. His cherry bushes soldiered on through snow in summer and balmy winter chinook winds.
(Incidentally, he also made wine from Nanking cherry, although I was too young at the time to partake!)
Cold hardiness is never an exact science as there are many variables. But this is a very cold hardy plant, surviving winter temperatures as low as -40°C (-40°F).
Pick a Location for your Nanking Cherry
Sunlight: Full sun is best. As with many crops, if you only have partial sun, it’s worth a try. You’ll still likely get something.
Soil: Well-drained soil, enriched with compost.
Snow load: Winter snow coverage is, if anything, helpful, as it insulates the bush. I have one next to my driveway, and it’s covered every year with heaps of snow.
Landscape with Fruit
That’s easy to grow in a home garden!
Prune Nanking Cherry
One of the things that makes fruit bushes far more suited to home gardens is that the burden of pruning is less. You can prune annually if you want – and you’ll be rewarded with a nicer form and more yield. But if you’re busy and don’t get around to it, that’s fine too.
Timing: Prune in late winter.
Size: Remember, as the gardener, you decide the final height of your Nanking cherry bush. Depending on the growing conditions, it will get to 1.5 – 3 metres high (5 – 10 feet). Bushes can get fairly wide if space permits.
I keep mine pruned to about 1.5 metres (5’) high. That’s because I don’t want it to block the sight line between my garden and the sidewalk. And another important consideration is not to let the bush get any higher than you can pick!
In general, pruning that encourages young branches encourages more fruit. Keeping the canopy open with pruning helps to minimize the chance of any diseases because there is good air circulation. Pruning tips:
Remove some of the older branches
Trim out dead branches
Cut out crossing branches
Prune to shorten the bush
Nanking Cherry Pests and Diseases
Nanking cherry is in the same family as cherries and plums, which are affected by a number of pests and diseases. But I’ve never found the need for pest or disease control.
The one challenge I occasionally encounter is branch dieback where leaves on a branch dry up, and the branch eventually dies. Some sources attribute this to fungal diseases. For dieback, prune affected branches back to the main stem.
Harvesting Nanking Cherries
We eat lots of our Nanking cherries right in the garden! But they are versatile in the kitchen too.
Nanking cherries are an early summer fruit. Around here, that means that I’m picking them around the same time as strawberry season is finishing up.
Unlike sweet and sour cherries, where the stem is left attached to the fruit when picked, the stubby little stems on Nanking cherry stay on the bush. As a result, the fruit don’t last as long as other cherries.
Nanking Cherry in the Kitchen
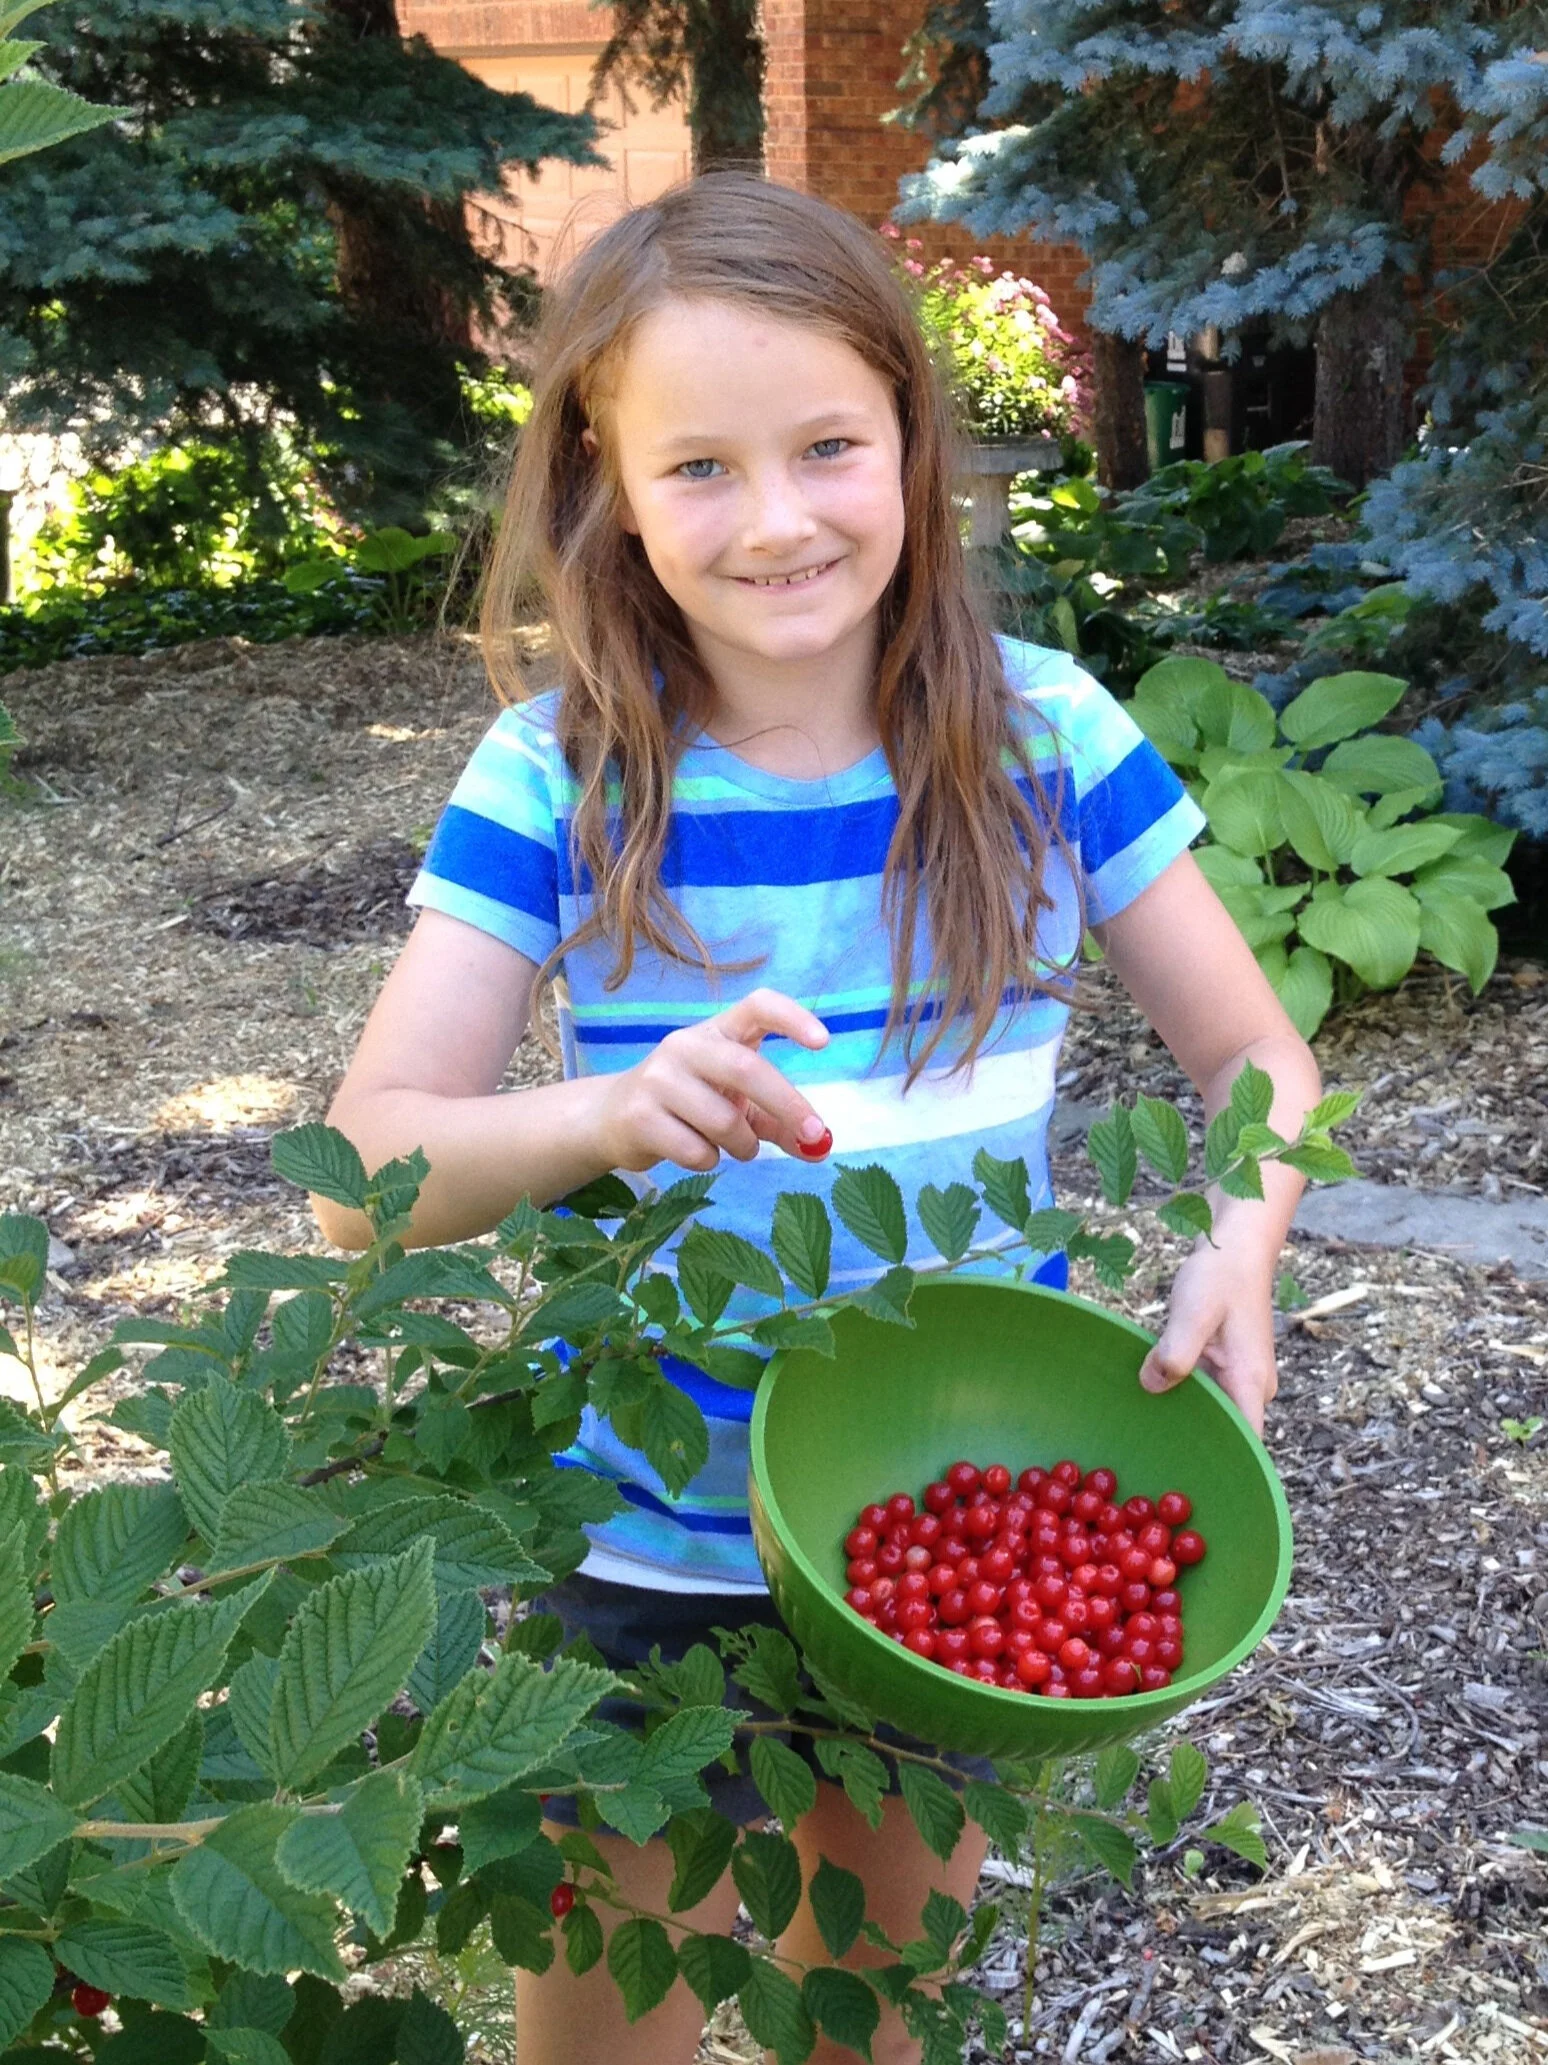
The kids and I sometimes stand around a bush and guzzle cherries and then see who can spit the seeds the farthest. And that’s an important point I should make: like all cherries, there’s a pit!
Use Nanking cherries for whatever recipes call for sour cherries. I also freeze some for winter use. Because of the size, they are a bit fiddlier to pit than larger cherries.
Here are ways we enjoy using Nanking Cherry:
Nanking cherry juice
Nanking cherry compote
Nanking cherry bump (not for the kids!)
And…one other food related idea: I consider cherry wood the finest wood for smoking meat. So when I prune my Nanking cherry, I keep the branches to use for smoking.
Nanking Cherry FAQ
Do I need more than one Nanking cherry bush?
Many sources report the need for two bushes for cross pollination. I started out with one bush – the only one in the neighbourhood – and had good fruit set. There are reports of some self-fertile varieties.
When should I move my Nanking cherry bush?
The best time to move it is in the spring, while it’s still dormant.
Can I grow my Nanking cherry bush in shade?
It will grow best in full sun, but can grow respectably well in part sun/shade. Just know that you probably won’t get as much fruit as you would if it were growing in a full-sun location. As home gardeners we don’t always have perfect conditions.
Can I grow my Nanking cherry in a wet location?
Well drained soil is best. If the water table is high, consider growing in a raised bed.
What about animal pests eating the Nanking cherries?
The birds will like them just as much as you do. But unlike large tree fruit, such as apples and peaches, there’s much more to share when we grow small-fruited crops such as cherries.
Should I cover my Nanking cherry if there’s a frost?
The flowers are early in the season, when the risk of frost is still high. Most years I still get good fruit set here in Toronto. I’ve had reduced fruit set caused by a freeze once in a dozen years.
Is there a Nanking cherry tree?
Nanking cherry naturally grows as a bush.
Find This Helpful?
If we’ve helped in your edible-gardening journey, we’re always glad of support. You can high-five us below! Any amount welcome!
More on Growing Cherries
Find out about 5 Types of Cherry Bush to Grow in Edible Landscapes and Food Forests
Hear Dr. Ieuan Evans talk about the Evan’s Cherry
More on Growing Fruit
These Courses Can Help you Grow Your Own Fruit
Edible Native Plants...and My Quest for a Rare Toronto Persimmon Tree
Native North American Fruits and Nuts (including persimmon and pawpaw!)
By Steven Biggs
Ontario Native Edible Fruits and Nuts
Pointing to two trees, Tom Atkinson explains that we have the makings of a golf club.
“There you have the shaft of the club; here you have the head,” he says, pointing from one tree to the other:
The shagbark hickory, with a bit of give in the wood, is ideal for the shaft.
The American persimmon, as part of the ebony family, has extremely hard wood that is suitable for whacking the ball.
Both are native North American species; and both have edible parts.
Hunting Pawpaw and Persimmon in Toronto
Our tree trek today is the result of my interest in another North American native, the pawpaw tree.
Because of my fascination with pawpaw, I tracked down Atkinson, a Toronto resident and native-plant expert, whose backyard is packed with pawpaw trees.
After I visited his yard and soaked up some pawpaw wisdom, he mentioned a fine specimen of American persimmon growing here, in Toronto.
I took the bait.
Under a Toronto Persimmon Tree
Now, in the shadow of that persimmon tree, I’m learning far more from Atkinson than persimmon trivia:
The nut of the shagbark hickory, a large native forest tree, is quite sweet.
He points to a pin oak, explaining that the leaves are often yellowish here in Toronto, where such oaks have trouble satisfying their craving for iron.
Waving toward a couple of conifers, Atkinson explains that fir cones point upwards, while Norway spruce cones point down.
There’s stickiness on the bud of American horse chestnuts, but not on their Asian counterparts.
And while the buckeye nut is normally left for squirrels, he’s heard that native North Americans prepared it for human consumption using hot rocks.
Landscape with Fruit
That’s easy to grow in a home garden!
A Backyard Native Fruit Food Forest
In his own garden, Atkinson’s focus is on native trees and shrubs. Many of them are considered Carolinian and are, here in Toronto, at the northern limits of their range.
My own interest in native trees and shrubs has gustatory motivations, but Atkinson’s came about because of his woodworking hobby. “I thought, if I was using wood, I should be putting it back,” he explains. While no longer woodworking, he still has a garden full of native trees and shrubs.
The edible native North American fruit and nut trees in his backyard food forest include sweet crabapple, black walnut, bitternut hickory, red mulberry and beaked hazelnut. “It is really for the creatures of the area, all this bounty,” he adds. I’m taken aback by his generous attitude towards harvest-purloining wildlife, but it’s consistent with his approach of putting something back.
Find out about elderberry, a native fruit bush.
American Persimmon
In the shadow of an American persimmon in Toronto. Grow persimmon in the warmer parts of Ontario.
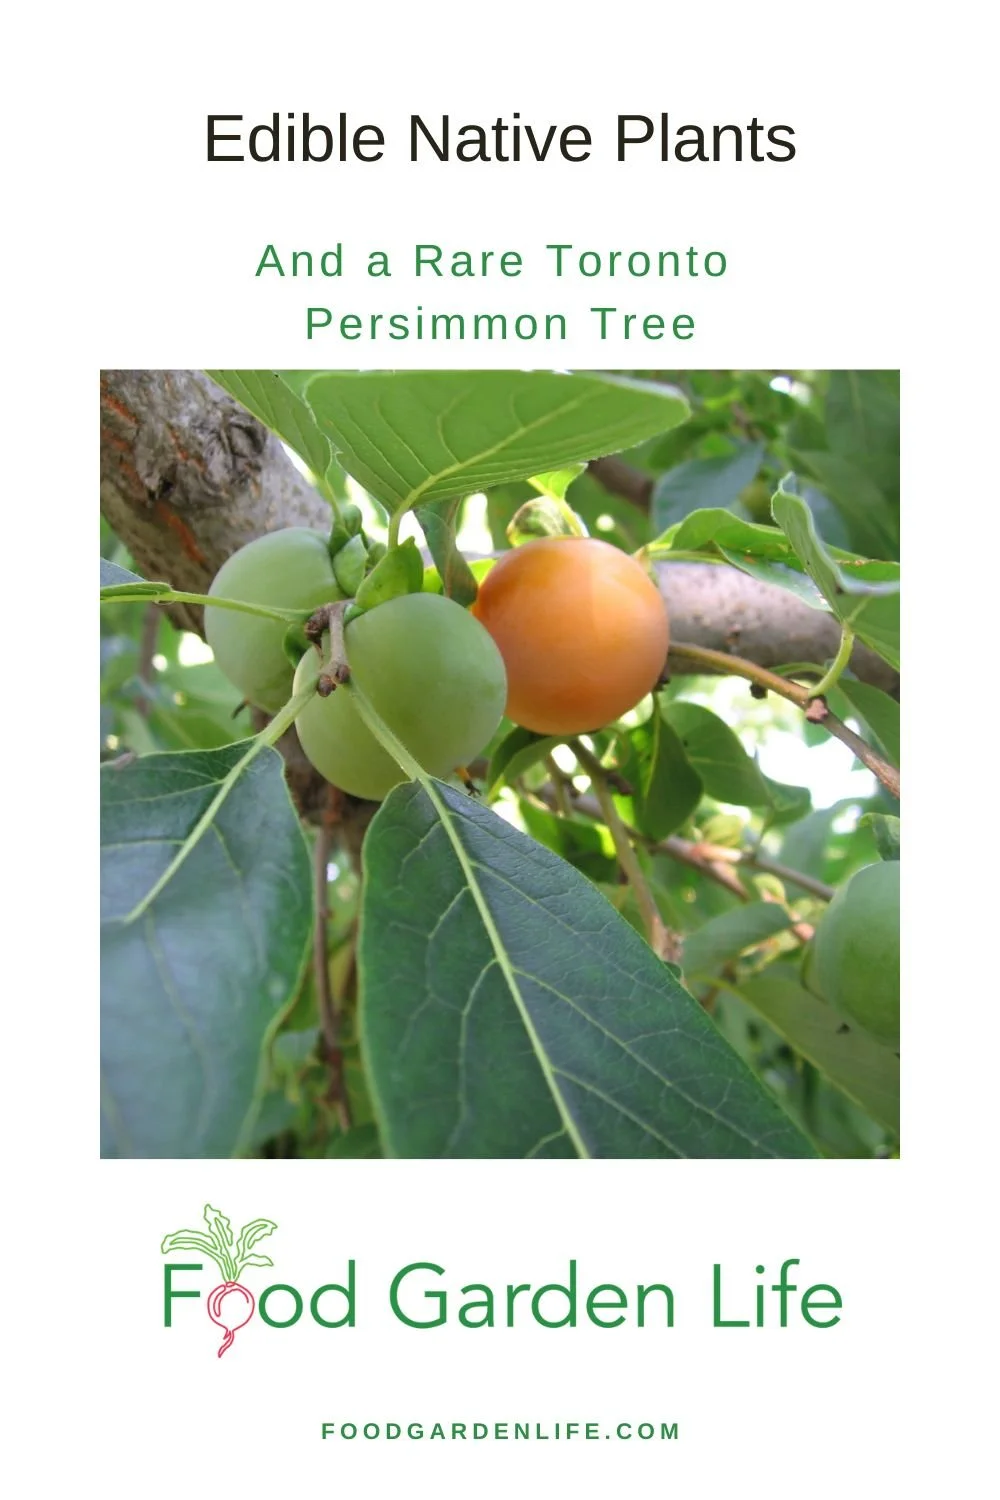
Sitting under the American persimmon tree and looking up, I’m dismayed to find that the fruits are still green. Atkinson cautions that the fruit are astringent and bitter when unripe, so I satisfy myself with snapping pictures.
He explains that although this is a native North American species, it doesn’t usually grow wild this far north. But it grows well under cultivation.
(I found ripe, orange American persimmons a week later at Grimo Nut Nursery in Niagara, where the more temperate climate aids in ripening fruit earlier than in Toronto. They are sweet and velvety on the tongue; I’m delighted that the young persimmon tree I’ve been nurturing in my garden will have been worth the effort when it starts to fruit. And the fruit-laden trees are beautiful.)
Pawpaw
Atkinson's Toronto backyard, where he grows pawpaw trees and other native fruit trees.
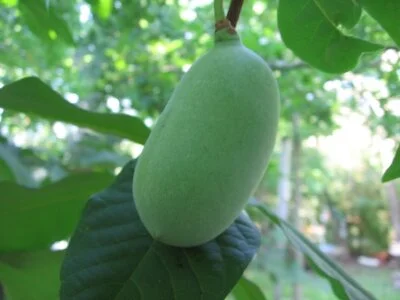
Pointing to clusters of mango-like fruit, Atkinson says, “The fragrance of the pawpaw when ripe is aromatic.” He finds that the texture is like custard.
Each fruit usually contains four to eight seeds. “Like a watermelon, spit out the seeds,” Atkinson adds.
Don’t wait too long to pick it. “If it’s starting to turn brown, give it to the squirrels or raccoons,” he advises.
Pawpaws can be found growing wild on the north shore of Lake Erie into the Niagara region. Like the American persimmon, you’re not likely to find wild ones here in Toronto, but they do grow well here when planted. The large, lush leaves add a tropical feel to the garden.
Serviceberry
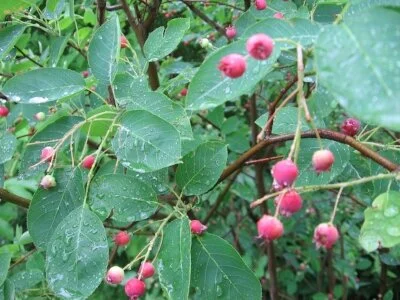
Serviceberry is a native edible plant well suited to growing in the city.
When it comes to native edible plants, Atkinson believes that one of the best to grow in the city is the serviceberry.
“There’s a whole bunch of them,” he explains, listing the related members of the serviceberry (Amelanchier) clan. They all have in common an edible fruit similar in size to a blueberry.
Palatability varies by species and variety. The saskatoon berry, which is also grown commercially, has consistently good fruit quality, according to Atkinson.
Serviceberry is widely planted in Toronto parks and is common in the nursery trade. They can be grown as a small tree or a bush.
In my own garden, I end up sharing my serviceberry harvest with robins if I don’t pick them quickly enough. Atkinson says that cedar waxwings like them, too.
Aside from the fruit, the serviceberry leaves turn a vibrant orange-red in the fall and the bark, smooth and grey, is showy, too.
Here’s a member of the serviceberry family that’s grown as a commercial crop: Guide to Growing Saskatoon Berries: Planting, Pruning, Care
American Hazelnut
American hazelnut is a native nut bush. It’s related to the European hazelnuts sold in grocery stores, but the nuts are smaller.
Hazelnuts send out attractive catkins in late winter, before any leaves are out.
Crabapple
“They’re a delight to look at,” agrees Atkinson as we change gears and talk about the sweet crab, a wild crabapple. “It puts on a really good show of flowers,” he says as he describes a blush of pink on white flowers in the spring, adding, “It’s as good as a flowering dogwood but in a different sort of way.” The fruit is very waxy, and very attractive, having a greenish yellow colour.
“Squirrels don’t touch it,” he exclaims. He likes the fall leaf colours, which range from yellow to burnt orange.
On the culinary side, he says the sweet crab fruit is sour, but a perfect accompaniment when roasted with a rich meat such as pork, where the tartness of the fruit cuts the richness of the meat.
Black Walnut
Atkinson speaks warmly of towering black walnut trees and of the beautiful dark wood they yield. He notes how common they are in the Niagara peninsula: “They’re almost like weeds.”
I agree with the weedy bit: My neighbour’s black walnut stops me from growing anything in the tomato family at the back of my yard. Despite its hostile actions towards my tomatoes, I have grown fond of sitting under that tree, never really considering why. “The shade under a walnut is really quite lovely,” he says, describing dappled light that results from the long leaf stalks adorned with small leaflets.
He discourages me from promoting the black walnut for edible uses because the nut meat is very difficult to extract: the shells are rock hard, requiring a hammer to crack. And the meat doesn’t come out easily like an English walnut, but has to be picked out. But by this point I’ve already decided to write about edible native plants because of their ornamental appeal.
Read about wicking beds, a way to deal with black walnut toxicity, a.k.a. juglone.
Growing Native Fruit in Urban Areas
I thank Atkinson for the tour and email correspondence. A couple of weeks later, Atkinson emails me a photo of a broken pawpaw branch. He writes: “Steve, here is what befalls a pawpaw when in an urban setting, and there are hungry raccoons about. I do not begrudge my masked friends at all for doing what inevitably they will do when after pawpaws.”
FAQ American Persimmon
Can persimmon grow in Ontario? Can you grow persimmons in Canada?
American persimmon is reported to be hardy into Canadian hardiness zone 4, though a long growing season with summer heat is needed for fruit ripening. Best in zones zones 5b-8.
Remember: Zones are only a guideline. Sometimes you can cheat if you have a warm microclimate.
Can I grow a persimmon tree from seed?
If you grow American persimmon from seed, the main thing to remember is that they are “dioecious.” This just means that a plant can be male or female. If you grow a seed and get a male plant, you won’t get fruit from it.
Many commercial varieties produce fruit without a male.
Interested in Forest Gardens?
Here are interviews with forest garden experts.
Find This Helpful?
If we’ve helped in your edible-gardening journey, we’re always glad of support. You can high-five us below! Any amount welcome!
More Information on Growing Fruit
Articles and Interviews about Growing Fruit
Courses on Fruit for Edible Landscapes and Home Gardens
Home Garden Consultation
Book a virtual consultation so we can talk about your situation, your challenges, and your opportunities and come up with ideas for your edible landscape or food garden.
We can dig into techniques, suitable plants, and how to pick projects that fit your available time.
Guide: How to Grow Sorrel (& How to Use it!)
Find out how to grow sorrel, and get ideas for creative sorrel recipes.
By Steven Biggs
Planting Sorrel: An Easy-to-Grow Perennial Vegetable
Sorrel is one of my favourite crops because it checks off a number of important things for me:
It’s easy to grow (it’s a perennial that comes back year after year)
It’s difficult to find fresh sorrel leaves in stores (and if you find them, they’re expensive)
It is versatile in the kitchen (soups, meat, salads, and more)
(And I've cooked with sorrel on TV!)
Sorrel also has a rich herbal history, with a variety of uses.
I’m no herbalist, so in this post I’ll tell you how to grow sorrel and give you lots of ideas for using it in the kitchen.
Haven’t Seen a Sorrel Plant? You’re Not Alone!
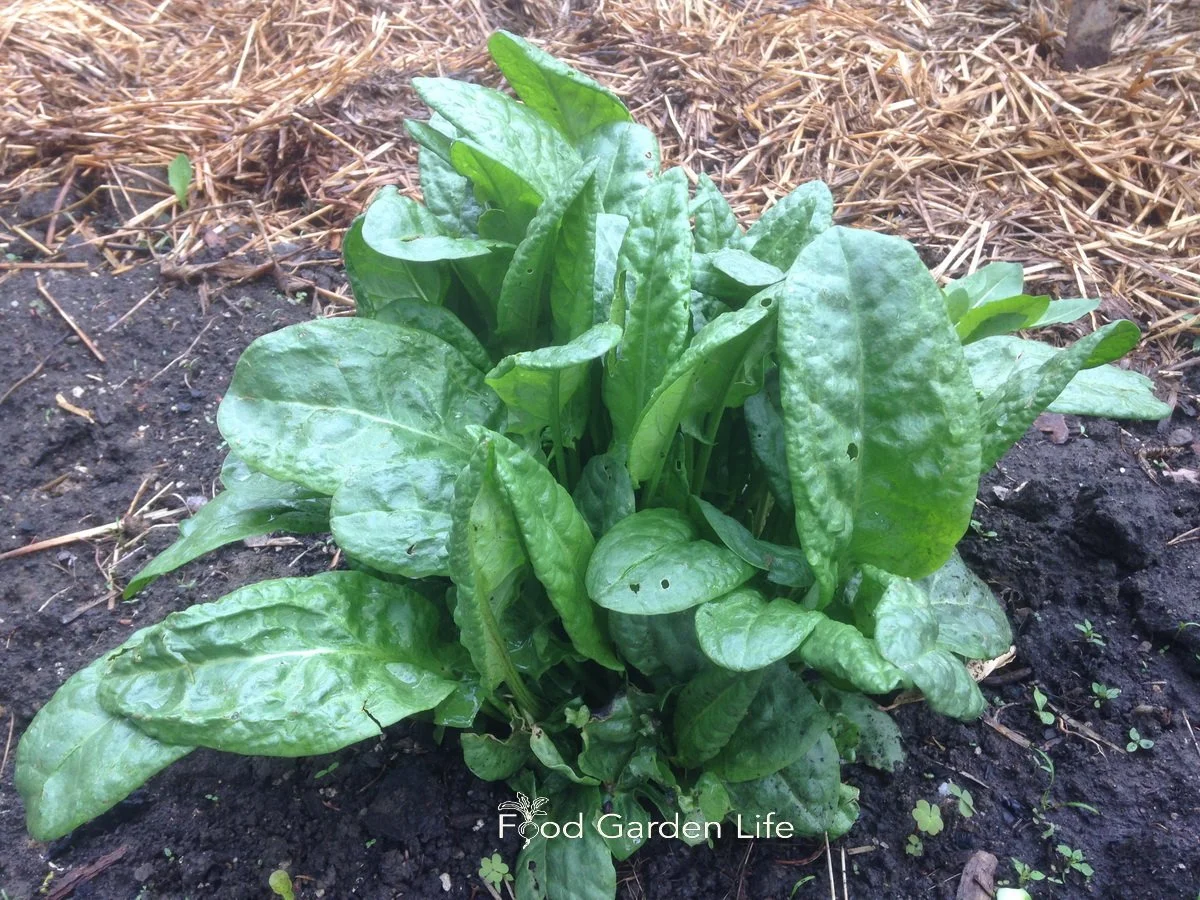
Garden sorrel is a hardy perennial.
Sorrel is a familiar ingredient in European cuisine. That’s how it came to North America—with European settlers.
The “wild” sorrel sought after by foragers is simply sorrel that’s escaped cultivation.
Yet many people in North America don’t know to sorrel.
If you’re new to sorrel, it’s grown for its leaves. It’s sour leaves. I think of it as a lemon substitute for northern gardeners.
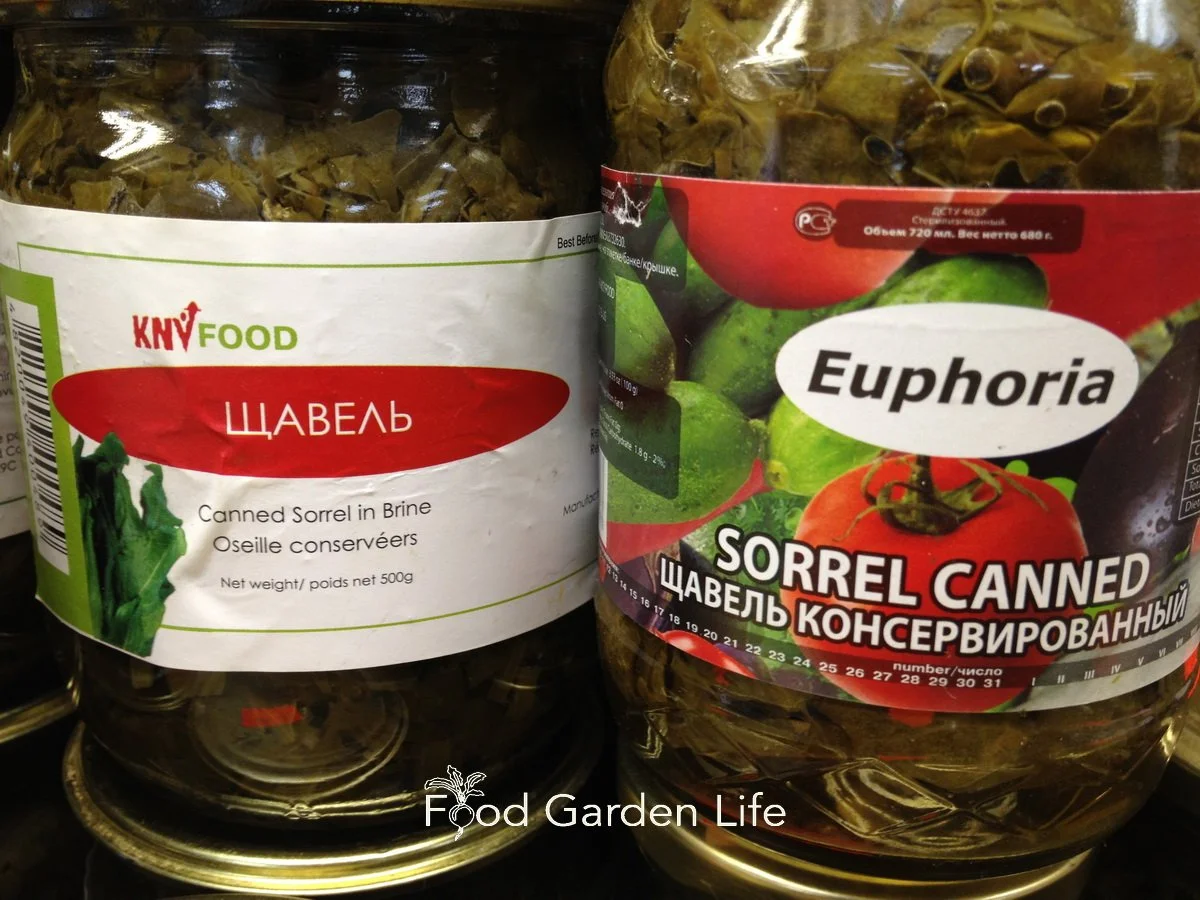
When I shop at eastern European shops, I see jarred sorrel…horrid sludge. I don’t recommend it. Grow yourself fresh sorrel!
Grow your own sorrel, and skip the brined sorrel!
But it was an eastern European connection that go me growing sorrel. As a teen, I took Ukrainian lessons (hoping to learn my mom’s first language—which she never taught us.) I never did pick up the language—but the teacher, who knew I was a gardener, couldn’t believe I’d never heard of sorrel. And brought me a clump of this plant that she said was an essential ingredient in the old country.
What is Sorrel?
Sorrel is a hardy perennial plant that grows in a clump. It’s tough as nails, hardy into Canadian zone 4.
The long, narrow leaves are ready to pick early in the season, making it one of the first greens to harvest.
You can use the leaves fresh—or cook with them. (See How to Use Sorrel, below.)
Types of Sorrel
There’s more than one type of sorrel. Here are three common ones:
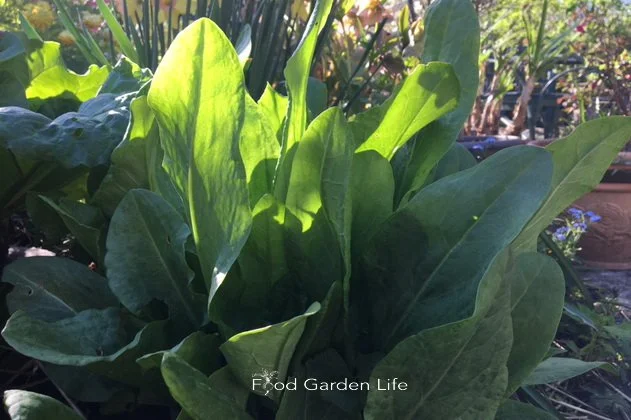
Garden sorrel leaves can be over 30 cm long when plants are in moist, rich soil.
Garden Sorrel (Rumex acetosa). Garden sorrel was brought to north America by European settlers. It's grown in gardens, but is also an escapee that can be found growing wild. Leaves reach 30-60 cm (12-24 inches) long, depending on the growing conditions.
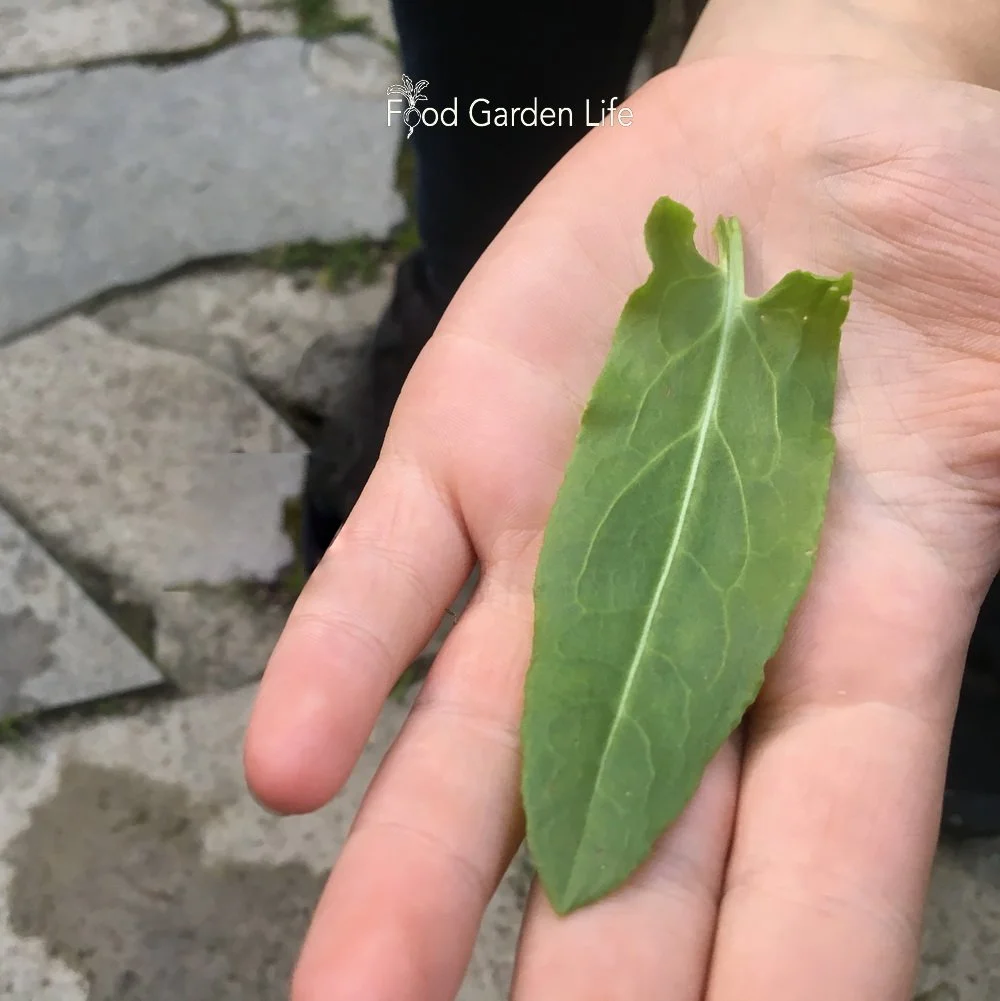
Sheep Sorrel (R. acetosella). Sheep sorrel is another escapee. Sometimes called sourgrass. You might find it filling in exposed spots like vacant lots and roadsides. Seed stalks take on a reddish colour. Spreads by seed and running roots. This is the less-loved cousin to garden sorrel, with smaller, narrower leaves that have a distinct lobe at the base, a bit like an arrowhead. I wouldn’t plant this fast-spreading plant in the garden, but it’s an excellent edible, and popular with foragers.
French Sorrel (R. scutatus). French sorrel is also called round-leaved sorrel. The leaves are shield shaped. Plants are shorter than garden and sheep sorrel.
Grow a Container Vegetable Garden
And get an early harvest of crops that usually take too long!
How Sorrel Grows
Sorrel grows best in rich, moist soil, in full sun or partial shade. Though that doesn’t mean it won’t grow elsewhere…as evidenced by the behaviour of sheep sorrel in vacant lots!
But in a garden setting, give it water if it’s in a dry location. If it’s in partial shade, you won’t need to water as much.
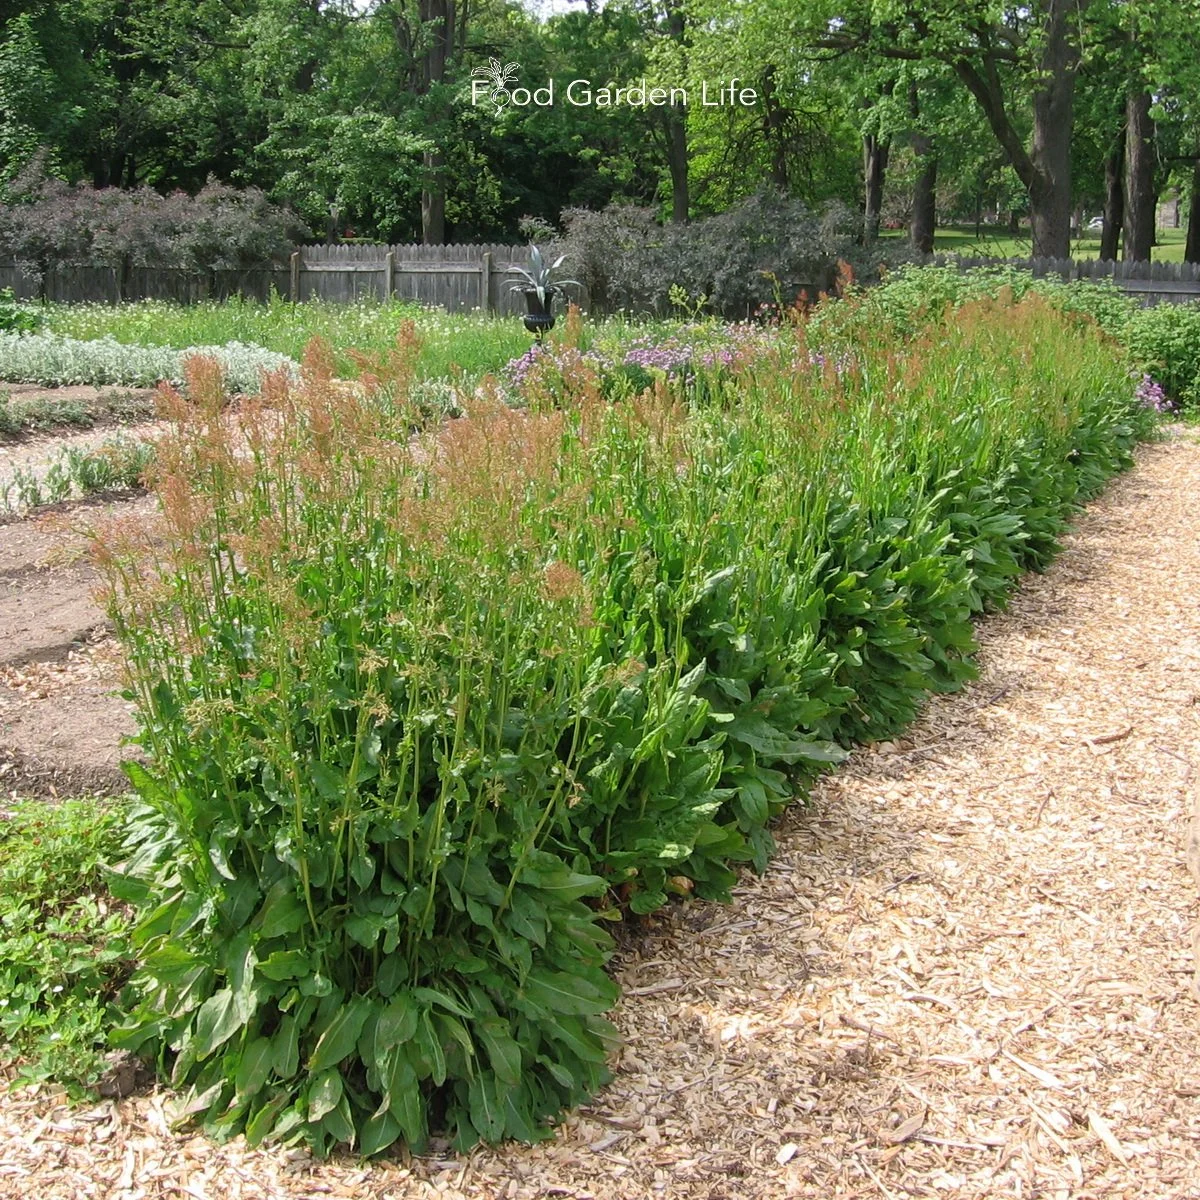
Flower stalks turn into red-tinged seed spikes. Remove stalks to encourage young leaves—unless you want to collect sorrel seed. If you’ve been diligently removing flower stalks, you’ll be able to continue harvesting for the whole growing season, until the plant shuts down for winter—when the top dies back with fall frosts.
Where to Grow Sorrel Plants
Because sorrel is ready to harvest early, I like to have mine close to the kitchen.
Growing Sorrel in Perennial Borders
As a perennial plant, sorrel is at home in the perennial border. Stick it at the front so it’s easy to reach.
Sorrel in the Vegetable Patch
A row of garden sorrel with seed heads. See the red tinge?
I don’t plant sorrel in my main veggie patch, where I move around crops from year to year. Because it is a perennial plant, I grow sorrel around the periphery, with the rhubarb and asparagus—other perennial vegetables.
I’ve seen an entire row of sorrel plants used as a border in a formal edible garden.
Find out more about perennial vegetables.
Sorrel in the Herb Garden
Garden sorrel and French sorrel are well behaved plants that make a nice addition to a herb garden.
Looking for vegetable garden planning ideas? Here are articles to help you plan and design your vegetable garden.
How to Harvest Sorrel
Young sorrel leaves in the spring are the most tender.
You’ll get the best flavour and texture in spring, from young leaves.
But you can harvest sorrel until fall frosts shut the plant down for winter.
How to Propagate Sorrel
There are two ways to propagate sorrel plants.
Division. When a clump is big enough, divide it in the spring.
Seed. Sow sorrel seeds indoors in early spring. Move to the garden after the risk of frost has passed. Space plants about 30 cm (1 foot) apart in the garden.
FAQ: Sorrel Plants
Will Sorrel Grow in Shade?
Sorrel grows in full sun and partial shade. Because it produces larger, more tender leaves in moist soil, semi-shaded conditions are a good option where conditions are hot.
Are sorrel and hibiscus the same?
An unrelated plant, Hibiscus sabdariffa, also goes by the name sorrel. It’s tangy flowers are used in Caribbean cuisine.
Can I forage for sorrel?
In North America, both garden sorrel and sheep sorrel grow wild.
If you’re interested in foraging, listen to our chat with foraging expert Robert Henderson.
What are oxalates?
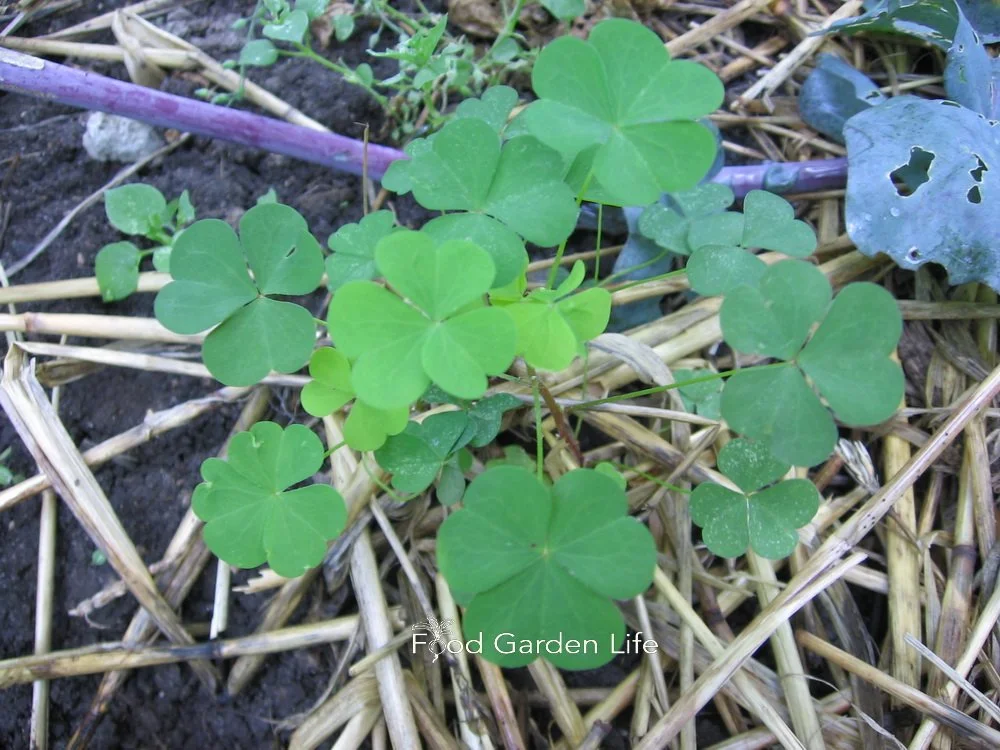
Wood sorrel is of no relation to garden sorrel, but it, too, has a sour tasting leaf.
Sorrel contains oxalic acid, a compound also found in spinach and rhubarb. If you go overboard and eat too much, it can cause tummy upset. That means don’t be a pig. You wouldn’t eat a whole bowl of lemons, would you? Consume it with other foods. It’s for flavour—not the main course.
One other thing about oxalic acid is that it can provoke existing joint and kidney problems. So if you have a history of kidney stones, skip the sorrel
What about wood sorrel?
Related in name only, wood sorrels (Oxalis sp.) can be grazed too.
Bloody dock is also known as red-veined sorrel.
Is bloody dock a sorrel?
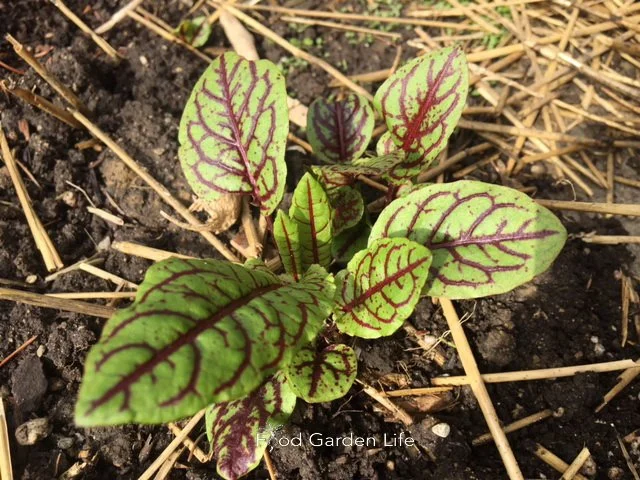
Bloody dock, R. Sanguineus, is also known as red-veined sorrel. It’s related to sheep, garden, and French sorrel.
But don’t waste a second on it. Unless it’s as an ornamental. (It's quite beautiful.) You’ll find shoe leather that’s more tender than bloody dock leaves.
How to Use Sorrel
Before we get to using sorrel in the kitchen, enjoy sorrel while you’re in the garden. You can graze as you garden. The tangy leaves are refreshing.
Because sorrel is tangy, it pairs well with rich food.
Here are ways to use sorrel:
Use sorrel leaves in salads (I find a sorrel-only salad a bit too tangy, so I mix it with other greens)
Sorrel leaves in sandwiches
Sorrel soup (see recipes below)
In recipes that call for greens such as spinach or lambs quarters, substitute part or all of the greens with sorrel (I add it to my Swiss-chard-and-leek spanakopita)
Add it to sauces for a lemony flavour (I throw in pieces of sorrel leaf when braising meat)
Add sorrel leaf bits to an omelette or frittata
Chop and freeze for use through the winter
I’ve seen a recipe for devilled eggs that includes bacon and sorrel…sounds divine
Gourmet butter: Finely chop sorrel leaves and mix in with soft butter
Making a ranch-style sour-cream or yogurt dip? Add chopped sorrel
Make ordinary pesto shine by adding a bit of sorrel (oh yeah, pairs nicely with blue cheese!)
Sorrel Recipes
Sorrel Soup
Pin this post!
Here’s an easy-to-make sorrel soup recipe.
Ingredients
3 tbsp. butter
1 onion, chopped
3 potatoes, cubed
3 cups sorrel leaves, stem removed
8 cups broth
½ cup sour cream
Salt and pepper to taste
Directions
Fry onion in butter until golden
Add potato, sorrel, broth and simmer (covered) for about 15 minutes, until potatoes are soft
Puree (I use a hand immersion blender)
Whisk in sour cream
Heat to serve (don’t boil)
Sorrel Vichyssoise Soup
If you want to take sorrel soup to the next level—and use some of your homegrown leeks—this take on the creamy potato-leek classic is delicious.
Sorrel vichyssoise soup, topped with a sorrel leaf, a dollop of sour cream, and edible redbud flowers.
Ingredients
2 tbsp. butter
3 cups of sorrel leaves, stem removed
1 large leek, chopped (use both white and pale green parts)
1 onion, chopped
3-4 potatoes, cubed
4 cups water or broth
2 tbsp. salt
4 cups whole milk (use cream if you want something more decadent)
Directions
Fry leek and onion in butter until onion is golden
Add potato, salt, water/broth, sorrel and bring to a boil
Simmer until potatoes are tender
Stir in milk, and then puree
Serve chilled
When serving, I like to float a dollop of sour cream on top, alongside a raft of croutons.
Sorrel Paste and Sorrel Soup
Hear this interview with forager Robert Henderson, who talks about how to make sorrel paste and sorrel soup.
Find This Helpful?
If we’ve helped in your edible-gardening journey, we’re always glad of support. You can high-five us below! Any amount welcome!
Courses
Edible Garden Makeover. Here’s a course that guides you through creating an edible garden you love. It’s my ode to edible gardening. You’ll find out how to think outside the box and create a special space. Get the information you need about a wide range of edible plants.
Container Vegetable Gardening Masterclass. Here’s a course that gives you everything you need to know for container vegetable gardening success.
Skip the Transplants: Direct Sowing Seeds
Find out how and what to direct seed in your vegetable garden.
by Steven Biggs
Why Direct Sow Seeds?
Ever had transplants that put on the brakes after you move them to the garden?
It’s disappointing.
But a big transplant isn’t always better than a wee seed.
Sometimes, it’s better to plant seeds straight into the garden.
This is called direct sowing (or direct seeding.)
This post tells you how to direct sow, best crops for direct sowing—and simple ways to sow seeds in a home garden.
What is Direct Sowing?
Direct sowing is when we sow seeds directly in the garden.
This is instead of starting seeds indoors—known as growing “transplants.”
Why Direct Sow Vegetable Seeds?
There are many reasons to direct-sow vegetables.
Here are a few reasons:
Pin this post!
Easier (there's no need to care for seedlings indoors)
Less expensive (no need for potting soil or containers)
Less environmental footprint (yeah, your coir-based and peat-based potting soils have an environmental footprint)
Saves indoor seed-starting space for crops that really need to be started indoors
No need to “harden off” young seedlings before planting them in the garden
Some crops don’t transplant well…and don’t bounce back well from transplanting
When Direct Sowing is NOT the Best Choice
Direct seeding isn’t the best choice for all crops, or in all situations.
Here are a few things to consider:
In areas with a short growing season, crops that take a long time to mature are grown from transplants
Slugs and other bugs can devastate small, direct-sown seedlings as they emerge…whereas a larger transplant might get through some insect damage
During hot summer weather, seed germination can be spotty (see below for a summer seed-sowing hack)
In low-lying area, the garden soil might be too wet to plant seeds in the spring
You’re new to gardening and won’t know the difference between emerging direct-seeded crops and the weed seedlings!
How to Direct Sow Seeds
Before sowing seeds, prepare the soil.
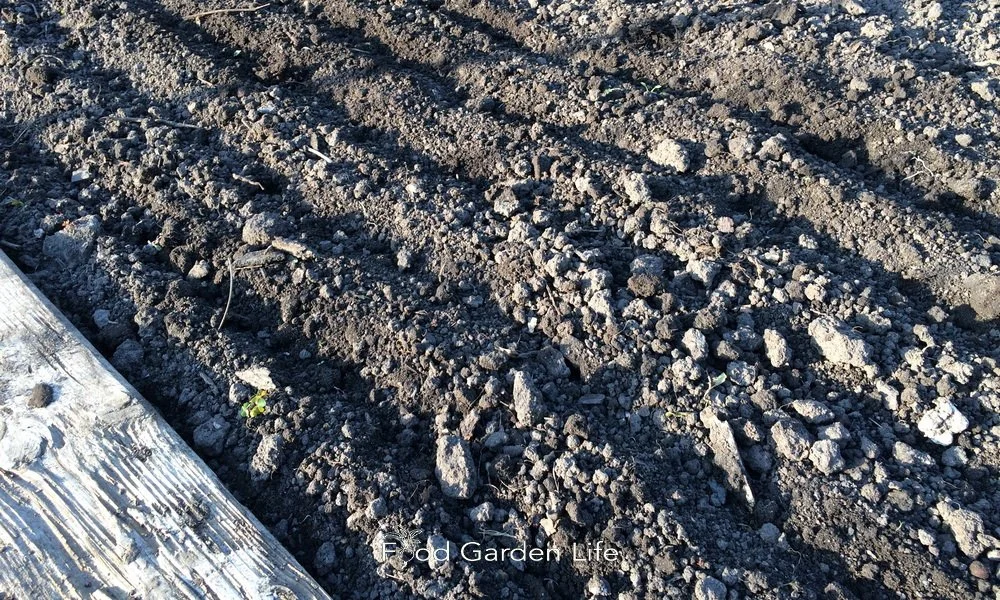
Start by preparing the soil ahead of time. When sowing seeds, we want to break up any crust on top of the soil surface, and break up bigger chunks of soil. That way, germinating seeds don’t hit roadblocks.
(Yes, there’s a whole body of work out there on no-dig techniques—and there is a time and place for this…but if you want the best results when planting seeds, prepare the soil.)
Planting Depth
Use the size of the seed as a guide to planting depth. Seed packets usually recommend a depth too.
Plant the seed about twice as deep as it is wide. Too shallow is better than too deep.
But don't feel as if you need to measure and be precise.
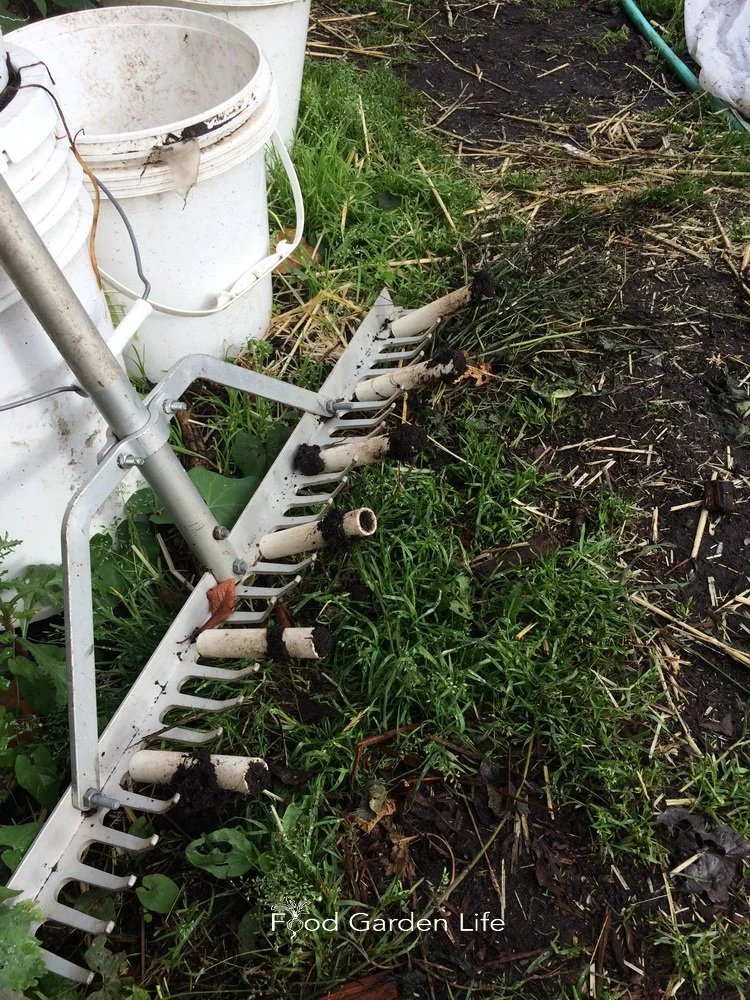
If you’re planting seeds into trenches, you can make well-spaced trenches using a garden rake that has pieces of pipe on it.
Like most things in gardening (and life), direct sowing isn't an exact science.
Trench for Sowing Seeds
If you direct-sow seeds in rows, make a trench with your trowel or the corner of a hoe.
Then, place your vegetable seeds into the trench, and cover with soil.
OR, make your trenches by fitting pieces of pipe onto a garden rake!
Poke Seeds in the Soil (Planting Seeds Simplified!)
This is low-tech and might be laughable to a commercial grower—but in a home-garden setting, can be a simple approach to direct sow seeds!
I drop large seeds into place, and then just poke them into the soil. Then I scuff the soil to fill the holes.
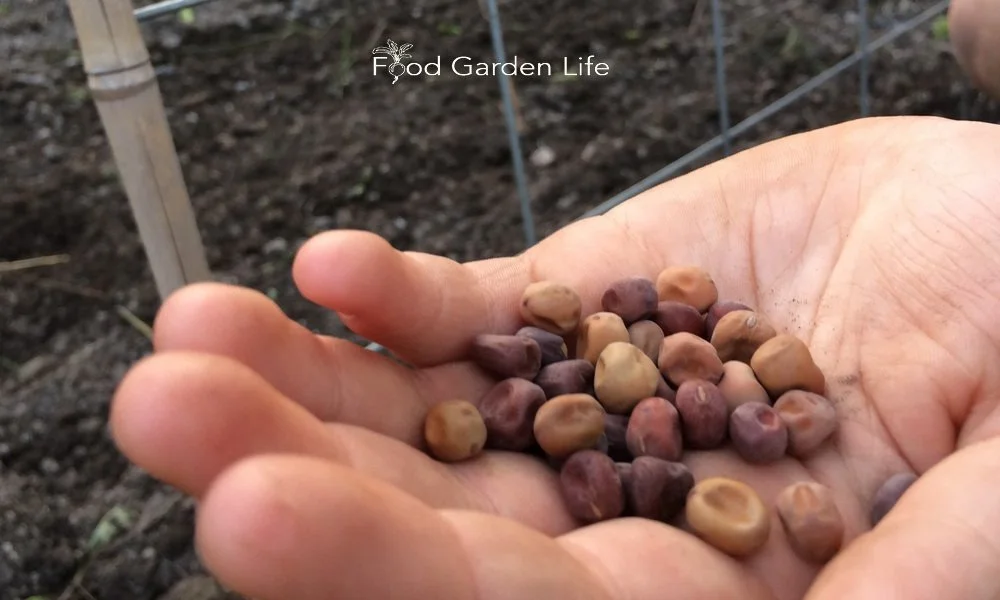
Poking works well for larger seeds that you can easily see:
Poking large seeds into the soil is a simple way of planting seeds.
Peas
Beans
Beets
Swiss chard
Squash
Zucchini
If you’re planting a whole block with seeds, as I like to do with beets and Swiss chard, you can do what I call the “scatter-and-poke” method. Scatter seeds to approximately the spacing you want—and then poke them into the soil. Scuff soil to fill in holes.
(Gardening is a great cure for perfectionism, and the scatter-and-poke approach dispenses with all notions of perfection in a garden!)
Broadcast and Cover
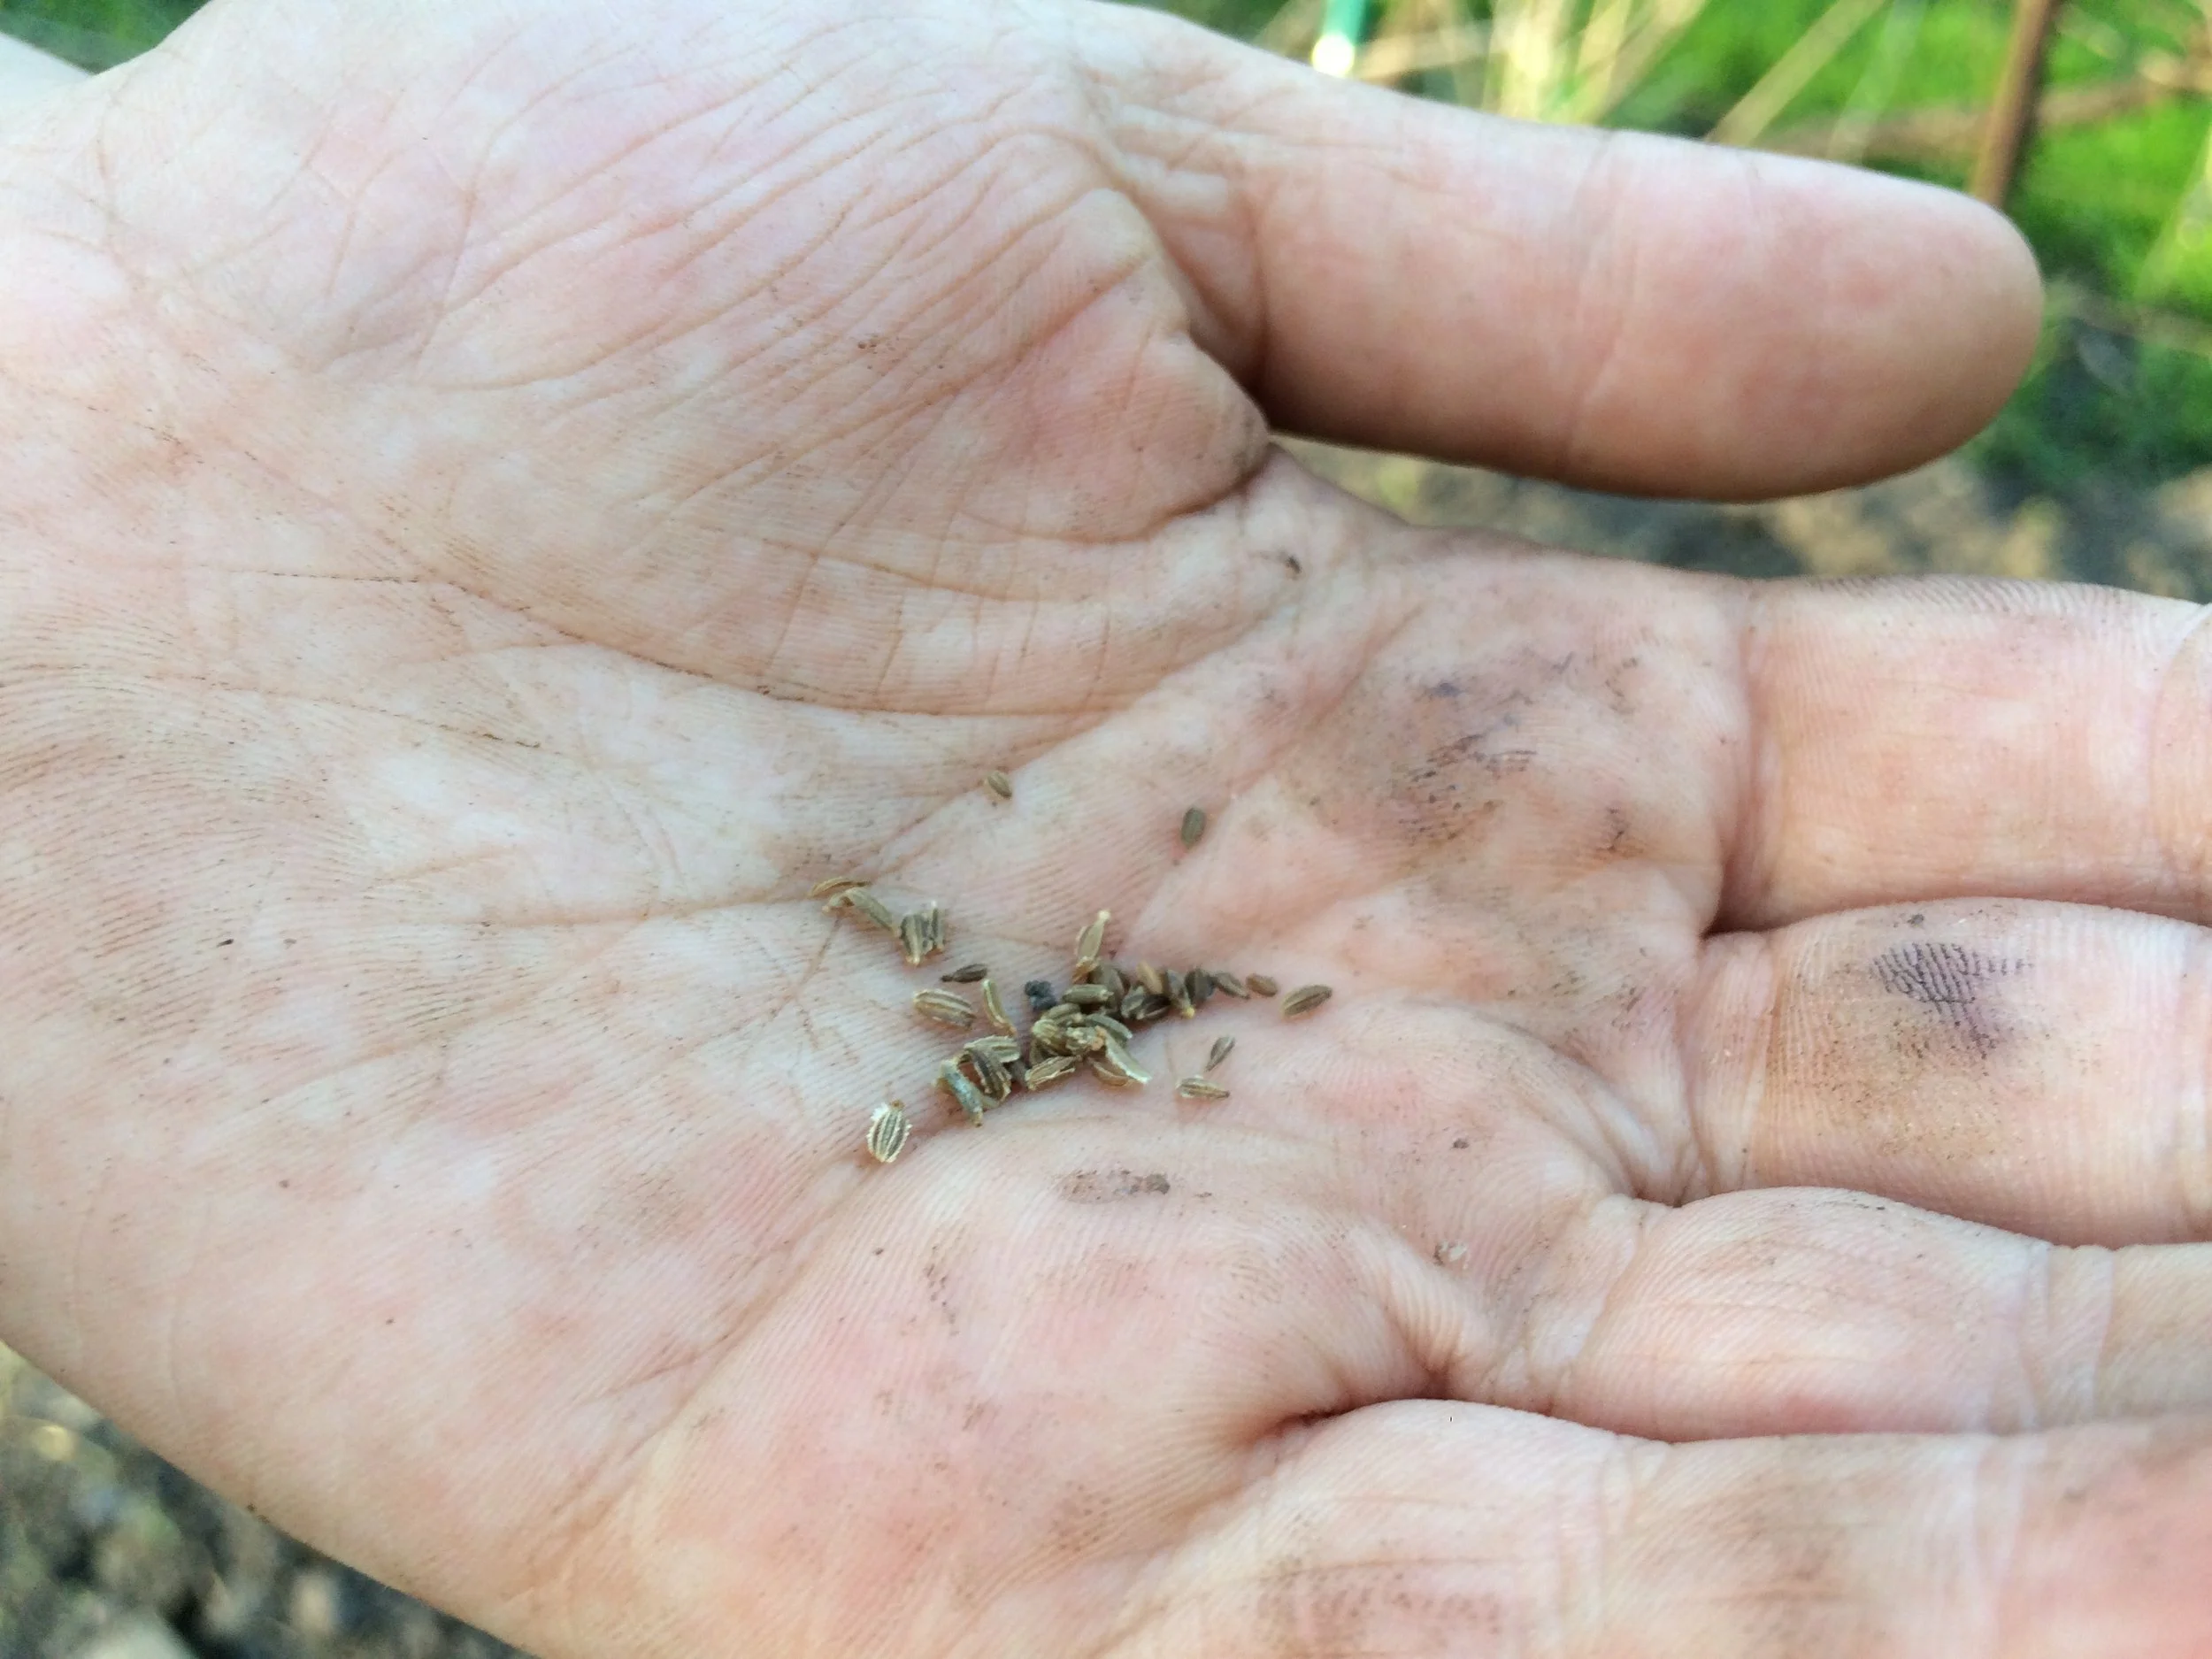
You can sprinkle small seeds such as these carrot seeds by hand, and then cover with soil.
If you’re filling a block or wide row with small seeds (e.g. carrot or lettuce), sprinkle by hand, and then cover with soil.
You might wonder, “Where do I get the soil I’m covering the seed with?” Rake aside some garden soil before you sprinkle your seed in place—and replace it over top of the seed afterwards.
Broadcast and Rake!
I’m always interested in methods that make my life simpler. And raking aside soil before I broadcast seed is a bother.
So I simply broadcast the seed, and then use an up-and-down motion with a hand rake to work some of those seeds into the soil.
Note: There will be some seeds that aren’t at an ideal depth. That’s OK. I’m a home gardener—not a commercial grower. I just seed more heavily to compensate.
Direct Sowing Hacks
Using a broadfork to make straight rows.
Folded paper. Forget the seed-dispensing gizmos for small seed. Fold a sheet of paper in half. Pour seed onto the folded sheet. Now, use a pencil or a nail to dispense individual seeds off the end of this folded sheet. Low tech, yes—but works well.
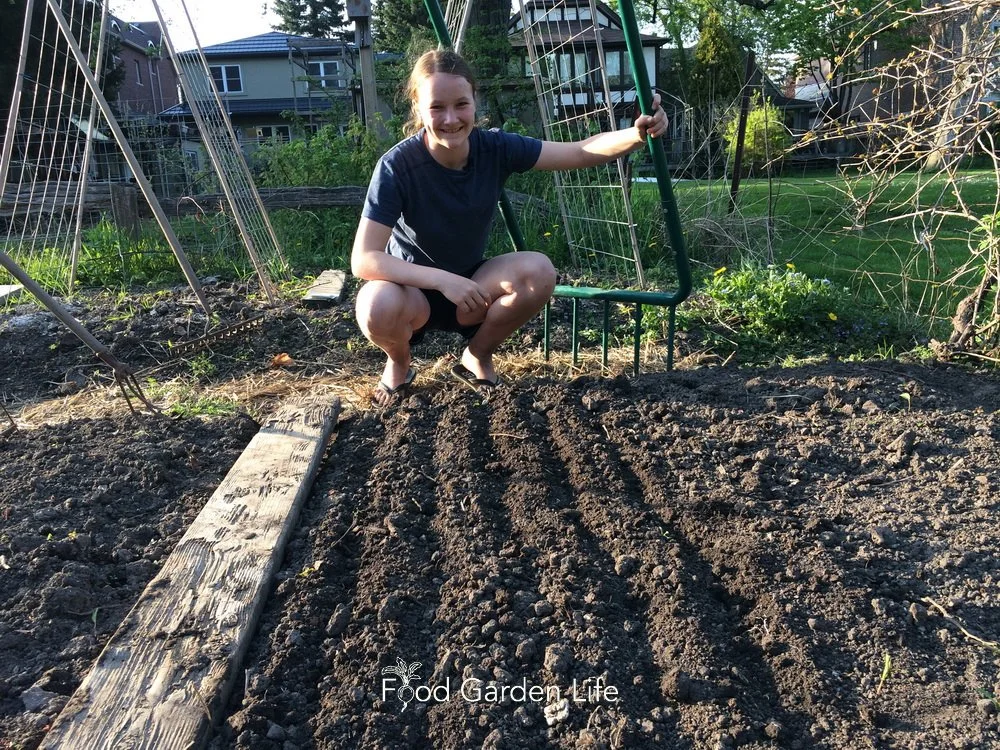
Broadfork. When my daughter, Emma, wanted side-by-side trial rows of a number of crops, she used the broadfork to make a tidy set of trenches. (The broadfork is normally used to loosen soil…but this works nicely!)
Seed tape. Seeds embedded in a strip of biodegradable paper. Yeah, a bit gimmicky. I don’t use this. But if you’re gardening with kids, or you have shaky hands and can’t easily dispense seed, it can be useful.
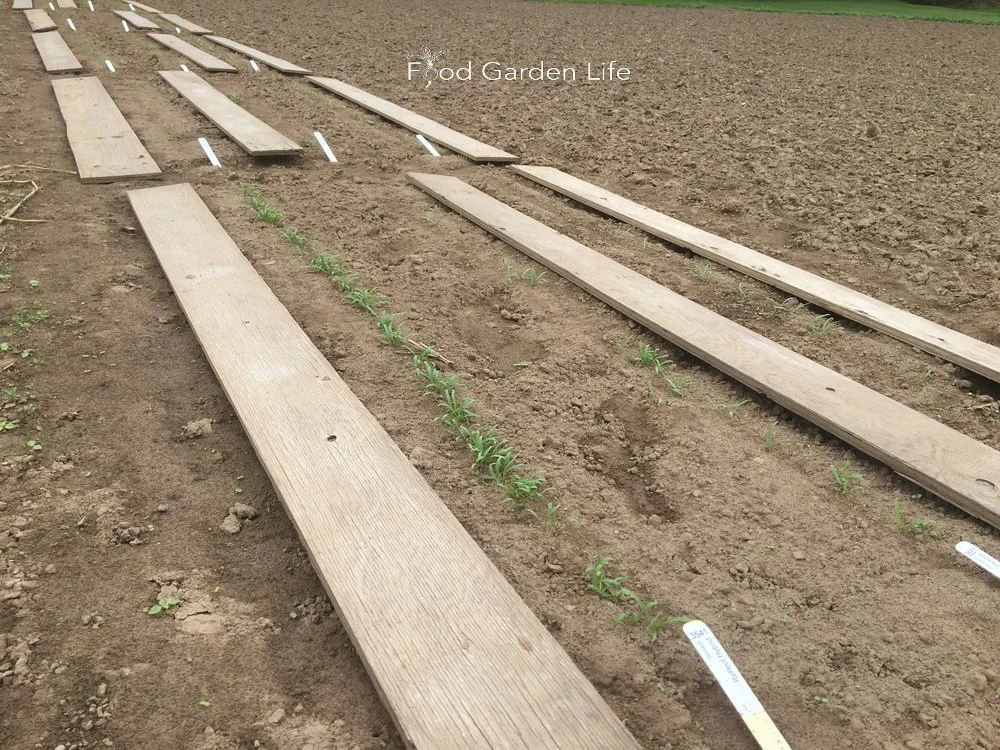
Using boards to keep the soil moist for direct seeding in the summer.
Pelleted seed. Small seeds bulked out with a clay coating. Like seed tape, you pay more per seed. But again, could be useful if you’re direct seeding with kids, or you’re having trouble coping with smaller seeds.
Boards. Yup, low-tech boards over summer-sown small seeds can be a life saver. In summer heat, soil can quickly form a crust that seedling have difficulty breaching. But a board over the soil during the germination window keeps the soil underneath moist. No crust.
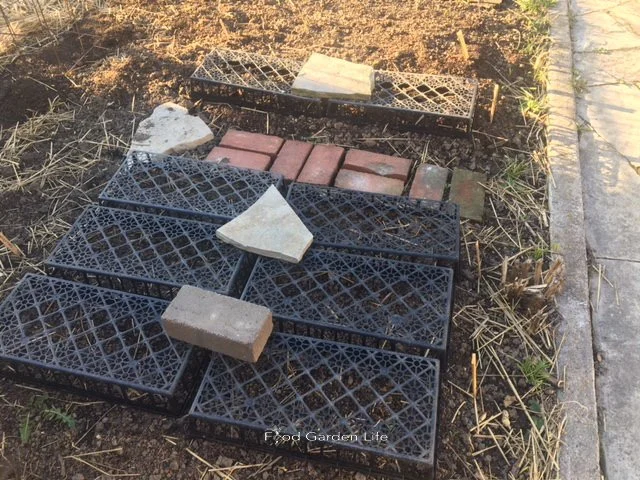
Web trays. As soon as squirrels see freshly turned soil in my garden, they’re eager to disinter seeds. It’s infuriating. Who would have thought there’s a higher purpose for those horrid plastic webbed trays that the horticulture industry so loves! Inverted web trays over top of your directly sown seeds keep digging varmints at bay.
Direct Seeding by Crop
Take that, squirrels!
Leafy Greens. I grow transplants of leafy green crops such as lettuce, spinach, and Swiss chard. I also direct-sow seeds into the garden.
Why both ways?
So I have a succession of harvests.
(It is also insurance. If weather or pests cause less successful results one way, I have a backup!)
Root Crops. I direct sow all my carrots, parsnips, and beets. These crops can all be direct-sown in the garden early. And they don’t respond well to root disturbance.
“Fruit” Veg. For those fruits that we insist on calling veg—tomatoes, peppers, and eggplant—I grow everything by transplants because I’m in a cold climate and I extend the harvest window with transplants.
Vining Crops. The vining crops in the squash and cucumber clans don’t respond well to root disturbance. So direct sowing is always a good strategy.
(But, like the leafy greens, I hedge my bets and both direct sow and start a few transplants.)
Find This Helpful?
If we’ve helped in your edible-gardening journey, we’re always glad of support. You can high-five us below! Any amount welcome!
Courses
Here’s a course that guides you through creating an edible garden you love. It’s my ode to edible gardening. You’ll find out how to think outside the box and create a special space. Get the information you need about a wide range of edible plants.
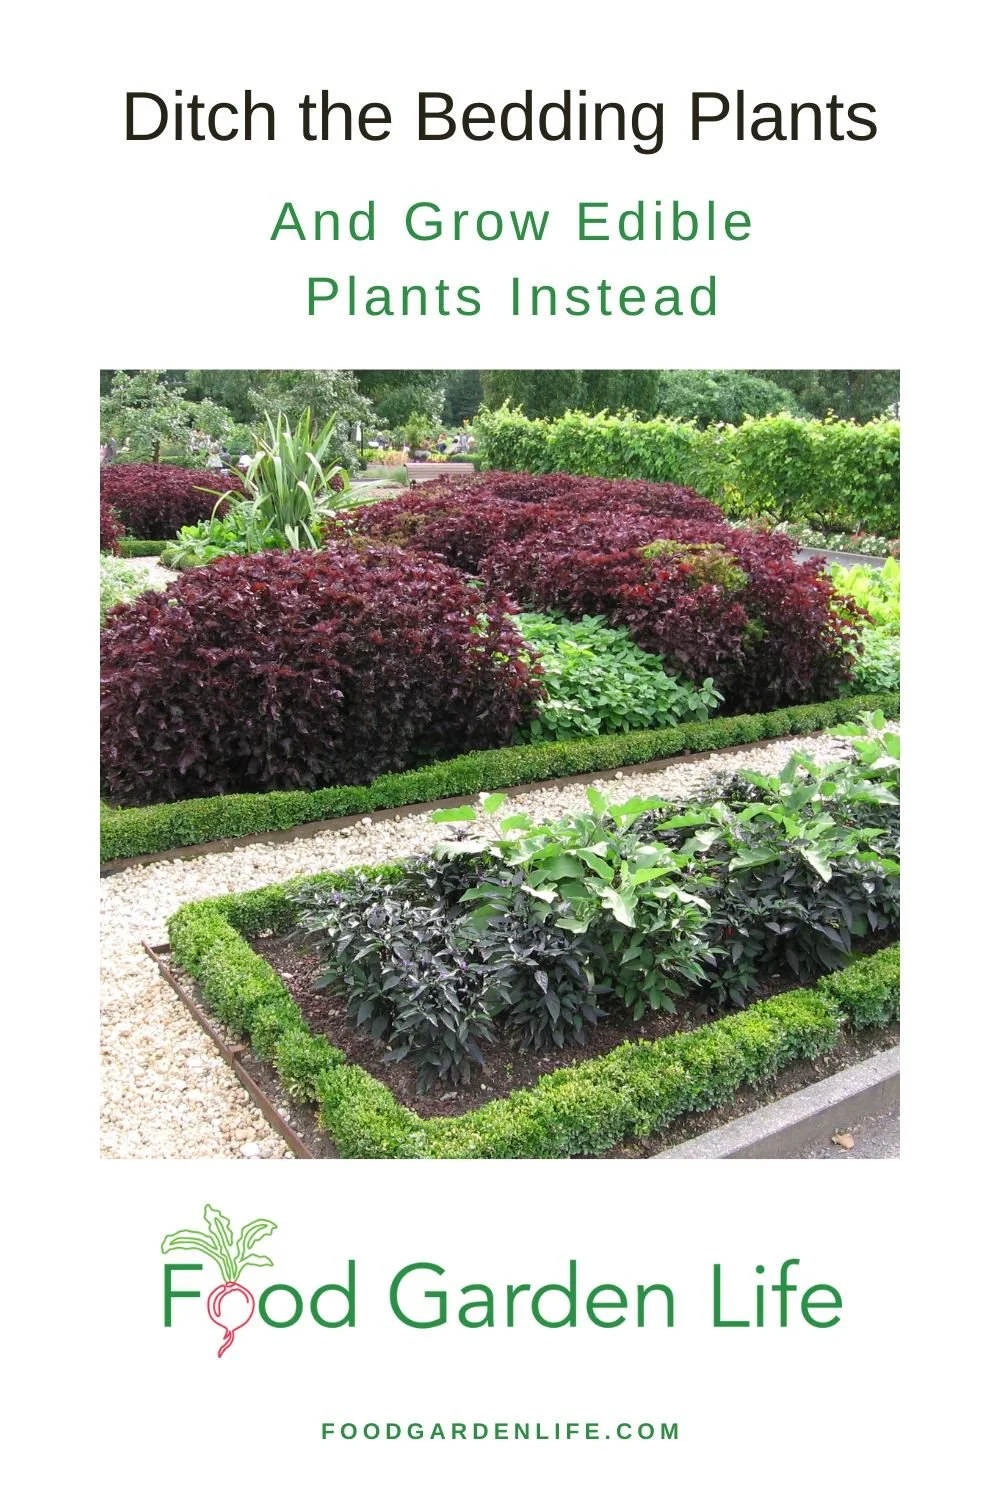
Move Over Bedding Plants...and Try These Edible Garden Plants Instead
Replace some of your bedding plants with edible plants! Find out how to choose suitable crops to use as bedding plants.
by Steven Biggs
A Few Plants for Edible Landscaping
Attractive? Check.
Low maintenance? Check.
Edible? Check.
The peppers were the finishing touch in my front-yard edible landscape. Right by the sidewalk. A nice pop of colour.
What had been my front lawn three months before was an edible front yard—edible plants including salad greens, herbs, vegetables, fruit bushes, and edible flowers.
I was enjoying the mix of colour, height, and texture as I popped one of those peppers into my mouth.
Sound the fire alarm. My face lit up scarlet. I grabbed a basket and, between hiccups, plucked all those hot peppers…worried about hot-pepper misadventures with the school kids that go by twice a day.
So the hot peppers were not a home run.
But with those little scorchers harvested, I left the pepper plants. They had dark green leaves and compact form. Nice bedding plants nonetheless. Just not next to the sidewalk.
If you’re interested in edible plants for edible landscaping, keep reading. This post gives you design ideas and top crops for using as edible bedding plants.
What’s a Bedding Plant?
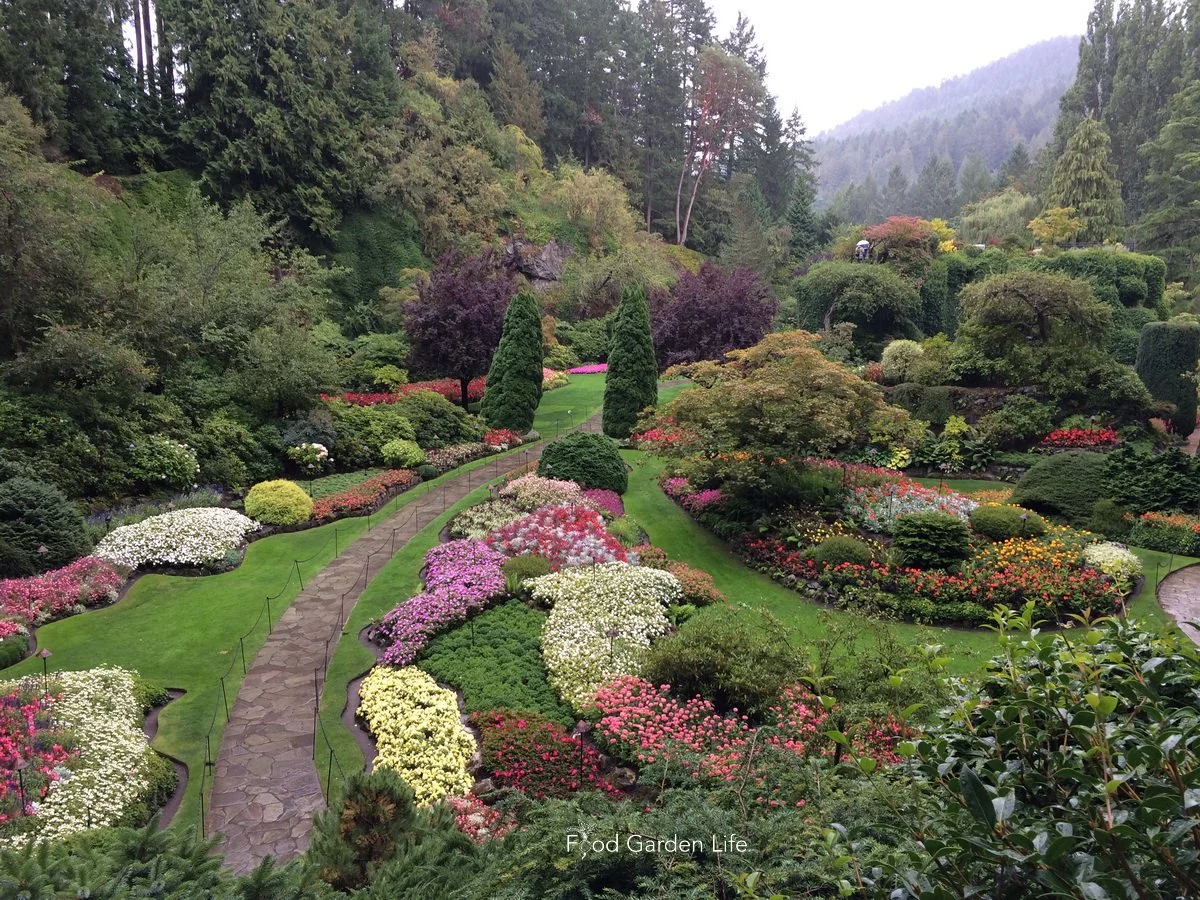
Bedding plants are display plants for seasonal plantings. Here’s a good example, at Butchart Gardens in BC.
Bedding plants are display plants for seasonal plantings. Garden bling. So choices usually combine fast-growing, colour, and resilience.
Some, like coleus, have fabulous foliage. Many have showy flowers. Commonly they’re flowering annuals—though not always. Others, like fuchsia, are tender perennials.
But what they have in common is that they’re typically transplanted into a garden to give an immediate show. Then they’re yanked out at the end of the season.
Lots of common vegetable-garden and herb-garden plants can fit the bill as bedding plants in an edible landscape.
What Makes a Good Bedding Plant?
A good bedding plant is low maintenance. It doesn’t need pruning or staking. You don’t need to hold its hand.
For summertime plantings, a good bedding plant also performs well through the heat of the summer.
Why Use Edible Plants as Bedding Plants?
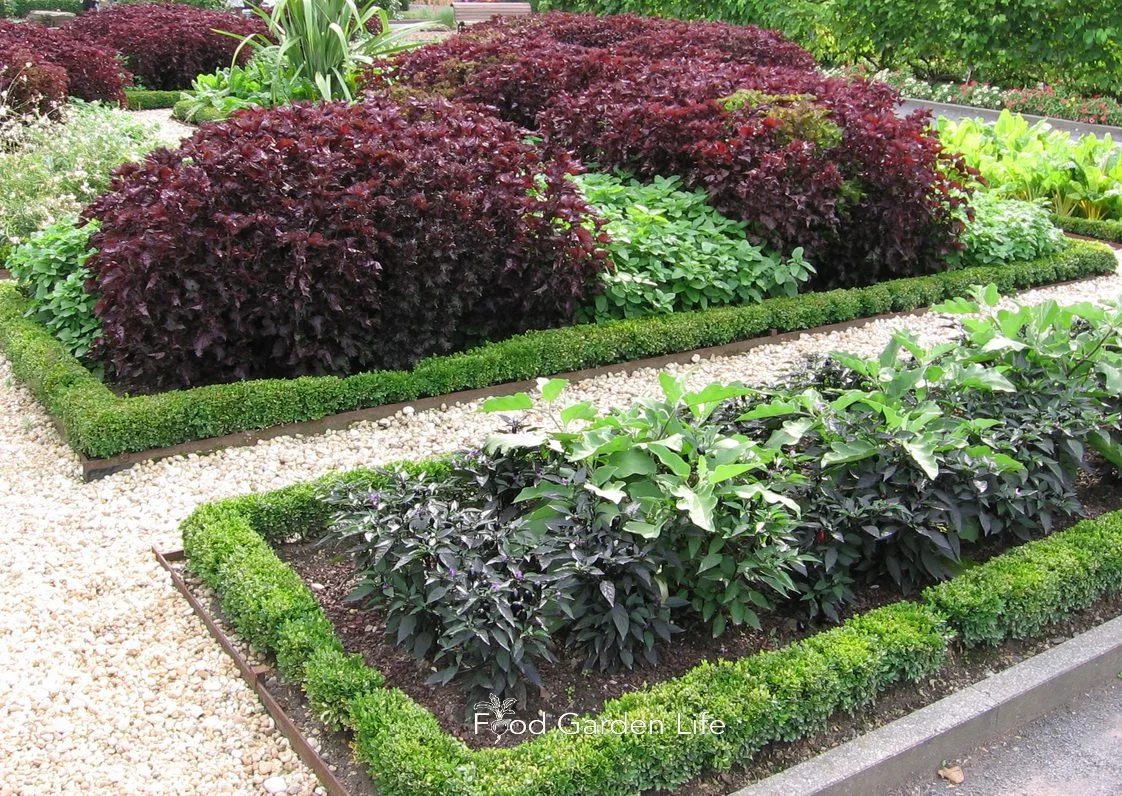
Using edible plants to make ornamental plantings—instead of traditional bedding plants.
I have nothing against flowers. I go overboard planting flowers every year.
But like many home gardeners, I never have enough space to grow all of the plants I want to grow.
So if I can kill two birds with one stone—edibles for both eating and appearance—count me in. Give me space in the flower garden for some veggies…I'll make it into an edible landscape.
Bedding Plants Through the Seasons
Pin this post!
Most ornamental bedding plants are planted after the last spring frost, but there are exceptions. The most common is pansies—which shine on despite a frost.
(If you didn’t know, pansy flowers are edible!)
You might see plantings of ornamental kale and cabbage in the fall. They soldier on through fall frosts while most bedding plant snivel.
(You can eat ornamental cabbage and kale—though they’re bred for looks, not as gustatory delight.)
Just as plant choice can keep the curtains open longer for a flower garden, choosing the right edible bedding plants keeps an edible landscape looking tip-top into the fall.
Designing Edible Landscapes with Edible Bedding Plants
Swiss chard hanging out with some ornamental bedding plants.
The way you use bedding plants depends on the situation and your taste (sorry about the pun.)
My advice? Be wildly creative and do something that your neighbours aren’t doing. Gardening can be more than practical; it can be creative, too.
(It should be creative, that’s the fun part!)
To get your creative juices going, here are three broad ways of using bedding plants in your edible landscape:
Formal. Think of public display gardens with formal flower beds and symmetrical patterns. (If you’re a detail person, this might be up your alley.)
Informal. This is where you’re getting playful with colour and texture and not constrained by having one big formal flower bed. Like icing on a cake, you “ice” the garden bed…a smear of bedding plants here and there.
Carpet. I once worked at a company where we made the company logo from bedding plants. That’s carpet bedding. We’re talking about a tightly planted, intricate pattern. Like painting with plants.
5 Edible Bedding Plants to Start With
Here are five edible bedding plants you can start with. There are lots more (including the pansies and kale I mentioned above.) But these five edible plants are all work horses, easy to find, and give a good mix of colour and texture.
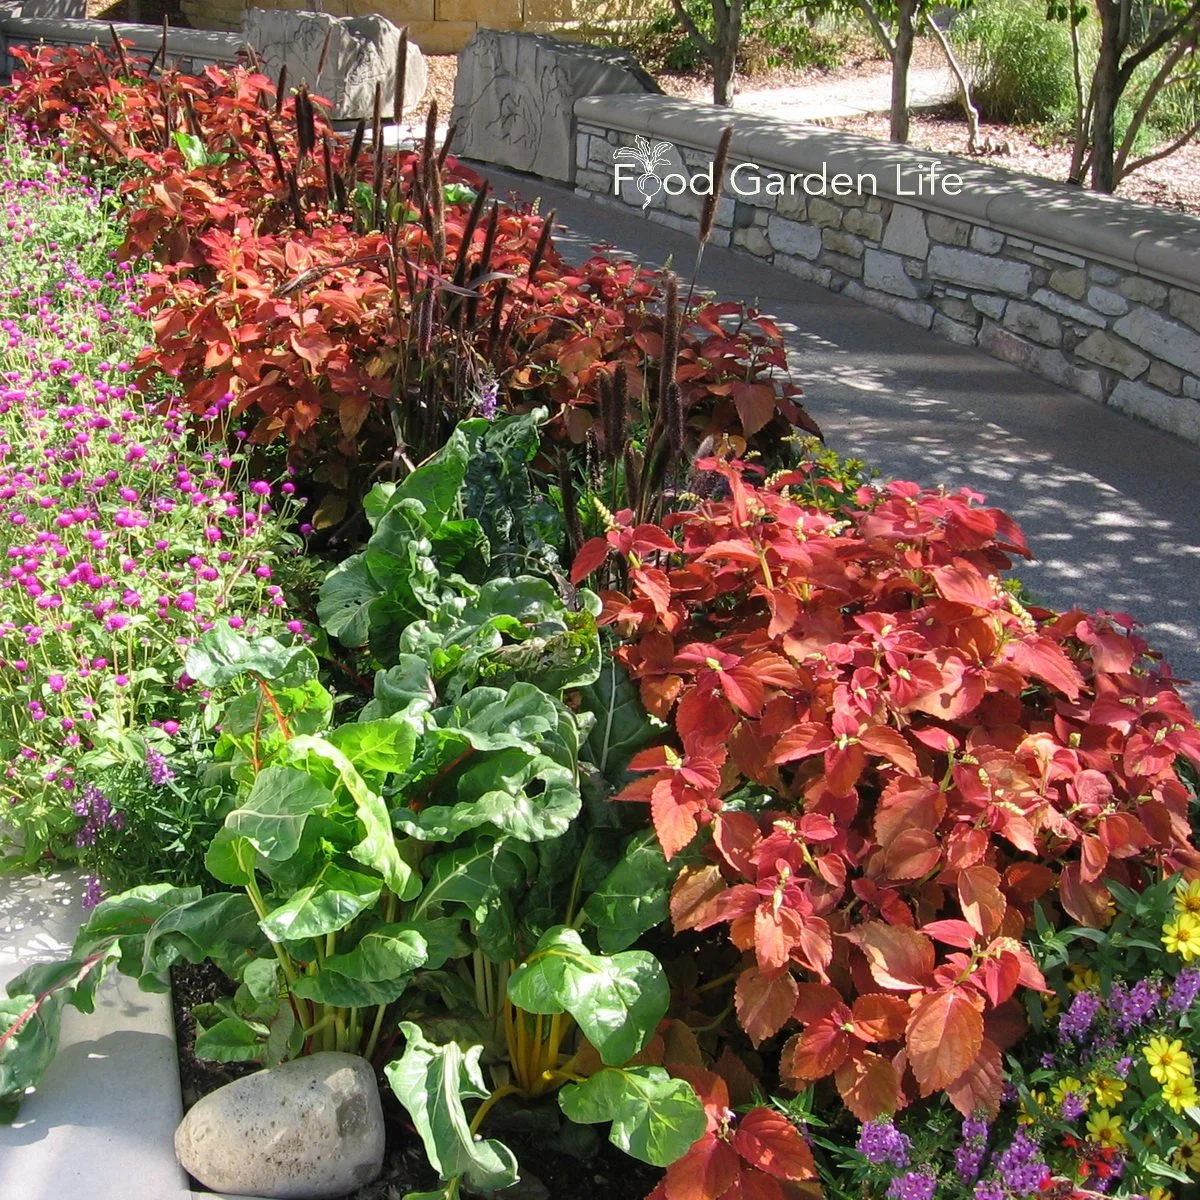
Swiss Chard. Such an underrated plant. While so many of its leafy-green brethren make haste to flower and die, Swiss chard just grows leaves all summer. And along with green varieties, there are red, orange, yellow—even striped red-and-white varieties. Find out why Swiss chard is also a great choice in the fall garden.
Swiss chard. This underused leafy green makes an excellent bedding plant.
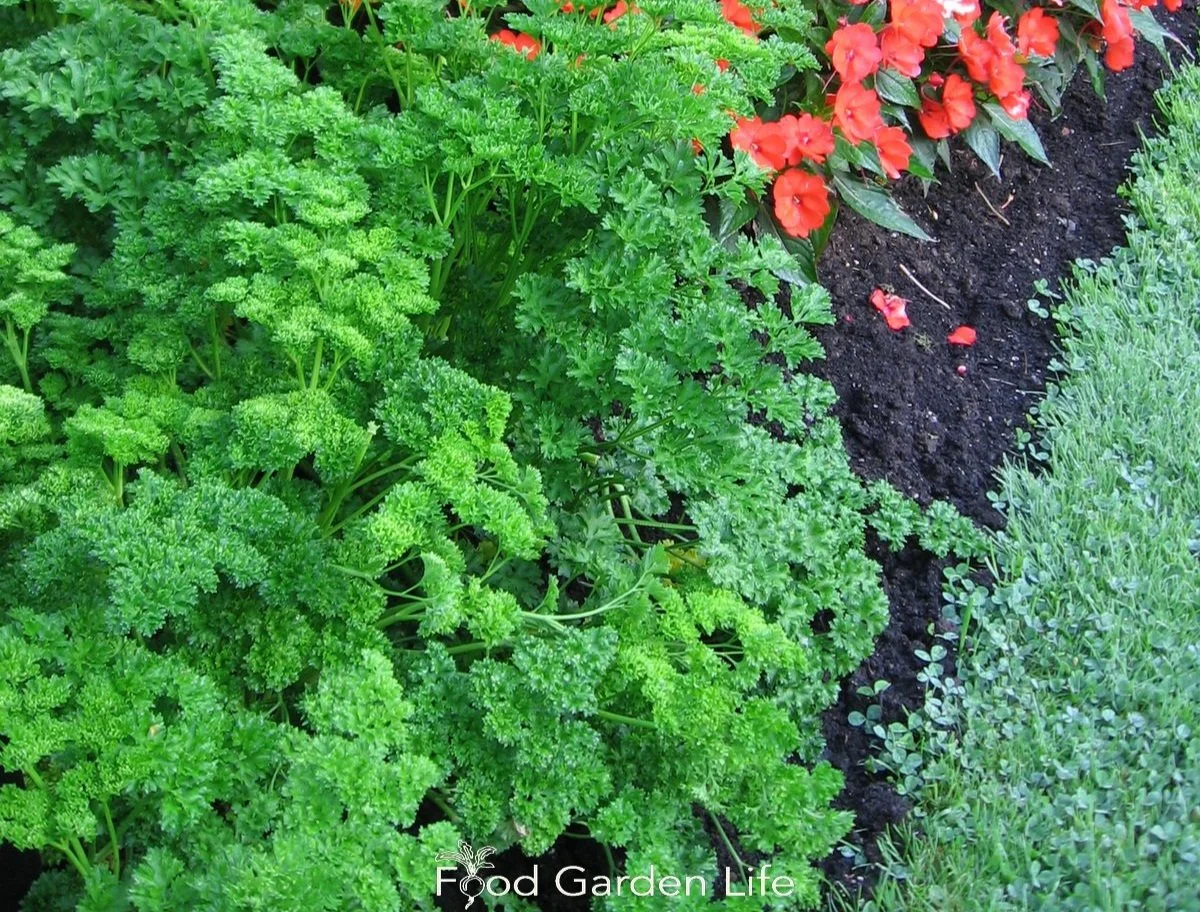
Parsley. The world needs more parsley. Seriously. Beyond garnishing a cheese tray or bulking out your bruschetta mix, parsley is a performer in the edible landscape. Great for edging borders. Planted in larger blocks, curly-leaf parsley is a brush-stroke of texture. And it lasts nicely even as fall frosts fell heat-loving crops.
Parsley. A top-notch bedding plant.
Cardoon. How many edible plants can you describe as elegant? This one has a touch of class. I was riveted when I saw cardoon punctuating the landscape of the historic Spadina House mansion in Toronto. What a bold beauty this plant it! Find out more about cardoon.
Cardoon. An elegant bedding plant!
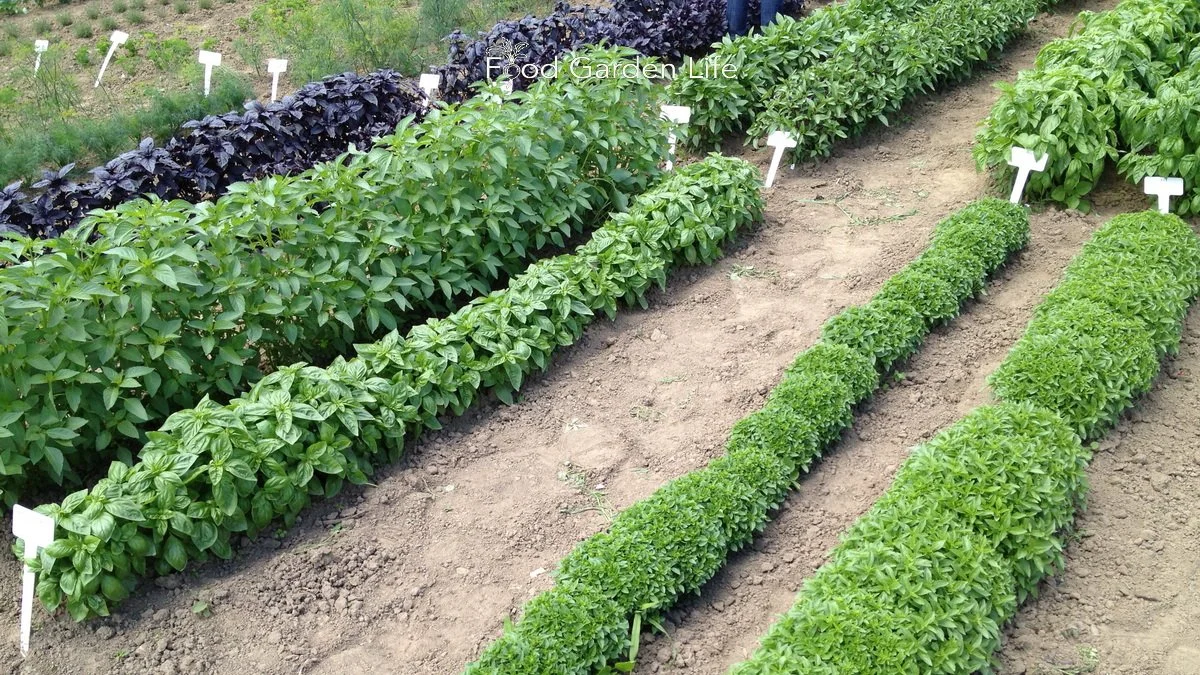
Basil. From compact, little-leaf varieties to more gangly family members, you can choose from quite a range of plant and leaf sizes. And for leaf colour, remember there’s red and purple, as well as green. The compact basils are great for carpet-style designs. Keep in mind that basil, after a spell of cold fall weather, will quickly pack it in for winter.
Basil. So many choices…here’s a shot from a trial garden.
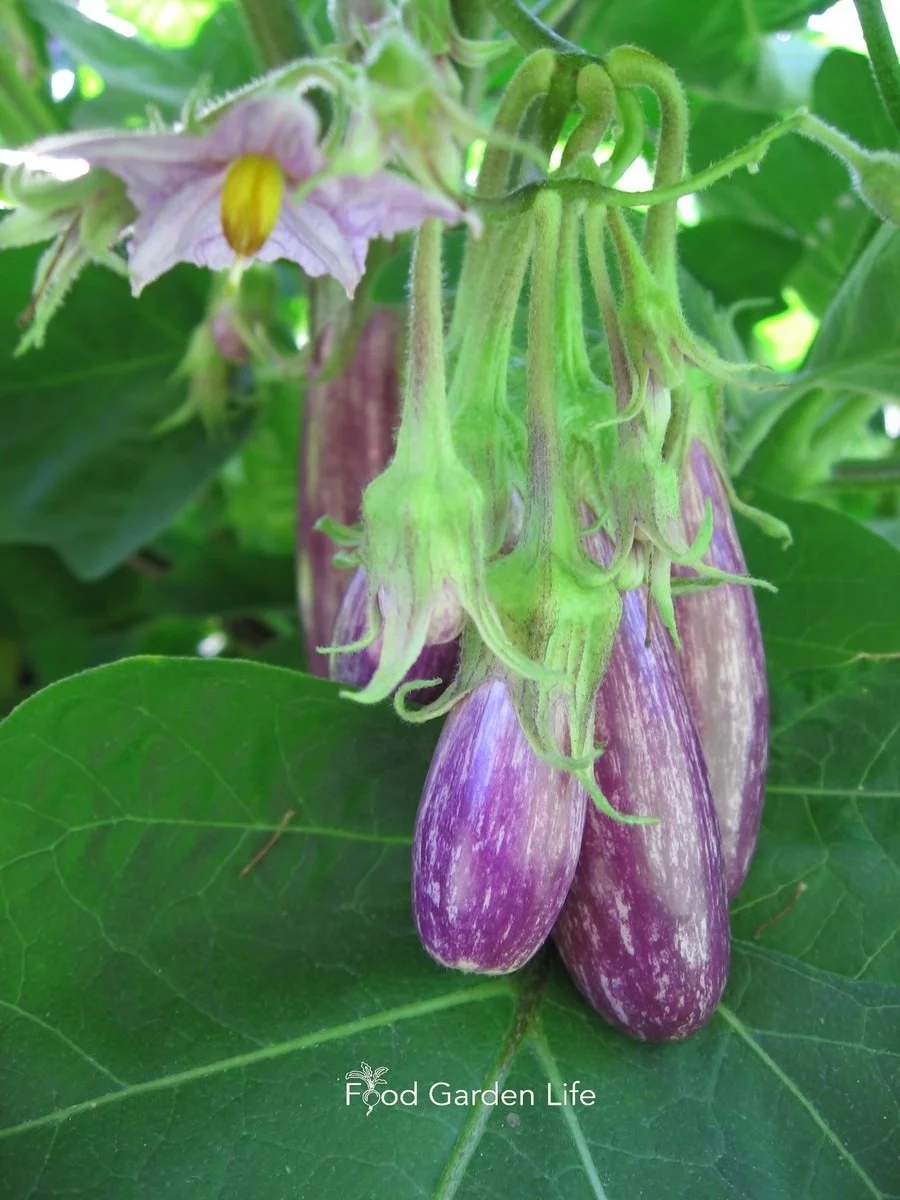
Eggplant. Compact plant. Attractive flowers. Beautiful fruit. Eggplant can be front and centre in an edible landscape. I love the small-fruited varieties with interesting colours, such as red-fruited eggplant or the skinny striped ones. Eggplant as a bedding plant? I bet your neighbours aren’t doing this!
Eggplant. Even if you don’t love eggplant, you have to admit it’s beautiful!
Find This Helpful?
If we’ve helped in your edible-gardening journey, we’re always glad of support. You can high-five us below! Any amount welcome!
Courses
Here’s a course that guides you through creating an edible garden you love. It’s my ode to edible gardening. You’ll find out how to think outside the box and create a special space. Get the information you need about a wide range of edible plants.
A Dragon's Garden for Children (Toothy, Pointy, Spiny Plants!)
By Steven Biggs
Kids Gardening…with Fun Themes
A dragon-themed garden never occurred to me.
It was Finn’s idea.
Finn and him mom came to my daughter Emma’s talk about gardens for children.
She told the kids they didn’t have to garden like grown ups. They could make their gardens fun.
Grow a tickling garden with plants that are good for tickling
A purple garden
Or a giant’s garden with giant sunflowers and mammoth pumpkins
Then Emma told the kids about one of her favourite plants that year: a bean with unusual markings called ‘Dragon Tongue.’
Finn Decides on a Theme Garden
The next morning Finn’s mom sent us a note. He loved the ‘Dragon Tongue’ bean. He loved dragons.
So he decided he’d grow a dragon-themed garden.
Dragon Tongue beans for a dragon-themed garden. (Photo by Emma Biggs)
Emma and I loved Finn’s idea.
So we scoured seed websites for dragon-themed plants. Here’s what we came up with:
Dragon’s Egg cucumber
Purple Dragon carrot
Red Dragon arugula
Dragon’s Fire arugula
Tongue of Fire bean
Snapdragon…and there are so many sizes and colours
Dragon’s Toe pepper
Green Dragon cucumber
Thai Dragon hot pepper
Blue Dragon dracocephalum
Flower Dragon watermelon
Black Dragon coleus
Taking the Dragon Idea Further
Then we thought about how we’d describe a dragon. We came up with ideas like spiny, toothy, winged, and pointy.
That helped us find even more plant ideas for the dragon-themed garden:
Litchi tomato for spiny skin!
Toothy. (An agave looks pretty toothy to my imagination. Or, if you want to stretch things, dandelion comes from French—dent-de-lion—which means "lion's tooth.” I even found a daylily called ‘Snaggle Tooth.’)
Long and pointy for the tail. (Corn? …I’ll let the kids brainstorm this one.)
Leathery or spiny for dragon-like skin. (I’m picturing citrus rind here; and Litchi Tomato would be perfect!)
Serpent-like shape. (I think snake gourds might work!)
Wings (How about a winged bean, angel wing begonia…or maybe something with winged seeds such as maple?)
I’m sure there are lots more plants with a dragon connection. E-mail us if you have any to add to the list!
Another Themed Garden
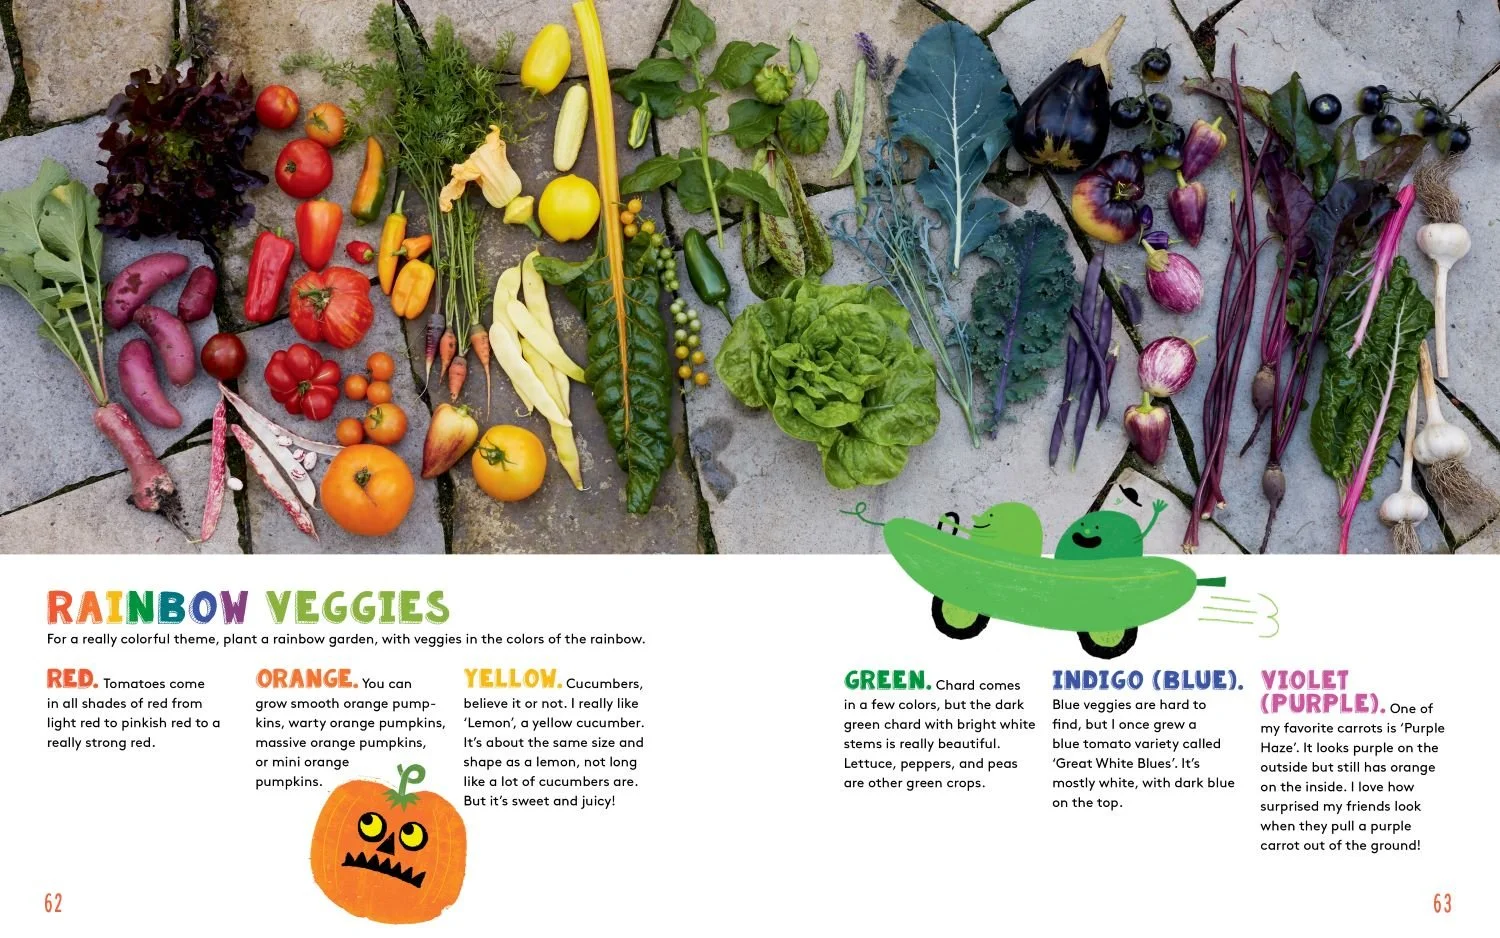
Check out the picture below of the harvest from Emma’s rainbow-themed garden.
A Rainbow-themed garden, from the book Gardening with Emma.
More theme ideas:
Pizza garden
Salsa garden
Bug’s garden (maybe include logs and rocks that kids can lift up to hunt for bugs)
More Ideas for a Garden for Children
Kids Gardening Articles and Interviews
Kids Gardening Books
Want fun books to inspire the kids in your life to explore the garden? Here are kids gardening books, signed by the author, Emma Biggs.
Driveway Makeover! 5 Ideas for Growing a Container Garden for Vegetables
A container vegetable garden is a good way to fit lots of vegetable crops into a small space. Find out how to get started.
by Steven Biggs
My Driveway Container Vegetable Garden
Not enough space to grow everything you want? Be creative! A container garden are a great way to fit more vegetables into your yard.
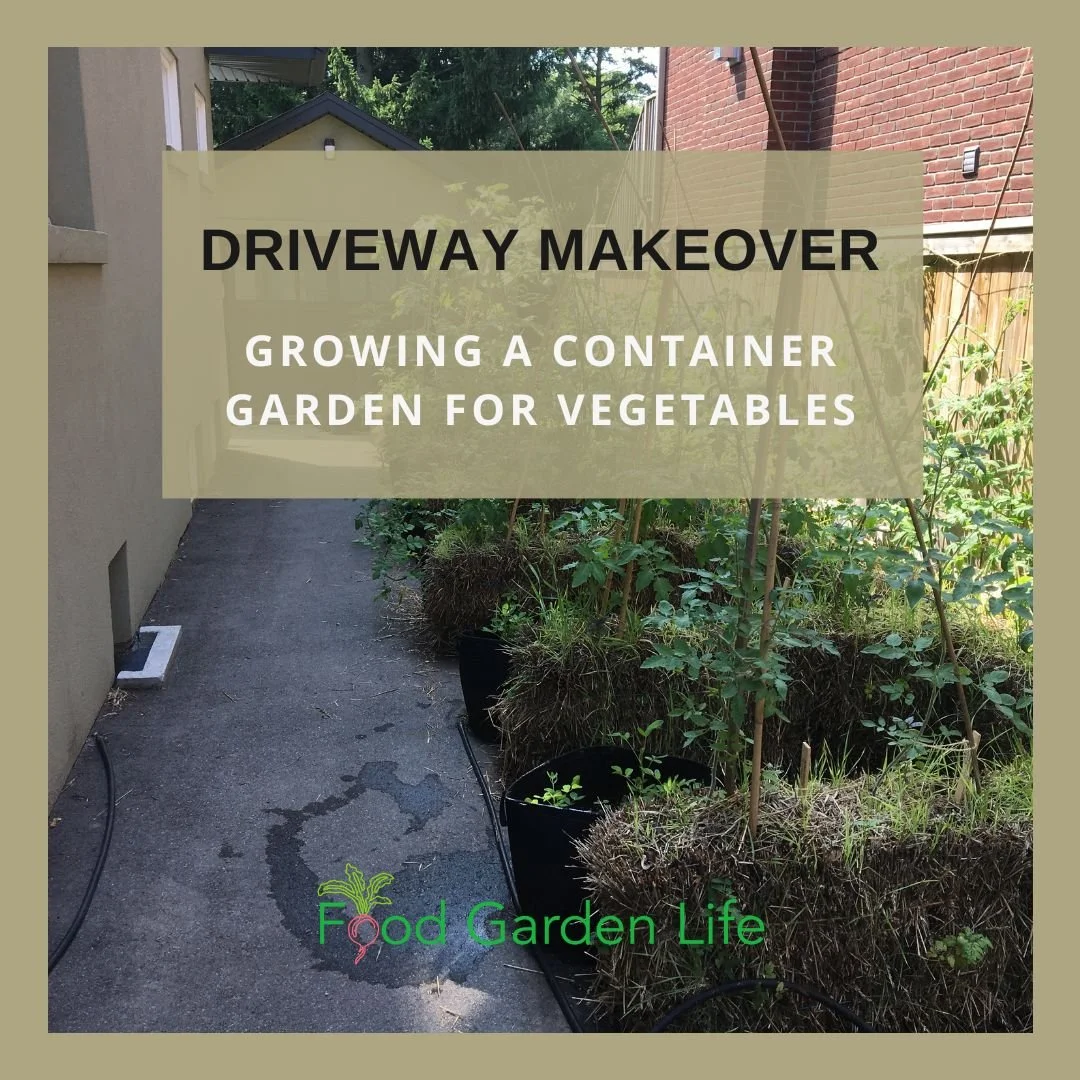
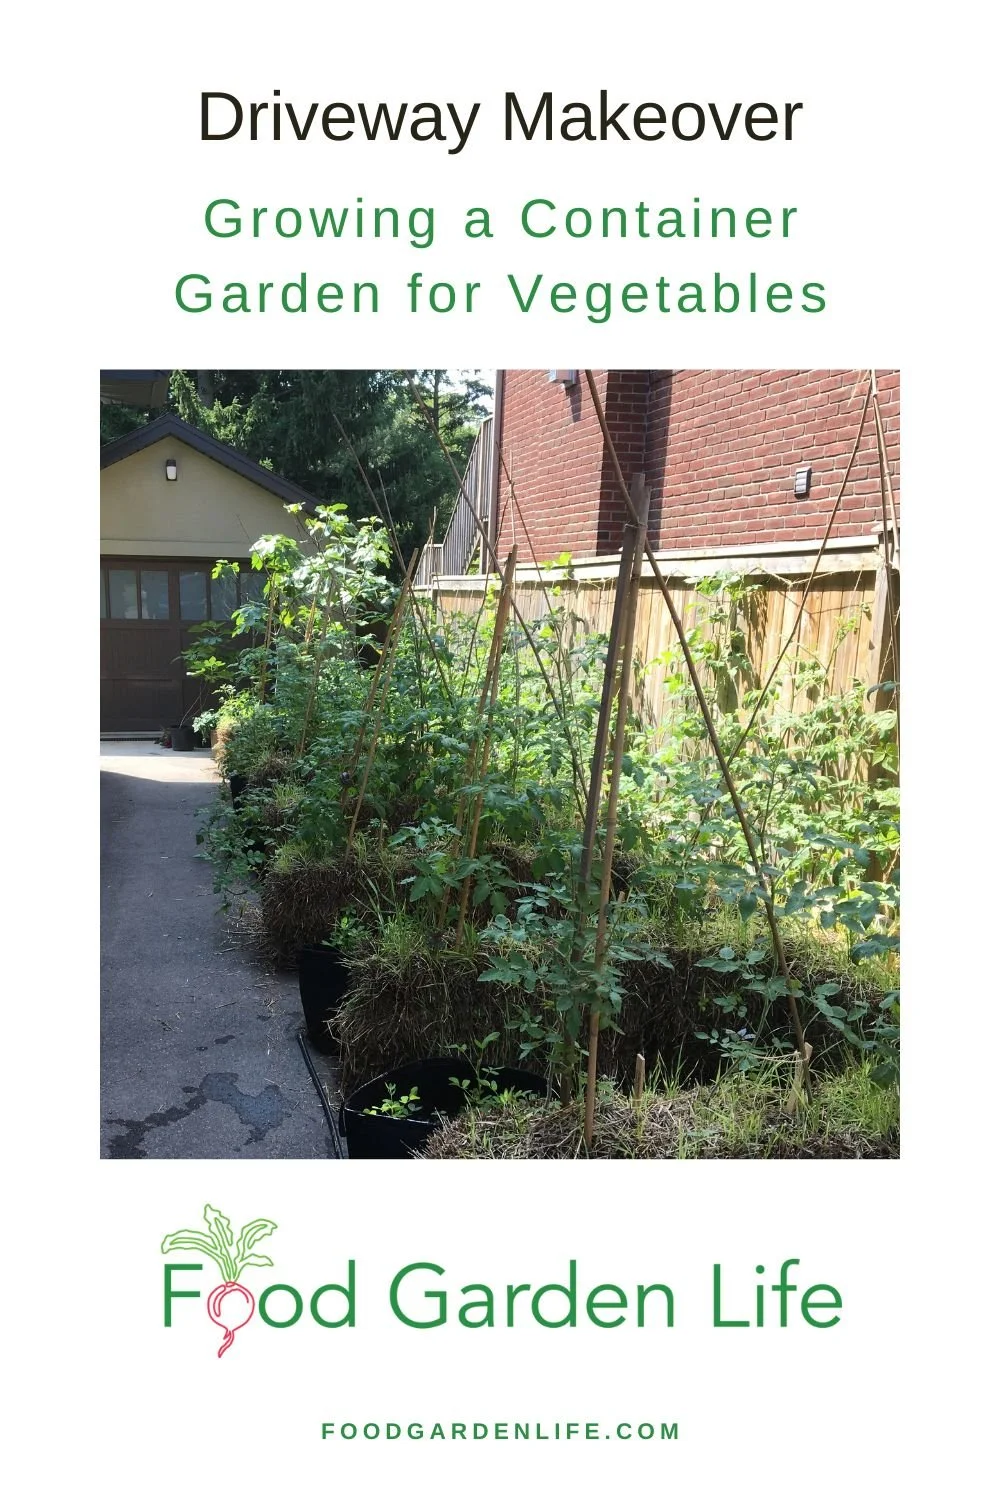
Here’s our driveway container garden. The driveway container garden is a quick, temporary space-making solution so we can grow extra tomato, pepper, potato, summer squash, and chard plants.
In this vegetable container garden, we use straw bales, fabric pots, nursery pots, bushel baskets, and vertical gardening techniques to make the most of the space.
In this post, I talk about these five vegetable container gardening techniques, along with container plants and container garden tips.
Ideas for Your Vegetable Container Garden
Container gardening is part science, and part creativity. There are lots of ways to approach it. Here are five ideas we’ve used to make the most of our driveway for growing vegetables.
1. Strawbale Gardens: Grow Vegetables in Containers that are Biodegradeable
Wetting the straw bales to start the “conditioning” process.
A lot of visitors take a second look at my straw-bale garden and wonder where I put the potting soil. There is no potting soil: The straw bale is both the container and the growing medium. No potting mix required!
The decomposing straw gives plant roots needed air while retaining moisture…like a big sponge.
By the end of the season, when we pull apart a bale, the inside is dark and crumbly. It’s already partially composted and perfect to use as mulch on our gardens. Then, we start again with new bales the following year.
We plant the top with tomato plants and leafy greens. Then we put bush beans on the sides of the bales.
Important: If you’re starting with new, fresh, dry bales, the first step is to get microbial activity underway by watering them and feeding them. This step is called “conditioning.”
Find out more about straw-bale gardening.
2. Bushel Baskets: Growing Vegetables in Containers that are Repurposed
Container vegetable gardening with repurposed stuff! Potatoes growing in lined bushel baskets.
We often have extra bushel baskets from our fall cider-making. So we use them for growing potatoes. (We can’t grow potatoes in our back yard because our neighbour’s black walnut tree gives off a compound that kills them.)
We line the bushel baskets with plastic bags so that the potting soil stays moist longer and so the bushel baskets won’t decompose as quickly. (We poke drainage holes in the bottom of the bags!)
There are lots of repurposed items that work well as containers. Here are a few ideas:
Milk crates. I’ve used these in previous gardens. Just cover the openings on the side and bottom with newspaper or cardboard, so the soil doesn’t escape.
Old wheelbarrow. A friend uses an old wheelbarrow as a driveway planter.
Wash basins. I have neighbours who use metal wash basins as vegetable garden planters. (Make sure to drill drainage holes in the bottom.)
3. Fabric Pots: Garden in Pots that are Moveable
Fabric pots are moveable, and a great way to start container gardening.
These pots are widely available. What we like about them is that they have handles so we can move them aside if we need to move anything large along the driveway.
I’ve seen impressive rooftop container gardens created with fabric pots. While some gardeners use drip irrigation to keep the soil consistently moist, a more simple approach is to put a saucer underneath; as the potting mix begins to dry, water in the saucer wicks upwards.
4. Fence: Grow Vegetable Plants on Surrounding Features
We train tomato plants up the twine that is dangling from the top of the fence.
Sometimes it’s possible to squeeze more crops into a space by growing some of them upwards—a concept that’s often referred to as “vertical gardening.” In the case of our driveway, there’s a wonky board fence that I like to hide with a wall of tomato and squash!
We plant tomatoes next to the fence, and then train them up twine suspended along the fence. We also grow squash vines along the fence—well past where the garden is.
Idea: I’ve also grown squash along hedges and up trees. Because the vines roam around, there are lots of vertical-gardening possibilities.
Here’s more about vertical gardening.
5. Nursery Pots: Figs Growing in Containers
Next to my garage is my potted fig “orchard.” It’s a collection of potted fig plants growing in nursery pots. These fig trees spend the winter in my garage.
Nursery pots are an inexpensive way to start container gardening. Talk with garden centres and arborists—you can often get them for free or very inexpensively.
If you’re interested in growing figs in a cold climate, here’s more about how to do it.
Grow a Container Vegetable Garden
And get an early harvest of crops that usually take too long!
Plan Your Container Vegetable Garden
Choose the Location
If you’re thinking about a container vegetable garden but don’t know where to start, choose your location first.
Then, once you’ve decided on a location, you’ll know how much sunlight you’re dealing with. Remember that full-sun crops such as tomatoes can do respectably well in partial sun. (This is not something a commercial market gardener would do…but if you’re a home gardener, conditions often aren’t perfect.)
Something else to think about is access to water. Is there a tap or hose nearby?
Choosing Container Plants
When it comes to choosing container gardening crops, a good starting point is things you like to eat.
Then, think about crops that do well in containers. Most vegetables grow well if a container is big enough, but some crops are more practical than others.
For example:
Pole beans are great if they're next to something they can grow on, but, otherwise, bush beans are more practical because you don't need to make a trellis.
Parsnips and Brussels sprouts take the whole summer and fall to mature. Instead, look for crops that mature more quickly, like carrots and carrots.
Here’s a list of best vegetables to grow in pots.
If the location is shady, here’s a list of crops that grow in shade.
Consider Containers with Reservoirs
A key to success—and common reason for failure—with container vegetable gardening is watering. When the soil in containers regularly dries out, your vegetable plants put on the brakes. Growth stalls. Or, even worse, your plants skip straight to flowering before they're big enough.
Pin this post!
(When you’re looking for bargain plants at a big-box store and see what looks like a bonsai cauliflower plant that’s only six inches tall, chances are that the plant got parched too often…and that stress made it flower before its time.)
If the potting soil is consistently moist, your crop will be miles ahead. It makes a big difference.
You can keep the potting mix consistently moist with what’s called “sub-irrigated” pots. This is just a fancy way of saying a container with a reservoir. As the potting mix begins to dry, water from the reservoir wicks upwards, keeping the soil continuously moist.
This sort of container is widely available—but you can easily make your own.
Find out more about sub-irrigated (a.k.a. self-watering) pots.
More Container Ideas
If space is tight, small containers might be your only option. I've made herb container gardens by dotting potted plants on a staircase.
Don't forget window boxes. Although they're shallow, they work well for shallow-rooted crops such as leafy greens.
Hanging baskets are a great way to fit more vegetable plants into your container garden.
Find This Helpful?
If we’ve helped in your container-gardening journey, we’re always glad of support. You can high-five us below! Any amount welcome!
Guide: Growing Raspberries (high yield, NO fuss fruit)
This article explains how to plant and care for raspberries in a home garden.
How to Grow Raspberry Plants
At the back of my aunt and uncle's house was a berm made of heavy yellow sticky clay. It was the soil excavated from an addition to their house. The contractor just dumped soil and rubble at the back of their yard.
And it became their raspberry patch.
Raspberries are well suited to the home garden because they’ll thrive in imperfect conditions like that hard-packed berm.
A home gardener can take a very systematic approach to raspberry care…or a hands off approach. Both work with raspberries. (Though by investing some time, you increase the harvest.)
If you want to find out how to grow raspberries, get ideas for using them in the landscape, and find out top tips for raspberry care, keep reading. This post tells you how.
Primer for Growing Raspberries
Let’s start with some raspberry basics.
How Raspberries Grow
A raspberry plant has perennial roots, but the canes live for only two years.
Raspberry bushes have perennial roots (meaning it lives for many years) but the tops—called the “canes”—live for only two seasons.
First-year canes are called “primocanes.” They start out green and tender, and get brown and woody as the season progresses.
Second-year canes are called “floricanes.” Floricanes flower and produce fruit, and then die at the end of the season.
Raspberries that produce fruit on the floricanes are called summer-bearing raspberries or summer-fruiting raspberries.
But some varieties of red and yellow raspberries grow a later crop of fruit on primocanes. These are called everbearing raspberries, fall-bearing raspberries, autumn-fruiting raspberries, or primocane raspberries.
Raspberry Fruiting
Raspberries are late to flower, so flowers are not likely to be hit by late frosts.
You don’t need multiple varieties to get fruit because raspberries are self-fertile. You will get fruit even if you have only one plant.
Here’s when raspberry fruit ripens:
Fruit on floricane-fruiting varieties ripens early summer through to midsummer.
Fruit on fall-bearing varieties ripens mid to late summer. If winter is slow to arrive, you can harvest raspberries until there’s a heavy frost.
Raspberry Growth by Fruit Colour
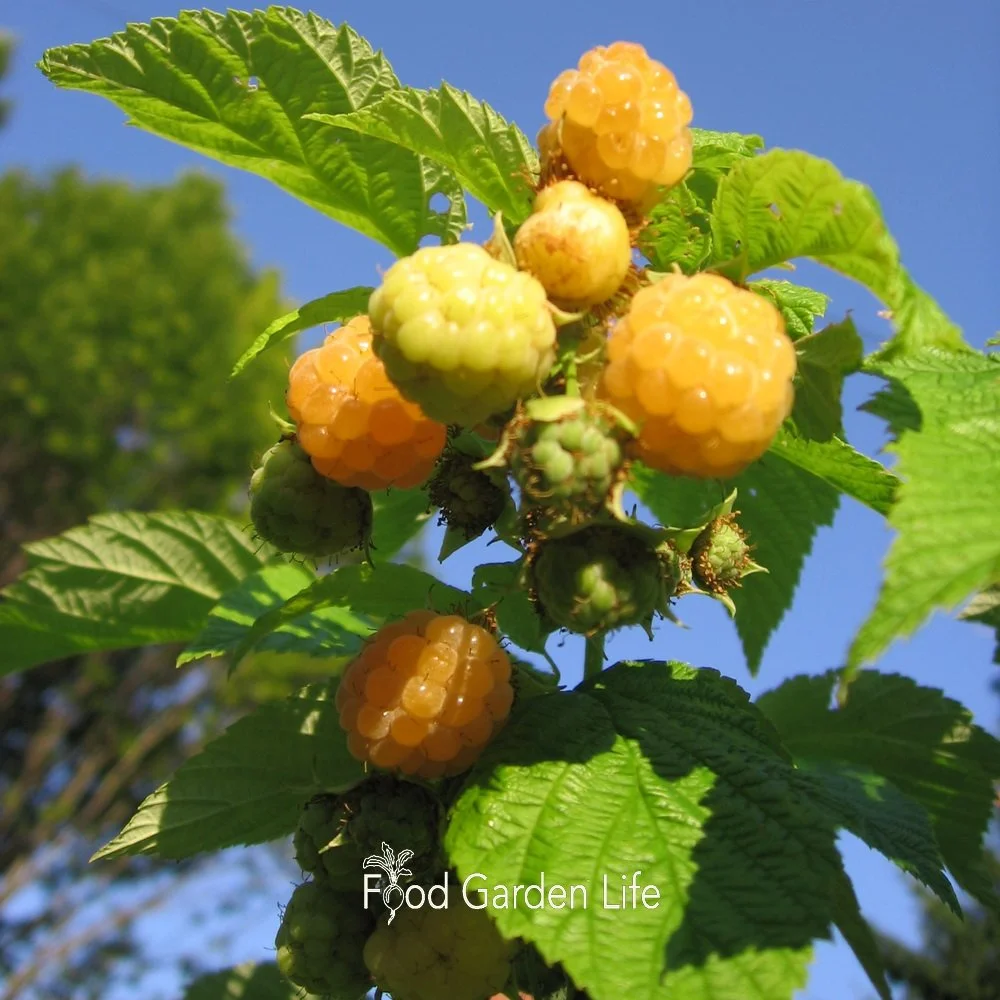
Yellow raspberries are the same species are red raspberries.
There are red, yellow, black, and purple raspberries. The red raspberries and yellow raspberries are the same species. Black raspberries are a different species. And purple raspberries are a hybrid of red and black.
Red and Yellow Raspberries
Red raspberry and yellow raspberry plants send up new canes from the base of existing canes. New canes also grow from the roots. That means that they don’t remain in a clump, and plants spread out in all directions.
Black and Purple Raspberries
These grow in a tidy clump, with new shoots growing from the base of the clump.
Where to Plant Raspberries
Black raspberries.
If you want to grow raspberries by the book, look for full sun and a rich, well-drained soil.
But in a home garden setting, we don’t always have the ideal conditions that a market gardener might have.
You don’t have to give raspberries the prime real estate.
They grow in a wide range of soils. Very sandy or very heavy clay are the least ideal—both situations can be helped by adding lots of organic matter. The ideal pH is around 6, though they can do fine on many soils.
They don’t do well in soil that’s continually wet. So avoid wet locations. Or, if you only have a wet location, consider raised beds.
Raspberries are affected by a disease called verticillium wilt. There are a few common plants that we grow in home vegetable gardens that also get verticilium wilt: the nightshades (tomato, eggplant, pepper, potato) and strawberries. If you've been growing these and you've had wilting and dieback, this is a red flag. Put your raspberries in another part of the yard.
Planting Raspberries
Purple raspberries.
A raspberry patch can last many years. So set it up right.
Your first step is to get the soil in good shape by adding lots of compost.
Next, make sure there are no perennial weeds.
Raspberry Spacing
How you space raspberry plants depends on how you’re fitting them into your yard. However you do it, though, your red and yellow raspberries will fill in the spaces soon enough.
Rows Make Picking Easier
Raspberries are easier to pick when you grow them in rows. If they’re in a patch, you have to blaze a trail for picking…and that might mean scratched arms!
I like rows that are at least 60 cm (2’) wide. Wider than that and they’re more difficult to pick. Leave 60-90 cm (2-3’) between plants. Because black and purple raspberries have long, arching canes, you can space them a bit farther apart.
Raspberry Hedge
Your neighbours might take issue with me for mentioning this…but what about a raspberry hedge as a way to separate yards? Because they sucker, a raspberry hedge creeps outward—so be prepared to rein it in.
Raspberries in the Landscape
Beyond rows or hedges, wherever you plant them, keep in mind that raspberries spread.
This is a plant that’s perfect in a spot with natural boundaries—like a space framed by a house and a patio.
In the wild, raspberries often grow in partial shade, at the forest edge. Think of this if you’re creating a layered landscape or a food forest.
I’ve seen commercial raspberry production in high tunnels, both in the ground and in pots. This is more work than most home gardeners want, but it gives the gardener more control of conditions, meaning the chance to boost yield. It also extends the fall harvest window.
Raspberry Care
Weeding
In an established raspberry patch it’s difficult to remove perennial weeds like thistle or bindweed. So don’t let them get established!
Raspberries have shallow roots, so don’t deeply cultivate the patch. You can scuff the surface or spot-dig bigger weeds.
Even better, minimize weeding by mulching your raspberry patch. This also helps to hold in moisture.
Trellising
Trellising raspberry plants with a T at either end of the row, and wires strung in between.
A simple way to support raspberry canes in rows is to have a horizontal wire running the length of the row on either side of it. To do this, install posts at the end of the row and put pieces of wood across the posts, so they’re T-shaped. Then run wires from one T to the other. The wire can be 1 – 1.5 metres off the ground—depending on how tall your canes are (which depends on the variety and the growing conditions.)
In short, you’re just getting canes to grow between horizontal wires, which prevent them from leaning too far away from the row.
A variation for those growing a skinny row of raspberries is to have a single wire down the centre, and then tie each cane to it.
Note: Fall-bearing types can get tall and top heavy when laden with fruit. If so, trellising help keep canes upright.
Landscape with Fruit
That’s easy to grow in a home garden!
Pruning Raspberries
If you let every cane grow, you’ll have smaller fruit. If you thin out canes, those remaining give more—and bigger—fruit.
If you’re managing your raspberries more intensively, you might opt to prune twice a year, with summer pruning and dormant pruning. You’ll still get raspberries if you don’t prune, but you can optimize production (and have a nicer looking patch) with regular pruning.
Summer Pruning
Prune out weak primocanes. Thicker, more vigorous canes give more fruit.
I aim for 30 cm (12”) between primocanes, bearing in mind that in a wide row there can be more than 1 cane in a 30 cm (12”) span.
Pinch tips of new black and purple raspberry canes mid-summer to encourage side branching.
After floricanes finish fruiting, cut them out (you can also just wait to do this later, while the plant is dormant).
Dormant Pruning
These floricanes will be pruned out at the end of the growing season.
I prune in the fall. In colder climates, prune late winter or early spring pruning so winter dieback can be removed with pruning.
Prune red (and yellow) raspberries back to 1.2-1.5 metres (4-5’) high before growth begins. This encourages more side shoots…meaning more fruit.
Cut back side branches on black and purple raspberries by half before growth begins in the spring.
Here’s an Idea: If you have fall-bearing raspberries and want only the fall crop, cut all of the canes to the ground in the spring before growth begins.
Water
Water raspberries during dry conditions to prevent dry, seedy fruit.
Raspberry Varieties
Here are things to think about as you choose raspberry varieties:
Hardiness
Summer or fall bearing
Taste
For summer varieties, there are early-, mid-, and late-season varieties
When it comes to varieties, it’s worth doing your homework to see which varieties are recommended for your area. Hardiness varies between varieties. Taste varies quite a bit too—so as you’re looking at zone ratings, see how the flavour is rated.
If you have a short growing season, there might not be enough time for fall-bearing raspberries to ripen. That’s because ripening stops and plants start to shut down with the first hard frost. To find out more about taste and what varieties do well in your area, ask other gardeners—or check in with a nearby pick-your-own farm.
In areas with winter thaws followed by extreme cold, where winter dieback is a concern, an early-fruiting primocane raspberry has the advantage of not relying on overwintering canes
Black raspberries not as cold hardy as red and yellow raspberries.
Challenges
Competition
My main competition for berries is my kids. But for many gardeners, it’s birds. Because canes are fairly low, netting, or growing in a net tunnel, are options.
Decline
A raspberry patch usually goes into decline after a few years. Start a new patch, on another piece of ground.
Raspberry Propagation
Use a spade to divide clumps in the fall, or in the spring before new growth begins. Spring and fall are also the time to dig up wayward suckers from red and yellow rapsberries.
Black and purple raspberries can also be propagated by tip layering. Here’s an explanation of tip layering for blackberries; it’s the same process for purple and black raspberries.
Buy Raspberry Canes
Many garden centres sell potted raspberry plants. The advantage to container-grown plants is that the planting window is much wider. But they cost much more than bare-root plants.
Dormant bare root plants, with roots washed of soil, are shipped in late winter and spring. These are available from many online nurseries—and the price per plant is considerably cheaper than potted plants.
FAQ – Grow Raspberries
Pin this post!
Do raspberries grow in shade?
They tolerate partial shade well, though the yield is less than in full sun. My productive black raspberry patch gets only a half day of sun.
Does frost affect raspberry flowers?
It can, but because the flowers are late to open, it’s rarely a problem.
I want to renew my raspberry patch with new plants. Can I put it where my current patch is?
It’s better to choose a fresh piece of ground, if that’s an option. That’s because raspberries planted where there were recently raspberries growing might not do as well. If your old patch had disease, it can affect the new plants.
Why does my raspberry fruit crumble?
If the ripe berries crumbles when you pick them, the problem might be poor pollination. This can happen when the weather at the time of bloom is rainy or overcast.
Can raspberries grow in a pot?
Yes. Raspberries grow well in containers. As with any container-grown crop, success depends on providing a large enough container, and sufficient water and feed.
More on Raspberry Plants
And here’s more on how to tip-layer blackberries and black raspberries.
Find This Helpful?
If we’ve helped in your food-gardening journey, we’re always glad of support. You can high-five us below! Any amount welcome!
More on Fruit Crops
Articles: Grow Fruit
Visit the Grow Fruit home page for more articles about growing fruit.
Here are a few popular articles:
Courses: Grow Fruit
Here are self-paced online courses to help you grow fruit in your home garden.
Home Garden Consultation
Book a virtual consultation so we can talk about your situation, your challenges, and your opportunities and come up with ideas for your edible landscape or food garden.
We can dig into techniques, suitable plants, and how to pick projects that fit your available time.
Edible Flowers: Flowers You Can Eat (AND how to use them)
Edible flowers: Find out which flowers are edible—and how to use them to spice up your cooking and culinary creations.
Edible Flowers for Your Garden
Bee balm (bergamot) is an edible flower that’s a good fit for a perennial border.
When I taught at a college with a farm-to-table horticulture and culinary program, the chef asked us to harvest small zucchinis with the flower still attached at the end. A pedestrian ingredient elevated to gourmet.
Yet they often fly under the radar. You can fit edible flowers into a vegetable garden, herb garden, edible landscape, and beyond. You might have some growing there already.
Once they’re on your radar, you’ll see them everywhere.
If you’re wondering what flowers you can eat, keep reading. This post explains where you can grow them, lists easy-to-grow edible flowers, and has ideas for creative ways of using them.
How to Grow Edible Flowers
Use bachelor’s buttons petals to decorate a cake, or dried in a tea.
Because edible flowers grow on a very wide range of plants, there’s no one-size-fits-all growing advice. Many are sun loving. Some tolerate some shade. While many are annuals, there are shrubs and trees too.
Success growing edible flowers is a matter of selecting the right plant for the right growing conditions.
Some of my favourite edible flowers are the ones that self-seed in my garden, meaning they come back year after year without me having to plant them. I like gardening that way.
NOTE: Not all flowers are edible. So don’t eat it if you’re not certain it’s edible. Start with small amounts if it’s the first time you’re eating a flower. As with any food, some people can have sensitivities.
Calendula (pot marigold) self-seeds in my garden. I let a “hedge” of calendula frame one of my potager beds.
Where to Grow Edible Flowers
Edible Flowers in the Vegetable Garden
There are lots of edible flowers to be found in a vegetable garden.
Here are some of my favourites.
Arugula flowers are edible and have a peppery taste similar to the leaves.
Arugula. Like the leaves, these small flowers are peppery. They’re nice atop a salad or a savoury soup.
Broccoli. We grow broccoli to harvest before the flowers open…but if your broccoli beats you to the punch and the flowers open, you’ll have cheery yellow flowers to toss into a salad or use as a garnish.
Fennel. Clusters of small, bright yellow flowers have a delicate anise flavour. I’ve seen a chef tap fennel flowers over a white plate to decorate it with the brightly coloured pollen. Along with Florence fennel, there’s bronze fennel, a short-lived perennial in my garden zone (and an invasive in others…). Find out more about bronze fennel and other edible perennials.
Pea. Flowers taste like…peas. As well as the flowers, you can also eat young shoots and tendrils. Caution: Flowers of peas we grow as a vegetable (Pisum sativum) are edible; flowers of sweet pea (Lathyrus odoratus), grown as a cut flower, are poisonous.
This squash flower is calling out for a wedge of cheese, some batter, and a bath in the deep fryer!
Runner bean. Along with edible flowers, runner bean flowers have long enough stems to make excellent cut flowers. In my garden, they’re a magnet for hummingbirds too! Runner beans are also a top crop for vertical gardening: Find out more about vertical gardening.
Squash. Slightly sweet taste. Stuff whole flowers with a wedge of cheese and batter and deep fry. Or, slice and serve atop a bowl of soup for a dash of bright yellow or throw into a stir fry just before serving.
All of these veggies can thrive in container gardens. I teach people how to grow great container vegetable gardens in my this masterclass.
Edible Flowers in a Potager or Kitchen Garden
I like to think of potager gardens as grazing gardens: Instead of large quantities of each crop for preserving, we’re growing smaller quantities to pick and eat fresh on an ongoing basis. I like a grazing garden with lots of annual flowers in it for cutting…and eating.
Bachelor’s Buttons. Flowers come in blue, pink, and white. Eat fresh, or dry to add colour to your home-made tea blends. Or sprinkle some petals over the bowl of whipping cream you’re putting out for dessert.
Calendula petals are a homegrown saffron substitute, great for colouring rice.
Calendula. Great for colour, though not a lot of flavour. Pluck off the petals to add to salads or dress up a plate. Use dried petals to add colour to rice dishes—a homegrown saffron substitute.
Rose. Pluck some rose petals to chop and add to a fruit salad. The lower, white portion of the petal can be bitter, so before using them, do a taste test—and remove the white portion if needed. Edible flower expert Denise Schreiber recommends rose-petal ice cream.
Sunflower. Use these brightly coloured and mildly bitter petals as a cheerful garnish.
Edible Flowers for Containers and Container Gardens
You can eat the whole nasturtium flower. It has a peppery taste, like the leaves.
Many well-known edible flowers are grown as annuals, and many are well suited to growing in containers.
Here are a couple of my favourites.
Begonia. Tuberous begonia petals have a citrusy taste and a firm texture.
Nasturtium. Unlike some flowers, where you must first remove petals from a corky core, you can pop a whole nasturtium flower into your mouth. Like the leaves, the flowers have a peppery flavour. (See below…rinsing before eating can be a good idea!)
Edible Flowers for an Edible Landscape
Here are ideas for perennials, shrubs, and trees with flowers you can eat for an edible landscape.
Apple blossoms have a floral flavour.
Apple. These blossoms have a floral flavour.
Bee Balm. A.k.a. monarda, pluck these slightly spicy petals to dry for tea or use fresh tossed into a fruit salad.
Daylily. Use the flower bud in stir fries instead of snap peas. Dice the flowers to throw into frittatas and pancakes. Or…what about an open flower to hold a scoop of ice cream—instead of an ice cream cone!
Elderberry. Use these sweet-smelling flowers fresh in fritters. Dry them for tea. Or to make cordial or elderflower champagne. Don’t graze on raw elderflower—this is a flower that should first be processed.
Redbud flowers taste sweet.
Lilac. Sweet, with a little drop of nectar in the throat. When I was a kid we’d pluck these from my parents’ hedge and suck on them to extract the sweet nectar.
Linden. Dried linden flowers make a lovely tea. My Aunt Anna had me pick them for her from the lindens that lined the front of her apartment building.
Eastern Redbud. Sweet little pink flowers that are out early in the season.
Create Your Own Unique Edible Landscape
That fits for your yard, and your style!
Edible Flowers in a Herb Garden
Basil. The flowers taste like the leaves. I pluck off these wee flowers to sprinkle over a salad or a bowl of tomato soup.
Borage flowers taste a bit like cucumber.
Borage. The sky-blue colour of borage flowers is a visual delight in the garden. Float these cucumber-flavoured flowers in a pitcher of water. This is a plant that reliably self-seeds in my garden.
Chive. Pull apart the flower heads and then sprinkle these onion-flavoured flowers over a curry!
Cilantro. This herb always flowers more quickly than I want…and as it flowers, it stops growing new leaves. But all is not lost, because the flowers, too, are edible.
Dill. Like fennel, these heads of small, yellow flowers are edible. I use a whole dill stem with leaves and flowers when I make a crock of dill pickles.
Garlic Chive. Use in the same way you do chive flowers. They look nice when you float them in a bowl of water.
Lavender. Float lavender flowers in a summery drink. One of the most unusual—and delightful—ice creams I ever had was a lavender-flower ice cream.
Lemon flowers have a very sweet smell and taste.
Lemon. I wasn’t sure where to put lemon in this post, so I’ve included it with herbs, since the leaves are used much like bay leaves. The flowers have a sweet smell and taste. Dot them on the thick whipped cream you spread over a summery fruit flan. Find out how to cook with lemon leaves.
Here’s a course about how to grow lemons in a cold climate.
Lemon Balm. The flowers have the same lemony taste and smell as the leaves. Eat as many flowers as you can, because this is one plant that’s quite naughty when it comes to self-seeding everywhere.
Mint. Shunned by many gardeners for its aggressive ways, mint flowers are a nice touch with something sweet…I’m thinking blueberry compote. (If you’re worried about mint taking over your garden, just grow it in a pot. That’s what we did when my daughter came home with 19 types of mint.)
Oregano. I love oregano with anything tomato. Or, how about a herb butter dotted with oregano flowers.
Rosemary. Like the leaves, the beautiful blue flowers have a resinous, unmistakable taste.
Edible Flowers…in the Lawn!
Chamomile. Apple-like smell. Use dried for tea, or fresh to adorn a plate. This herb is quite tolerant of being shorn like a sheep, making a chamomile lawn an unusual option.
Dandelion. I don’t know many gardeners who set out to grow dandelions, but they usually invite themselves to your lawn anyway. I harvest dandelion leaves and flowers from my lawn every spring. Pick when young, as they become more bitter when older. Pluck the petals from the centre of the flower before using.
Thyme. Like chamomile, here’s another herb that’s useful to create a lawn. When choosing a thyme variety for your edible-flower lawn, keep in mind that some types of thyme are low and creeping, while others are more upright and woody, making them less suited to using for a lawn.
Sweet Woodruff. The small, white flowers combine sweetness and vanilla. I also love the glossy, dark green leaves.
How to Harvest Edible Flowers
Pin this post!
When to Pick Edible Flowers
Pick flowers as close to when you’ll use them as possible for the best colour and flavour.
Storing Edible Flowers
Store wrapped in damp paper towel, in a sealed plastic bag in the fridge. The damp paper towel keeps the humidity high, without the flowers actually sitting in water.
Cleaning Edible Flowers
When flowers have an open structure, you can quickly spot any uninvited guests.
But if a flower has hiding spots, do give it a good rinse—or even a soak.
(I say this because once made a salad with fresh nasturtium flowers. As soon as I dressed the salad, an army of aphids marched out of those flowers. I think I ate the salad anyway…having bragged about it to my colleagues. A bit of protein...)
Tip: Edible Flowers That I Wouldn’t Eat
I don’t eat cut flowers from the store. Who knows what’s been used on them. Same with plants from the garden centre. Come to think of it, flowers from the roadside too.
Find This Helpful?
If we’ve helped in your food-gardening journey, we’re always glad of support. You can high-five us below! Any amount welcome!
More on Growing Food
Food Gardening Articles and Interviews
For more posts about how to grow your own food, head over to the library of posts.
Food Gardening Courses
Home Garden Consultation
Book a virtual consultation so we can talk about your situation, your challenges, and your opportunities and come up with ideas for your edible landscape or food garden.
We can dig into techniques, suitable plants, and how to pick projects that fit your available time.
Vegetables to Grow: 12 Tips to Choose What’s Best for Your Vegetable Garden
Choose the best vegetables to grow in your garden with these 12 crop-choosing tips.
by Steven Biggs
Choose Which Veggies to Grow in a Garden
12 tips to help you choose vegetables to grow.
“Grow radishes!”
It’s a recommendation I often hear given to new gardeners. That’s because radishes are easy to grow. And they grow quickly.
True.
But in my house, it’s the radishes that are still on the veggie platter when everything else has been devoured.
So while the easy-to-grow crops are part of a good vegetable garden plan, there are other things to think about too.
Keep reading to find out how to pick vegetable crops and varieties for your needs and situation. Instead of being prescriptive and telling you what you should grow, this post gives you 12 tips to help you choose which vegetables to grow.
1. Grow What You Love
So back to the radishes, there’s no point growing what you won’t eat—even if it’s easy to grow
Even if it’s nutritious.
Grow things you’ll enjoy eating.
2. Grow for How You Cook
I love big slabs of eggplant that I can marinate and grill, so I grow large-fruited eggplant varieties
As you choose crops and varieties, think about how you’ll use your harvest.
Here’s an example:
I love big slabs of eggplant that I can marinate and grill—or use to make eggplant parmesan. So I always go for large-fruited eggplant varieties
For tomatoes, I like to make sauce all winter, so I grow good sauce-making varieties
3. Rule Out Some Crops
There might be crops that aren’t a fit for your garden. I’m talking about space hogs—and crops that will probably be a frustration.
Space Hogs
Some crops use up a lot of space—more than makes sense in a small garden.
For example:
I love Brussels sprouts. But they’re big plants that tie up the same patch of garden for an entire season. So I leave them to the market gardeners.
I love edamame too. But for the amount I get considering the amount of space they take in the garden, they’re not my top choice.
Unnecessary Frustrations
Depending on what your situation, there might be crops that disappoint—or frustrate—you.
Here’s are examples:
Corn. I love corn. So do all the raccoons around here. So I don’t grow it. I don’t need the chest pains!
Tomatoes. Some people prefer cherry tomatoes to big beefsteak tomatoes because that way there’s lots more tomatoes to harvest. That way, the gardener gets lots even if wildlife steals some.
4. Try Something New
Have you added something new to your garden? I like to grow something new every year.
Recently it was celtuce, a.k.a. stem lettuce. It’s easy to grow and fun to cook with. Not a new crop at all…just new to me.
20 years ago I grew cucamelons for the first time and have grown them ever since.
20 years ago I tried cucamelons and have loved them and grown them every year since.
Look for neat varieties (e.g. a pepper variety I love is the corkscrew-shaped ‘Corbacci’
Or branch out into a crop from a cuisine you’re not familiar with (okra was new to me…but after I learnt a Cajun fiddle tune I wanted to learn how to make Cajun-style gumbo soup…and now I aways grow okra for making gumbo soup!)
5. Consider Diseases
Variety choice sometimes helps with disease problems. For example:
Downy mildew ravaged my basil for a couple of years. So now when I’m getting basil seeds, I look for mildew-resistant basil varieties
There’s no totally blight-proof tomatoes, but there are blight-resistant varieties, worth adding to the mix in a garden so that in years when blight decimates the tomato patch, there are still a few plants producing late in the season
6. Pick Crops for Small Spaces
If space is a challenge, crop choice can often help you harvest much, much more.
Crops for Vertical Gardening
If you’re gardening in a small space, choose vegetable crops that you can grow upwards on trellises, tee-pees, or fences.
If you’re gardening in a small space, choose veg that you can grow vertically. When you grow upwards, that frees up space on the ground—so you can fit more into a small space.
Here are a couple of my favourites:
Runner beans. I love runner runner beans! The flowers are edible, great for bouquets, attract hummingbirds. Oh, did I mention there’s beans too! (If you’re in a maritime climate, you might find runner beans produce more than pole beans.)
Zucchini: Many zucchini varieties have a bush-like growth habit, and the plant can take up a fair bit of space. But if you grow a climbing zucchini variety, it won’t take up as much space…so there’s room to plant more in your garden.
Grow a Container Vegetable Garden
And get an early harvest of crops that usually take too long!
Plants with Multiple Edible Parts
You might also think about plants with more than one edible part, so in a limited space you’re getting multiple harvests from one crop
Radishes have edible seed pods.
Snap peas (you can eat the peas and the pod…and don’t forget young tendrils)
Squash (eat the flowers, the squash…and shoot tips!)
Beets (both leaves and roots are edible)
Radish (along with the roots, the seed pods are edible)
Find out more crops with more than one edible part.
Hear a chef talk about using squash shoot tips and other uncommon ingredients.
7. Choose for an Early Harvest
Look for crops and varieties that can move up your first harvest.
For example:
I like broad beans, which can be planted far ahead of all the other types of beans
Look for fast-maturing varieties (I grow fast-maturing arugula and spinach varieties in my cold frames in late winter because I want that first harvest as soon as possible)
Do the same with your beets, carrots, tomatoes and other crops
To choose faster-maturing varieties, compare the days-to-maturity information with other varieties (often called “DTM”)
8. Remember Fall Harvesting
Parsley holds up well when fall frosts arrive.
Remember to add in cool-season crops that keep producing as fall frosts arrive.
Cabbage family
Kale
Celery
Parsley
9. Choose for a Short Growing Season
If you’re dealing with a short growing season, there might be some crops you don’t want to bother with. I have friends who won’t grow eggplant and pepper.
More ideas:
Bush beans give a quicker, more concentrated harvest than pole and runner beans
Look for varieties that mature more quickly (e.g. we love Cream of Saskatchewan watermelon, which ripens melons much more quickly than watermelon varieties grown in warmer zones.)
10. Grow for Year-Round Enjoyment
Many gardeners like to enjoy the harvest year-round. If that’s you, here are some ideas:
· Grow dry beans that you can easily store for later use
· Look for root crops that store well (these tend to be varieties that grow larger roots)
· Thought of kohlrabi…there’s a storage variety too
· You can harvest leeks right through the winter when there’s a thaw
Get more crop ideas for year-round enjoyment.
11. Plan an Edible Landscape
Looking for attractive veg to add an ornamental touch to a landscape?
Here are ideas:
Asparagus looks great at the back of a perennial border, with its tall, ferny foliage
Runner beans have beautiful flowers
Lovage is a perennial with a celery-like taste, great for the perennial border
Eggplant has beautiful flowers
Kale is a great way to add colour and texture into a garden
Here are more perennial edibles.
If you’re serious about edible landscaping and want to create an awesome out-of-the box edible landscape, check out this course.
12. Crop Substitution for Less Work
Pin this post!
Keep your workload to a minimum through crop choice!
Here are examples of the type of thinking you can use to make less work for yourself.
Leaf celery instead of stalk celery. Stalk celery takes lots of water and feeding to get tender, crispy stalks. Leaf celery doesn’t make big stalks—you just get lots of leaves on short stems, and it’s far less bother if you don’t mind consuming celery this way. (I chop it into soups, stews, and salads for that same celery taste.)
Ground cherry instead of cape gooseberry. I actually prefer the taste of cape gooseberries…but they need a longer growing season, meaning I have to start the seeds earlier, and then give them prime, hot, garden real estate to get a decent harvest. Ground cherries are far easier to grow. (Find out more about these two different husk cherries.)
Broccoli instead of cauliflower. Not only is cauliflower more finicky, to get snow-white heads it must be blanched, which is often done by tying leaves over the head with an elastic. It’s a lot of bother compared to broccoli, which requires no blanching.
Squash instead of potato and sweet potato. Squash is far less work. Instead of transplanting sweet potato plants, you just poke squash seeds into the soil. And instead of digging out sweet potato roots, you just snip squash from the vine. You still get the sweet, orange ingredient for baking.
Find This Helpful?
If we’ve helped in your food-gardening journey, we’re always glad of support. You can high-five us below! Any amount welcome!
More on Vegetable Garden Planning
More on Growing Vegetables
Vegetable Gardening Articles and Interviews
For more posts about how to grow vegetables and kitchen garden design, head over to the vegetable gardening home page.
Vegetable Gardening Courses
Seed Company List: Where to Buy Vegetable Seed
Where to buy vegetable seed.
By Steven Biggs
Buying Vegetable Seeds Online
I get a lot of messages from people wondering where to buy vegetable seed. So I hope this list helps you find a seed company with the veggie seeds you’re looking for.
This list focuses on seed companies that have a good selection of vegetable seeds. Some have print catalogues—some sell seed online.
This list is a work in progress. If there’s a seed company or seed catalogue you recommend, please e-mail me so I can find out more about it.
Before you browse vegetable seed suppliers, get started with Tips When Shopping for Vegetable Seeds, below.
Tips When Shopping for Vegetable Seed
Here are tips to keep in mind as you get ready to order vegetable seed.
You Don’t Always Have to Shop!
To start with, you don’t always have to buy seed.
Emma and I at a GVGO field day, finding out how experts in this club grow giant vegetables. Members get free seed.
Many gardeners save seed—and are often eager to share favourite varieties. (My three favourite tomato varieties came from friends who shared the seed with me, and now I save the seed and share it with my gardening friends every year.)
Seeds of Diversity is a Canadian organization focused on protecting seed diversity. It has an annual member seed exchange. You can also visit the website to find Seedy Saturday events across Canada. These events feature seed swaps and often include a retail component with seed vendors.
Seed Savers Exchange is an American organization focused on preserving biodiversity in food crops. It collects heirloom seed varieties to store in a large, nongovernmental seed bank, and operates an online seed exchange where members can search and swap seeds.
Seed Libraries operate in many areas. Sometimes they are hosted by municipalities—sometimes by other organizations. I’ve seen some hosted by libraries—libraries with books! The idea is that gardeners can “borrow” seeds, and at the end of the year, having saved seeds, “return” seeds to the library.
A garden club can be another way to get seed. For example, Giant Vegetable Growers of Ontario (GVGO) is a garden club focused on growing giant pumpkins and giant vegetables. Members get seed when they join.
Interested in the idea of seed libraries? Tune in to hear Ben Cohen, the author of Saving Our Seeds, talk about seed libraries on the Food Garden Life Show.
Grow a Container Vegetable Garden
And get an early harvest of crops that usually take too long!
About Seed Companies
Not all seed companies grow seed; some buy seed in bulk and repackage it. Some small companies grow everything they sell. Still others grow some of what they sell, and then get other producers to grow what they don’t produce.
Some seed companies have trial gardens to test and showcase varieties before selling them…a worthwhile trip if you have one nearby.
As you read seed catalogues and browse seed websites, you’ll see that different seed companies have different specialties:
A regional focus—only selling seed grown in a certain region
Untreated or organic seed
Heirloom or open-pollinated varieties
New hybrid varieties
Ordering Vegetable Seed
There’s often lots of seed-related lingo in seed catalogues. Here’s a glossary of seed terminology.
New seed catalogues start to show up in my mailbox (and e-mail inbox!) late in the year. Shipping usually begins in early in the year. The closer to planting season you leave your ordering, the more chance your order will get bogged down in the last-minute rush of orders.
Because I like to test crops and varieties, I often order from a lot of companies. But this is not a cost-effective way to seed shop, because there’s usually a minimum shipping fee for each seed company. So if you can find everything you want at one seed company, you might save money.
One more thing: Find out how the company you’re ordering from deals with out-of-stock items. Some companies will ship what they have and then keep a back-order for what’s not available; but some companies will substitute a similar variety.
Cross-Border Shipments
Some seed companies don’t ship out of country because of the extra paperwork to sell in another jurisdiction.
(The last time I tried to order my favourite sweet pea seeds from the UK, the seed company no longer shipped to Canada! But sometimes companies will have another company distribute seeds elsewhere…and this was how I got my hands on my favourite sweet pea variety—the one my late cousin Jill grew.)
When You Receive Your Seed Order
Unpack your order and check to make sure that you have everything.
See if there are any back orders.
Seed Company List
Canada Vegetable Seed
Annapolis Seeds
Nictaux, Nova Scotia
Owner Owen Bridge started the business in 2008 as a high-school-aged seed saver. Great place to find unusual veg like Bolivian cucumber and Jamaican burr gherkin. Seeds are grown in the Maritimes by Owen and other small-scale growers.
Halifax Seed
Halifax, Nova Scotia
Canada's oldest continuously operating family-owned seed company, established in 1866.
Hawthorn Farm Organic Seeds
Mount Forest, Ontario
Organic vegetable, herb, and flower seeds.
Heritage Harvest Seed
Fisher Branch, Manitoba
Heirloom flower and vegetable seeds, and ancient grains.
Kitchen Table Seed House
Wolfe Island, Ontario
Organic vegetable, flower, and herb seeds.
Matchbox Garden and Seed Co.
Caledonia, Ontario
We see Hanna Jacobs, founder of Matchbox Garden and Seed Co., at Seedy Saturday events here in Southern Ontario and are fans of her heirloom and rare vegetable seed varieties.
OSC Seeds
Kitchener, Ontario
Ships garden seed from coast to coast across Canada.
Richters Herbs
Goodwood, Ontario
More than herbs, a great selection of unusual vegetable seed too. My daughter and I have given a number of gardening seminars at Richters over the years—and we’re big fans of this family business. (Don’t ask me about the time we came home with 18 varieties of mint!)
Prairie Garden Seeds
North Battledford, Saskatchewan
Small family-run (father-daughter) seed company. Veg, grains, and cereals.
Sage Garden Greenhouses
Winnipeg, Manitoba
Great selection of vegetable seed. Co-owner Dave Hanson is a CBS Radio gardening columnist—and we teach gardening courses together. This company leads the way in how horticulture of the future can look, with compost-based fertilizing, wood-fibre biodegradable pots, and geothermal heating in the greenhouses.
Stokes Seeds
Thorold, Ontario
Sells vegetable seed to commercial growers and home gardeners. It’s a family-run business, and I’ve visited the trial gardens and the seed-sorting facility as a member of a Garden Writers Association.
Sweet Rock Farm
Gabriola, British Columbia
Small, farm-based seed company recommended to me by some of my students.
T&T Seeds
Headingley, Manitoba
Seeds, accessories, and fruit plants by mail order. Also a garden centre if you’re in the area.
The Incredible Seed Co.
Bridgewater, Nova Scotia
Good mix of vegetable seed and other edibles.
Urban Harvest
Warkworth, Ontario
Great source for organic and heirloom veg seeds. We’ve hung out with founder Colette Murphy at many seed events. I credit her with helping to stoke my daughter’s seed addiction!
Veseys Seeds
Charlottetown, Prince Edward Island
Usually the first glossy seed catalogue to arrive in my mailbox in December.
West Coast Seeds
Delta, British Columbia
Wide variety of untreated seeds.
William Dam Seeds
Dundas, Ontario
Long one of our favourite seed companies, with a broad selection of vegetable seeds. It’s in our neck of the woods, so we like to see what’s growing in the trial garden.
Grow a Container Vegetable Garden
And get an early harvest of crops that usually take too long!
USA Vegetable Seed
Adaptive Seeds
Sweet Home, Oregon
Seeds grown in the Pacific Northwest, with a focus on unusual and resilient seed varieties. We’ve grown some fantastic kale from here!
Baker Creek Heirloom Seeds
Mansfield, Missouri
A focus on heirloom seed and unusual crops. We love the Whole Seed Catalog, their glossy guide that makes me wish I had a 10-acre garden!
Founder Jere Gettle has joined us on The Food Garden Life Show to talk about seeds. Tune in to hear him talk about how the the 12-page photocopied price list he put out as a teenager grew into what he does today.
Fedco Seeds
Clinton, Maine
Worker- and consumer-owned co-operative. (You can join and be a member!)
High Mowing Organic Seeds
Wolcott, Vermont
Serving both vegetable gardeners and commercial growers. Good selection of veg seeds.
Johnny’s Selected Seeds
Winslow, Maine
Employee owned. Lots of great online growing resources. Serves commercial growers and home gardeners.
Renee’s Garden
Felton, California
Focused on varieties suited to home gardeners. Founder Renee Shepherd curates seeds from around the world, testing them in her own garden.
Territorial Seed
Cottage Grove, Oregon
Wide selection of veggie seeds and other edibles.
Victory Seed Co.
Irving, Texas
Vegetable seed for home gardeners. And…they sell the dwarf tomato varieties released by the Dwarf Tomato Breeding Project.
Wild Boar Farms
Citrus Heights, California
With a reputation for unusual and wildly popular tomato varieties, tomato breeder Brad Gates at Wild Boar Farms focuses on flavour.
Hear our chat with Brad on The Food Garden Life Show.
More on Vegetable Gardening
Articles and Interviews
Looking for more information about growing vegetables? Drop by the Grow Vegetables home page for articles and interviews.
Self-Paces Gardening Classes
Wood Ash for the Garden: What You Need to Know
Find out whether wood ash is good for your garden. It can be used as a fertilizer and to make the soil less acidic.
By Steven Biggs
Fireplace Ashes for the Garden?
I have happy memories of cooking holiday roasts over charcoal with my dad. He taught me how to cook over charcoal—and he drilled in the importance of NEVER leaving a barbecue full of ash out in the rain.
Wet ash in a barbecue is like road salt on a car…corrosion just waiting to happen.
Yet many people spread wood ash on the garden.
Actually, sprinkling ash around the yard isn’t anything new. And in an era when people pay attention to how much waste they generate, it seems to make sense not to send wood ash to landfill.
My neighbour Al always sprinkled wood ash around his garden. I’d see the ash as the wind blew it over the fresh snow, and ash specks peppered the sidewalk.
Whether wood ash is good for your vegetable garden depends on your soil and how you’re using the ash.
Thinking further back, I remember as a child, playing on my grandmother’s gravel driveway and eagerly collecting the nuggets of coal clinker from decades before, when ash from the coal furnace was sprinkled around the yard.
But is ash good for the garden? The answer depends on what type of ash it is, how you’re using it, and your soil.
If you’re wondering about using ash in your yard, this post tells you more about wood ash, ways to use it—or when not to use it.
What’s in Wood Ash
Wood ash contains a lot of plant nutrients, including potassium, phosphorus, calcium and magnesium. There are other minor nutrients too.
The amount of the various nutrients in your wood ash depend on the type of wood you’re burning.
The other thing to know is that wood ash is alkaline. So in the same way that lime is used to make soil less acidic, so can wood ash. (More wood ash is needed than lime, though wood ash is faster acting.)
Using Wood Ash in the Garden
Ash has two uses in the garden:
Fertilizing
Reducing the acidity of some types of soil
Whether wood ash is beneficial in your garden depends on soil nutrient levels and soil pH (which is the measure of acidity or alkalinity.)
When soil is too acidic or alkaline, some nutrients get “locked up.” The nutrients might be in the soil—but unavailable to plants. That means:
Ash applied to acidic soils can make more nutrients available by making the soil less acidic (more alkaline)
Ash applied to a soil that’s already alkaline can sometimes make the soil more alkaline to the point that nutrients become unavailable
That’s why you might come across the advice not to use wood ashes on soils with a pH over 6.5.
Don’t Know Your Soil pH?
Pin this post!
Some sources say not to use wood ash in the garden without testing your soil first.
What’s a gardener to do if you don’t want to have the soil tested…but don’t want to unnecessarily send ash to landfill?
I’m not a proponent of soil-testing hypochondria, so I understand. Garden soil is often highly disturbed and highly variable, so one garden bed can be quite different from an adjacent one. (If you guessed that I don’t test my soil, you’re correct.)
Keep reading and get a few ideas.
What to Know About Wood Ash if You Don’t Plan to Test the Soil
Like many things in life, moderation is key.
Soils with high levels of organic matter and clay can resist pH change—so the occasional sprinkle of ash isn’t a problem. I sprinkle some wood ash the slightly alkaline clay soil in my vegetable garden; it’s got lots of organic matter, and I don’t put on a lot of wood ash.
You can also sprinkle in ash as you add new layers to the compost heap. The organic matter in the compost absorbs the nutrients so they’re not washed away. Organic matter also lessens the change to pH.
Using Wood Ash in the Garden
If you’re using wood ash in the garden, remember that it’s not a complete fertilizer. It doesn’t have any nitrogen, for example.
Here are tips for using wood ash in the garden:
On bare soil, sprinkle on wood ash at least a couple of weeks before planting, and then rake or dig it into the soil.
If applying wood ash to the soil and you don’t want coarse bits, sift out big unburnt chunks (hardwire cloth works well, though you can skip this step if you’re putting your wood ash in the compost)
On bare soil, sprinkle on wood ash at least a couple of weeks before planting—but not too far ahead because it’s soluble and nutrients will wash away
Rake or dig in the wood ash—you don’t want to seed into ash, and mixing with soil at least a couple of weeks beforehand gives it time to start breaking down
Don’t apply wood ash near germinating seeds, because they can be easily damaged by the high salt levels.
Don’t overdo it…keep it to once per year because too much wood ash (or too much of many fertilizers) can make some nutrients unavailable to plants
Use only wood ash. Don’t use ash from cardboard, briquettes, pressure-treated timber, or painted woods.
If you heat with only wood, you might find you have more ash than you have garden to spread it around. Don’t make heavy, repeated applications in the same part of the garden. Consider spreading some over the lawn, or sprinkling in some with new additions to the compost pile.
Your acid-loving plants such as blueberries, raspberries, azaleas, and rhododendrons won’t appreciate ash treatments. Skip these plants, even if you have an acidic soil. (And potatoes too, because alkaline conditions encourage the disease potato scab.)
Types of Wood Ash
Ash from wood burned in stoves, fireplaces, and outdoor fire pits is suitable. So is ash from hardwood lump charcoal.
Stick to wood ash: Ash produced from cardboard, coal, briquettes, pressure-treated wood, and painted woods can contain stuff we don’t want in the garden, including heavy metals.
Storing Wood Ash
Keep wood ash dry until you use it.
The potassium in wood ash is soluble, meaning it leaches out with rain. So keep the wood ash dry until you’re ready to use it in the garden.
Other Wood Ash Uses
Wood ash has long been used to make lye for soap. I don’t make my own soap, but I do use wood ash to clean the windows of my wood stove. I dip scrunched up newspaper in water, and then into wood ash before rubbing it on the glass. It’s an excellent glass cleaner.
Wood ash is caustic, meaning don’t breathe it in, and mind your skin and eyes.
Find This Helpful?
If we’ve helped in your food-gardening journey, we’re always glad of support. You can high-five us below! Any amount welcome!
More on Soils
Soil and composting Articles and Interviews
For more posts about how to grow vegetables and kitchen garden design, head over to the soil and compost home page.
Edible Gardening Courses
Want more ideas to make a great kitchen garden? We have great online classes that you can work through at your own pace.

