To Taste This Fruit, You'll Need to Grow it! (Meet the Medlar)
By Steven Biggs
Medlar (Mespilus germanica): A little-known fruit that’s easy to grow and a great fit for a home garden.
The Guide to Medlar
Medlar Stumps Museum Staff
“Anyone know what this is?” read the online post.
The post, by a local historical museum, showed a photo of a fruit carving on an old piece of furniture. The curators couldn’t identify the fruit.
“It’s medlar,” I replied.
This obscure fruit, popular in past centuries, was unknown even to historical interpreters.
And that obscurity means that if you want to taste medlar, you’ll probably have to grow it yourself (or share this post with someone who will grow it for you!)
Grow Medlar at Home
Even though the fruit is little known, the plant deserves of a spot in more home gardens. Here’s what I like about medlar:
Low maintenance. It needs minimal pruning.
Ornamental. It has flowers, fall colour, and winter interest.
Hardy. It’s winter hardy, and resistant to diseases and pest.
Suited to cold climates. The late bloom means fruit production isn’t affected by a late spring frost.
And there’s one other intriguing thing about medlar: For gardeners who love the idea of enjoying homegrown food throughout the year, medlar adds to the winter fruit larder.
Medlars are Ornamental
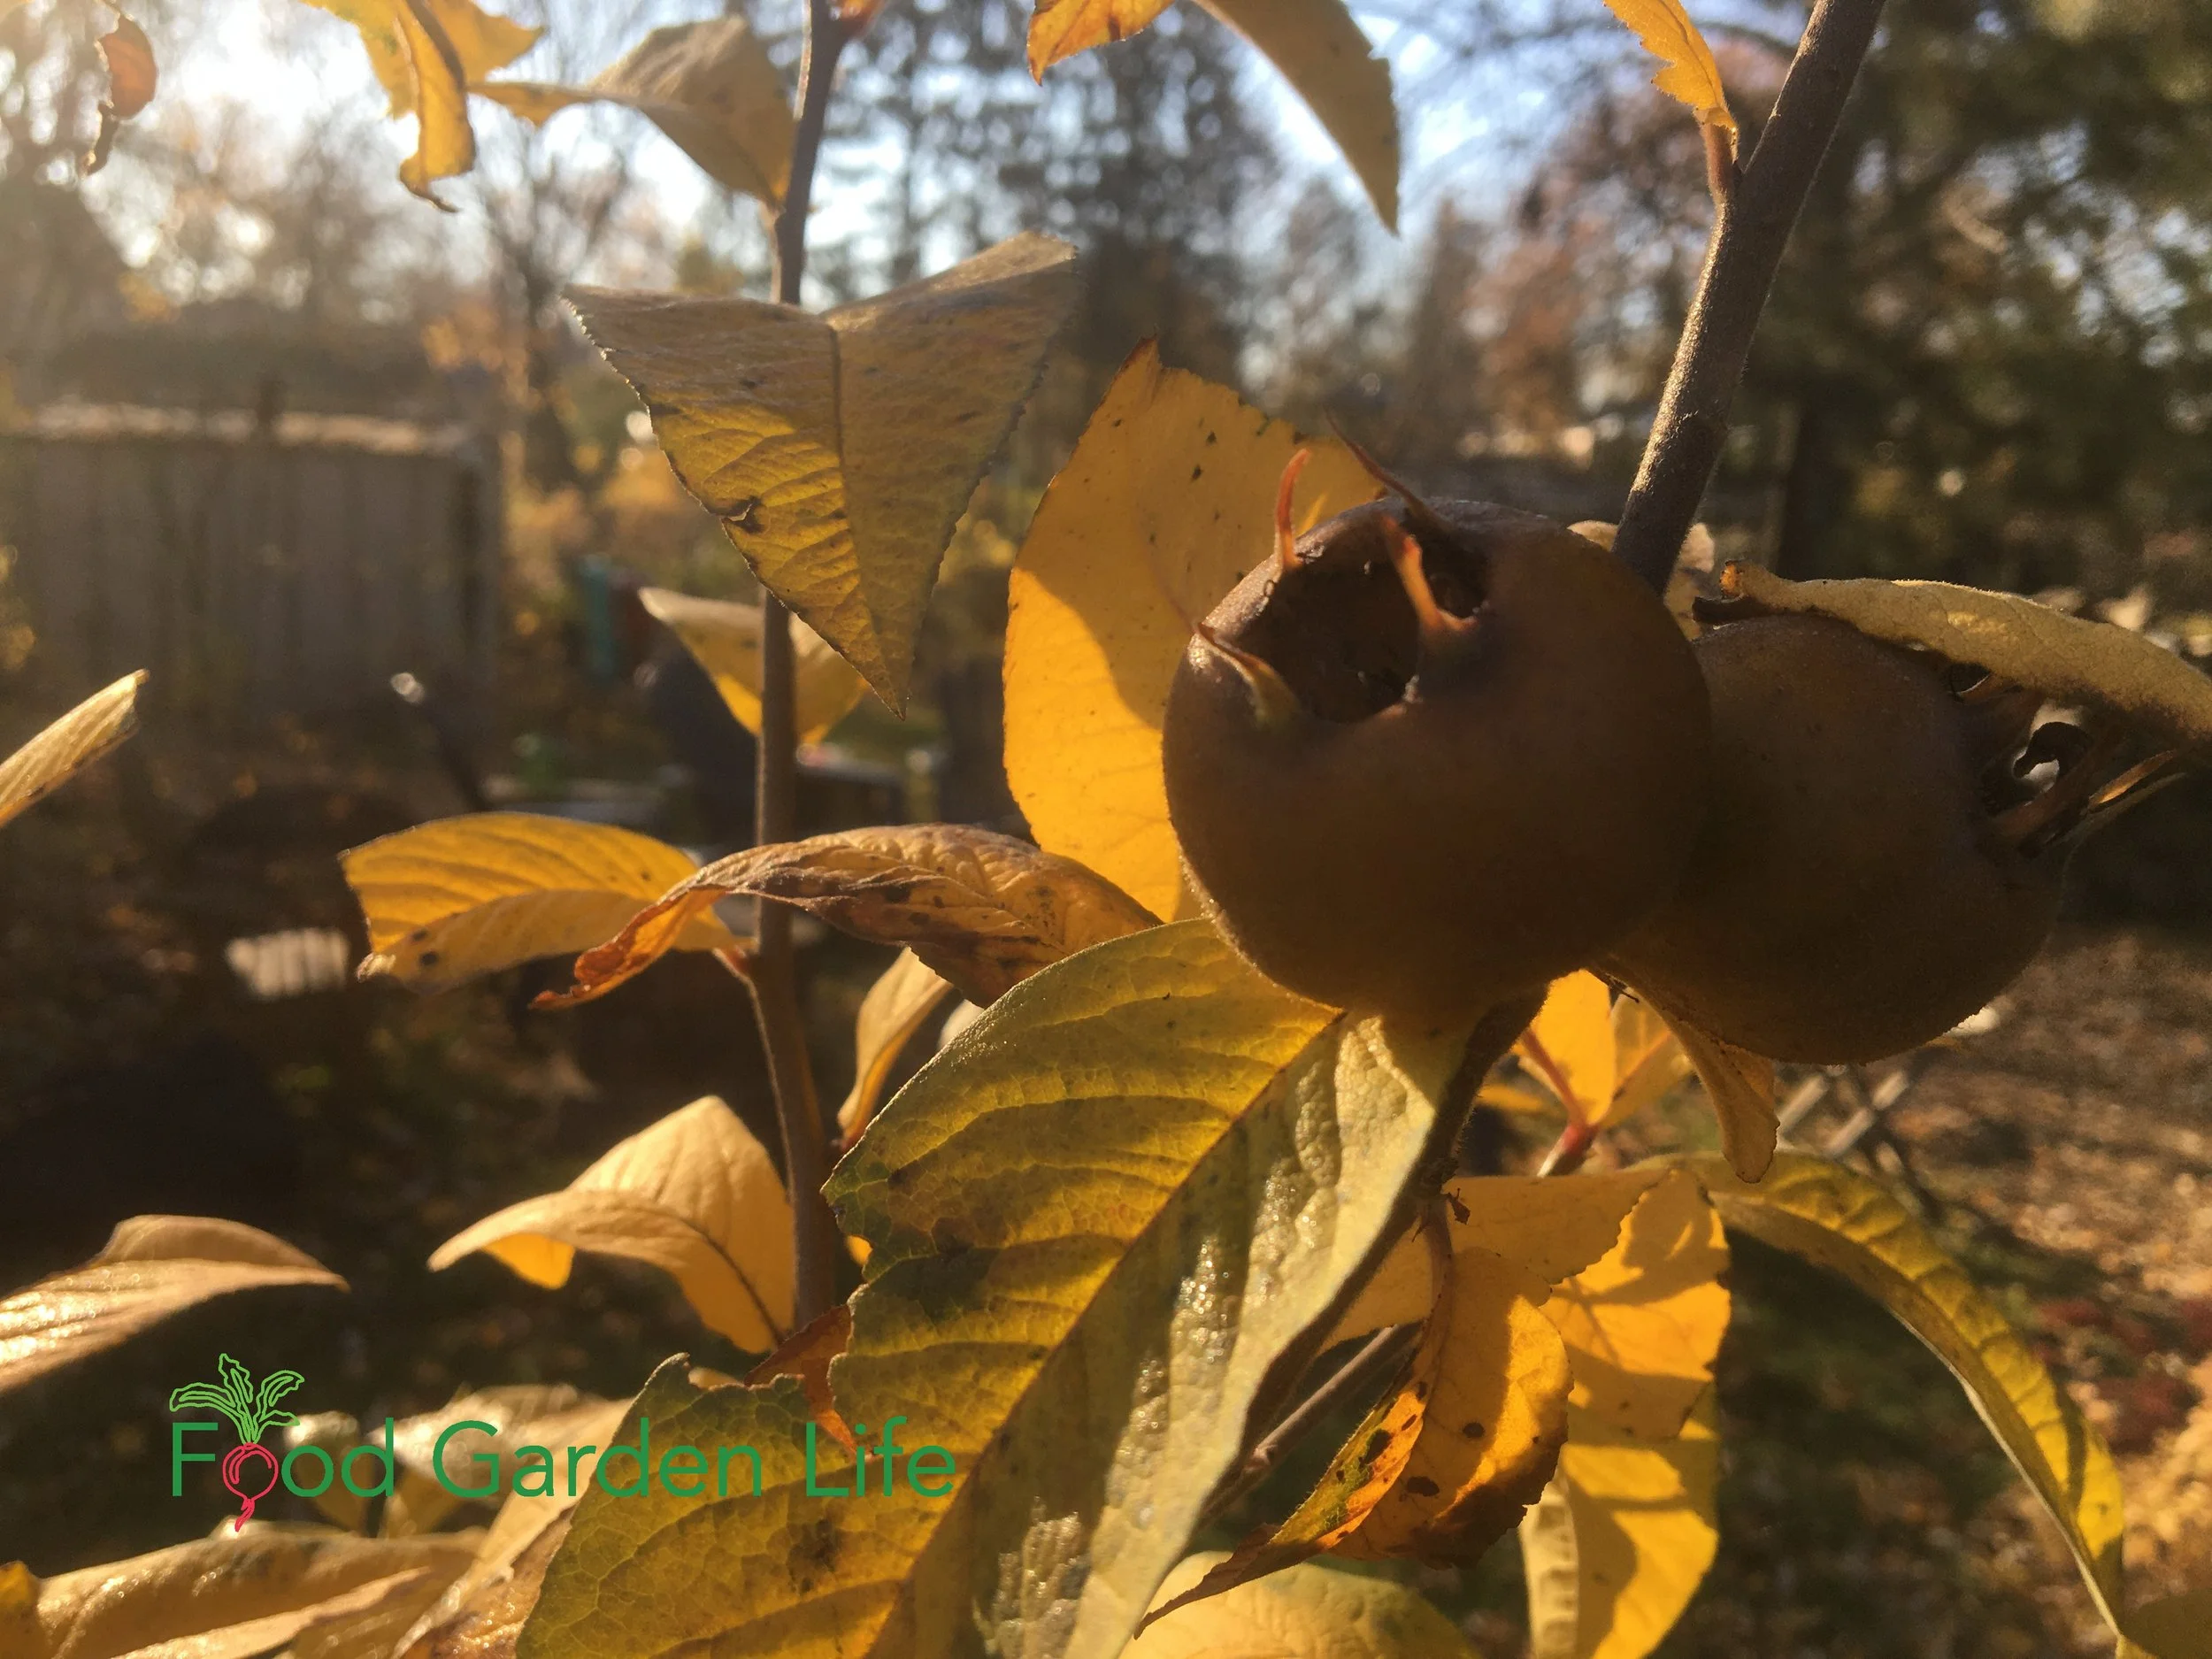
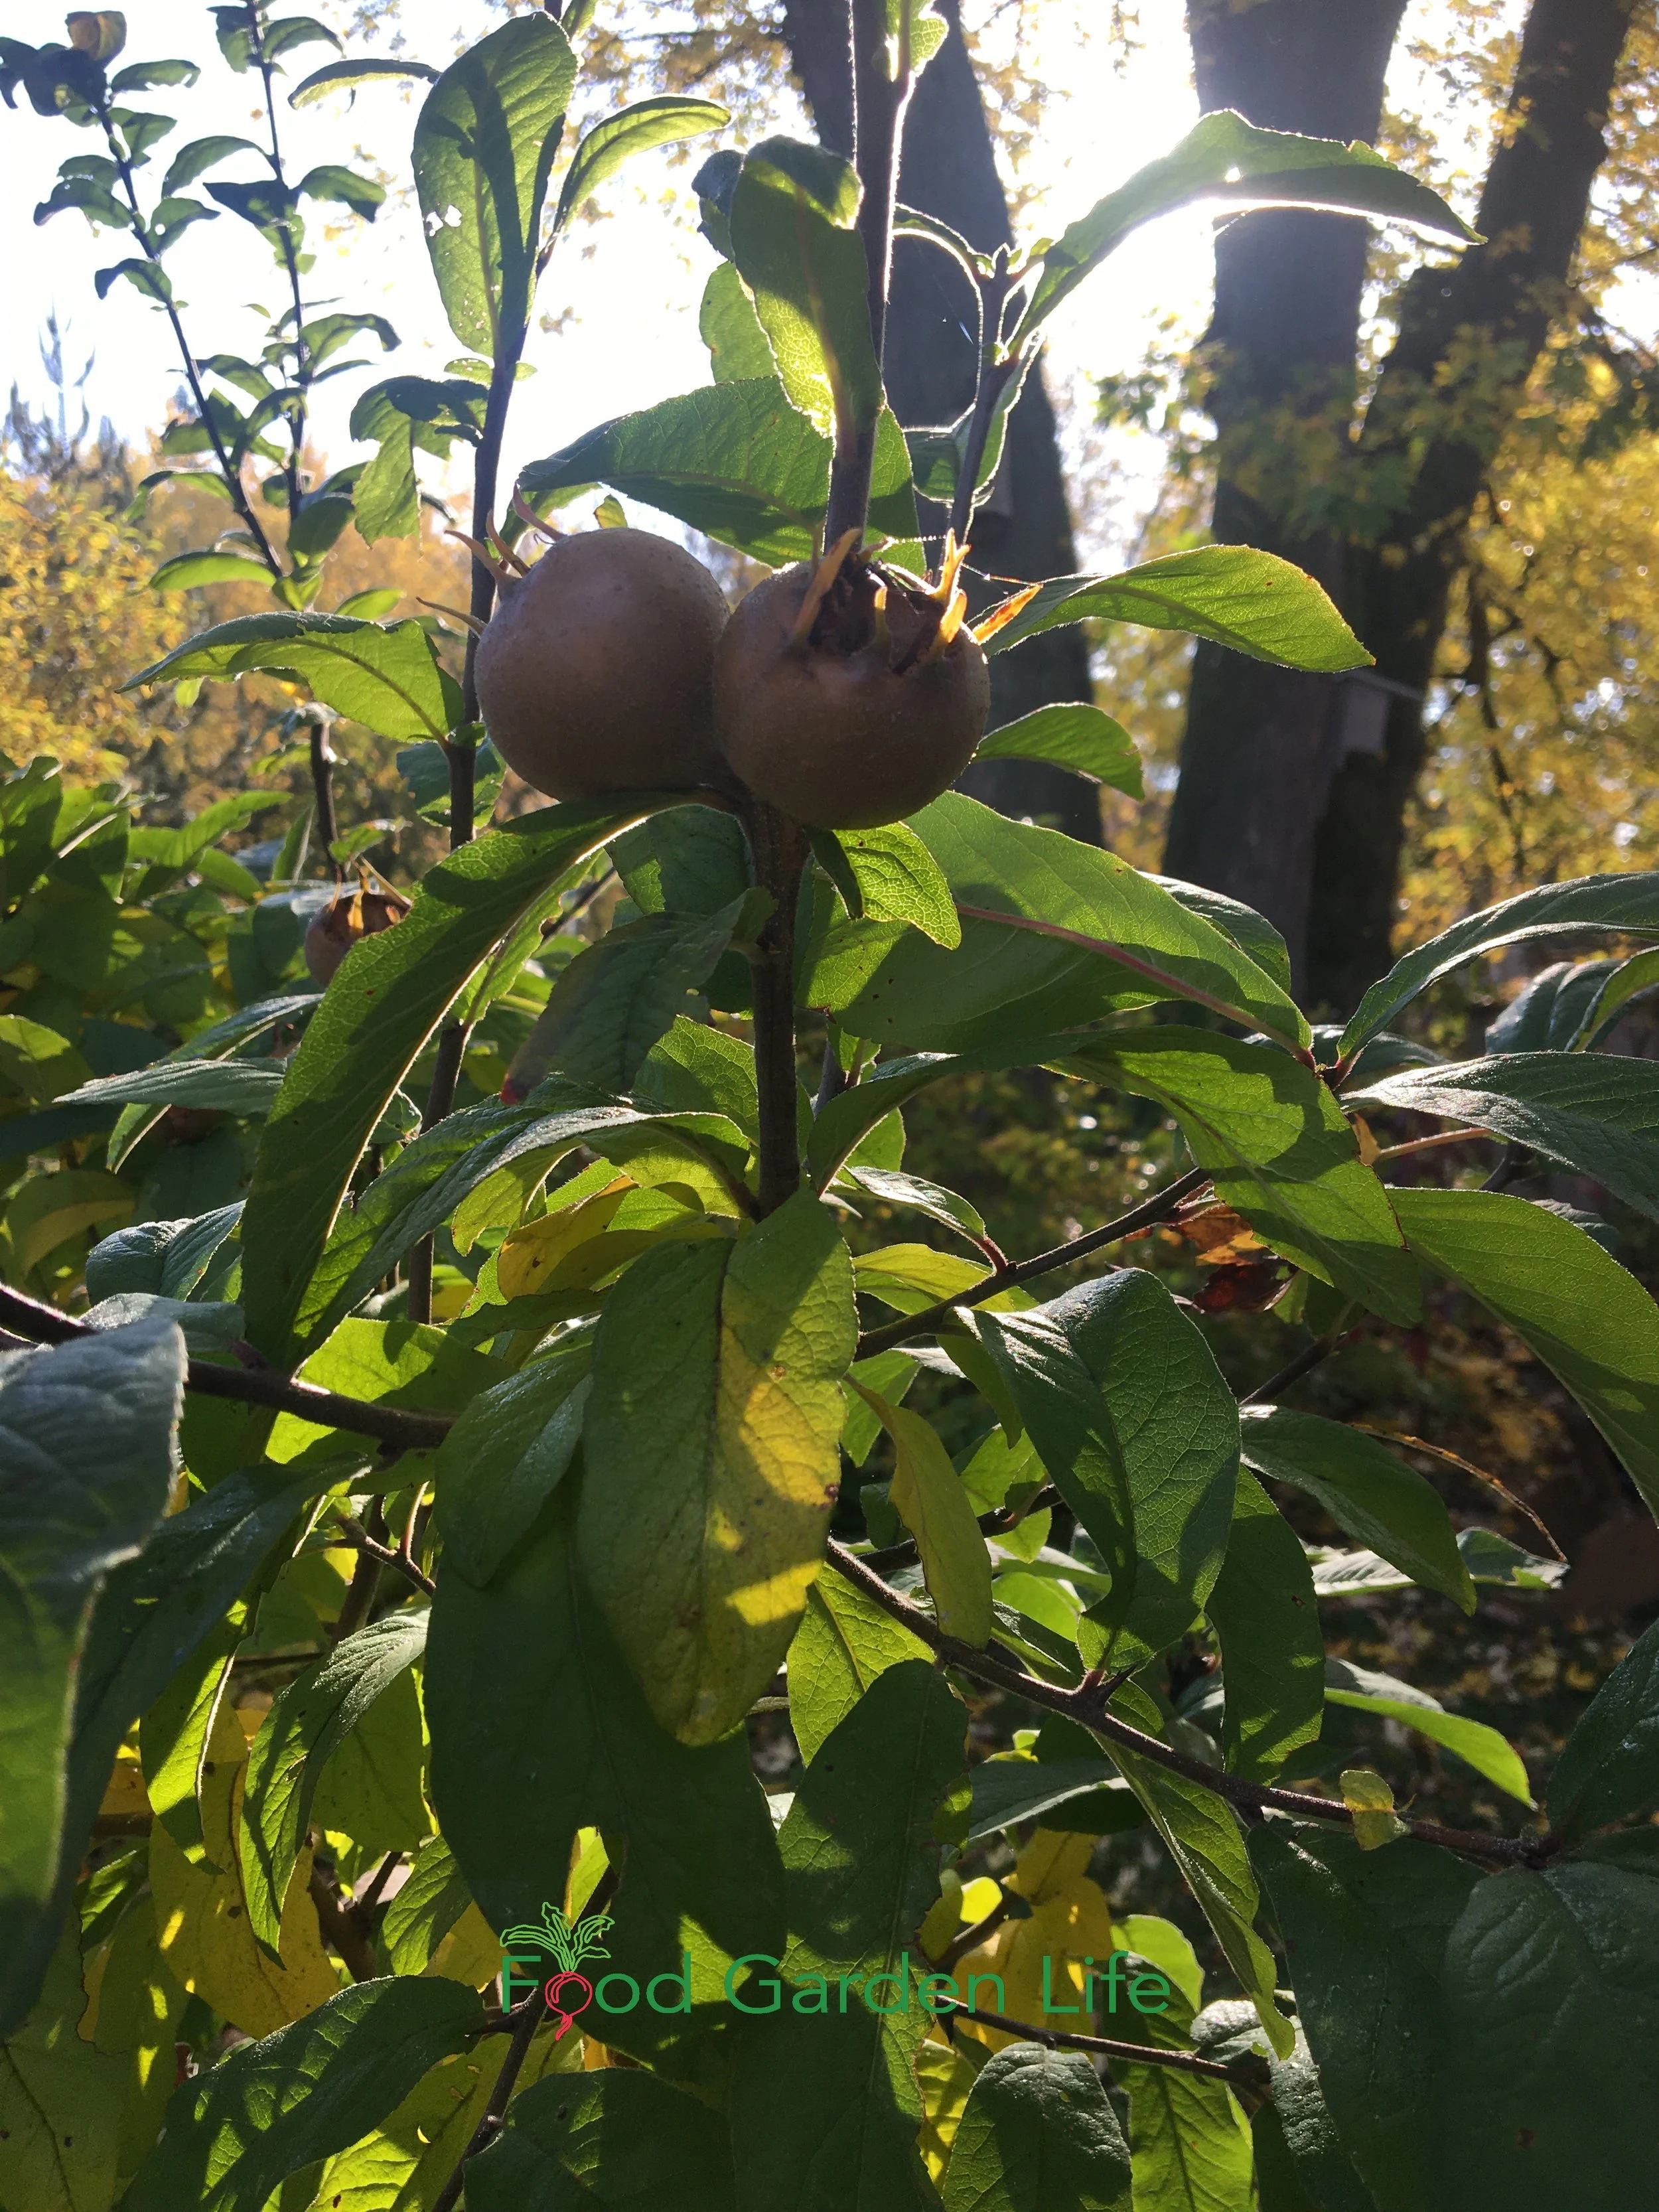
Medlar plants have nice leaf colour in the fall. Depending on the year, the leaves can turn a vibrant gold, taking on hues of orange and copper.
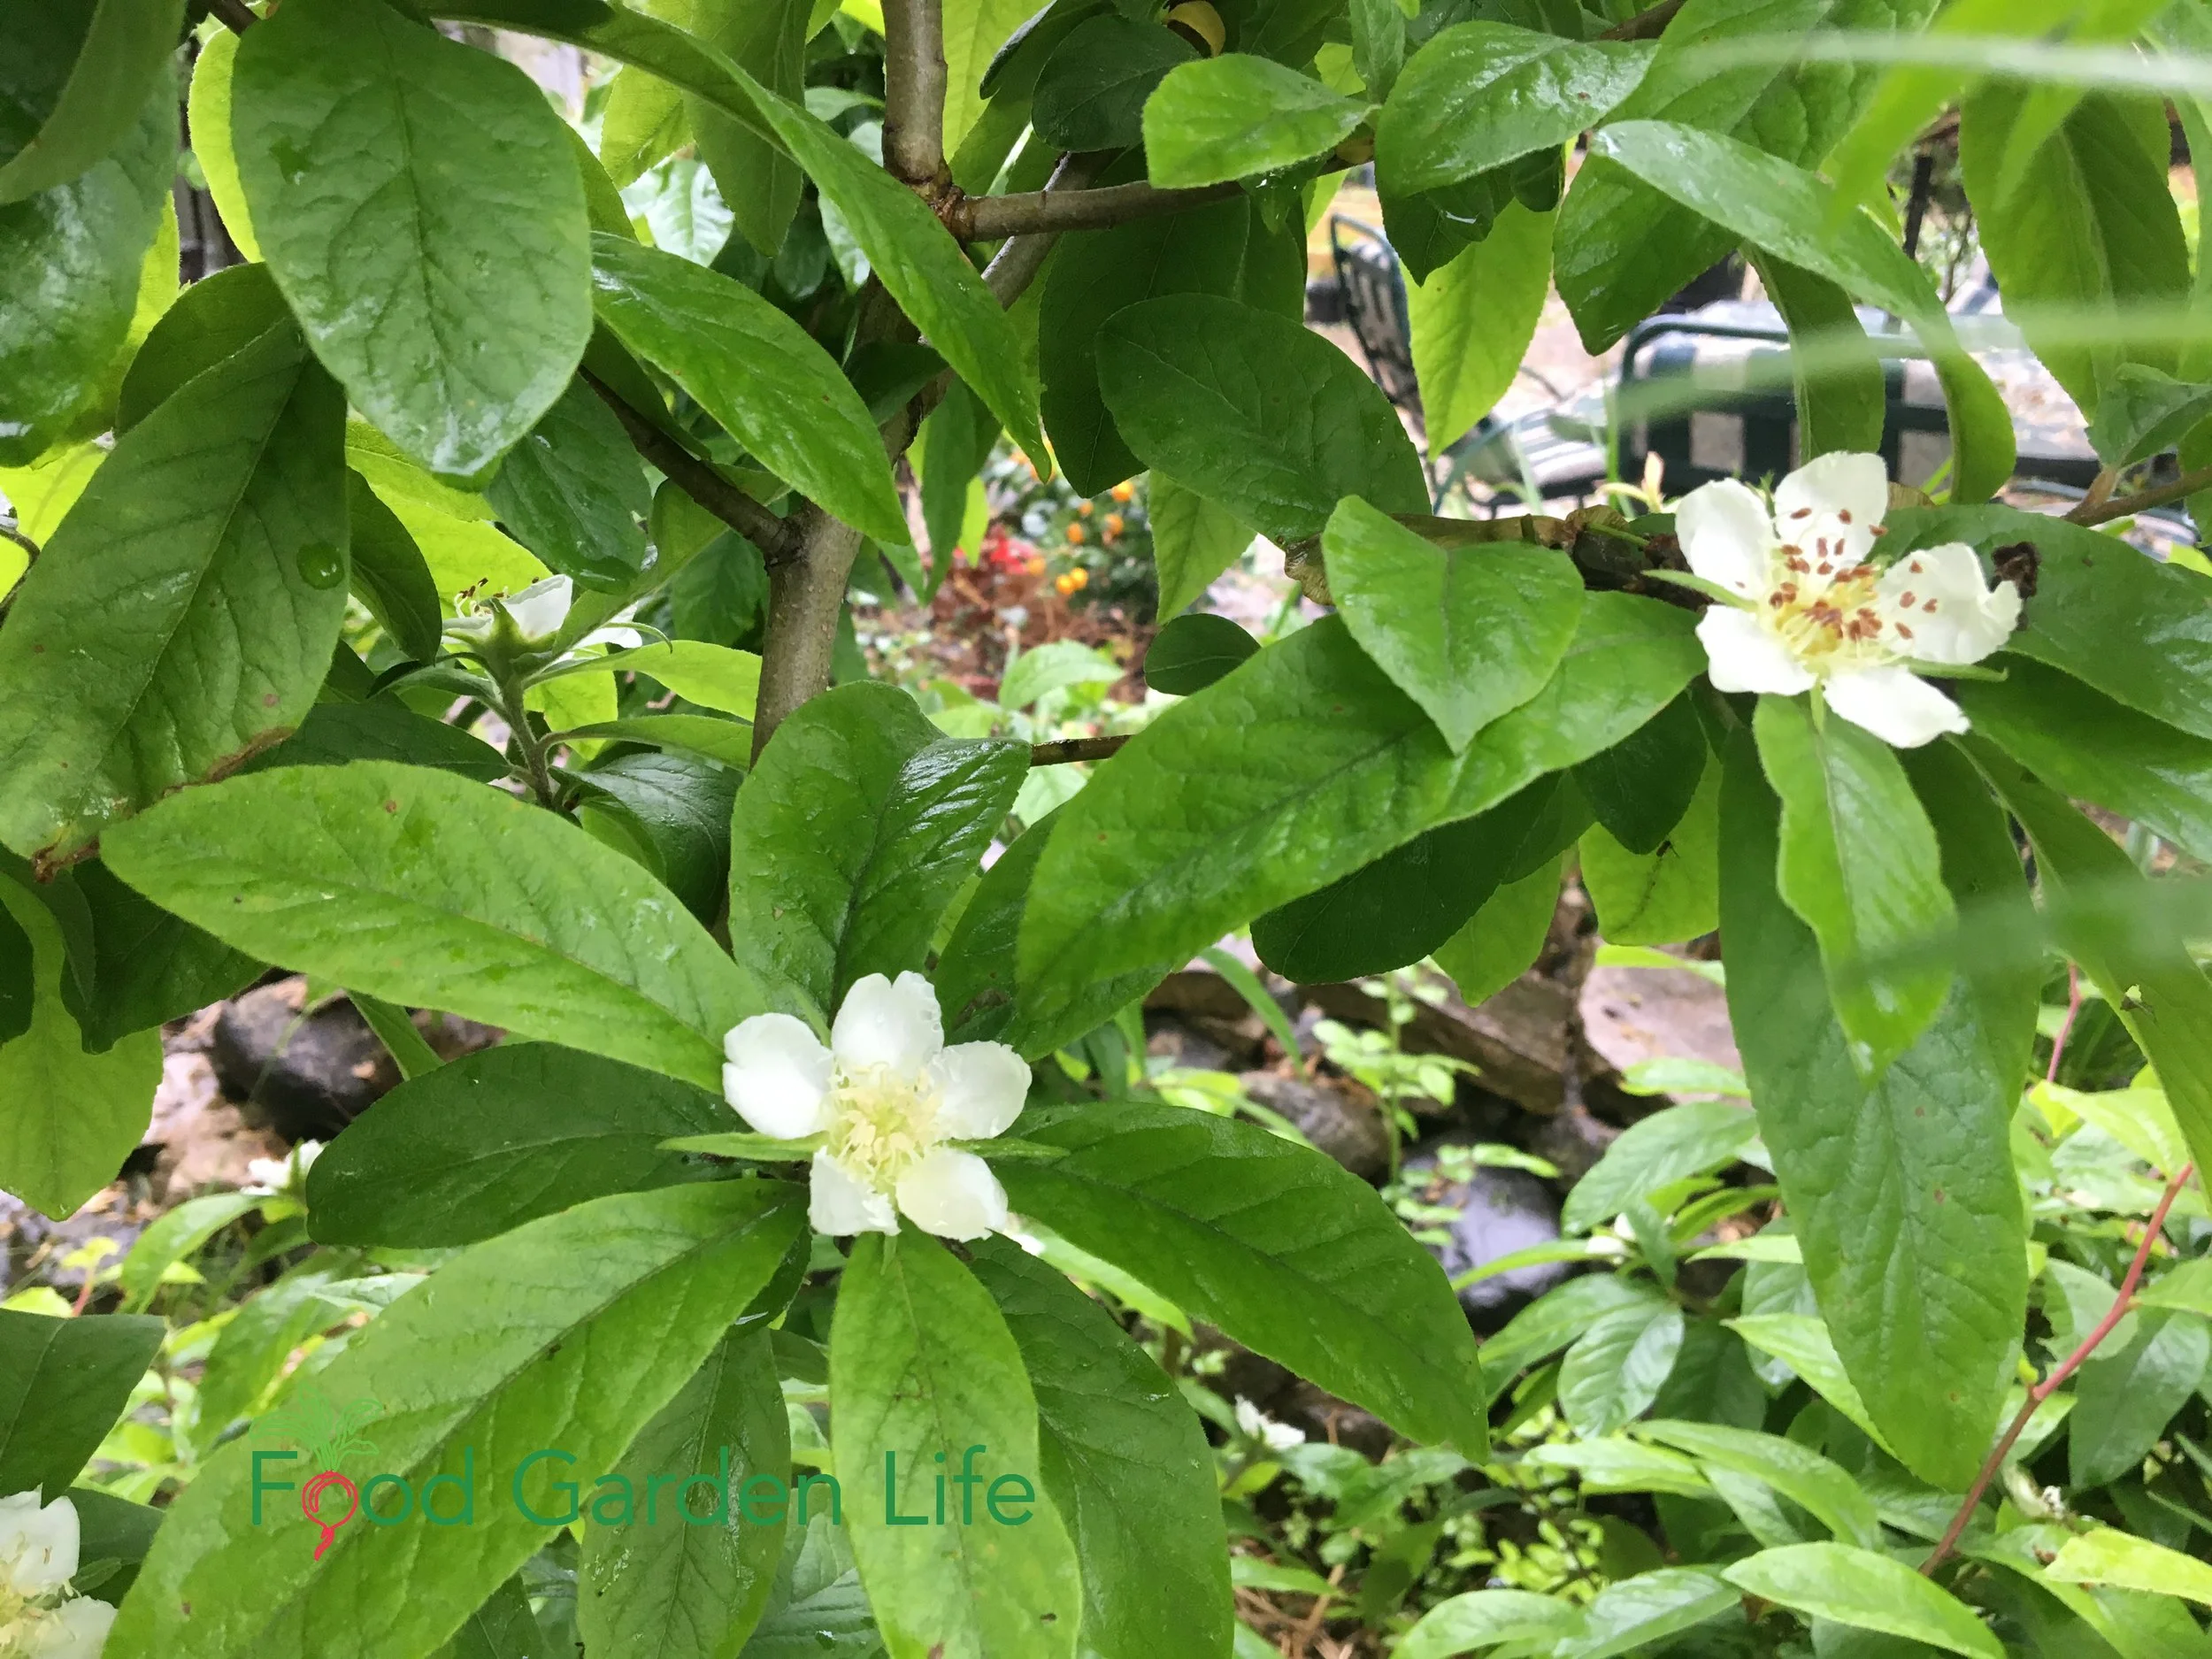
Medlar plants have large star-shaped white blossoms in spring, and nice leaf colour in the fall. Depending on the year, the dark-green, leathery, oblong leaves can turn a vibrant gold, taking on hues of orange and copper. If you’ve ever admired the fall leaf colour of cherries, medlar are just as good.
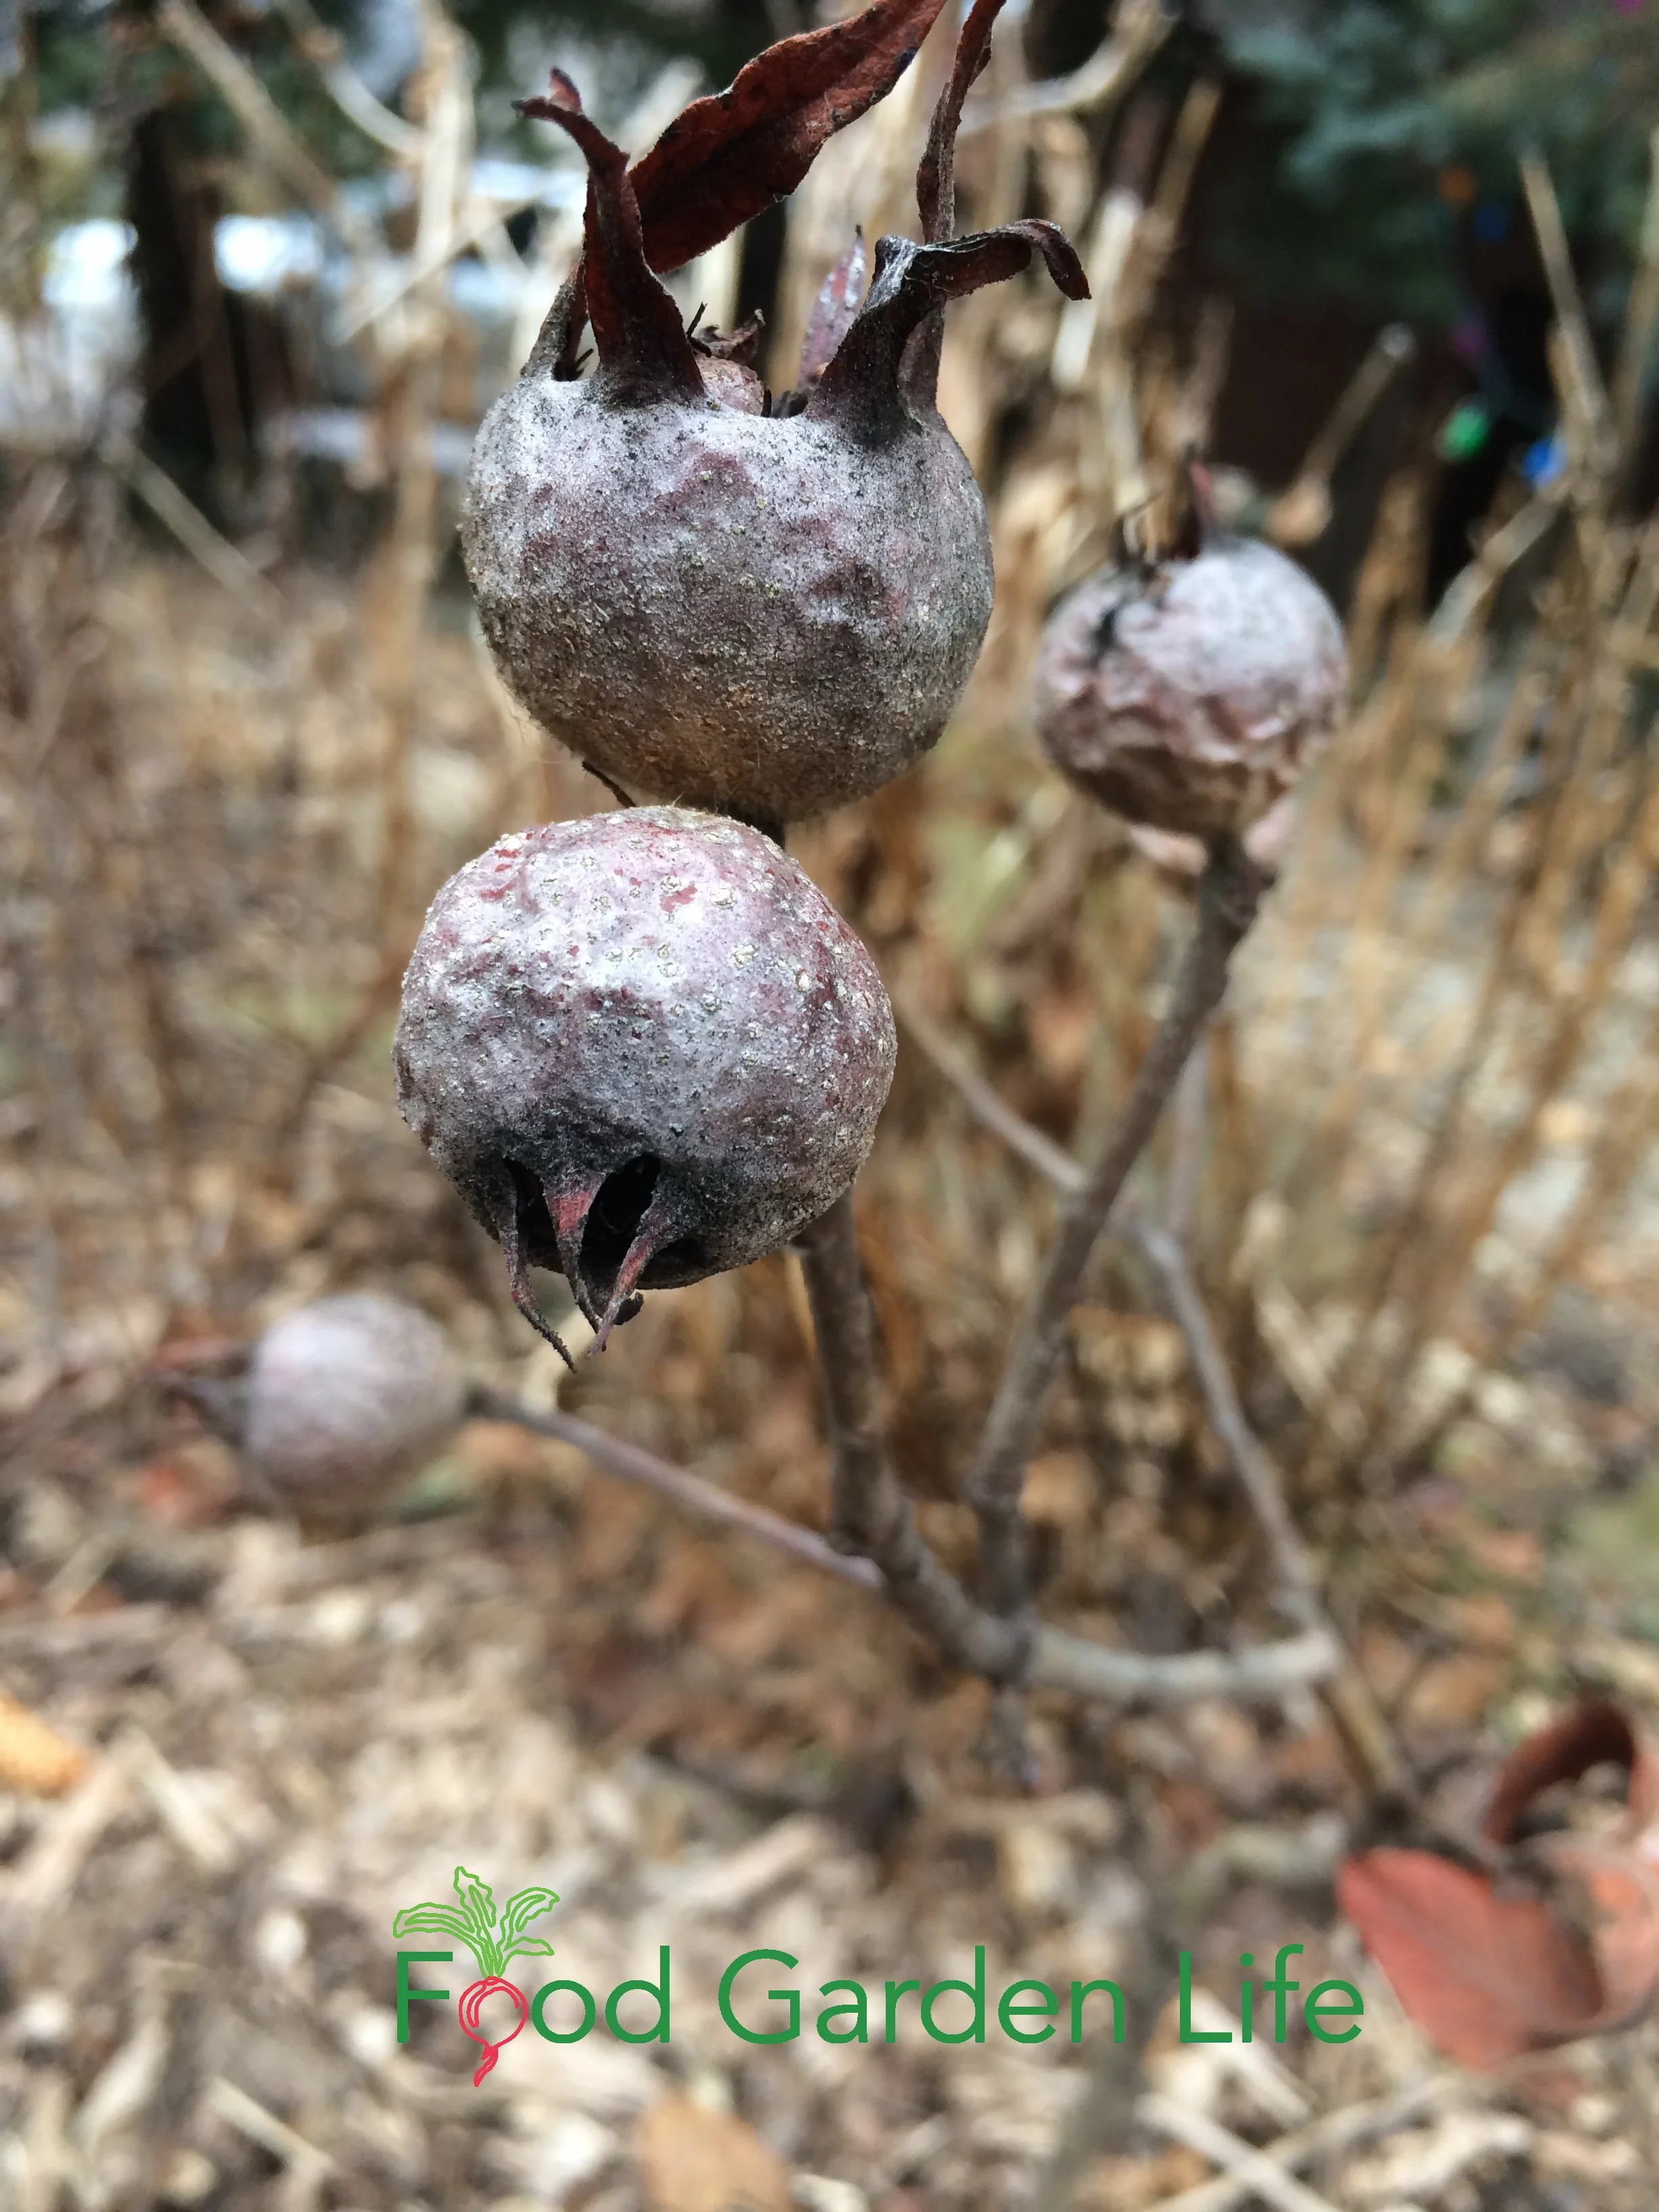
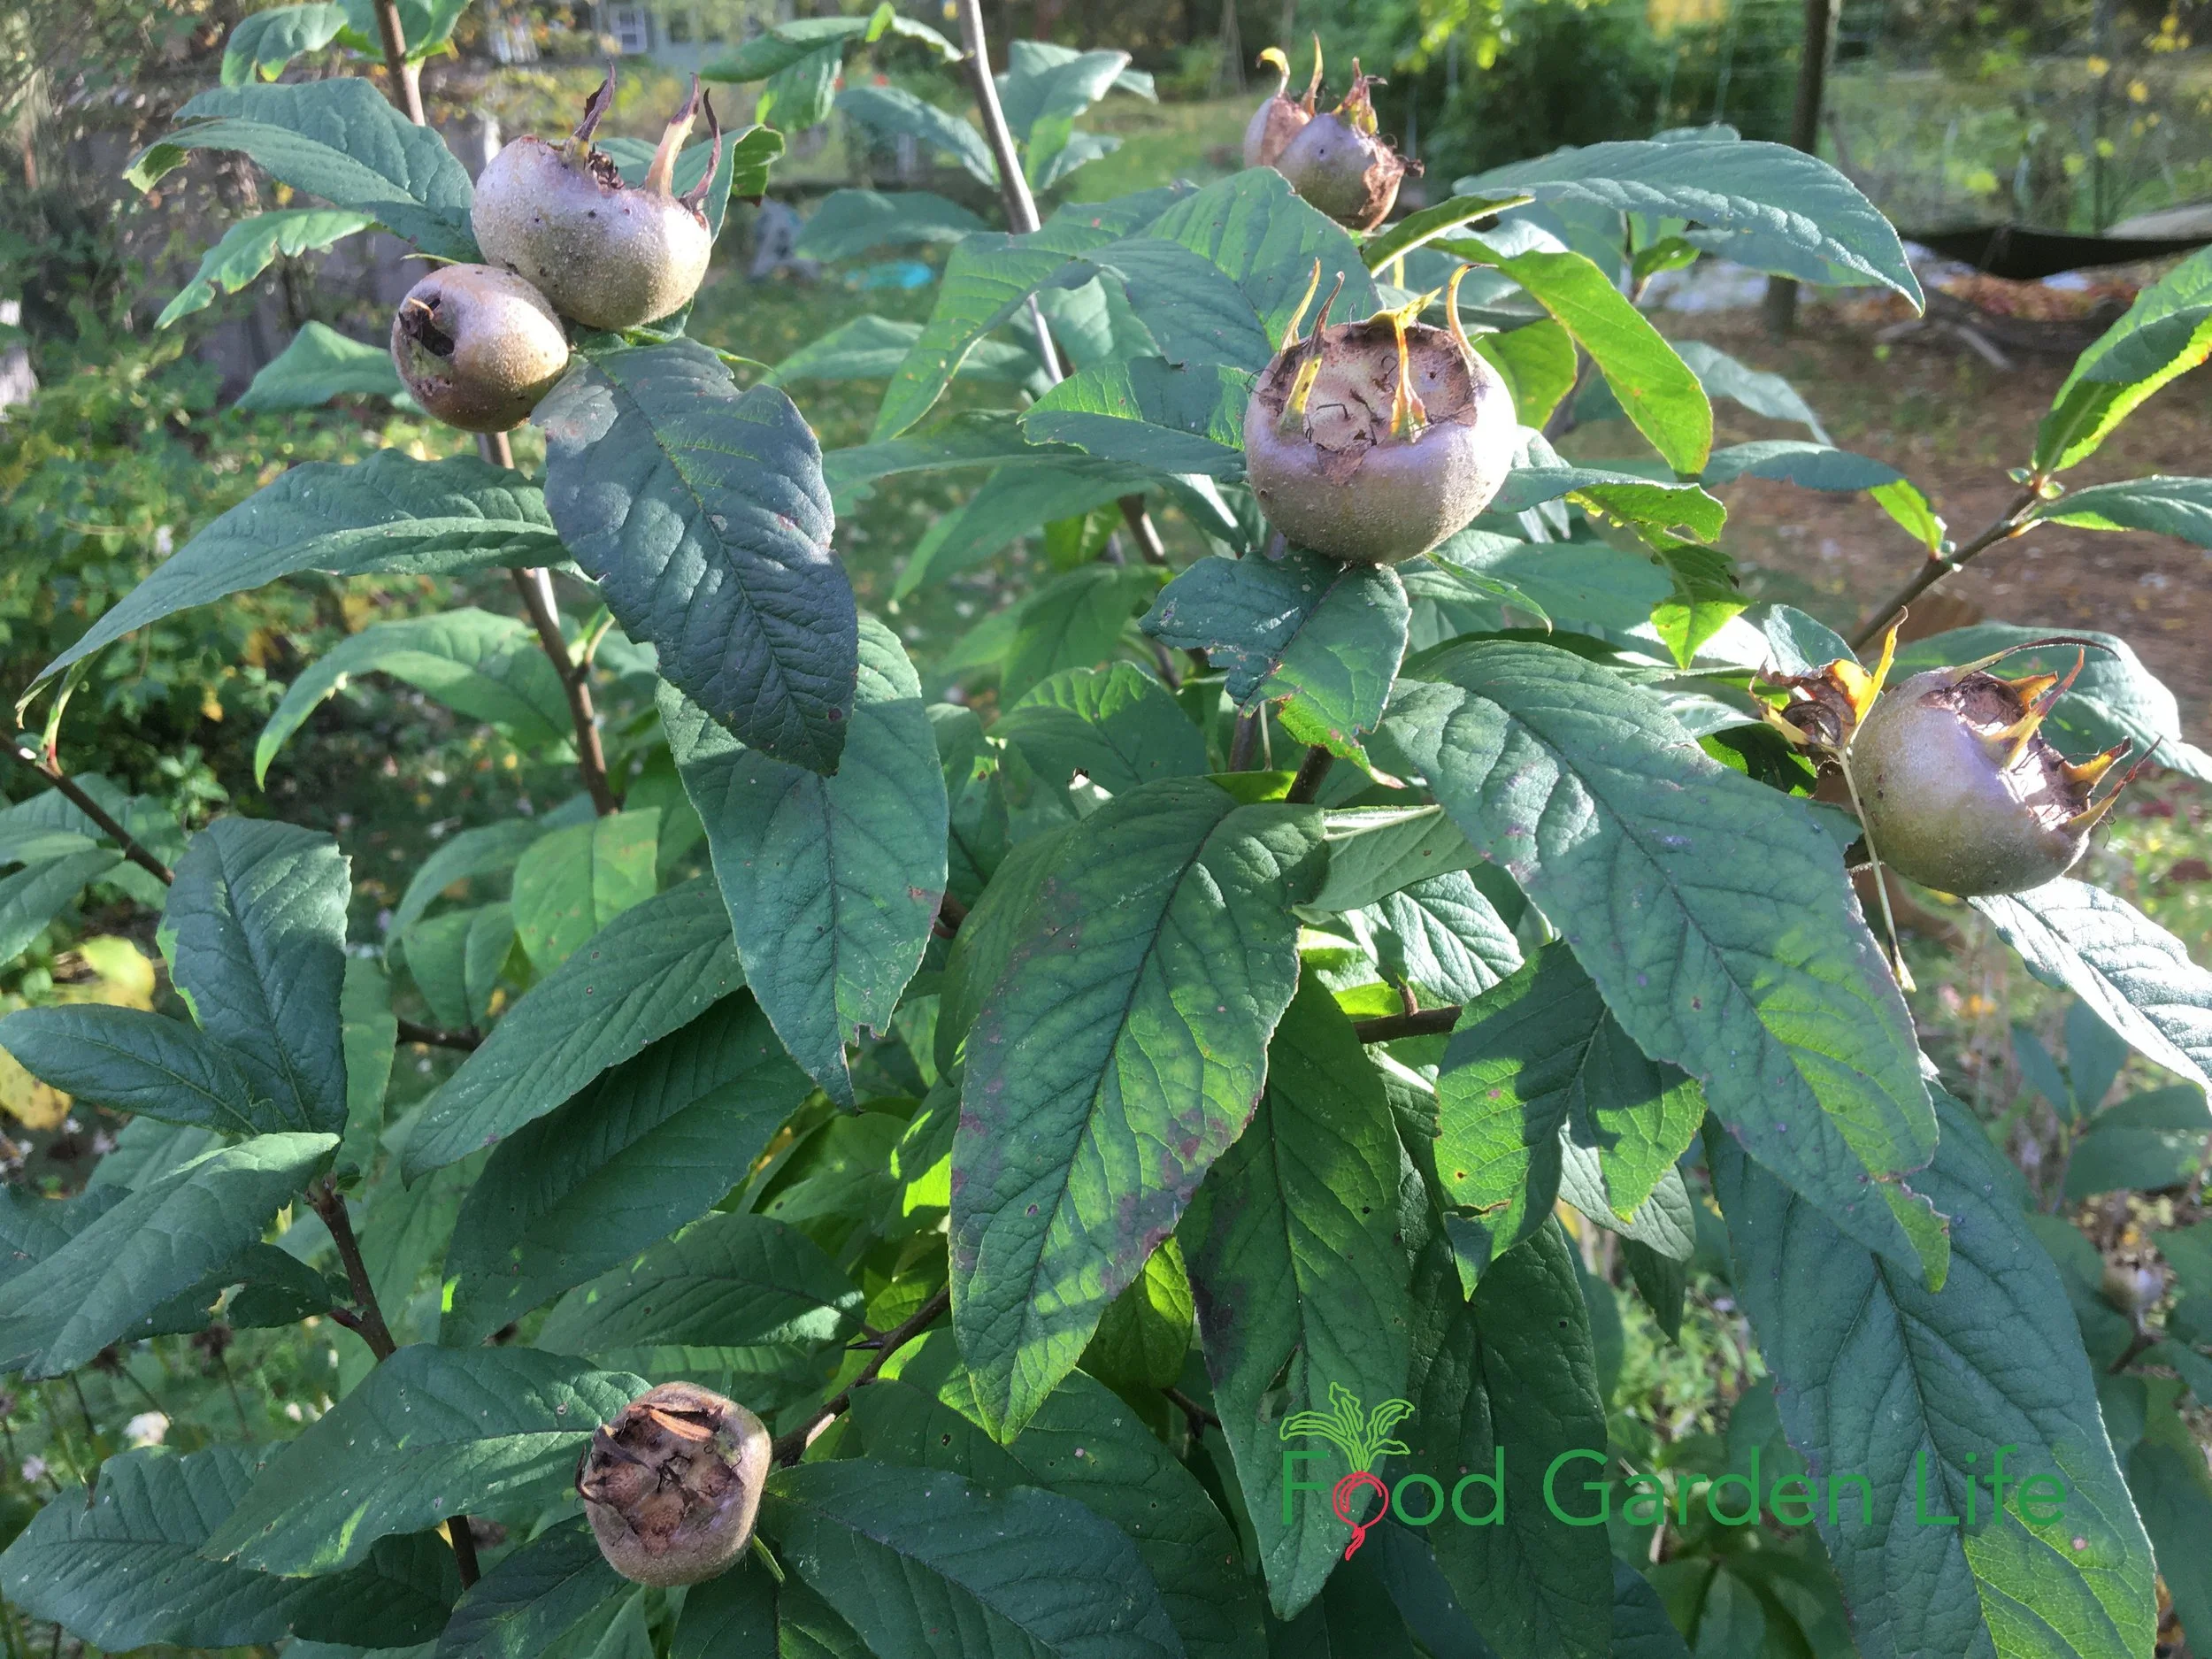
The fruit is decorative too. I pick my medlar fruit in mid- to late-November, once the leaves have dropped. And in years that I harvest late, those fruit are still there, adding winter interest to my garden. They really dress up the naked medlar bush.
How Medlar Plants Grow
If you don’t harvest all of your medlar, they add winter interest to the garden.
Medlar is fairly slow growing. But as it fills in, it takes on a fascinating gnarled look thanks to the ways the branches grow into a nest of twisted shoots.
My medlar is a bush. No taller than me. But it can be either a large shrub or a small tree. Like apples, you determine shape and size with pruning – and like apples, it can be grown on a rootstock that dwarfs it. A medlar tree on its own roots can get bigger, 4-6 metres (13-20’) high.
Ultimately, the size depends on the rootstock, the growing conditions, and how you prune it.
Best Site for a Medlar
Medlar grows best in full sun, but does respectably well in partial shade. Mine is underneath a towering silver maple, where it gets 4-6 hours of sun a day.
It’s not fussy about soil. The important thing is that the soil is well drained.
Landscape with Fruit
That’s easy to grow in a home garden!
Does Medlar need a Mate?
Medlar is self-fertile.
That means that if you have just one plant, you’ll still get fruit.
How to Prune Medlar
Medlar plants have large star-shaped white blossoms in spring.
Nursery-grown medlar bushes and trees are often pruned to have a length of bare trunk before side shoots are allowed to grow. This is so that when the branches are bent from the weight of fruit, they are high enough above the ground that they don’t touch it.
I prune my medlar once a year, in late winter, while it’s dormant. There’s an art to pruning many fruit trees, but pruning medlar is simple. Like most fruit trees and bushes, we want an open framework of branches that gives good air circulation and lets in some light.
Here are tips for pruning your medlar:
Remove dead, damaged, spindly, diseased, and crossing branches
Shorten long branches that might touch the ground when bearing a heavy crop of fruit (fruit forms on spurs on branches, so when you remove the tip of a branch, you’ll still get fruit)
Remove any suckers that grow from the base
Prune your medlar while it’s dormant, in late winter.
(And if you don’t get around to pruning for a year or two? Sometimes life gets busy for home gardeners. Your medlar will keep growing, and you can prune it the following year.)
Medlar in the Landscape
A medlar bush is a great addition to a forest garden and an edible landscape.
I hope that with the increasing interest in edible landscapes and forest gardens, more people will try to grow medlar.
Forest Gardens
In forest gardens and polycultures, a medlar bush can be part of the lower canopy; or a medlar tree as part of the canopy.
Edible Landscapes
In edible landscapes, where aesthetics matter too, the addition of a medlar bush brings spring flowers, fall colour, winter interest.
Food Gardens
For hard-core food gardeners, you can use a more intensive approach to maximize your medlar production. I’ve seen medlar in a demonstration orchard being trained in a high-density system, tightly spaced, and trained along horizontal wires.
Harvest Medlar Fruit
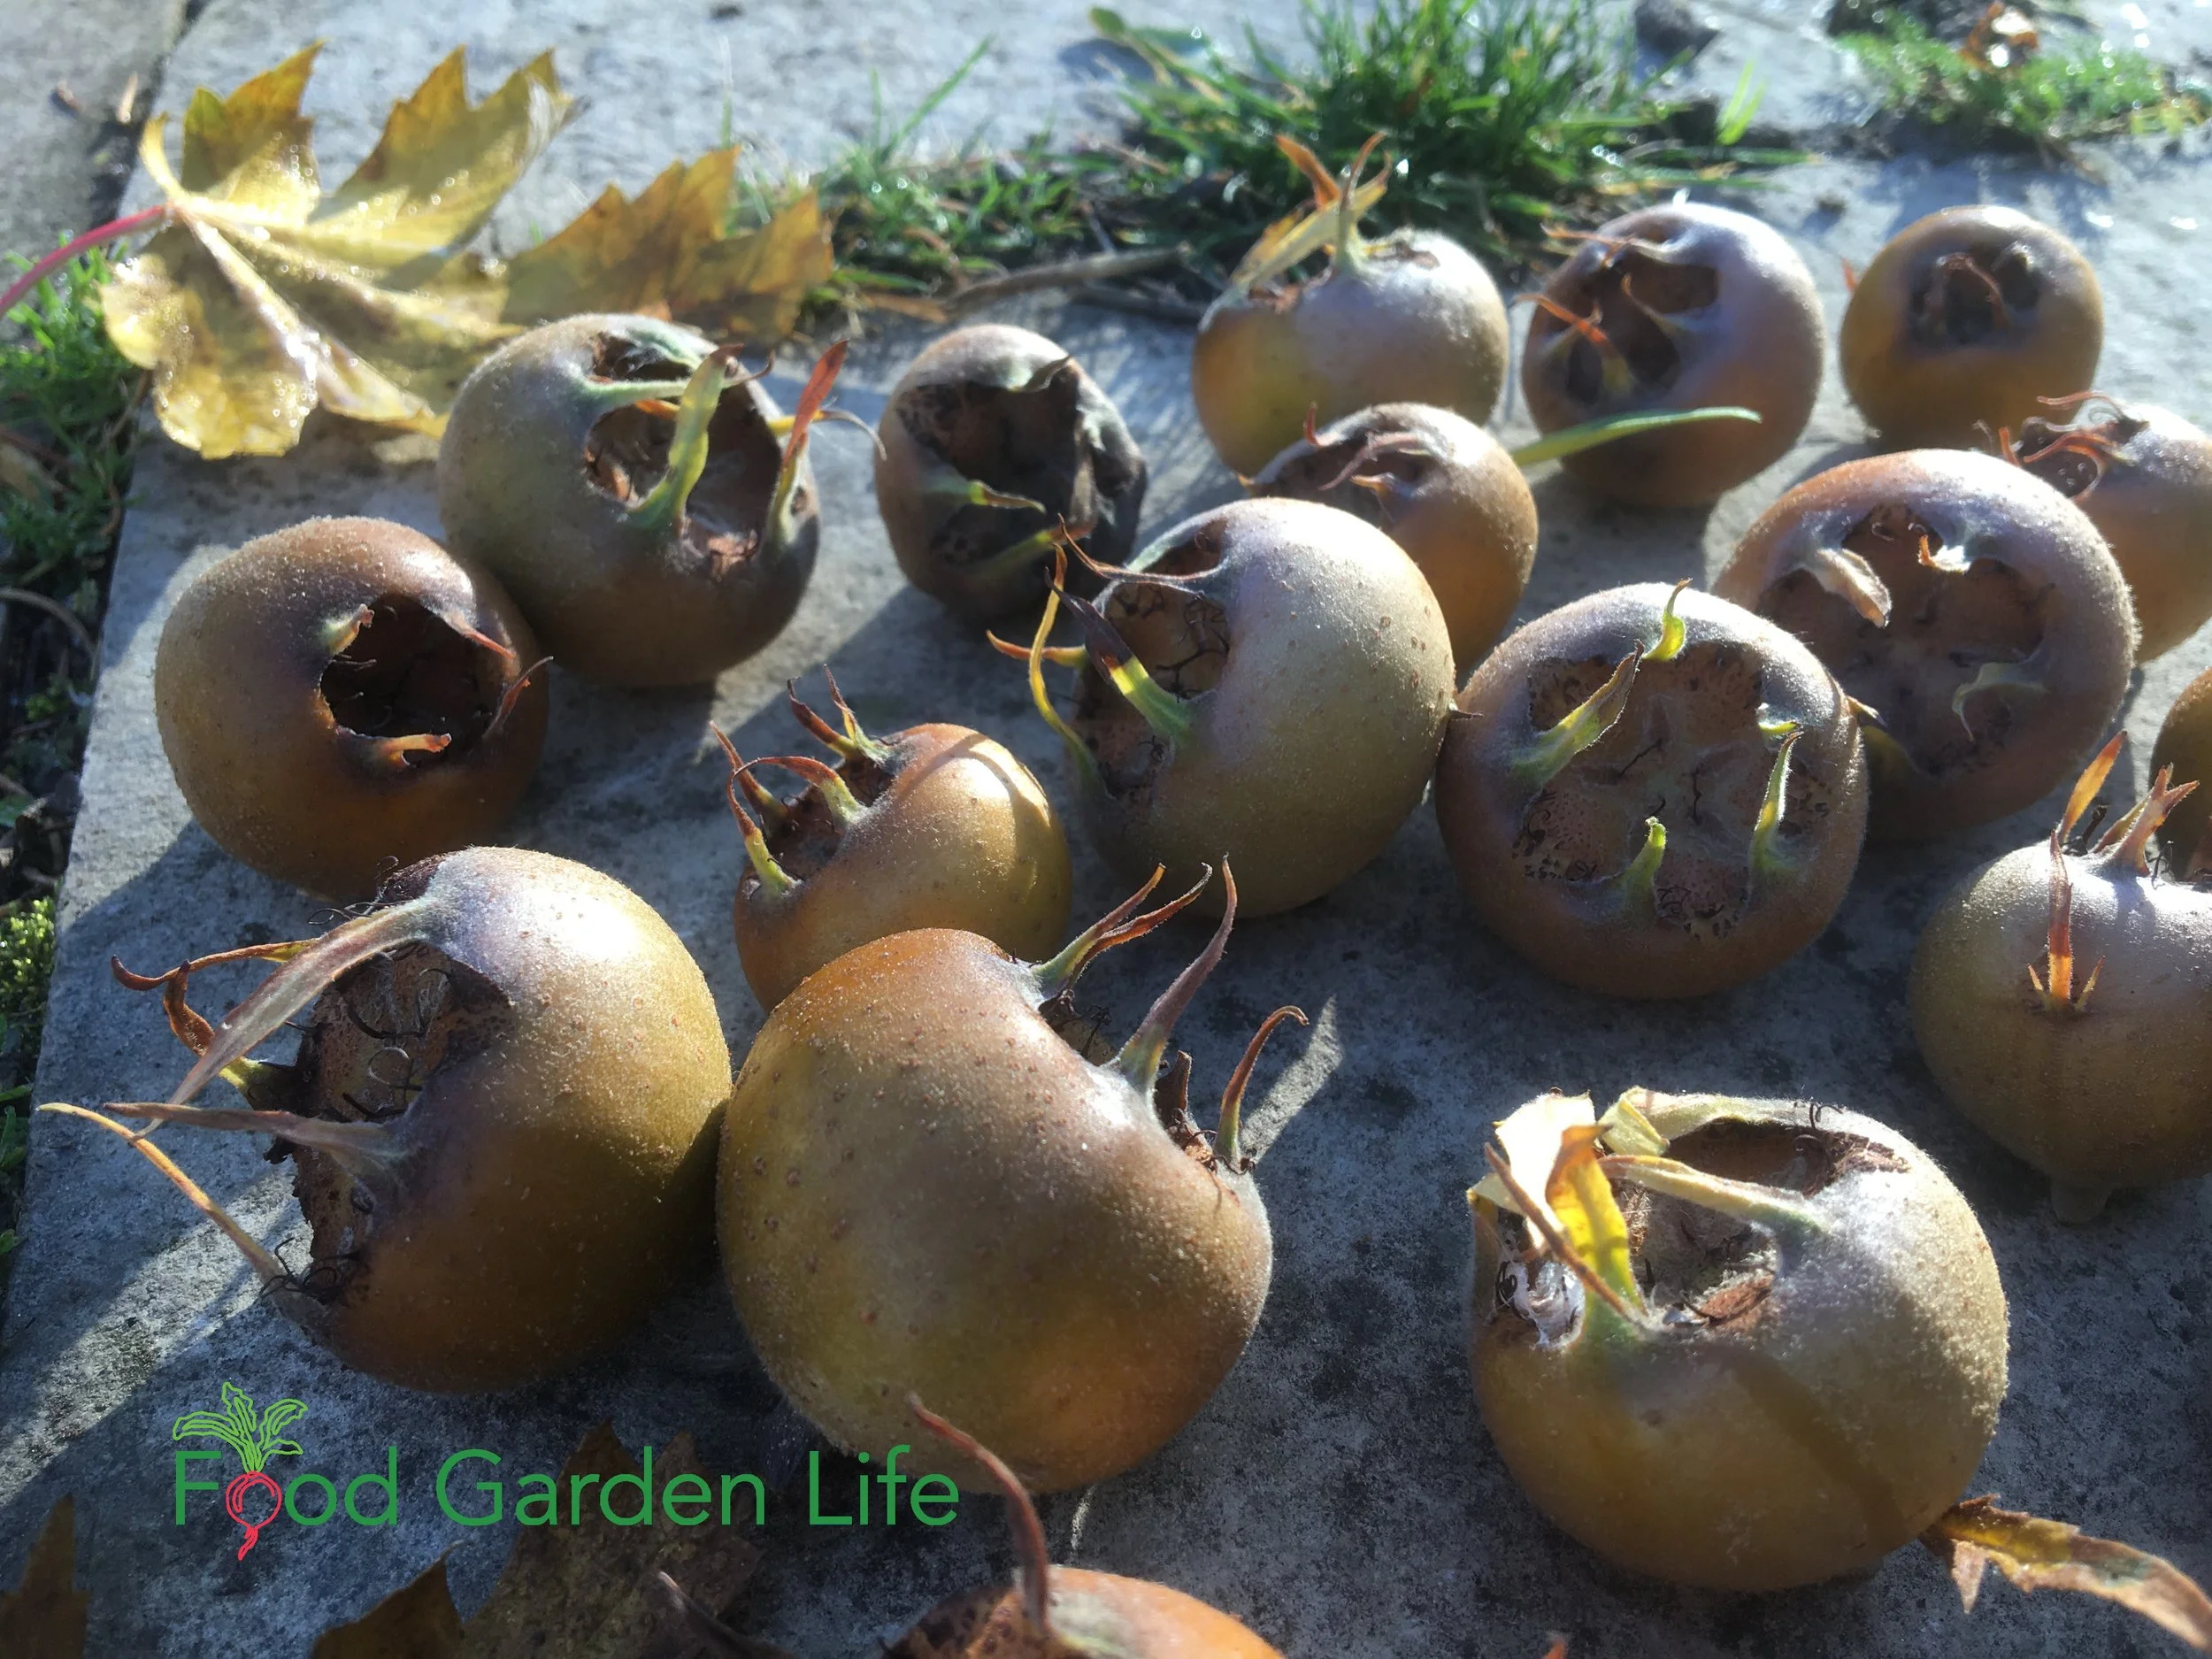
Medlar harvest, after the leaves have fallen
The fruit size depends on the variety and growing conditions, but they’re often 3 - 6 cm (1 ¼ - 2 ½”) across. They’re a bit fuzzy when small, and as they grow the skin starts to look like a russet apple. You’ll find 5 large seeds inside.
Pick medlar fruit in the fall, once the fruit has fully sized up. It will be greenish-brown. Don’t rush to pick it, though, as it is fine with some light frost. This is a fruit that takes a long time to mature, so you want to give it as much time on the plant as you can. And besides, it’s a winter treat, so don’t rush to pick it while there are still apples and other fall fruit to eat.
I pick my medlars here in southern Ontario in mid-November, after the leaves on my medlar bush start to fall. You’ll know it’s time when the fruit detaches from the branch fairly easily.
Don’t pick medlars too early. Even though the trees in the background are changing colour, these medlar fruit can stay on the bush until it drops its leaves.
(You can harvest earlier, if the fruit are fully sized up…but without the frost, it takes longer for them to be ready to eat, after a treatment called “bletting.”)
Bletting Medlar
There’s a special word we use with medlar, the verb “to blet.” It means to give the fruit time to ripen and soften. I’ve seen some sources liken this to “decay” though I think that’s a bit harsh. We give wine time to reach its best, so why not medlars!
Don’t skip the bletting process. You won’t try to eat an unbletted medlar more than once because of the pucker power! Just like an unripe persimmon.
But when bletted, the white, acrid flesh becomes a brown apple-like puree with a sweet taste. To me it tastes a bit like very sweet fig with a touch of citrus.
Here’s more on bletting:
To make them last longer, blet your medlars in a cool spot
If you want them sooner, blet them on a plate in the kitchen
Either way, the timeframe measures in weeks
Face the eye (called the calyx) downwards
Some people place them in sawdust or a bed of straw, although I’ve never done this
As bletting progresses, the skin turns a darker brown and begins to wrinkle.
If you’re picking medlar from your garden in late fall or early winter and it’s already soft, it might not need further bletting. A taste test will tell you.
Landscape with Fruit
That’s easy to grow in a home garden!
Medlar in the Kitchen
The first thing to do if you haven’t tasted medlar before it to take a well-bletted medlar and just scoop out some of the insides—a bit like baked apple—with a spoon. Then taste it as is.
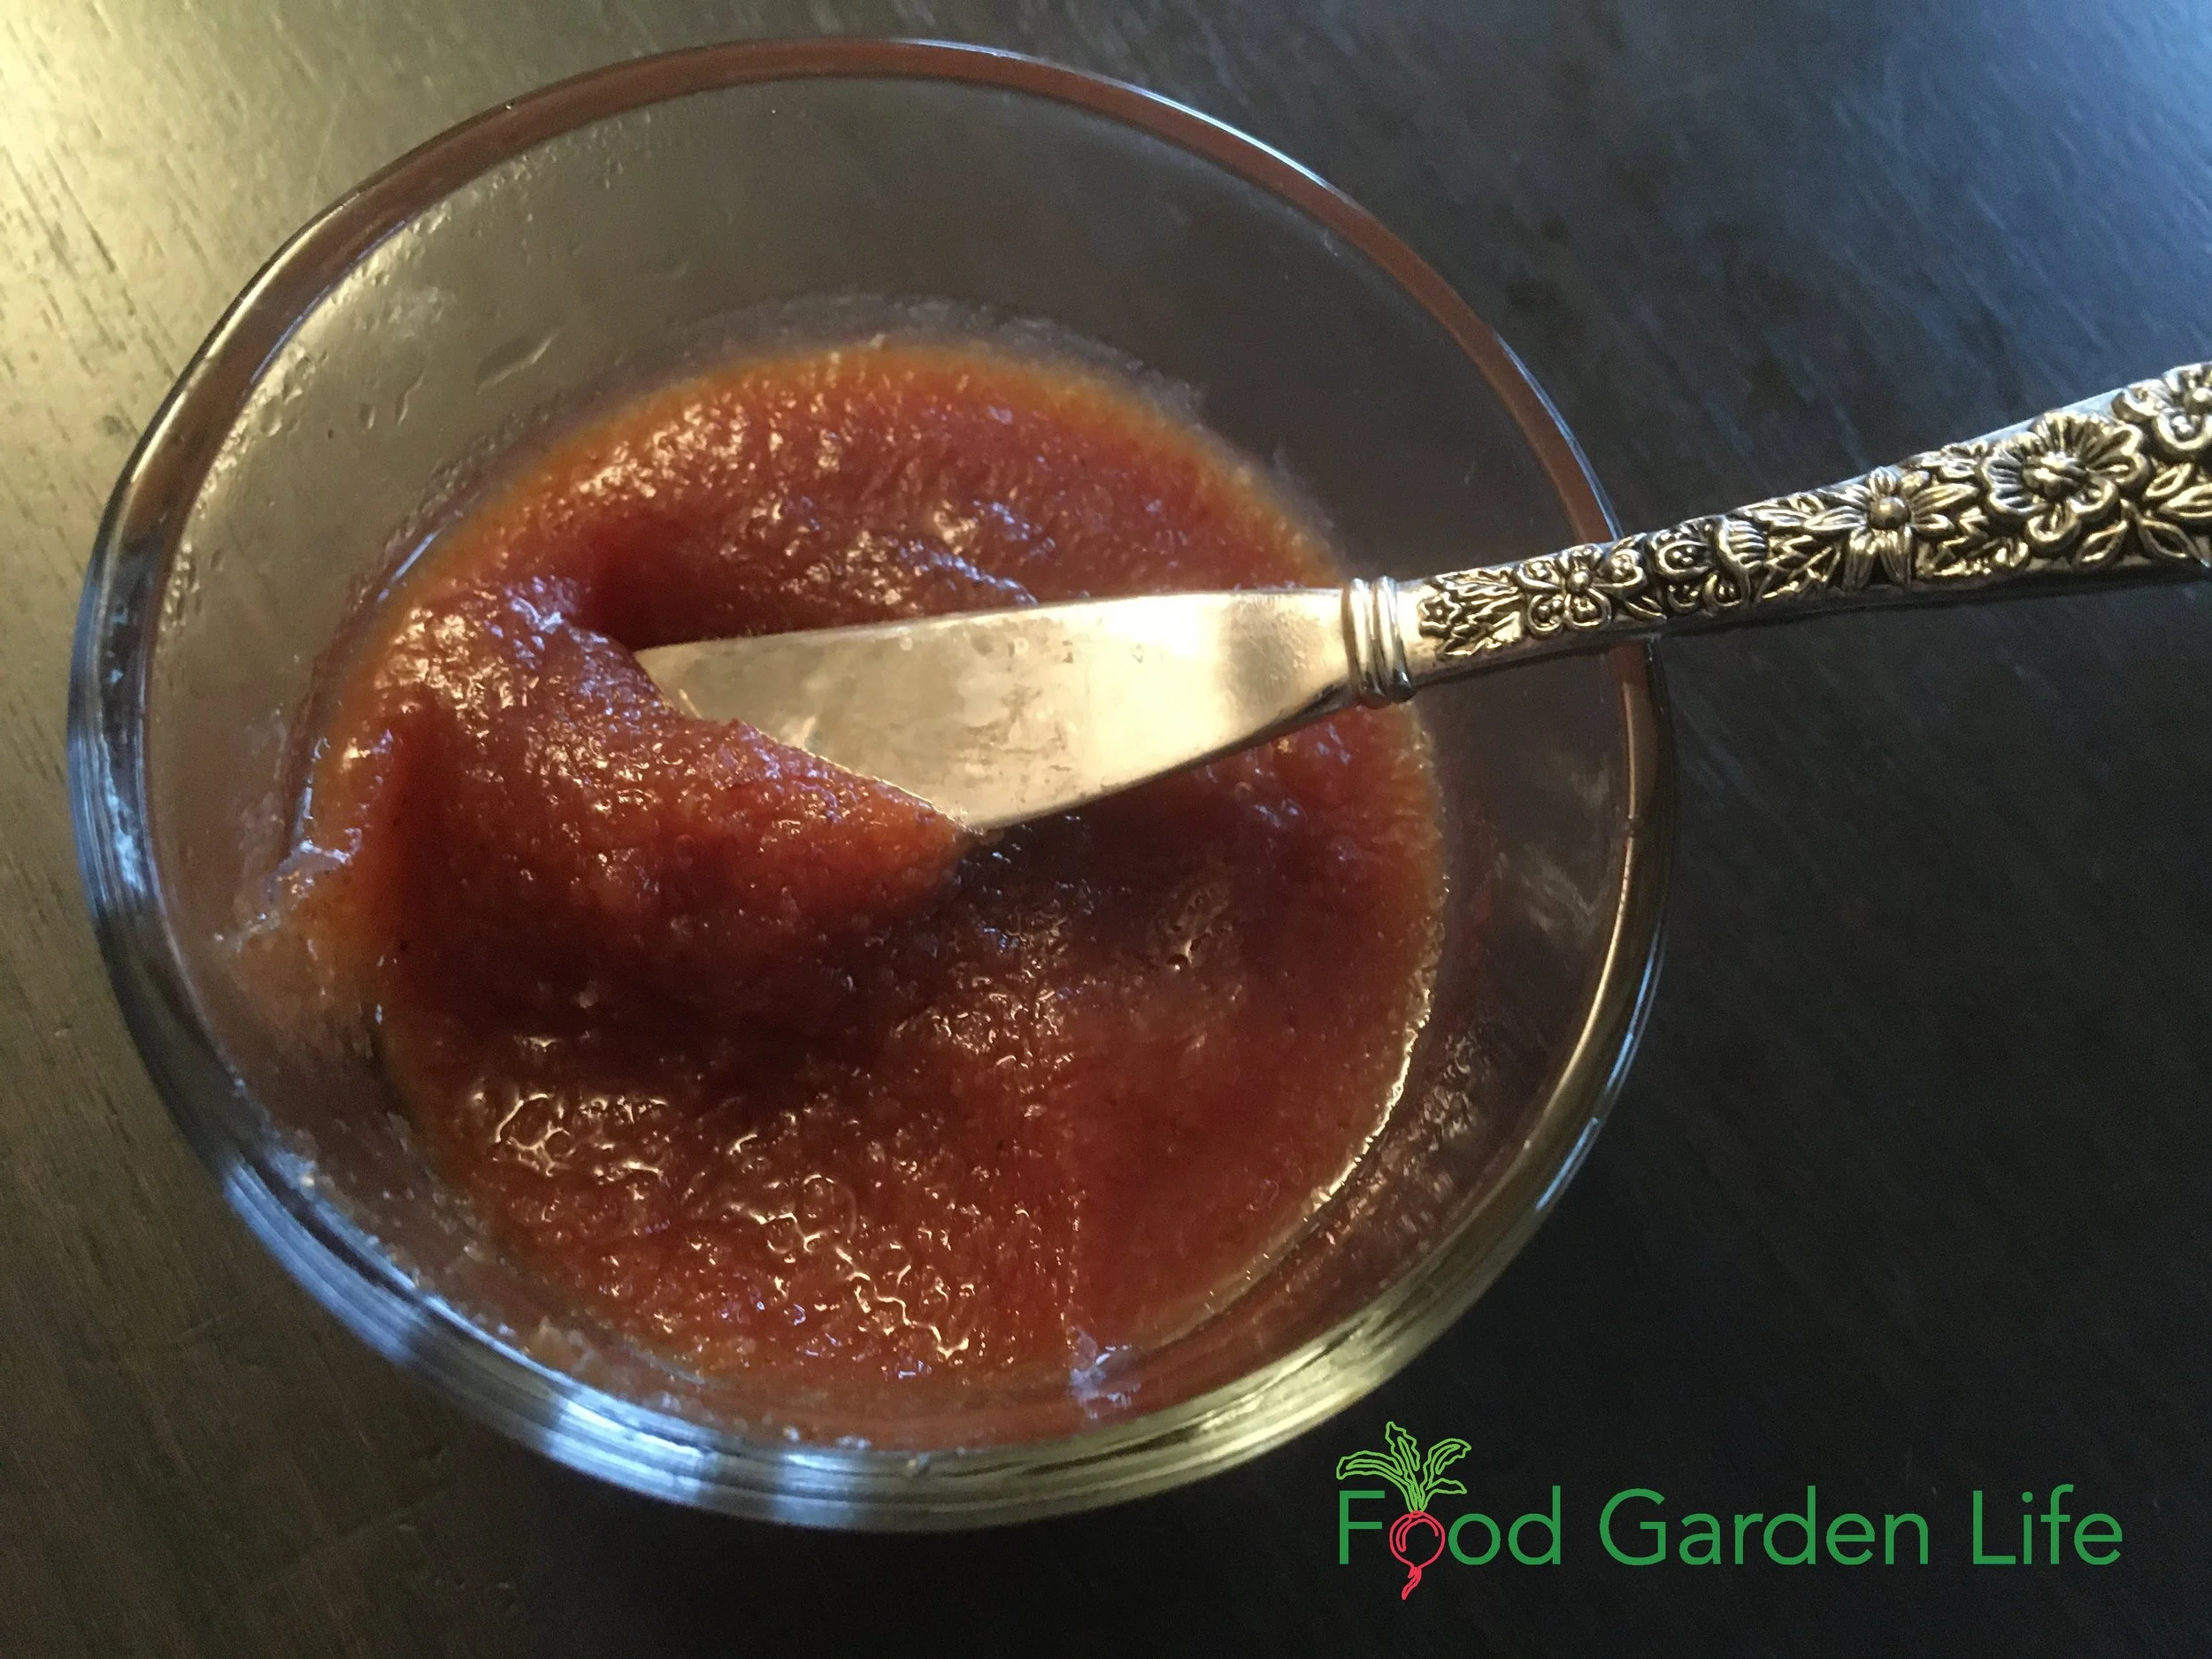
Other uses are to make jam or jelly – or to make a “cheese,” where the pulp is retained, cooked down, then put into a mould to set. (It sets nicely because medlar fruit has lots of pectin.) Fruit cheeses are a nice addition to a cheese platter.
More medlar ideas:
Medlar fruit leather
Medlar compote
Medlar Pedigree
Medlar is in the same family as apples, rose, quince, hawthorn, and pear. But you won’t confuse it with any of these relatives because of its long strap-like leaves.
Because they’re in the same family, medlar is often grafted onto quince and hawthorn rootstock.
Where to Find it
Pin this post!
Pity it’s not more easy to find medlar at garden centres. You’ll probably have to find a specialist nursery if you want to buy a medlar plant. Or, if you’re lucky, a fruit-growing enthusiast who can share a plant with you.
I’ve never found feral medlar trees here in southern Ontario. But in some places you might. In Cultivated Fruits of Britain, author F.A. Roach talks about medlar growing in hedges of southern Europe and being used as a hedging material in Florida.
Propagate Medlar
Medlar is usually propagated by grafting onto hawthorn or quince rootstock.
Just like apples, seeds don’t grow to be like the parent plants. They don’t “come true” from seed.
I’ve never tried growing medlar from seed, but it’s said to be tricky because the hard seed coat causes erratic germination. Seeds need a cold treatment (called stratification). This cold treatment can be from leaving potted seeds somewhere protected from rodents (a shed or garage) or in the fridge.
Get Your Fig Trees Through Winter
And eat fresh homegrown figs!
Medlar FAQ
What are the growing zones for medlar?
Hardiness is never an exact science, and different sources report different levels of hardiness. Many sources suggest USDA hardiness zones 5-8…but I’ve also seen USDA zone 4. A microclimate can help push zone boundaries. You might also be able to track down cold-adapted varieties..I’ve seen medlar near Montreal.
Are there named Medlar varieties?
Yes. But not many. Unlike apples, with countless varieties, there are very few improved varieties of medlar. ‘Nottingham’ and ‘Breda Giant’ are two varieties that I’ve come across here in Canada. But your choice will probably be dictated by what your local specially fruit nursery carries.
Is there another name for medlar?
Yup. The large eyes (calyx) on the bottom of the fruit inspired a number of bawdy references in the past. There are lots of aliases for medlar. A common one is “open-arse.” I’ll leave you to research the rest.
Is it true that the Romans at medlar?
Apparently. I’m no historian, but here’s a very fun article that tells you about the history of medlar.
What is the botanical name?
Mespilus germanica
Medlar Jam Recipe
Medlar jam
Ingredients
Medlar fruit, well bletted
Lemon
Sugar
Water
Directions
Cut up medlars and put in a pan (if you are saving seeds to grow, remove them now, before cooking)
Add enough water to cover the fruit
Simmer until you have a brown pulp
Strain (some people use cheese cloth or a jelly bag to make a very clear jelly…but I just use a coarse sieve…which lets through some pulp, giving me jam)
Measure the liquid you’ve just strained out – and for each pint of liquid, add 1 ½ cups of granulated sugar, and the juice of ½ a lemon
Boil until you get to the setting point
A note on setting point. I’m no expert at making preserves, but here’s what I do:
I put a saucer into the freezer for a few minutes before I need to test for the setting point. Then, when I’m ready to test, I put a spoonful of the jelly on the plate. If I press into it and get wrinkles, I figure I’m done.
Find This Helpful?
Enjoy not being bombarded by annoying ads?
Appreciate the absence of junky affiliate links for products you don’t need?
It’s because we’re reader supported.
If we’ve helped in your food-gardening journey, we’re glad of support. You can high-five us below. Any amount welcome!


